Table of Contents
Advertisement
Quick Links
Advertisement
Table of Contents

Related Manuals for Videotron EMG2926-Q10A


Summary of Contents for Videotron EMG2926-Q10A
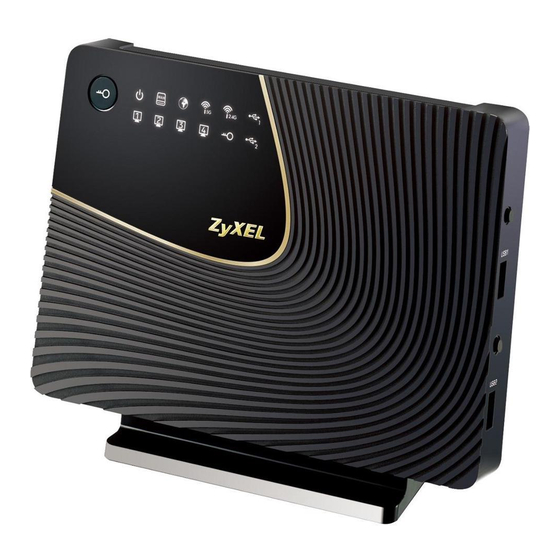
- Page 1 EMG2926-Q10A Dual-Band Wireless AC/N Gigabit Ethernet Gateway Version 1.00 Edition 1, 03/2014 Quick Start Guide User’s Guide Default Login Details LAN IP Address http://192.168.0.1 (Router Mode) User Name www.zyxel.com admin Password (blank) Copyright © 2014 ZyXEL Communications Corporation...
- Page 2 Related Documentation • Quick Start Guide The Quick Start Guide shows how to connect the EMG2926-Q10A. It contains information on setting up your network and configuring for Internet access. EMG2926-Q10A User’s Guide...
-
Page 3: Table Of Contents
Static Route ............................107 Firewall ..............................110 Content Filtering ............................ 114 Parental Controls ..........................116 IPv6 Firewall ............................121 StreamBoost Management ........................124 Remote Management ..........................129 Universal Plug-and-Play (UPnP) ......................134 USB Media Sharing ..........................136 Port Configuration ..........................145 Maintenance ............................147 Troubleshooting ............................156 EMG2926-Q10A User’s Guide... -
Page 4: Table Of Contents
1.1 Overview ............................11 1.1.1 Dual-Band ..........................12 1.2 Applications ............................12 1.3 Ways to Manage the EMG2926-Q10A ....................12 1.4 Good Habits for Managing the EMG2926-Q10A ................13 1.5 Resetting the EMG2926-Q10A ......................13 1.5.1 How to Use the RESET Button ....................13 1.6 The WPS Button ..........................13 1.7 LEDs ..............................14... - Page 5 6.2.1 Push Button Configuration (PBC) ....................48 6.2.2 PIN Configuration ........................49 6.3 Configure Wireless Security without WPS ..................50 6.3.1 Configure Your Notebook ......................52 6.4 Using Multiple SSIDs on the EMG2926-Q10A ..................54 6.4.1 Configuring Security Settings of Multiple SSIDs ..............55 Part II: Technical Reference................60 Chapter 7 Monitor..............................61...
- Page 6 10.3 IP Alias Screen ..........................93 10.4 IPv6 LAN Screen ..........................94 Chapter 11 DHCP Server ............................95 11.1 Overview ............................95 11.2 DHCP Server General Screen ......................95 11.3 DHCP Server Advanced Screen ....................96 11.4 DHCP Client List Screen .........................97 Chapter 12 NAT...............................99 EMG2926-Q10A User’s Guide...
- Page 7 17.2 Parental Control Screen ........................ 116 17.2.1 Add/Edit a Parental Control Rule ..................117 17.2.2 Add/Edit a Service ....................... 119 Chapter 18 IPv6 Firewall ............................121 18.1 Overview ............................121 18.2 IPv6 Firewall Screen ........................121 Chapter 19 StreamBoost Management.......................124 19.1 Overview ............................124 EMG2926-Q10A User’s Guide...
- Page 8 Maintenance ............................147 24.1 Overview ............................147 24.2 General Screen ..........................147 24.3 Account Screen ..........................147 24.3.1 Edit a User’s Account ......................148 24.4 Time Setting Screen ........................149 24.5 Configuration Backup/Restore Screen ..................151 24.6 Restart Screen ..........................152 24.7 Language Screen ..........................152 EMG2926-Q10A User’s Guide...
- Page 9 25.1 Overview ............................156 25.2 Power, Hardware Connections, and LEDs ..................156 25.3 EMG2926-Q10A Access and Login ....................157 25.4 Internet Access ..........................158 25.5 Resetting the EMG2926-Q10A to Its Factory Defaults ..............160 25.6 Wireless Connections ........................160 25.7 USB Device Problems ........................162 Appendix A Legal Information......................163...
-
Page 10: User's Guide
User’s Guide... -
Page 11: Introduction
Quality of Service (QoS), to redistribute traffic over the EMG2926-Q10A for the best possible performance in a home network. There are two USB 2.0 ports on the side panel of your EMG2926-Q10A. You can connect USB (version 2.0 or lower) memory sticks, USB hard drives, or USB devices for file sharing. The EMG2926-Q10A automatically detects the USB devices. -
Page 12: Dual-Band
Chapter 1 Introduction 1.1.1 Dual-Band The EMG2926-Q10A is a dual-band AP and able to function both 2.4G and 5G networks at the same time. You could use the 2.4 GHz band for regular Internet surfing and downloading while using the 5 GHz band for time sensitive traffic like high-definition video, music, and gaming. -
Page 13: Good Habits For Managing The Emg2926-Q10A
Make sure the power LED is on. Press the RESET button for one to four seconds to restart/reboot the EMG2926-Q10A. Press the RESET button for longer than five seconds to set the EMG2926-Q10A back to its factory- default configurations. 1.6 The WPS Button Your EMG2926-Q10A supports Wi-Fi Protected Setup (WPS), which is an easy way to set up a secure wireless network. -
Page 14: Leds
1.7 LEDs Look at the LED lights on the front panel to determine the status of the EMG2926-Q10A. Use the LED button at the side panel of the device to turn the LED lights on or off. If you have already pushed the LED button to the ON position but none of the LEDS are on, make sure the EMG2926- Q10A is receiving power and the power is turned on. - Page 15 The EMG2926-Q10A is sending or receiving IP traffic. The EMG2926-Q10A does not have an IP connection. WLAN 2.4/5G The EMG2926-Q10A is ready, but is not sending/receiving data through the 5G wireless LAN. Blinking The EMG2926-Q10A is sending/receiving data through the 5G wireless LAN.
-
Page 16: Wall Mounting
Make sure the screws are fastened well enough to hold the weight of the EMG2926-Q10A with the connection cables. Align the holes on the back of the EMG2926-Q10A with the screws on the wall. Hang the EMG2926- Q10A on the screws. -
Page 17: Introducing The Web Configurator
H A PT ER Introducing the Web Configurator 2.1 Overview This chapter describes how to access the EMG2926-Q10A Web Configurator and provides an overview of its screens. The Web Configurator is an HTML-based management interface that allows easy setup and management of the EMG2926-Q10A via Internet browser. -
Page 18: Password Screen
Type "admin" (default) as the user name. Click Login. Password Leave this field blank. 2.2.2 Password Screen You should see a screen asking you to change your password (highly recommended) as shown below. Figure 7 Change Password Screen EMG2926-Q10A User’s Guide... - Page 19 Note: The management session automatically times out when the time period set in the Administrator Inactivity Timer field expires (default five minutes; go to Chapter 24 on page 147 to change this). Simply log back into the EMG2926-Q10A if this happens. EMG2926-Q10A User’s Guide...
-
Page 20: Connection Wizard
Expert Mode, you can click the Easy Mode icon on the upper right corner of any Web Configurator screen to go to Easy Mode. Click the eaZy123 icon on the network map screen in Easy Mode. The Wizard screen opens. Choose your Language and click Connect to Internet. Figure 8 Welcome EMG2926-Q10A User’s Guide... -
Page 21: Connect To Internet
Chapter 3 Connection Wizard 3.3 Connect to Internet The EMG2926-Q10A offers two Internet connection types. They are IPoE or PPPoE. The wizard attempts to detect which WAN connection type you are using. Figure 9 Detecting your Internet Connection Type If the wizard does not detect a connection type, you must select one from the drop-down list box. -
Page 22: Connection Type: Ipoe
Chapter 3 Connection Wizard Internet Connection Type Figure 10 Your EMG2926-Q10A detects the following Internet Connection types. Table 5 Internet Connection Types CONNECTION TYPE DESCRIPTION IPoE Select the IPoE (IP over Ethernet) option when the WAN port is used as a regular Ethernet. - Page 23 First DNS Server Select Obtained From ISP if your ISP dynamically assigns DNS server information (and the EMG2926-Q10A's WAN IP address). The field to the right Second DNS Server displays the (read-only) DNS server IP address that the ISP assigns.
-
Page 24: Connection Type: Pppoe
By implementing PPPoE directly on the EMG2926-Q10A (rather than individual computers), the computers on the LAN do not need PPPoE software installed, since the EMG2926-Q10A does that part of the task. Furthermore, with NAT, all of the LAN's computers will have Internet access. -
Page 25: Router Password
Click this to return to the previous screen. Next Click this to continue. The EMG2926-Q10A connects to the Internet. Figure 13 Connecting to the Internet Note: If the Wizard successfully connects to the Internet, it proceeds to the next step. If you get an error message, go back to the previous screen and make sure you have entered the correct information provided by your ISP. -
Page 26: Wireless Security
Figure 14 Router Password 3.5 Wireless Security Configure Wireless Settings. Configure the wireless network settings on your EMG2926-Q10A on the following screen. The fields that show up depend on the kind of security you select. 3.5.1 Wireless Security: No Security Choose No Security on the Wireless Security screen to let wireless devices within range access your wireless network. -
Page 27: Wireless Security: Wpa2-Psk
Enter a descriptive name (up to 32 printable 7-bit ASCII characters) for the wireless LAN. Network Name If you change this field on the EMG2926-Q10A, make sure all wireless stations use the same (SSID) SSID in order to access the network. - Page 28 Enter a descriptive name (up to 32 printable 7-bit ASCII characters) for the wireless LAN. Network Name If you change this field on the EMG2926-Q10A, make sure all wireless stations use the (SSID) same SSID in order to access the network.
- Page 29 Chapter 3 Connection Wizard Figure 17 Congratulations You can also click GO to open the Easy Mode Web Configurator of your EMG2926-Q10A. You have successfully set up your EMG2926-Q10A to operate on your network and access the Internet. You are now ready to connect wirelessly to your EMG2926-Q10A and access the Internet.
-
Page 30: Easy Mode
The Web Configurator is set to Easy Mode by default. You can configure several key features of the EMG2926-Q10A in this mode. This mode is useful to users who are not fully familiar with some features that are usually intended for network administrators. -
Page 31: Navigation Panel
Click this to change to Expert Mode and customize features of the EMG2926- Q10A. eaZy123 Click this icon to open the setup wizard. Logout Click this to end the Web Configurator session and go to the Login page. EMG2926-Q10A User’s Guide... -
Page 32: Network Map
When you log into the Web Configurator, the Network Map is shown as follows. Figure 21 Network Map You can view the upstream and downstream transmission speeds between the EMG2926-Q10A and the Internet and/or between the EMG2926-Q10A and the connected device(s) (represented by icons indicating the kind of network device), including those connecting wirelessly. -
Page 33: Power Saving
Wireless LAN scheduling is disabled by default. Click the Power Saving icon in the control panel of the Easy Mode to open the screen shown next. Disabling the wireless capability lowers the energy consumption of the of the EMG2926-Q10A. Figure 23 Power Saving... -
Page 34: Parental Controls
Click Cancel to close this screen without saving any changes. 4.4.2 Parental Controls Use this screen to view the parental control rules configured on the EMG2926-Q10A. Click the Parental Control icon in the control panel of the Easy Mode to open the screen shown next. See Chapter 17 on page 116 for how to enable and configure parental control rules. -
Page 35: Firewall
Click OK to close this screen. 4.4.4 Internet Settings Use this screen to configure your EMG2926-Q10A for Internet access. You should already have Internet account information from your ISP. The screen varies depending on the Internet connection type you selected. Click the Internet Setting icon in the control panel of the Easy Mode to open the screen shown next. - Page 36 Select this radio button if your ISP did not assign you a fixed IP address. Address Automatically Static IP Address Select this radio button if your ISP assigned an IP address for your Internet connection. IP Address Enter the IP address provided by your ISP. EMG2926-Q10A User’s Guide...
-
Page 37: Wireless Security
Select this radio button if your ISP did not assign you a fixed IP address. automatically from ISP Use Fixed IP Select this radio button, provided by your ISP to give the EMG2926-Q10A a fixed, unique Address IP address. PPP Username Type the user name given to you by your ISP. -
Page 38: Wps
Type a pre-shared key from 8 to 63 case-sensitive keyboard characters. Verify password Type the password again to confirm. Apply Click Apply to save your changes back to the EMG2926-Q10A. Cancel Click Cancel to close this screen. Click this to configure the WPS screen. -
Page 39: Status Screen In Easy Mode
Click Exit to close this screen. 4.5 Status Screen in Easy Mode In the Network Map screen, click Status to view read-only information about the EMG2926-Q10A. Figure 30 Status Screen in Easy Mode The following table describes the labels on this screen. - Page 40 This shows the SSID of the wireless network. You can configure this in the Wireless Name (SSID) Security screen (Section 4.4.5 on page Section 9.2 on page 74). Wireless 5G Network Name (SSID) Security This shows the wireless security used by the EMG2926-Q10A. EMG2926-Q10A User’s Guide...
-
Page 41: Router Mode
Router Mode 5.1 Overview The EMG2926-Q10A is set to router mode by default. Routers are used to connect the local network to another network (for example, the Internet). In the figure below, the EMG2926-Q10A connects the local network (LAN1 ~ LAN4) to the Internet. - Page 42 DESCRIPTION Click this at any time to exit the Web Configurator. Click this icon to view copyright and a link for related product information. Click this icon to go to Easy Mode. See Chapter 4 on page EMG2926-Q10A User’s Guide...
- Page 43 This shows the IPv6 address of the EMG2926-Q10A on the LAN. WLAN 2.4G Information WLAN OP Mode This is the device mode to which the EMG2926-Q10A’s wireless LAN is set - Access Point Mode. MAC Address This shows the 2.4GHz wireless adapter MAC Address of your device.
-
Page 44: Navigation Panel
This displays what percentage of the EMG2926-Q10A’s processing ability is currently being used. When this percentage is close to 100%, the EMG2926-Q10A is running at full load, and the throughput is not going to improve anymore. If you want some applications to have more throughput, you should turn off other applications (for example, using bandwidth management.) - Page 45 The following table describes the sub-menus. Table 20 Navigation Panel: Router Mode LINK FUNCTION Status This screen shows the EMG2926-Q10A’s general device, system and interface status information. Use this screen to access summary statistics tables. MONITOR View Log Use this screen to view the list of activities recorded by your EMG2926- Q10A.
- Page 46 Use this screen to schedule the times the Wireless LAN is enabled. Use this screen to configure LAN IP address and subnet mask. IP Alias Use this screen to have the EMG2926-Q10A apply IP alias to create LAN subnets. IPv6 LAN Use this screen to configure the IPv6 address for the EMG2926-Q10A on the LAN.
- Page 47 USB storage device. SAMBA Use this screen to enable file sharing through the EMG2926-Q10A. Use this screen to have the EMG2926-Q10A act as a FTP server. Port Use this screen to change the Ethernet port speed and duplex settings.
-
Page 48: Tutorials
49. This is the more secure method, since one device can authenticate the other. 6.2.1 Push Button Configuration (PBC) Make sure that your EMG2926-Q10A is turned on. Make sure the WIFI button (at the side panel of the EMG2926-Q10A) is pushed in, and that the device is placed within range of your notebook. -
Page 49: Pin Configuration
Chapter 6 Tutorials Note: Your EMG2926-Q10A has a WPS button located on its panel, as well as a WPS button in its configuration utility. Both buttons have exactly the same function; you can use one or the other. Note: It doesn’t matter which button is pressed first. You must press the second button within two minutes of pressing the first one. -
Page 50: Configure Wireless Security Without Wps
EMG2926-Q10A securely. The following figure shows you an example of how to set up wireless network and security on EMG2926-Q10A and wireless client (ex. NWD210N in this example) by using the PIN method. Figure 35 Example WPS Process: PIN Method... - Page 51 Web Configurator through your LAN connection (see Section 2.2 on page 17). Make sure the WIFI switch (at the side panel of the EMG2926-Q10A) is set to ON. Open the Configuration > Network > Wireless LAN 2.4G > General screen in the AP’s Web Configurator.
-
Page 52: Configure Your Notebook
Note: We use the ZyXEL NWD2205 wireless adapter utility screens as an example for the wireless client. The screens may vary for different models. The EMG2926-Q10A supports IEEE 802.11a, IEEE 802.11b, IEEE 802.11g and IEEE 802.11n wireless clients. Make sure that your notebook or computer’s wireless adapter supports one of these standards. - Page 53 Chapter 6 Tutorials Select SSID_Example3 and click Connect. Select AES and type the security key in the following screen. Click Next. The Confirm Save window appears. Check your settings and click Save to continue. EMG2926-Q10A User’s Guide...
-
Page 54: Using Multiple Ssids On The Emg2926-Q10A
You can configure more than one SSID on a EMG2926-Q10A. See Section 9.4 on page This allows you to configure multiple independent wireless networks on the EMG2926-Q10A as if there were multiple APs (virtual APs). Each virtual AP has its own SSID, wireless security type and MAC filtering settings. -
Page 55: Configuring Security Settings Of Multiple Ssids
Connect your computer to the LAN port of the EMG2926-Q10A using an Ethernet cable. The default IP address of the EMG2926-Q10A in router mode is “192.168.0.1”. In this case, your computer must have an IP address in the range between “192.168.0.2” and “192.168.0.254”. - Page 56 Configure the screen as follows. In this example, you enable Intra-BSS Traffic for SSID_Worker to allow wireless clients on the same wireless network to communicate with each other. Click Apply. 10 Click the Edit icon of the second entry to configure wireless and security settings for SSID_VoIP. EMG2926-Q10A User’s Guide...
- Page 57 13 Configure the screen as follows. In this example, you enable Intra-BSS Traffic for SSID_Guest to allow wireless clients on the same wireless network to communicate with each other. Select Enable Guest WLAN to allow clients to access the Internet only. Click Apply. EMG2926-Q10A User’s Guide...
- Page 58 SSID_VoIP from the SSID Select drop-down list, enable MAC address filtering and set the Filter Action to Allow. Enter the VoIP device’s MAC address in the Mac Address field and click Apply to allow only the VoIP device to associate with the EMG2926-Q10A using this SSID. EMG2926-Q10A User’s Guide...
- Page 59 Chapter 6 Tutorials EMG2926-Q10A User’s Guide...
-
Page 60: Technical Reference
Technical Reference... -
Page 61: Monitor
EMG2926-Q10A. 7.2 The Log Screen The Web Configurator allows you to look at all of the EMG2926-Q10A’s logs in one location and select the logs you wish to display. -
Page 62: Log Setting
TCP/IP configuration at start-up from a server. You can configure the EMG2926-Q10A’s LAN as a DHCP server or disable it. When configured as a server, the EMG2926-Q10A provides the TCP/ IP configuration for the clients. If DHCP service is disabled, you must have another DHCP server on that network, or else the computer must be manually configured. -
Page 63: Packet Statistics
Reserve Select this if you want to reserve the IP address for this specific MAC address. Apply Click Apply to save your changes back to the EMG2926-Q10A. Cancel Click Cancel to reload the previous configuration for this screen. 7.4 Packet Statistics Click Monitor >... -
Page 64: Wlan Station Status
This displays the reception speed in bytes per second on this port. Up Time This is the total time the EMG2926-Q10A has been on for each session. System Up Time This is the total time the EMG2926-Q10A has been on. - Page 65 This is the index number of an associated wireless station. MAC Address This field displays the MAC address of an associated wireless station. Association Time This field displays the time a wireless station first associated with the EMG2926-Q10A’s WLAN. EMG2926-Q10A User’s Guide...
-
Page 66: Wan
Figure 41 LAN and WAN 8.2 Internet Connection Use this screen to change your EMG2926-Q10A’s Internet access settings. Click Network > WAN from the Configuration menu. The screen differs according to the encapsulation and IPv4/IPv6 mode you choose. - Page 67 Select IPv4 Only if you want the EMG2926-Q10A to run IPv4 only. Select Dual Stack to allow the EMG2926-Q10A to run IPv4 and IPv6 at the same time. Select IPv6 Only if you want the EMG2926-Q10A to run IPv6 only.
- Page 68 Use IPv6 Rapid Deployment (6rd) when the local network uses IPv6 and the ISP has an IPv4 network. When the EMG2926-Q10A has an IPv4 WAN address and you set IPv6/IPv4 mode to IPv4 Only, you can enable 6rd to encapsulate IPv6 packets in IPv4 packets to cross the ISP’s IPv4 network.
-
Page 69: Pppoe Encapsulation
IPv6 DNS server This is not available when you select IPv4 Only in the IPv6/IPv4 field. Obtain IPv6 DNS Select this to have the EMG2926-Q10A get the IPv6 DNS server addresses from the ISP info Automatically automatically. Use the following... - Page 70 By implementing PPPoE directly on the EMG2926-Q10A (rather than individual computers), the computers on the LAN do not need PPPoE software installed, since the EMG2926-Q10A does that part of the task. Furthermore, with NAT, all of the LANs’ computers will have access.
- Page 71 Select IPv4 Only if you want the EMG2926-Q10A to run IPv4 only. Select Dual Stack to allow the EMG2926-Q10A to run IPv4 and IPv6 at the same time. Select IPv6 Only if you want the EMG2926-Q10A to run IPv6 only.
-
Page 72: Advanced Wan Screen
IPv6 DNS server This is not available when you select IPv4 Only in the IPv6/IPv4 field. Obtain IPv6 DNS Select this to have the EMG2926-Q10A get the IPv6 DNS server addresses from the ISP info Automatically automatically. Use the following... - Page 73 Chapter 8 WAN Table 26 Network > WAN > Advanced (continued) LABEL DESCRIPTION Apply Click Apply to save your changes back to the EMG2926-Q10A. Cancel Click Cancel to begin configuring this screen afresh. EMG2926-Q10A User’s Guide...
-
Page 74: Wireless Lan
This chapter discusses how to configure the wireless network settings in your EMG2926-Q10A. The EMG2926-Q10A is able to function on both 2.4GHz and 5GHz networks at the same time. You can have different wireless and wireless security settings for 2.4GHz and 5GHz wireless LANs. Click Configuration >... - Page 75 Chapter 9 Wireless LAN Note: If you are configuring the EMG2926-Q10A from a computer connected to the wireless LAN and you change the EMG2926-Q10A’s SSID, channel or security settings, you will lose your wireless connection when you press Apply to confirm.
- Page 76 Table 27 Network > Wireless LAN 2.4G/5G > General (continued) LABEL DESCRIPTION Auto Channel Select this check box for the EMG2926-Q10A to automatically choose the channel with Selection the least interference. Deselect this check box if you wish to manually select the channel using the Channel Selection field.
-
Page 77: Wireless Security
Select No Security to allow wireless clients to communicate with the access points without any data encryption. Note: If you do not enable any wireless security on your EMG2926-Q10A, your network is accessible to any wireless networking device that is within range. -
Page 78: Wep Encryption
Both the wireless stations and the access points must use the same WEP key. Your EMG2926-Q10A allows you to configure up to four 64-bit or 128-bit WEP keys but only one key can be enabled at any one time. -
Page 79: Wpa-Psk/Wpa2-Psk
A passphrase functions like a password. In WEP security mode, it is further converted by the EMG2926-Q10A into a complicated string that is referred to as the “key”. This key is requested from all devices wishing to connect to a wireless network. -
Page 80: Wpa/Wpa2
Timer all clients. The default is 3,600 seconds (60 minutes). Apply Click Apply to save your changes with the EMG2926-Q10A. Cancel Click Cancel to reload the previous configuration for this screen. 9.3.4 WPA/WPA2 Select WPA or WPA2 from the Security Mode list. - Page 81 This check box is available only when you select WPA2-PSK or WPA2 in the Security Mode field. Select the check box to have both WPA2 and WPA wireless clients be able to communicate with the EMG2926-Q10A even when the EMG2926-Q10A is using WPA2- PSK or WPA2. Group Key Update...
-
Page 82: More Ap Screen
Q10A. The key is not sent over the network. Session Timeout The EMG2926-Q10A automatically disconnects a wireless client from the wireless and wired networks after a period of inactivity. The wireless client needs to send the username and password again before it can use the wireless and wired networks again. -
Page 83: More Ap Edit
This shows whether the SSID profile is active (a yellow bulb) or not (a gray bulb). SSID An SSID profile is the set of parameters relating to one of the EMG2926-Q10A’s BSSs. The SSID (Service Set IDentifier) identifies the Service Set with which a wireless device is associated. - Page 84 WMM QoS Check this to have the EMG2926-Q10A automatically give a service a priority level according to the ToS value in the IP header of packets it sends. WMM QoS (Wifi MultiMedia Quality of Service) gives high priority to voice and video, which makes them run more smoothly.
-
Page 85: Mac Filter Screen
Click Cancel to reload the previous configuration for this screen. 9.5 MAC Filter Screen The MAC filter screen allows you to configure the EMG2926-Q10A to give exclusive access to devices (Allow) or exclude devices from accessing the EMG2926-Q10A (Deny). Every Ethernet device has a unique MAC (Media Access Control) address. - Page 86 Select Allow to permit access to the EMG2926-Q10A, MAC addresses not listed will be denied access to the EMG2926-Q10A. Select Deny to block access to the EMG2926-Q10A, MAC addresses not listed will be allowed to access the EMG2926-Q10A. MAC Filter Summary This is the index number of the MAC address.
-
Page 87: Wireless Lan Advanced Screen
Tx Power Set the output power of the EMG2926-Q10A in this field. If there is a high density of APs in an area, decrease the output power of the EMG2926-Q10A to reduce interference with other APs. Select one of the following 100%, 90%, 75%, 50%, 25% or 10%. -
Page 88: Quality Of Service (Qos) Screen
DESCRIPTION WMM QoS Select Enable to have the EMG2926-Q10A automatically give a service a priority level according to the ToS value in the IP header of packets it sends. WMM QoS (Wifi MultiMedia Quality of Service) gives high priority to voice and video, which makes them run more smoothly. - Page 89 PIN Number This is the WPS PIN (Personal Identification Number) of the EMG2926-Q10A. Enter this PIN in the configuration utility of the device you want to connect to the EMG2926-Q10A using WPS. The PIN is not necessary when you use WPS push-button method.
-
Page 90: Wps Station Screen
Note: After you click Push Button on this screen, you have to press a similar button in the wireless station utility within 2 minutes. To add the second wireless station, you have to press these buttons on both the EMG2926-Q10A and the wireless station again after the first 2 minutes. - Page 91 If you chose Off earlier for the WLAN Status the Wireless LAN will turn off between the two times you enter in these fields. Apply Click Apply to save your changes with the EMG2926-Q10A. Cancel Click Cancel to reload the previous configuration for this screen.
-
Page 92: Lan
The LAN screens can help you configure a management IP address, and partition your physical network into logical networks. 10.2 LAN IP Screen Use this screen to change the IPv4 address for your EMG2926-Q10A. Click Network > LAN > IP. Figure 61 Network > LAN > IP EMG2926-Q10A User’s Guide... -
Page 93: Ip Alias Screen
Cancel Click Cancel to begin configuring this screen afresh. 10.3 IP Alias Screen Use this screen to have the EMG2926-Q10A use IP aliasing to create LAN subnets. Click LAN Alias. Figure 62 Network > LAN > IP Alias The following table describes the labels on this screen. -
Page 94: Ipv6 Lan Screen
Chapter 10 LAN 10.4 IPv6 LAN Screen Use this screen to configure the IPv6 address for your EMG2926-Q10A on the LAN. Click Network > LAN > IPv6 LAN. Figure 63 Network > LAN > IPv6 LAN The following table describes the labels on this screen. -
Page 95: Dhcp Server
TCP/IP configuration at start-up from a server. You can configure the EMG2926-Q10A’s LAN as a DHCP server or disable it. When configured as a server, the EMG2926-Q10A provides the TCP/ IP configuration for the clients. If DHCP service is disabled, you must have another DHCP server on your LAN, or else the computer must be manually configured. -
Page 96: Dhcp Server Advanced Screen
MAC addresses. You can also use this screen to configure the DNS server information that the EMG2926-Q10A sends to the DHCP clients. To change your EMG2926-Q10A’s static DHCP settings, click Network > DHCP Server > Advanced. The following screen displays: Figure 65 Network >... -
Page 97: Dhcp Client List Screen
Q10A's LAN IP address displays in the field to the right (read-only). The EMG2926-Q10A tells the DHCP clients on the LAN that the EMG2926-Q10A itself is the DNS server. When a computer on the LAN sends a DNS query to the EMG2926-Q10A, the EMG2926-Q10A forwards the query to the EMG2926-Q10A's system DNS server (configured in the WAN >... - Page 98 Reserve Select this if you want to reserve the IP address for this specific MAC address. Apply Click Apply to save your changes with the EMG2926-Q10A. Cancel Click Cancel to reload the previous configuration for this screen. EMG2926-Q10A User’s Guide...
-
Page 99: Nat
You assign the LAN IP addresses to the devices (A to D) connected to your EMG2926-Q10A. The ISP assigns the WAN IP address. The NAT network appears as a single host on the Internet. All traffic coming from A to D going out to the Internet uses the IP address of the EMG2926-Q10A, which is 192.168.0.1. -
Page 100: Nat General Screen
To change your EMG2926-Q10A’s port forwarding settings, click Network > NAT > Port Forwarding. The screen appears as shown below. Note: If you do not assign a Default Server, the EMG2926-Q10A discards all packets received for ports that are not specified in this screen or remote management. - Page 101 If you have chosen a pre-defined service in the Service Name field, this field will not be available. Port Range Type the first and last internal port number that identifies a service. Translation Port Type the first and last external port number that identifies a service. Range EMG2926-Q10A User’s Guide...
-
Page 102: Port Forwarding Edit Screen
Click the Edit icon to open the edit screen where you can modify an existing rule. Click the Delete icon to remove a rule. Apply Click Apply to save your changes with the EMG2926-Q10A. Cancel Click Cancel to begin configuring this screen afresh. - Page 103 Type the IP address of the server on your LAN that receives packets from the port(s) Address specified in the Port field. Back Click Back to return to the previous screen. Apply Click Apply to save your changes with the EMG2926-Q10A. Cancel Click Cancel to begin configuring this screen afresh. EMG2926-Q10A User’s Guide...
-
Page 104: Port Trigger Screen
Chapter 12 NAT 12.4 Port Trigger Screen To change your EMG2926-Q10A’s trigger port settings, click Network > NAT > Port Trigger. The screen appears as shown below. Note: Only one LAN computer can use a trigger port (range) at a time. - Page 105 Chapter 12 NAT Table 49 Network > NAT > Port Trigger (continued) LABEL DESCRIPTION Apply Click Apply to save your changes with the EMG2926-Q10A. Cancel Click Cancel to begin configuring this screen afresh. EMG2926-Q10A User’s Guide...
-
Page 106: Ddns
DDNS services let you use a domain name with a dynamic IP address. 13.2 General To change your EMG2926-Q10A’s DDNS, click Network > DDNS. The screen appears as shown. Figure 72 Dynamic DNS The following table describes the labels on this screen. -
Page 107: Static Route
This chapter shows you how to configure static routes for your EMG2926-Q10A. The EMG2926-Q10A usually uses the default gateway to route outbound traffic from computers on the LAN to the Internet. To have the EMG2926-Q10A send data to devices not reachable through the default gateway, use static routes. -
Page 108: Add/Edit Static Route
Modify Click the Edit icon to open a screen where you can modify an existing rule. Click the Delete icon to remove a rule from the EMG2926-Q10A. 14.2.1 Add/Edit Static Route Click the Add Static Route button or a rule’s Edit icon in the Static Route screen. Use this screen to configure the required information for a static route. - Page 109 Gateway IP Enter the IP address of the next-hop gateway. The gateway is a router or switch on the Address same segment as your EMG2926-Q10A's interface(s). The gateway helps forward packets to their destinations. Back Click Back to return to the previous screen without saving.
-
Page 110: Firewall
However other traffic initiated from the WAN is blocked (3 and 4). Figure 76 Default Firewall Action 15.2 General Screen Use this screen to enable or disable the EMG2926-Q10A’s firewall, and set up firewall logs. Click Security > Firewall to open the General screen. EMG2926-Q10A User’s Guide... -
Page 111: Services Screen
Click Cancel to start configuring this screen again. 15.3 Services Screen If an outside user attempts to probe an unsupported port on your EMG2926-Q10A, an ICMP response packet is automatically returned. This allows the outside user to know the EMG2926-Q10A exists. - Page 112 Respond to Ping The EMG2926-Q10A will not respond to any incoming Ping requests when Disable is selected. Select LAN to reply to incoming LAN Ping requests. Select WAN to reply to incoming WAN Ping requests. Otherwise select LAN&WAN to reply to all incoming LAN and WAN Ping requests.
- Page 113 Enter the IP address of the computer to which traffic for the application or service is entering. The EMG2926-Q10A applies the firewall rule to traffic initiating from this computer. Source IP Address Enter the IP address of the computer that initializes traffic for the application or service.
-
Page 114: Content Filtering
Java A programming language and development environment for building downloadable Web components or Internet and intranet business applications of all kinds. Cookies Used by Web servers to track usage and provide service based on ID. EMG2926-Q10A User’s Guide... - Page 115 When a proxy server is located on the WAN it is possible for LAN users to circumvent content filtering by pointing to this proxy server. Apply Click Apply to save your changes. Cancel Click Cancel to begin configuring this screen afresh EMG2926-Q10A User’s Guide...
-
Page 116: Parental Controls
17.1 Overview Parental controls allow you to block specific URLs. You can also define time periods and days during which the EMG2926-Q10A performs parental control on a specific user. 17.2 Parental Control Screen Use this screen to enable parental control, view the parental control rules and schedules. -
Page 117: Add/Edit A Parental Control Rule
Click Add new rules in the Parental Control screen to add a new rule or click the Edit icon next to an existing rule to edit it. Use this screen to configure a restricted access schedule and/or URL filtering settings to block the users on your network from accessing certain web sites. EMG2926-Q10A User’s Guide... - Page 118 The following table describes the fields on this screen. Table 57 Security > Parental Control: Add/Edit LABEL DESCRIPTION General Active Select the checkbox to activate this parental control rule. Parental Enter a descriptive name for the rule. Control Profile Name EMG2926-Q10A User’s Guide...
-
Page 119: Add/Edit A Service
Custom, enter the LAN user’s MAC address. If you select All, the rule applies to all LAN users. Internet Access Schedule Select check boxes for the days that you want the EMG2926-Q10A to perform parental control. Time Drag the time bar to define the time that the LAN user is allowed access. - Page 120 If you have chosen a pre-defined service in the Service Name field, this field will not be configurable. Apply Click Apply to save your settings with the EMG2926-Q10A. Back Click Back to return to the previous screen. EMG2926-Q10A User’s Guide...
-
Page 121: Ipv6 Firewall
This chapter shows you how to enable and create IPv6 firewall rules to block unwanted IPv6 traffic. 18.2 IPv6 Firewall Screen Click Configuration > Security > IPv6 Firewall. The Service screen appears as shown. Figure 83 Configuration > Security > IPv6 Firewall EMG2926-Q10A User’s Guide... - Page 122 "ping". Respond to Ping on The EMG2926-Q10A will not respond to any incoming Ping requests when Disable is selected. Select LAN to reply to incoming LAN Ping requests. Select WAN to reply to incoming WAN Ping requests. Otherwise select LAN&WAN to reply to all incoming LAN and WAN Ping requests.
- Page 123 Chapter 18 IPv6 Firewall Table 59 Configuration > Security > IPv6 Firewall (continued) LABEL DESCRIPTION Delete Click Delete to remove the firewall rule. Cancel Click Cancel to restore your previously saved settings. EMG2926-Q10A User’s Guide...
-
Page 124: Streamboost Management
19.1 Overview The EMG2926-Q10A supports the new StreamBoost technology, introduced by Qualcomm, to redistribute traffic over the EMG2926-Q10A for the best possible performance in a home network. Streamboost is smart Quality of Service (QoS). Streamboost detects traffic flow and applies traffic shaping policies automatically. -
Page 125: Network Screen
19.2 Network Screen Use this screen to view the current upstream and downstream transmission speeds between the EMG2926-Q10A and the Internet and/or between the EMG2926-Q10A and the connected device(s) (represented by icons indicating the kind of network device), including those connecting wirelessly. -
Page 126: Up Time Screen
Figure 87 Management > StreamBoost Management > Up Time 19.5 Downloads Screen Use this screen to view the type and percentage of most download traffic on the EMG2926-Q10A. Click Management > StreamBoost MGMT > Downloads to open the Downloads screen. -
Page 127: All Events Screen
Click Management > StreamBoost MGMT > All Events to open the All Events screen. The y-axis shows the type of the traffic flow. The x-axis shows the time period over which the traffic flow got the required bandwidth. EMG2926-Q10A User’s Guide... - Page 128 Chapter 19 StreamBoost Management Figure 89 Management > StreamBoost Management > All Events EMG2926-Q10A User’s Guide...
-
Page 129: Remote Management
There is a default system management idle timeout of five minutes (three hundred seconds). The EMG2926-Q10A automatically logs you out if the management session remains idle for longer than this timeout period. The management session does not time out when a statistics screen is polling. -
Page 130: Snmp
Simple Network Management Protocol is a protocol used for exchanging management information between network devices. Your EMG2926-Q10A supports SNMP agent functionality, which allows a manager station to manage and monitor the EMG2926-Q10A through the network. The EMG2926- Q10A supports SNMP version one (SNMPv1) and version two (SNMPv2c). The next figure illustrates... - Page 131 • Set - Allows the manager to set values for object variables within an agent. • Trap - Used by the agent to inform the manager of some events. To change your EMG2926-Q10A’s SNMP settings, click Management > Remote MGMT > SNMP. Figure 92 Management > Remote Management > SNMP...
-
Page 132: Wake On Lan Screen
Enter the name of the person in charge of the EMG2926-Q10A. Trap Settings Trap Enable Select this to have the EMG2926-Q10A send an SNMP trap to the specified IP address when it receives the event. Clear this to disable it. Trap Manager IP Type the IP address of the SNMP manager to which your SNMP traps are sent. - Page 133 A MAC address consists of six hexadecimal character pairs. Start Click this to have the EMG2926-Q10A generate a WoL packet and forward it to turn the specified device on. A screen pops up displaying MAC address error if you input the MAC address incorrectly.
-
Page 134: Universal Plug-And-Play (Upnp)
When a UPnP device joins a network, it announces its presence with a multicast message. For security reasons, the EMG2926-Q10A allows multicast messages on the LAN only. All UPnP-enabled devices may communicate freely with each other without additional configuration. - Page 135 UPnP Select Enable to activate UPnP. Be aware that anyone could use a UPnP application to open the web configurator's login screen without entering the EMG2926-Q10A's IP address (although you must still enter the password to access the web configurator).
-
Page 136: Usb Media Sharing
USB device and your USB version (1.1 or 2.0). Media Server You can set up your EMG2926-Q10A to act as a media server to provide media (like video) to DLNA- compliant players, such as Windows Media Player, ZyXEL DMAs (Digital Media Adapters), Xboxes or PS3s. -
Page 137: Dlna Screen
The following figure is an overview of the EMG2926-Q10A’s file-sharing server feature. Computers A and B can access files on a USB device (C) which is connected to the EMG2926-Q10A (D). Figure 96 File Sharing Overview 22.2 DLNA Screen... -
Page 138: Samba Screen
Select the media type that you want to share on the USB device connected to the EMG2926-Q10A’s USB port. Rescan Click this button to have the EMG2926-Q10A scan the media files on the connected USB device and do indexing of the file list again so that DLNA clients can find the new files if any. - Page 139 Specify the name to identify the EMG2926-Q10A in a work group. Work Group You can add the EMG2926-Q10A to an existing or a new workgroup on your network. Enter the name of the workgroup which your EMG2926-Q10A automatically joins. You can set the EMG2926-Q10A’s workgroup name to be exactly the same as the workgroup...
-
Page 140: Ftp Screen
Click Cancel to begin configuring this screen afresh. 22.4 FTP Screen Use this screen to set up file sharing via the EMG2926-Q10A using FTP and create user accounts. Click Management > USB Media Sharing > FTP. Figure 99 Management > USB Media Sharing > FTP The following table describes the labels on this screen. -
Page 141: Example Of Accessing Your Shared Files From A Computer
Enter the maximum bandwidth (in Kbps) allowed for outgoing FTP traffic. Bandwidth Apply Click Apply to save your changes with the EMG2926-Q10A. Cancel Click Cancel to begin configuring this screen afresh. 22.5 Example of Accessing Your Shared Files From a... - Page 142 [ENTER]. A screen asking for password authentication appears. Type the user name and password (Bob and 1234 in this example) and click OK. Note: Once you log into the shared folder via your EMG2926-Q10A, you do not have to relogin unless you restart your computer.
-
Page 143: Use Ftp To Share Files
22.5.2 Use FTP to Share Files You can use FTP to access the USB storage devices connected to the EMG2926-Q10A. In this example, we use the web browser to share files via FTP from the LAN. The way or screen you log into the FTP server (on the EMG2926-Q10A) varies depending on your FTP client. - Page 144 USB Media Sharing > FTP screen and click Log In. The screen changes and shows you the folder for the USB storage device connected to your EMG2926-Q10A. Double-click the folder to display its contents. EMG2926-Q10A User’s Guide...
-
Page 145: Port Configuration
(10/100/1000 Mbps) and duplex mode (full duplex or half duplex) of the connected device. 23.2 Port Configuration Screen Use this screen to configure the EMG2926-Q10A port speed and duplex settings. Click Configuration > Management > Port Configuration. Figure 100 Management > Port Configuration The following table describes the labels on this screen. - Page 146 If the peer port does not support auto-negotiation or turns off this feature, the EMG2926-Q10A determines the connection speed by detecting the signal on the cable and using half duplex mode.
-
Page 147: Maintenance
Table 69 Maintenance > General LABEL DESCRIPTION System Name System Name is a unique name to identify the EMG2926-Q10A in an Ethernet network. Domain Name Enter the domain name you want to give to the EMG2926-Q10A. Administrator Type how many minutes a management session can be left idle before the session times Inactivity Timer out. -
Page 148: Edit A User's Account
24.3.1 Edit a User’s Account Use this screen to edit a user’s account. Click the Edit icon next to the user account you want to edit. The Account Setup screen displays as shown. Figure 103 Maintenance > Account > Edit EMG2926-Q10A User’s Guide... -
Page 149: Time Setting Screen
Click Cancel to begin configuring this screen afresh. 24.4 Time Setting Screen Use this screen to configure the EMG2926-Q10A’s time based on your local time zone. To change your EMG2926-Q10A’s time and date, click Maintenance > Time. The screen appears as shown. - Page 150 (yyyy/mm/dd) When you select Manual, enter the new date in this field and then click Apply. Get from Time Select this radio button to have the EMG2926-Q10A get the time and date from the Server time server you specified below.
-
Page 151: Configuration Backup/Restore Screen
Backup configuration allows you to back up (save) the EMG2926-Q10A’s current configuration to a file on your computer. Once your EMG2926-Q10A is configured and functioning properly, it is highly recommended that you back up your configuration file before making configuration changes. The backup configuration file will be useful in case you need to return to your previous settings. -
Page 152: Restart Screen
Upload Click Upload to begin the upload process. Note: Do not turn off the EMG2926-Q10A while configuration file upload is in progress. After you see a “configuration upload successful” screen, you must then wait one minute before logging into the EMG2926-Q10A again. The EMG2926-Q10A automatically restarts at this time causing a temporary network disconnect. -
Page 153: System Operation Mode Overview
Chapter 24 Maintenance Select the language you prefer and click Apply. The Web Configurator language changes after a while without restarting the EMG2926-Q10A. At the time of writing, you can only select English or Francais. Figure 107 Maintenance > Language 24.8 System Operation Mode Overview... -
Page 154: Sys Op Mode Screen
Chapter 24 Maintenance Figure 109 Access Point Mode 24.9 Sys OP Mode Screen Use this screen to select how you want to use your EMG2926-Q10A. Figure 110 Maintenance > Sys OP Mode The following table describes the labels on the General screen. - Page 155 The DHCP server on your device is disabled. • Router functions (such as NAT, bandwidth management, remote management, firewall and so on) are not available when the EMG2926-Q10A is in Access Point Mode. • The IP address of the device on the local network is set to 192.168.0.2.
-
Page 156: Troubleshooting
Make sure you are using the power adaptor or cord included with the EMG2926-Q10A. Make sure the power adaptor or cord is connected to the EMG2926-Q10A and plugged in to an appropriate power source. Make sure the power source is turned on. -
Page 157: Emg2926-Q10A Access And Login
IP address in your Internet browser. If your EMG2926-Q10A in Access Point Mode is a DHCP client, you can find your IP address from the DHCP server. This information is only available from the DHCP server which allocates IP addresses on your network. -
Page 158: Internet Access
Make sure your Internet browser does not block pop-up windows and has JavaScript and Java enabled. Make sure your computer is in the same subnet as the EMG2926-Q10A. (If you know that there are routers between your computer and the EMG2926-Q10A, skip this step.) •... - Page 159 • If the EMG2926-Q10A is in Access Point Mode, make sure the WAN port is connected to a broadband modem or router with Internet access and your computer is set to obtain a dynamic IP address.
-
Page 160: Resetting The Emg2926-Q10A To Its Factory Defaults
Make sure the power LED is on. Press the RESET button for one to four seconds to restart/reboot the EMG2926-Q10A. Press the RESET button for longer than five seconds to set the EMG2926-Q10A back to its factory- default configurations. If the EMG2926-Q10A restarts automatically, wait for the EMG2926-Q10A to finish restarting, and log in to the Web Configurator. - Page 161 • Position the antennas for best reception. If the AP is placed on a table or floor, point the antennas upwards. If the AP is placed at a high position, point the antennas downwards. Try pointing the antennas in different directions and check which provides the strongest signal to the wireless clients. EMG2926-Q10A User’s Guide...
-
Page 162: Usb Device Problems
If the USB device requires a special driver, install the driver from the installation disc that came with the device. After driver installation, reconnect the USB device to the EMG2926-Q10A and try to connect to it again with your computer. -
Page 163: Appendix A Legal Information
For product available in the USA/Canada market, only channel 1~11 can be operated. Selection of other channels is not possible. Pour les produits disponibles aux États-Unis / Canada du marché, seul le canal 1 à 11 peuvent être exploités. Sélection d'autres canaux n'est pas possible. EMG2926-Q10A User’s Guide... - Page 164 Connect the power adaptor or cord to the right supply voltage (for example, 110V AC in North America or 230V AC in Europe). • Do NOT allow anything to rest on the power adaptor or cord and do NOT place the product where anyone can walk on the power adaptor or cord. EMG2926-Q10A User’s Guide...
- Page 165 Your product is marked with this symbol, which is known as the WEEE mark. WEEE stands for Waste Electronics and Electrical Equipment. It means that used electrical and electronic products should not be mixed with general waste. Used electrical and electronic equipment should be treated separately. EMG2926-Q10A User’s Guide...
Need help?
Do you have a question about the EMG2926-Q10A and is the answer not in the manual?
Questions and answers