Table of Contents
Advertisement
User Manual - English
This manual applies to the following Y-cam products:
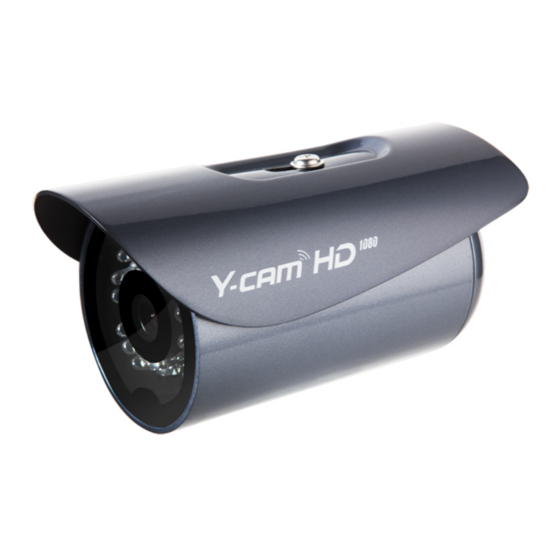
Y-cam Bullet HD 1080
Please read this manual carefully before attempting to install or operate this product.
Please retain this manual for your future reference. This User Manual is a work-in-progress and is constantly being
updated. You are invited to check the website regularly for updated versions.
v1.0
Advertisement
Table of Contents

Related Manuals for Y-cam Bullet HD 1080


Summary of Contents for Y-cam Bullet HD 1080
- Page 1 User Manual - English This manual applies to the following Y-cam products: Y-cam Bullet HD 1080 Please read this manual carefully before attempting to install or operate this product. Please retain this manual for your future reference. This User Manual is a work-in-progress and is constantly being updated.
-
Page 2: Table Of Contents
....................... 14 CAM SOFTWARE INSTALLATION FOR INDOWS ....................... 16 CAM SOFTWARE INSTALLATION FOR ......................17 INDING YOUR CAMERA WITH CAM SETUP WELCOME TO YOUR Y-CAM! ........................18 HD 1080 ( ) ..................20 IEW ON ULLET USING NTERNET XPLORER HD 1080 ( ) ............ - Page 3 6.3.3 ..................................36 TREAM ETUP 6.3.4 .................................... 37 ARDWARE 6.3.4.1 GPIO ..................................37 6.3.4.2 ................................38 YSTEM DENTITY 6.3.4.3 ..............................38 YSTEM TIME SETTING 6.3.4.4 ..............................40 ANAGEMENT 6.3.4.5 ..............................41 IRMWARE PGRADE 6.3.4.6 ..........................42 ACKUP RESTORE RESET AND REBOOT STORAGE MENU ..............................
-
Page 4: Introduction
Please read the following instructions carefully before attempting to install or use the camera. The Y-cam can be accessed remotely, and controlled from any PC/laptop over an Intranet or the Internet via a web browser. The user friendly installation procedure and intuitive web-based interface allows easy integration with your home or business network or Wi-Fi. -
Page 5: Restrictions
Please note: Y-cam Power Supplies are not interchangeable. The Power Adaptor supplied with your Y-cam should not be used with other models of Y-cam, and may cause product failure for other products. Always check the voltage of the Power Supply you are using with the corresponding model. -
Page 6: Maintenance
It is strongly recommended that you upgrade to the latest firmware version available for your Y-cam product before set-up begins (as settings may be lost). To ensure that you have the most recent firmware, please visit http://www.y-cam.com... -
Page 7: Minimum System Requirements
1.6 Minimum System Requirements A PC or Mac is required for the initial setup of a Y-cam only and once the camera is configured, a Y-cam can be used independently without being connected to a computer. Network requirements: • Network Connection: 10/100 Mbps Ethernet •... -
Page 8: Exploring Your Y-Cam
Please note: To reset your Y-cam Bullet HD 1080 back to factory default settings, you will need to press the reset button. This is located inside the Y-cam Bullet HD 1080 and you will need to remove the back part of the camera. The reset button is located next to the internal Ethernet connector. -
Page 9: Microsd Card Information And Installation
You should try to avoid purchasing second-hand memory cards. 2) If the card is not recognized by the Y-cam, try formatting the microSD card via your computer and then trying it again in the camera. -
Page 10: Microsd Card Installation For Y-Cam Bullet Hd 1080
2.21 microSD card installation for Y-cam Bullet HD 1080 Inserting a microSD card into the Y-cam Bullet HD 1080 requires you to remove the back section of the camera. For this reason, it is advised not to do this once the camera has been mounted in a wall or in a non-easily accessible place. -
Page 11: Installation
(that is connected to your computers network). Using the standard Ethernet network cable, plug this in to the network connection socket on the Y-cam at one end, and plug the other end in to a spare port on your router/switch. -
Page 12: Hardware Installation
3.1 Hardware installation 3.11 Using standard supplied cable Secure the Network Camera to the wall/ceiling by the supplied camera stand. If the housing was opened for microSD card installation or factory default, please re-install the parts in the following order (A to E) and make sure you tightly fasten the screws Please Note: To ensure water-proof function, put the waterproof rubber in place (see the figure), before installing the back cover. - Page 13 3.12 Using Cable connect 1) Loose the back cover by removing the 3 screws on the back cover 2) Disconnect the Ethernet, power and terminal block wires on the supplied cable from the main board 3) Remove the supplied cable from the back cover by loosening the plastic connector at the back. 4) Disassemble the supplied ½”...
-
Page 14: Y-Cam Software Installation
4.0 Y-CAM SOFTWARE INSTALLATION We are now going to run the Setup CD provided in the Y-cam box. This will install an utility called Y-cam Setup software on your computer. This is for PC and Mac. Y-cam Setup software searches your local network and displays any cameras it finds. - Page 15 If you want to change the default folder click “Change” to replace otherwise click “Next” Click “Install” to install the Y-cam Setup utility. Click Finish to end the installation. You should now find a Y-cam icon on your Desktop. Page 15...
-
Page 16: Y-Cam Software Installation For Mac
3. Select the “Firewall” tab then click on “Advanced” 4. Select “Automatically allow signed software to receive incoming connections” 5. Click on the “+” button and locate and select the Y-cam Setup program then click “Add”. You should now “Y-cam – Allow incoming connections” in the table. -
Page 17: Finding Your Camera With Y-Cam Setup
[Exit] - Click Exit to close the Y-cam Setup window. Anytime you lose the IP address of your Y-cam camera, you can run the Setup software to easily find it again. Once your camera is displayed, either chose “Open” to open the camera. -
Page 18: Welcome To Your Y-Cam
5.0 WELCOME TO YOUR Y-CAM! Once you have used the Y-cam Setup Software to find your camera and opened your selected camera, it will bring up a Login panel, similar to the below screenshot. You will need to enter the username and password to access the camera. - Page 19 (Ctrl+D) so you can come back later. Of course, you can run Y-cam Setup at any time to find it again, but this option may save you time. Page 19...
-
Page 20: Live View On Bullet Hd 1080 (Using Internet Explorer)
5.1 Live View on Bullet HD 1080 (using Internet Explorer) Please note that when using the camera for the first time, you will be prompted to install an ActiveX Control. Please follow the on-screen instructions to download and install this control. You will then view the following screen: Please view the next page for an explanation of the Operating Bar settings. - Page 21 Explanation of Operating Bar Folder. Press this button to change the default snapshot and record path. Recording. Press the Record button to record from the Live View to your local hard disk. Snapshot. Press the Snapshot button to capture a still image of the camera view.
-
Page 22: Live View On Bullet Hd 1080 (Using Firefox, Safari And Other Browsers)
5.2 Live View on Bullet HD 1080 (using Firefox, Safari and other browsers) Upon verification of the username and password, the camera image will begin to load. QuickTime or your media program may ask you to re-enter your login username and password at this point. This is common on most systems. -
Page 23: Y-Cam Settings
You can now view your camera live, however this is only on your local network, so you can now refine and customise the settings of the Y-cam. This entire next section deals with the settings of the camera.. 6.1 Quick setup with SMART SETUP To make the setup process quicker for users, we have created SMART SETUP. - Page 24 This should help you get your camera setup and working very quickly. It will also allow you access to the complete functionality of the camera should this be desired. To continue with Y-cam customisation, there are a number of tabs that you can access from the main page. Page 24...
-
Page 25: Connection Menu
6.2 CONNECTION MENU The CONNECTION menu is located within the main navigation menu bar. When you click on the “CONNECTION” tab, a sub-menu of network setup options will be displayed. Page 25... -
Page 26: Wireless Setup
Wireless Setup Options [Automatic search] – Click the Search button for the Y-cam to scan for available Wi-Fi networks to connect to. A new screen will display all the wireless networks found, select the desired network, and click SAVE SETTINGS. -
Page 27: Infrastructure Wireless Setup Options
Whichever you are using, you will need to enter the settings to connect to your router. Each mode has default settings, which should suit most installations. The “key” your Y-cam requires is the password you use to access your Wi-Fi / Wireless Connection. You need to enter this twice so it matches. -
Page 28: Ad-Hoc Wireless Setup Options
6.2.1.2 Ad-Hoc Wireless Setup Options If you wish to make a direct wireless connection from your camera to your computer, you will need to setup the Y-cam in “Ad-Hoc” mode. In order to view the Y-cam directly from your computer you first need to configure the wireless device in your computer according to the Y-cam settings above. -
Page 29: Tcp/Ip Setup
6.2.2 TCP/IP Setup The Y-cam is setup to obtain an IP address automatically (DHCP) from your Network by default, so these settings should not be needed by most users. Should you wish to assign the IP address manually, use this page to enter the address details. -
Page 30: Ddns Setup
If you have only just registered your DDNS account, it may take a while until your account is activated and fully registered on the internet. Some of the DDNS services listed offer free and paying services. A free account is more than adequate for a Y-cam to use. Page 30... -
Page 31: Upnp Setup
This allows your camera to easily talk to your router. [UPnP] Enable or disable the UPnP function. We recommend you to have UPnP enabled. For most users of Y-cam, the rest of the settings can be left as the default settings. -
Page 32: Viewing Your Camera Externally Using Ddns
If you have setup your DDNS account, and UPNP is enabled, you should be able to view your camera externally. To get your cameras external address, visit the Y-cam Settings System page, and it will be listed under “Internet URL”. -
Page 33: Port Forwarding If Upnp Is Not Available
Firewall security features built into some routers may prevent the camera’s UPNP from configuring your router. Your router connects to the Internet over a series of “ports” and sometimes the default ports used by the Y-cam are blocked from access over the Internet, therefore, these ports need to be made accessible. -
Page 34: Image
6.3.1 Image For most users, many of these settings can be left as default. Page 34... - Page 35 [B/W Mode] “By IR Type” switches the video from colour to monochrome when the IR LEDs are turned on. “B/W” switches the video to monochrome irrelevant of the status of the IR LEDs. “Colour” forces the Y-cam to stay in colour mode even when the IR LEDs are on.
-
Page 36: Audio
6.3.2 Audio Audio Setting Options [Enable Audio] Enables or disables audio functions. 6.3.3 Stream Setup Click on Stream Setup under the Camera Menu to change the streaming settings for your camera. This is useful if you require a certain size of video stream, a certain quality, or different streams for different devices (such as laptop or mobile phone). -
Page 37: Hardware
The Mobile stream is similar to the first two streams but is purely for mobile viewing and has a fixed resolution. Stream Setting Options [Image size] Three image resolutions are available: 1920 x 1080 for primary stream, 1280 x 720 or 640 x 360 for secondary stream, 320 x 180 or 160 x 90 for mobile stream. -
Page 38: System Identity
6.3.4.3 System time setting The Y-cam will allows you to set the date and time and is used for the timestamp on any files created by the camera. [Current device time] Internal time of the Y-cam [Proposed device time] PC system time. On clicking Apply the internal time of the Y-cam will be changed to this time. - Page 39 [Time server] Type the SNTP server name. There are suggestions included. Note: If the SNTP server is not found, the time on the Y-cam will be synchronized with the PC time. The Y-cam keeps track of the time even when power is disconnected.
-
Page 40: User Management
6.3.4.4 User Management The Y-cam User Management provides the function to add or remove users who can view your camera. This is useful if you wish to allow others to view your camera without having full admin rights. [Add] additional users can be created. -
Page 41: Firmware Upgrade
If the update has not worked after 20 minutes, reset the camera via the reset button located inside the camera. If you camera is unresponsive, you will need to contact either your place of purchase or Y-cam directly. Your dealer or Y- cam Solutions Ltd reserves the right to charge for any repair attributable to faulty upgrading by the user. -
Page 42: Backup, Restore, Reset And Reboot
Note: Do not turn off the power during the Restore function since this might corrupt the camera’s firmware [Reset settings] Click Reset to initialize the Y-cam to default factory settings. All users and settings will be lost, requiring you to reconfigure the camera. -
Page 43: Storage Menu
6.4 STORAGE MENU 6.4.1 Storage Setup The Y-cam can record video direct to virtually any NAS drive or to its internal microSD memory card. 6.4.1.1 SD Disk Select SD Disk to record to internal microSD memory card. Press Format to format the microSD memory card. -
Page 44: File List
6.4.2 File list File list gives a flexible method to search for recorded files during a specific time period. You can also filter by file type. To use, enter the start date and end you wish to search through, the desire file type and the allotted time. Click search to see all files that are selected within these categories. -
Page 45: E-Mail Server Setup
6.4.3 E-Mail Server setup The Y-cam can be configured to send an E-mail when the motion detection alarm is triggered or after specified intervals. The Y-cam can be configured with four different E-mail servers. These servers can be individually connected to either send on motion detection or periodically. -
Page 46: Y-Cam & Common Email Server Settings
Please note: The most common reason for Email Alerts not being sent is that the cameras Primary DNS IP Address is not set. You can check this on your Y-cam Settings System page. If it is empty, you can set it on the TCP/IP settings page, set to your Default Gateway address and this should solve the problem. -
Page 47: Ftp Server
6.4.4 FTP Server The Y-cam can upload an image to an FTP server upon receiving an alarm from the motion detection window or at specific time intervals. FTP is a commonly used protocol for exchanging files over any network or the internet and there are a number of FTP providers which will allow you to upload the images free of charge. -
Page 48: Timed Recording Menu
Click SAVE SETTINGS to confirm your settings. 6.5.1 Continuous record Y-cam can continuously records footage to your storage device [Continuous Record] Enable/Disable saving video to your storage device. [Record From] Select the stream from which it should record the video. -
Page 49: Snapshot At Interval
[Schedule] Record effective period according to schedule. 6.5.2 Snapshot at Interval Y-cam allows for programmed snapshot at interval records a JPG snapshot to your storage device at a set interval. [Snapshot at interval] Enable/Disable saving a snapshot on your storage device at periodic intervals. -
Page 50: E-Mail Periodic Sending
6.5.3 E-Mail periodic sending The Y-cam can be configured to send an E-mail at specific time intervals. [E-Mail periodic sending] Enable/Disable sending of e-mails at periodic intervals [Interval Time] Time interval between e-mails. [e-Mail Server ID] Select the e-mail server number from the list (set under STORAGE Menu) [File attachment] Select if you would like a snapshot of the camera view attached to the e-mail. -
Page 51: Periodic Sending - Ftp
6.5.4 Periodic Sending - FTP The Y-cam can upload an image to an FTP server at specific time intervals. [FTP Periodic Sending] Enable/Disable uploading of images at periodic intervals to an FTP server. [Interval Time] Time interval between uploads. [FTP Server ID] Select the FTP Server number from the list (set under STORAGE Menu) [Remote path] Path where to save the image file on the FTP server. -
Page 52: Motion Recording Menu
6.6 MOTION RECORDING MENU 6.6.1 Schedule You can specify schedule which you would like the motion recording, snapshot, e-mail/FTP sending to be active. Click, hold and drag the desired period to select. You can select multiple periods by pressing Ctrl on the keyboard and clicking and dragging another Click SAVE SETTINGS to confirm your settings. -
Page 53: Motion Detection
6.6.2 Motion Detection Y-cam motion detection can trigger an alarm to record video, snapshot or sends images via e-mail or FTP (File Transfer Protocol). You can set up to three different Motion Detection windows and three Privacy Mask Windows 6.6.2.1 Motion Detection Window Y-cam motion detection threshold and sensitivity can be adjusted. -
Page 54: Privacy Mask Window
6.6.2.2 Privacy Mask Window Y-cam privacy mask can be set up to block out areas that you do not wish any recording or snapshot to take place. [Mask] Check this box to enable the window. -
Page 55: Record On Alarm
6.6.3 Record on alarm The Y-cam record on alarm will record footage to your storage device upon detection of the motion trigger. [Record on alarm] Enable/Disable saving video to your storage device. [Record From] Select the stream from which it should record the video. -
Page 56: Snapshot On Alarm
6.6.4 Snapshot on alarm Y-cam cameras allow you to program a snapshot on alarm which will record a JPG snapshot to your storage device upon detection of motion trigger. [Snapshot on alarm] Enable/Disable saving a snapshot on your storage device at periodic intervals. -
Page 57: E-Mail Alarm Management
6.6.5 E-Mail alarm management The Y-cam can also be configured to send an email when the Motion Detection alarm is triggered. [Email alarm management] Enable/Disable sending of e-mails on motion detection. [Trigger Time] The number of seconds that the camera should keep sending images after motion stops. -
Page 58: Periodic Sending - Ftp
6.6.6 Periodic Sending - FTP The Y-cam can be configured to upload an image to an FTP when the Motion Detection alarm is triggered. [FTP alarm management] Enable/Disable FTP upload on motion detection. [Trigger Time] The number of seconds that the camera should keep sending images after motion stops. -
Page 59: Gpout
6.6.7 GPOUT The Y-cam can be configured to send signal on the GPOUT when the Motion Detection alarm is triggered. [GPOUT] Enable or disable GPOUT signal on motion detection Effective Period: [Always] Always trigger the alarm upon motion detection. [Schedule] FTP periodic sending effective period according to schedule. -
Page 60: System Info Menu
6.7 SYSTEM INFO MENU The system info screen is one of the most useful within the settings. The screen lists all the information you will need to connect to your camera from other systems. It is also great way to ensure your camera has all the details needed to operate correctly. -
Page 61: Advanced Settings
TCP/IP settings of the camera before you connect to it, if DHCP is disabled across your network, or if you have subnet network problems. Assigning an IP address to the Camera with Y-cam Setup utility Launch Y-cam Setup to detect the camera on your local network. - Page 62 6. Take note of the following: a. IP Address b. Subnet Mask c. Default Gateway d. DNS Servers (Both numbers with the first being the primary DNS server and the second being the secondary DNS server) 7. Enter the details noted in step 6 into the relevant fields in the setup. Note: The default IP address of the camera is 192.168.1.150.
-
Page 63: Proxy Server Setting
When not checked, click [Cancel]. Your proxy server settings should not cause any problems. If it is checked, click [Advanced...] Under exceptions, enter the IP address of your Y-cam into the Do not use proxy server for addresses beginning with data field. -
Page 64: Enabling Active Xin Internet Explorer
7.3 Enabling Active X in Internet Explorer Your browser must have Active X enabled to view the camera in Internet Explorer. To activate this, do the following: 1) Open a new Internet Explorer window. 2) From the menu bar, select Tools, and then select Internet options… 3) From the Internet Options window, select the Security tab. -
Page 65: Connecting Your Y-Cam Directly To A Computer
7.4 Connecting your Y-cam directly to a Computer You can also connect the Y-cam directly to a computer. Please note that in this mode you will not be able to view your Y-cam from anywhere else apart from the computer you are currently using. -
Page 66: Troubleshooting
4. Refresh the page. 1. Confirm the colour setting of PC is 16 bits or more. 2. Identify which Y-cam model you have, Infrared versions of the camera The colour of the picture is strange. sometimes have shades of colour spectrum alter the images the camera displays due to the Infrared LEDs. - Page 67 Green – Flashes, camera is booting/starting up Green - Steady , camera is operational If your Y-cam is not working properly, these suggestions might help you identify the problem. If the problem persists check the support section on http://www.y-cam.com/...
-
Page 68: Glossary Of Terms
IP address from a server which has a list of addresses available for assignment. Firmware: The firmware is the software in your Y-cam that makes the hardware functional and allows you to use the many features of your wireless IP Camera FTP: File Transfer Protocol.
Need help?
Do you have a question about the Bullet HD 1080 and is the answer not in the manual?
Questions and answers