Table of Contents
Advertisement
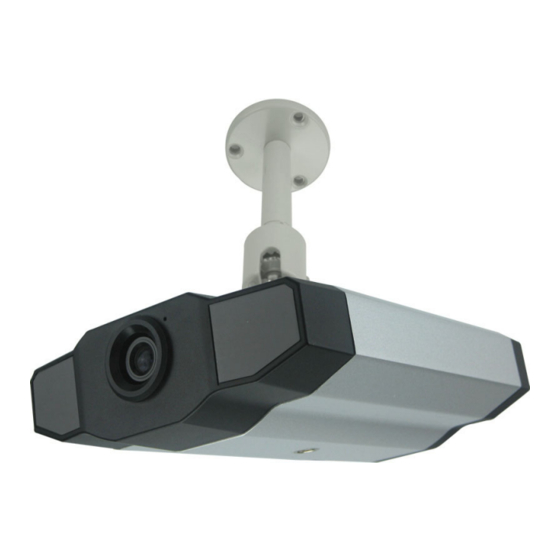
Quick Links
Advertisement
Table of Contents

Related Manuals for Avtech AVI 201


Summary of Contents for Avtech AVI 201
-
Page 1: Network Cameras
197Z AVI201 / 202 / 203 / 212 Network Cameras User’s Manual Please read instructions thoroughly before operation and retain it for future reference. The image shown above may differ from the actual product appearance. AVI201, 202, 203, 212 manual_V0.83... - Page 2 IMPORTANT SAFEGUARD CAUTION RISK OF ELECTRIC SHOCK CAUTION: To reduce the risk of electric shock, do not expose this apparatus to rain or moisture. Only operate this apparatus from the type of power source indicated on the label. The company shall not be liable for any damages arising out of any improper use, even if we have been advised of the possibility of such damages.
-
Page 3: Table Of Contents
TABLE OF CONTENTS 1. PRODUCT OVERVIEW......................1 1.1 Description ..............................1 1.2 Features ................................1 1.3 Package Contents............................1 1.4 Specifications*..............................2 2. HARDWARE OVERVIEW ......................3 2.1 Rear Panel ..............................3 2.2 Upper Side & Underside ..........................3 3. INSTALLATION ........................4 3.1 Install the Hardware ............................ -
Page 4: Product Overview
PRODUCT OVERVIEW 1. PRODUCT OVERVIEW 1.1 Description This camera series is a network-based digital surveillance device with a built-in web server for the purpose of remote monitoring and recording. It supports TCP/IP networking for live video transmission in the format of H.264, MPEG4 or MJPEG, and you can easily operate the camera via the web browser or the supplied video viewer AP software. -
Page 5: Specifications
PRODUCT OVERVIEW 1.4 Specifications* SPECIFICATIONS AVI201 AVI202 AVI203 AVI212 ▓ Network LAN Port LAN Speed 10/100 Based-T Ethernet DDNS, PPPoE, DHCP, NTP, SNTP, TCP/IP, Supported Protocols ICMP, SMTP, FTP, HTTP, RTP, RTSP Frame Rate NTSC:30, PAL:25 Number of Online Users Security Multiple user access levels with password Web management software... -
Page 6: Hardware Overview
HARDWARE OVERVIEW 2. HARDWARE OVERVIEW 2.1 Rear Panel Audio Alarm Output Connector Video Audio Output Reset Default Reset Default Input 12V DC 12V DC AUDIO AUDIO VIDEO VIDEO ALARM Power Power Video Power Indicator Indicator Power Output Connector Connector AVI212 / AVI203 / AVI202 AVI201 CONNECTOR / BUTTON DESCRIPTION... -
Page 7: Installation
INSTALLATION 3. INSTALLATION 3.1 Install the Hardware This camera can be installed in two ways: ceiling-mounted and desktop. During the installation, please make sure the upper side of the camera is always facing up, as shown in Figure 1 below, regardless of which installation way you’re using. This is to ensure the video output won’t be up side down. - Page 8 INSTALLATION Assemble the bracket: a). Align the stem with the central hole of the base, and rotate it to secure, as shown in Figure 3. b). Align the joint lock with the stem, and rotate it to secure, as shown in Figure 4. Figure 3: Connect the stem to the base Figure 4: Connect the joint lock to the stem 4.
-
Page 9: Assign An Ip Address And Access The Camera
INSTALLATION 3.2 Assign an IP address and Access the Camera Step 1. Install the Software Place the supplied Video Viewer AP software CD into your DVD- / CD-ROM drive. The installation process will automatically start. Follow the on-screen instructions to install the application programs. After installation, a “Video Viewer”... -
Page 10: Video Viewer Basic Operation
VIDEO VIEWER BASIC OPERATION 4. VIDEO VIEWER BASIC OPERATION 4.1 The Live View Page After setting up the network information, login user name and password, double-click “ ” on the PC desktop to open and log into the Video Viewer control panel. You will see a screen similar to the following with 6 major sections: ‧... -
Page 11: Address Book
VIDEO VIEWER BASIC OPERATION 4.2 Address Book This view is displayed when the Video Viewer is activated for you to log in / out the network camera from the current address list, or search the available IP address as follows: Click to view the pre-defined network camera access details. -
Page 12: Emap
VIDEO VIEWER MISCELLANEOUS CONTROL PANEL Click to search and view the available IP address(es) for the network camera connection. You can choose one address to add into the address book, edit the details, or update the address list. Button Function Description Select from the available IP address list, and click this button. - Page 13 VIDEO VIEWER MISCELLANEOUS CONTROL PANEL Step 3: If you want to relocate the cameras, you can click “ ” (Configure), and then move the cameras on the emap at will. You can also click “Remove” / “Remove All” to remove a camera or all the cameras on the emap.
-
Page 14: Manual Record
VIDEO VIEWER MISCELLANEOUS CONTROL PANEL 4.4 Manual Record Choose the record type and assign the record location Click “ ” (Miscellaneous Control) → “ ” (Record Setting) to go to the “Record Setting” page. Check the record type “Manual”, and assign the location to save the recordings by double-clicking the “Video Path” cell. Start manual recording Once the “Manual”... -
Page 15: Playback
VIDEO VIEWER MISCELLANEOUS CONTROL PANEL 4.5 Playback To play a recording, click “ ” (Miscellaneous Control) → “ ” (Status List), and select the “Record” tab. A list of all the recordings will be shown by defaults, and you can also sort out the logs you want to speed up the search time. For details, please see “5.6 Status List”... -
Page 16: Snapshot
VIDEO VIEWER MISCELLANEOUS CONTROL PANEL 4.6 Snapshot To take a snapshot of the current view, click “ ” (Snapshot) on the main control panel. Once the current view is captured, you’ll see an icon “ ” shown at the bottom right corner of the image display view. The snapshot will be saved in the path you specified in “... -
Page 17: Video Viewer Miscellaneous Control Panel
VIDEO VIEWER MISCELLANEOUS CONTROL PANEL 5. VIDEO VIEWER MISCELLANEOUS CONTROL PANEL Click “ ” (Miscellaneous Control) on the Video Viewer control panel, and 7 functions are available as follows: Click the button to show the current version of the Video Viewer. The audio / broadcast function is only for AVI202, AVI212 and AVI203 models. -
Page 18: Color Setting
VIDEO VIEWER MISCELLANEOUS CONTROL PANEL 5.1 Color Setting In the live view page, choose the desired network camera from the image display tab. Click “ ” (Miscellaneous Control) → “ ” (Color Setting) to go into the “Color Setting” page, and you can adjust the brightness / contrast / hue / saturation for the selected network camera. -
Page 19: Record Setting
VIDEO VIEWER MISCELLANEOUS CONTROL PANEL Function Description Select the IP address of the desired network camera from the IP Address / Port / User Name / Password drop-down list and check if the network information is correct. Specify the hard disk (HDD Number) and channel number (Channel) HDD Number / Channel within which have the video data you need. -
Page 20: Update
VIDEO VIEWER MISCELLANEOUS CONTROL PANEL Hard Disk Overwrite Check this checkbox to overwrite from the oldest recorded data when the HDD is full. Record Time Range There are two options available for you to set the recording time: Weekly & Custom. Weekly Choose the time box(es) within which you want to enable the recording. -
Page 21: Server Setting
VIDEO VIEWER MISCELLANEOUS CONTROL PANEL Record Path Select and view the location for saving the recorded video and snapshot pictures. To change the saving path for the recorded video clips or snapshots, check the drive you want, click the cell of “Video Path”... -
Page 22: Log
VIDEO VIEWER MISCELLANEOUS CONTROL PANEL Click “ ” (Miscellaneous Control) → “ ” (Server Setting) → “General” → “Log” to go into the “Log” page. In the “Log” page, you can see all the logs for the network camera, such as “Power On”, “Reset Default”, “Net Login” and “SNTP Update”... -
Page 23: Online User
VIDEO VIEWER MISCELLANEOUS CONTROL PANEL To modify an existing account, select the account you want, change the setting, and click “Apply”. ‧ To remove an existing account, select the account you want, and click “Delete”. ‧ To save your changes, click “Apply”. ‧... -
Page 24: Trigger
VIDEO VIEWER MISCELLANEOUS CONTROL PANEL Trigger Click “ ” (Miscellaneous Control) → “ ” (Server Setting) → “General” → “Trigger” to enter this page. Alarm Trigger (Only for AVI202 / 203 / 212): In this section, you can select to enable the function of alarm trigger. Motion Trigger: Item Description... -
Page 25: Network
VIDEO VIEWER MISCELLANEOUS CONTROL PANEL Function Description Apply After setup, click “Apply” to confirm. Notify In this section, you can select to enable the function of E-mail and/or FTP notification. Item Description ‧ Method Email If the E-mail notification function is activated, the network camera will send the captured video clip to the assigned E-mail address(s) once motion-trigger or alarm-trigger recording happened. -
Page 26: Ddns
VIDEO VIEWER MISCELLANEOUS CONTROL PANEL Function Description Web Port Typically, the default TCP port used by HTTP is 80. However, in some cases, it is better to change this port number for added flexibility or security. The valid web port number ranges from 1 to 9999. Static IP Computers are communicated and recognized by their own unique IP addresses over the Internet. - Page 27 VIDEO VIEWER MISCELLANEOUS CONTROL PANEL Sign up Enter all the information necessary for signing up an account according to the website instructions. 1. Key in a user name for login. This name is not equal to the domain name. 2. Key in your E-mail address and input it again to confirm.
-
Page 28: Host Name
VIDEO VIEWER MISCELLANEOUS CONTROL PANEL address. Please read this email within 48 hours and complete the procedure to activate your account according to the instructions in the email. Go to the hyperlink in the email and you will see “Account Confirmed”. Your account is created successfully now. Input the user name and the password you preset before to log in. -
Page 29: Sntp
VIDEO VIEWER MISCELLANEOUS CONTROL PANEL SNTP SNTP (Simple Network Time Protocol) is for time setting. Click “ ” (Miscellaneous Control) → “ ” (Server Setting) → “Network” → “SNTP” to go into the “SNTP” page. Function Description GMT (Greenwich Mean Time) Once users choose the time zone, the network camera will adjust the local area time of the system automatically. -
Page 30: Mail
VIDEO VIEWER MISCELLANEOUS CONTROL PANEL MAIL Click “ ” (Miscellaneous Control) → “ ” (Server Setting) → “Network” → “MAIL” to go into the “MAIL” page. Enter the detailed E-mail information and press “Apply” to confirm. The information you set here will be applied when the function of E-mail notification is enabled in the "Trigger"... -
Page 31: Tools
VIDEO VIEWER MISCELLANEOUS CONTROL PANEL Item Description JPEG Choose the image size (4CIF / CIF) and picture quality (BEST / HIGH / NORMAL / BASIC) when the web transmission format is JPEG. MPEG Choose the image size (4CIF / CIF) and picture quality (BEST / HIGH / NORMAL / BASIC) when the web transmission format is MPEG. -
Page 32: Language Selection
VIDEO VIEWER MISCELLANEOUS CONTROL PANEL Language Selection This software is available in English / Chinese / French / German / Portuguese / Spanish / Japanese. Select a language from the drop-down list, and press “Apply”. You will be prompted to restart the application to make this change take effect. -
Page 33: Event
VIDEO VIEWER MISCELLANEOUS CONTROL PANEL Button / Function Description Range Unit Set different time range unit (One Day / One Week) of the event logs. Date Selection (From / To) Choose the specific date range including the event / record logs you might want. Record Type This section is enabled only when the “Record”... -
Page 34: Backup (For Dvr Only)
VIDEO VIEWER MISCELLANEOUS CONTROL PANEL Backup (For DVR only) Select “Backup” to search for the specific log(s) by date. Button / Function Description Set different time range unit (One Day / One Week) of the event logs. Range Unit Choose the specific date range including the event / record logs you might want. Date Selection (From / To) When all the search criteria are set, click to search the specified logs. - Page 35 VIDEO VIEWER MISCELLANEOUS CONTROL PANEL Function Description Playback / Download This area shows the detailed playback / download information, such as the file name, Info Display record date and time, and the speed, etc. Playback Progress Bar This area shows the playback progress and the progress percentage. Playback Operation This area is enabled only when the playback is started.
-
Page 36: Ie Web Browser
IE WEB BROWSER 6. IE WEB BROWSER 6.1 Access the Camera from an IE Web Browser You can view the images or operate your network camera from an IE web browser. Note: The supported PC operation systems are Windows 2000 and Windows XP. Step 1: Key in the IP address used by your network camera in the URL address box, such as “http://ipcam.dyndns.org”, and press Enter. -
Page 37: Trigger
IE WEB BROWSER Function Description Camera Snapshot Path Set the location where the snapshot pictures are saved. According to the bandwidth, set the required frame rate (FULL / HALF / ONE THIRD / Frame Rate QUARTER / ONE FIFTH / ONE TENTH / ONE FIFTEENTH). For details, please refer to “Video”... -
Page 38: Quicktime Player
QUICKTIME PLAYER 7. QUICKTIME PLAYER You can also use the QuickTime player to log into the network camera and check the live view only. Note: QuickTime is Apple’s multimedia software. You need to have QuickTime installed in you computer first, and you can access the network camera to see the live view. -
Page 39: Appendix 1 Recording Time Table
APPENDIX 1 RECORDING TIME TABLE APPENDIX 1 RECORDING TIME TABLE The following table lists the recording time table for AVI202 and AVI203 and takes PAL video system image capture as an example. The compression format for AVI202 is MPEG4, and the one for AVI203 is H.264. ‧... - Page 40 APPENDIX 1 RECORDING TIME TABLE ‧ Table 2: dynamic state AVI202 AVI203 Resolution Quality Frame Rate MB/Hrs Frame Rate MB/Hrs full full 1743 Best 259.5 1/10 257.1 1/10 1/15 174.3 full full 1158 High 274.5 1/10 194.1 1/10 159.3 1/15 148.8 4CIF full...
- Page 41 APPENDIX 1 RECORDING TIME TABLE ‧ Table 3: Suggested Settings Note: It is recommended to take the following settings for Frame Rate / Resolution / Quality when you use AVI203 under the upload speed of 2M / 1M / 512Kbps. H.264 MPEG4 MJPEG...
-
Page 42: Appendix 2 User Level For Remote Operation
APPENDIX 2 USER LEVEL FOR REMOTE OPERATION APPENDIX 2 USER LEVEL FOR REMOTE OPERATION ● For Video Viewer (AVI201 / 202 / 203 / 212) Supervisor Power User Normal User Guest Address Book ● ● ● ● Emap ● ● ●... - Page 43 APPENDIX 2 USER LEVEL FOR REMOTE OPERATION ● For Web Browser (AVI202) Supervisor Power User Normal User Guest Main Connection Mode ● ● ● ● Protocol ● ● ● ● Quality ● ● ● Change resolution ● ● ● Audio function ●...
-
Page 44: Appendix 3 Default Value
APPENDIX 3 DEFAULT VALUE APPENDIX 3 DEFAULT VALUE ‧ Default Value Items Default Value ‧ Default Network Settings: User Name admin Password admin Port IP Address 192.168.1.10 -41-...
Need help?
Do you have a question about the AVI 201 and is the answer not in the manual?
Questions and answers