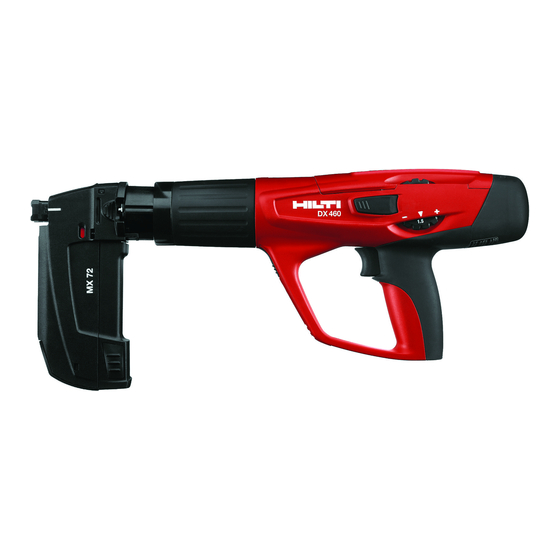
Hilti DX460 Operating Instructions Manual
Hide thumbs
Also See for DX460:
- Operating instructions manual (203 pages) ,
- Operating instructions manual (25 pages) ,
- Operating instructions manual (25 pages)
Advertisement
Advertisement
Table of Contents

Summary of Contents for Hilti DX460
- Page 1 DX460 Operating instructions 17–32...
- Page 4 X-DNI X-ZF X-SL X-EDNI X-CR X-DAK X-AL-H X-FS X-SW X-M8/X-W8 ... P8 X-M6/W6 ... P8 X-M10/W10 ... P10 X-IE IE, IEA = X-460-P8 = X-460-P8W AL = X-460-P8AL 10 = X-460-P10 = X-460-PIE IEA = X-460-PIEA...
- Page 5 8.10 8.11 8.12 CLICK 8.13...
-
Page 6: Table Of Contents
Make a note of this infor- 3. Accessories mation in your operating instructions and always refer to it when making an enquiry to your Hilti representa- 4. Technical data tive or service department. -
Page 7: Description
In addition, all Hilti DX tools are equipped with an unin- block masonry. tentional firing safety device . -
Page 8: Accessories
X-IE piston – For fastening X-IE insulation fasteners X-460-PIEA X-IE approval-piston – For fastening approved X-IE insulation fasteners. Safety accessory and cleaning set Safety goggles, earplugs, Hilti spray, ramrod, flat brush, large round brush, small round brush, scraper, cleaning cloth... -
Page 9: Technical Data
Flexible washer fasteners to fasten insulating foils / sheeting to concrete and steel. 23/36 mm Washers for Hilti nails: simple securing of joint seals, foils / sheeting and timber to concrete and steel using the X-460 WH23/36 washer holder X-(E)M/W/6/8 ... P8, Studs for bolted fastenings on concrete and steel. -
Page 10: Safety Precautions
Never attempt to pry a cartridge from the magazine To avoid the risk of injury, use only original Hilti fas- strip or the tool. teners, cartridges, accessories and spare parts or those Keep the arms flexed when the tool is fired (do not of equivalent quality. -
Page 11: Before Use
If necessary, Flying fragments may injure parts have the tool repaired at a Hilti service centre. of the body or the eyes. Check the buffer and piston for wear (see “8. Care Wear safety goggles and a hard and maintenance”). - Page 12 Fastening guidelines NOTE These application recommendations must always be observed. For more specific information, refer to the Hilti Fastening Technology Manual, which is available from your local Hilti organisation. Concrete Steel A = min. edge distance = 70 mm (2 ")
-
Page 13: Care And Maintenance
If necessary, there is a cartridge strip in the tool, remove it by pulling have the tool repaired at a Hilti service centre. it upwards out of the tool. 2. Release the magazine cover by pressing the release button. - Page 14 Clean inside the housing 1. Use the large round brush to clean inside the hous- ing. 2. Spray the inside of the housing lightly with Hilti spray. 8.10 Clean the cartridge strip guideway Use the scraper provided to clean the right and left car- tridge strip guideways.
-
Page 15: Troubleshooting
Carbon build up Clean the cartridge strip guide- way (see 8.10) If the problem persists: Tool damaged Contact Hilti Repair Centre Tool overheated because of high Let the tool cool down and then Cartridge strip cannot be setting rate carefully try to remove the... - Page 16 Let the tool cool down. from the magazine strip or tool. Clean the tool and remove loose cartridge. If it is impossible to disassemble the tool: Contact Hilti Repair Centre Carbon build-up Clean the tool The operator notices: (see 8.3–8.13) – increased contact pressure –...
- Page 17 Clean the tool (see 8.3–8.13) If the problem persists: Contact Hilti Repair Centre Incorrect piston position Remove cartridge strip and use The tool fires but no nail is driven enclosed pushrod to push piston fully back (see 9.1)
- Page 18 Cause Possible remedies Fastener too short Use longer fastener Fastener penetrates too deeply Driving power too high Reduce power setting Use lighter cartridge Fastener too long Use shorter fastener Fastener does not penetrate deeply enough Driving power too low Increase power setting Use heavier cartridge Hard and/or large aggregate in Use shorter nail...
- Page 19 Cause Possible remedies Fastening on steel Driving power too low Nail does not Try higher power setting or heavier cartridge penetrate surface Short nail application: Application limit exceeded try DAK 16 P8 (TH) or (very hard surface) X-ZFAH 16 S8 TH Long nail application: try DAA or X-AL-H Use co-acting principle/fastener...
-
Page 20: Disposal
10. Disposal Most of the materials from which Hilti power actuated tools are manufactured can be recycled. The materials must be correctly separated before they can be recycled. In many countries, Hilti has already made arrange- ments for taking back your old powder actuated tools for recycling. Please ask your Hilti customer service department or Hilti sales representative for further information. - Page 21 Noise information as per German legislation (3, GSGV dated January 18, 1991): The noise (power) level L as per § 1 (2) 1b) applicable to the tool and, due to different workplaces depend- WA, 1S ing on the application for which the tool is used, also the noise (pressure) level L , at the measurement sur- pAImax face of 1 metre as per §...
- Page 22 Tel.: +423 / 234 2111 Fax: +423 / 234 29 65 www.hilti.com Hilti = registered trademark of Hilti Corp., Schaan W 2678 0502 10-Pos. 2 1 Printed in Liechtenstein © 2002 Right of technical and programme changes reserved S. E. & O.


Need help?
Do you have a question about the DX460 and is the answer not in the manual?
Questions and answers