Table of Contents
Advertisement
Quick Links
Advertisement
Table of Contents

Summary of Contents for Accu-Chek Smart Pix
- Page 1 Smart Pix DEVICE READER User’s Manual...
- Page 2 CE mark on the device. The device may only be operated via the USB port of a suitable computer. The Accu-Chek Smart Pix system is installed, used and maintained by the user and is the user's sole responsibility.
-
Page 3: Table Of Contents
Overview of the Accu-Chek Smart Pix user interface ....................1-6 Installing the Accu-Chek Smart Pix system .......................2-1 What you require for using the Accu-Chek Smart Pix system ................2-1 Connecting the Accu-Chek Smart Pix device ........................2-2 Note about security settings in the Internet browser ....................2-3 Final preparations ..................................2-4... - Page 4 Trend Graph ..................................... 4-35 Day Graph ....................................4-35 Week Graph ..................................... 4-36 Overview ....................................4-36 Record List ....................................4-40 Analysing data in external applications ........................4-41 Literary references for reports ............................4-43 Low/High BG Index ................................4-43 Accu-Chek Smart Pix user's manual...
- Page 5 Error signals and troubleshooting ..........................5-1 Errors without error signals ..............................5-1 Error signals on the device ..............................5-2 Maintenance .....................................6-1 Cleaning the Accu-Chek Smart Pix system ........................6-1 Disposal ......................................6-1 Appendix .......................................7-1 Abbreviations .....................................7-1 Technical data ...................................7-1 Information about advice and the repair service ......................7-2 Roche Diagnostics addresses ..............................7-3...
-
Page 6: Version Note
This user’s manual applies to software version 3.0 of the Accu-Chek Smart Pix system. You can check the software version of your Accu-Chek Smart Pix system on the user interface (browser window) at any time. The version number is shown in the left corner of the menu bar. -
Page 7: Accu-Chek Smart Pix System Overview
Chapter 1, Accu-Chek Smart Pix System overview Accu-Chek Smart Pix System overview The Accu-Chek Smart Pix system is used to easily and automatically analyse blood glucose levels and therapy data from various Accu-Chek meters and insulin pumps. The analyses are displayed on a computer in the form of various, specifiable reports using a standard Internet browser. - Page 8 The procedure is as simple as it could possibly be: • Prepare the meter for data transfer • Place the meter in front of the Accu-Chek Smart Pix device • The report is created automatically and can be viewed and printed on a computer using an Internet browser...
-
Page 9: Printed Symbols
Chapter 1, Accu-Chek Smart Pix System overview Printed symbols Some passages in this manual are highlighted by symbols. Please read these passages very carefully! There are more symbols on the type plate of the device and/or the packaging. Symbol Name... -
Page 10: Overview Of The Accu-Chek Smart Pix System
Comfort). In the devices indicated, it is used for data transfer in place of the code chip. The Accu-Chek IR Key is available as an accessory (REF 0 3307778190) if you have not already received it from your dealer or Roche Diagnostics. -
Page 11: Overview Of The Accu-Chek Smart Pix Status Indicator Signals
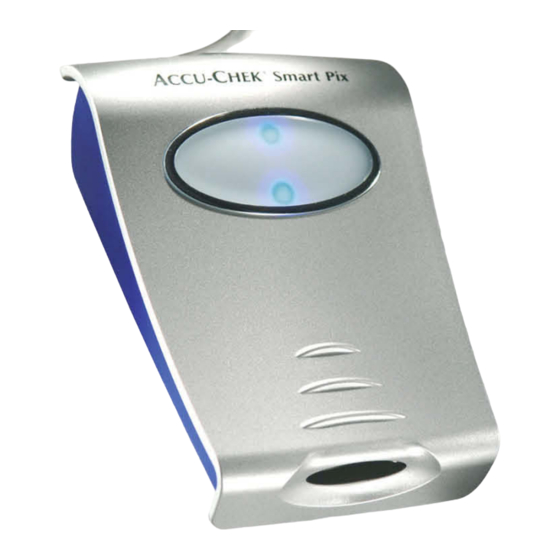
Chapter 1, Accu-Chek Smart Pix System overview Overview of the Accu-Chek Smart Pix status indicator signals The Accu-Chek Smart Pix system indicates various operating states on the status indicator on top of the device. The following signals can appear on this indicator:... -
Page 12: Overview Of The Accu-Chek Smart Pix User Interface
Chapter 1, Accu-Chek Smart Pix System overview Overview of the Accu-Chek Smart Pix user interface The Accu-Chek Smart Pix system has a user interface which is displayed in standard Internet browsers. You do not require an Internet connection if you wish to use the Accu-Chek Smart Pix system. -
Page 13: Installing The Accu-Chek Smart Pix System
Chapter 2, Installing the Accu-Chek Smart Pix system Installing the Accu-Chek Smart Pix system You can connect the Accu-Chek Smart Pix system to any computer which meets the necessary system requirements (see below). No further steps are necessary to prepare the device for operation. -
Page 14: Connecting The Accu-Chek Smart Pix Device
(similar to a USB memory stick). Then the dots at the top and bottom of the status indicator start flashing slowly. The Accu-Chek Smart Pix system is now ready to read data from a device. Accu-Chek Smart Pix user's manual... -
Page 15: Note About Security Settings In The Internet Browser
Internet browser being used and any personal system settings. The content displayed depends not only on your settings of the Accu-Chek Smart Pix system but also on the meter data or insulin pump data read. Accu-Chek Smart Pix user's manual... -
Page 16: Final Preparations
If you can follow the above procedure on your computer, the Accu-Chek Smart Pix system is ready to read data from a meter or an insulin pump. However, you should first perform the configuration described below in order to customise the reports properly. -
Page 17: Configuring The Accu-Chek Smart Pix System
Open the START.HTM file with a double click. The • default Internet browser on your computer is launched and, at the same time, the Accu-Chek Smart Pix user interface is loaded. • Click (once, as is usual in browsers) on the Settings button. - Page 18 Chapter 2, Installing the Accu-Chek Smart Pix system Note about saving the settings: The response to saving the following setting may vary according to the operating system and browser you are using: • Changed settings (e.g. Personal Setup) may not immediately be displayed.
-
Page 19: Selecting A Language
Chapter 2, Installing the Accu-Chek Smart Pix system Selecting a language On the navigation bar, click on the Language link. The display pane now shows a drop-down list with all available languages, the default setting being English. Select the language which you want to be used both on the browser screen and for printouts. -
Page 20: Display Options
Chapter 2, Installing the Accu-Chek Smart Pix system Display options On the navigation bar, click on the Display options link. The display pane now shows the options for the various formats. Select the following settings here: • Date and time format. -
Page 21: Personal Setup
Chapter 2, Installing the Accu-Chek Smart Pix system Personal Setup On the navigation bar, click on the Personal Setup link. The display pane now shows the available options. • Input fields for personalising the printouts (here you can enter, for example, the name of a doctor's practice or pharmacy). - Page 22 (top right of the window). The text file created in this manner is read by the Accu-Chek Smart Pix system, and all entries are adopted as settings for the Accu-Chek Smart Pix system (until they are changed again).
-
Page 23: Report Setup
Chapter 2, Installing the Accu-Chek Smart Pix system Report Setup On the navigation bar, click on the Report Setup link. The display pane now shows the options for reports to be created in the future. Select the following settings here: •... - Page 24 Chapter 2, Installing the Accu-Chek Smart Pix system Target range • Click on the arrow pointing down to open the selection list, for lower limit and upper limit separately. • Click the desired figure to select it. • Click the arrow pointing down to open the selection list and define the hypo limit.
- Page 25 Chapter 2, Installing the Accu-Chek Smart Pix system Combined analysis of meters If you use more than one meter (e.g. one during the day/one during the night), it is a good idea to display the data of all meters together in the reports. You can analyse up to three meters at a time.
-
Page 26: Completing Configuration
When you unplug the USB cable, the browser window may close. If it does, simply plug in the Accu-Chek Smart Pix device again and open the START.HTM file again with a double click. -
Page 27: Preparing The Devices
Chapter 3, Preparing the devices Preparing the devices The Accu-Chek Smart Pix system can read and analyse data from the following devices: • Accu-Chek Active • Accu-Chek Aviva/Aviva Nano • Accu-Chek Aviva Combo/Aviva Expert • Accu-Chek Compact/Integra • Accu-Chek Compact Plus •... - Page 28 Chapter 3, Preparing the devices In some cases, these devices require different preparations in order to be able to transfer data to the Accu-Chek Smart Pix system. On the following pages, you will find the procedure for each device to analyse stored data successfully.
- Page 29 • The computer is switched on and the operating system is running. • The Accu-Chek Smart Pix device is ready for data transfer when the top/bottom dots flash slowly (about once a second). • If you have already opened the START.HTM file in the browser, you will see the picture shown on the left (search mode).
-
Page 30: Accu-Chek Active
Chapter 3, Preparing the devices Accu-Chek Active The Accu-Chek Active meter has a built-in infrared port for data transfer. In order to read data from these devices, proceed as follows: • Place the device no more than 10 cm away from the infrared window on the Accu-Chek Smart Pix device. -
Page 31: Accu-Chek Aviva/Aviva Nano
• Place the device no more than 10 cm away from the infrared window on the Accu-Chek Smart Pix device. Both infrared windows must be facing one another. • Switch the meter on by keeping the buttons pressed simultaneously until two alternately flashing arrows appear on the display. -
Page 32: Accu-Chek Aviva Combo/Aviva Expert
Chapter 3, Preparing the devices Accu-Chek Aviva Combo/Aviva Expert The Accu-Chek Aviva Combo/Aviva Expert meter has a built- in infrared port for data transfer. In order to read data from these devices, proceed as follows: • Place the device no more than 10 cm away from the infrared window on the Accu-Chek Smart Pix device. -
Page 33: Accu-Chek Compact/Integra
• Place the device no more than 10 cm away from the infrared window on the Accu-Chek Smart Pix device. Both infrared windows must be facing one another. • Switch the meter on by pressing the SET and MEMO buttons simultaneously. -
Page 34: Accu-Chek Compact Plus
Chapter 3, Preparing the devices Accu-Chek Compact Plus The Accu-Chek Compact Plus meter has a built-in infrared port for data transfer. In order to read data from these devices, proceed as follows: • Place the device no more than 10 cm away from the infrared window on the Accu-Chek Smart Pix device. -
Page 35: Accu-Chek Go
Chapter 3, Preparing the devices Accu-Chek Go The Accu-Chek Go meter has a built-in infrared port for data transfer. In order to read data from these devices, proceed as follows: • Place the device no more than 10 cm away from the infrared window on the Accu-Chek Smart Pix device. -
Page 36: Accu-Chek Mobile
Chapter 3, Preparing the devices Accu-Chek Mobile The Accu-Chek Mobile meter has a built-in infrared port for data transfer. In order to read data from these devices, proceed as follows: • Place the device no more than 10 cm away from the infrared window on the Accu-Chek Smart Pix device. -
Page 37: Accu-Chek Sensor/Advantage
• Remove the code chip from the meter. • Remove the Accu-Chek IR Key 5 from the slot on the back of the Accu-Chek Smart Pix device (if that is where you store it). • Insert the Accu-Chek IR Key into the meter in place of the code chip. -
Page 38: Accu-Chek Comfort
• Remove the code chip from the meter. • Remove the Accu-Chek IR Key 5 from the slot on the back of the Accu-Chek Smart Pix device (if that is where you store it). • Insert the Accu-Chek IR Key into the meter in place of the code chip. -
Page 39: 3.10 Accu-Chek Performa/Performa Nano
• Place the device no more than 10 cm away from the infrared window on the Accu-Chek Smart Pix device. Both infrared windows must be facing one another. • Switch the meter on by keeping the buttons pressed simultaneously until two alternately flashing arrows appear on the display. -
Page 40: 3.11 Accu-Chek Performa Combo/Performa Expert
• Place the device no more than 10 cm away from the infrared window on the Accu-Chek Smart Pix device. Both infrared windows must be facing one another. • In the main menu, select My Data and press... -
Page 41: 3.12 Accu-Chek Pocket Compass Software
Diary • Place the handheld computer no more than 10 cm Reports away from the infrared window on the Accu-Chek Health Management Smart Pix device. Both infrared windows must be 3/20/05 Data Transfer facing one another. Options Import Data •... -
Page 42: 3.13 Accu-Chek Voicemate Plus
Chapter 3, Preparing the devices 3.13 Accu-Chek Voicemate Plus The Accu-Chek Voicemate Plus voice unit has a built-in infrared port for data transfer. In order to read data from these devices, proceed as follows: • Place the device no more than 10 cm away from the infrared window on the Accu-Chek Smart Pix device. -
Page 43: Insulin Pump Accu-Chek D-Tronplus (And Disetronic D-Tronplus)
• Place the device no more than 10 cm away from the infrared window on the Accu-Chek Smart Pix device. Both infrared windows must be facing one another. • Make sure that your Accu-Chek (Disetronic) DTRONplus insulin pump is in STOP mode and that the key lock (KeyLock) is deactivated or unlocked. -
Page 44: 3.15 Accu-Chek Spirit Insulin Pump
Chapter 3, Preparing the devices 3.15 Accu-Chek Spirit insulin pump The Accu-Chek Spirit insulin pump has a built-in infrared port for data transfer. In order to read data from these devices, proceed as follows: • Place the device no more than 10 cm away from the infrared window on the Accu-Chek Smart Pix device. -
Page 45: 3.16 Accu-Chek Spirit Combo Insulin Pump
Chapter 3, Preparing the devices 3.16 Accu-Chek Spirit Combo insulin pump The Accu-Chek Spirit Combo insulin pump has a built-in infrared port for data transfer. In order to read data from these devices, proceed as follows: • Place the device no more than 10 cm away from the infrared window on the Accu-Chek Smart Pix device. -
Page 46: 3.17 Note On Time Settings For The Accu-Chek Insulin Pumps
Chapter 3, Preparing the devices 3.17 Note on time settings for the Accu-Chek insulin pumps If you have to correct the time set in your Accu-Chek insulin pump, please observe the following: Do not change the time on your Accu-Chek insulin pump if you have programmed time-based changes of insulin delivery (e.g. -
Page 47: Accu-Chek Report
• When the data has been transferred, the Accu-Chek Smart Pix system prepares the reports. The two left/ right dots on the status indicator flash (more slowly) during this process. •... -
Page 48: Printing Reports
Do not use the integrated print function of the browser to print one or more reports after data transfer, instead use the special print functions offered by the Accu-Chek Smart Pix system. In any view of the report, click on the Create Report •... -
Page 49: Blood Glucose: General Information About The Reports
Blood glucose: general information about the reports Types of report The Accu-Chek Smart Pix system creates single-page or multi-page reports for defined periods (e.g. the last 2 or 4 weeks). The period of time and the style of the report have been set during configuration. -
Page 50: Evaluated Data
Chapter 4, Accu-Chek Report Evaluated data During creation of the individual analyses, the data read is checked by the Accu-Chek Smart Pix system. The following data is not included in the statistical analysis: • Test results outside the period selected •... -
Page 51: Report Styles
For some analyses a style is defined, either Detailed or Trends , during configuration of the Accu-Chek Smart Pix system. These two styles offer different types of presentation for identical information. You can choose from these styles for each of the following analyses individually: •... -
Page 52: Graphic Elements Of The Reports
Insulin values are also shown in different colours, however, the meanings mentioned above (for blood glucose results) do not apply for insulin values. The colours are only used as a means to distinguish different insulin types. Accu-Chek Smart Pix user's manual... - Page 53 The bars shown in this illustration (from left to right) represent the following amounts: – Block 1: 2.5 g – Block 2: 5.0 g – Block 3: 7.5 g – Bar 4 (3 blocks of 10 g each): 30 g Accu-Chek Smart Pix user's manual...
- Page 54 Maximum value or minimum value within a time interval. Maximum value/minimum value outside the measuring range (Hi/Lo). Symbols (record lists and logbook) The following additional symbols are used in the analysis lists: User-defined event, e.g. Alternative Site Testing (AST) Hypo Carbohydrate amount Accu-Chek Smart Pix user's manual...
- Page 55 Chapter 4, Accu-Chek Report Test results which have been imported from the Accu-Chek Pocket Compass software may include additional information (events) which is not represented by symbols. Such events are indicated by a number or letter in the comments column of the record list style.
-
Page 56: Blood Glucose: Content Of The Report
In addition to the thin connecting line between the various blood glucose results, you will also see a (thicker) blue curve; the day-to-day development of the mean blood glucose level. 4-10 Accu-Chek Smart Pix user's manual... - Page 57 These figures are: • n: Number of analysed test results. • MBG: Mean value of all analysed results. • SD: Standard deviation or variance of the analysed results. Accu-Chek Smart Pix user's manual 4-11...
-
Page 58: Day Graph
If they are not, the time block settings in the Accu-Chek Smart Pix configuration will be used. The analysis can be displayed in two different styles of presentation. - Page 59 These figures are: • n: Number of analysed test results. • MBG: Mean value of all analysed results. • SD: Standard deviation or variance of the analysed results. Accu-Chek Smart Pix user's manual 4-13...
-
Page 60: Week Graph
At the lower edge of the analysis, carbohydrate amounts are shown (if transferred by the meter). In the lower area of the right-hand y-axis, you will find the scale for the carbohydrate amounts. 4-14 Accu-Chek Smart Pix user's manual... - Page 61 These figures are: • n: Number of analysed test results. • MBG: Mean value from all analysed results. • SD: Standard deviation or variance of the analysed results. Accu-Chek Smart Pix user's manual 4-15...
-
Page 62: Metabolic Control
Good metabolic control can be recognised by as many dots as possible in the “stable-low” quadrant (bottom left); there should, however, have been no cases of hypoglycemia, or as few as possible in the relevant period. 4-16 Accu-Chek Smart Pix user's manual... - Page 63 High/low BG index: These figures represent the frequency and the resulting risk of blood glucose levels being too low or too high (see literary references on page 4-43). Figures should be as low as possible. Accu-Chek Smart Pix user's manual 4-17...
-
Page 64: Distribution
If the time blocks are defined in the meter, this information is used. If they are not, the time block settings in the Accu-Chek Smart Pix configuration are used. 4-18 Accu-Chek Smart Pix user's manual... -
Page 65: Logbook
If the evaluated period contains blood glucose levels which are marked with the event User-defined, a separate statistic is calculated and displayed for these. Accu-Chek Smart Pix user's manual 4-19... - Page 66 The level measured last is in the top left position. In such a case, the statistical analyses can only be displayed for all the levels because it is not possible to assign them to time blocks. 4-20 Accu-Chek Smart Pix user's manual...
-
Page 67: Overview
In addition, the statistical information also contains the value (in brackets) for those days only on which a test was performed at least once. • Target Range: The target range used for evaluation. Accu-Chek Smart Pix user's manual 4-21... - Page 68 This information is only displayed if required: • Values without Date/Time: Number of test results which were stored without date or time information. • Values with warnings: Number of test results which were stored with temperature warning, expiry note, etc. 4-22 Accu-Chek Smart Pix user's manual...
-
Page 69: Record List
User-defined, a separate statistic is calculated and displayed for these. In addition, levels without date and time information as well as levels which were determined using control solution are each listed in separate statistics. Accu-Chek Smart Pix user's manual 4-23... -
Page 70: Insulin Pump: General Information About The Reports
Chapter 4, Accu-Chek Report Insulin pump: general information about the reports Types of report The Accu-Chek Smart Pix system creates single-page or multi-page reports for defined periods (e.g. the last 1 or 2 weeks). The period has been defined in configuration. -
Page 71: Graphic Elements Of The Reports
Temporary decrease in basal rate Active basal rate (Long Term Overview) Switch to a named basal profile (e.g. “A”) Switch from a named basal profile (e.g. “A”) to another named basal profile (e.g. “B”) Accu-Chek Smart Pix user's manual 4-25... - Page 72 Bolus advice is only displayed if the bolus has been delivered and is thus stored in the pump. Prime infusion set Return of piston rod (cartridge change) Insulin pump run Insulin pump stop 4-26 Accu-Chek Smart Pix user's manual...
-
Page 73: Insulin Pump: Content Of The Report
You will find the meanings of the various symbols in brief in the legend and in detail on page 4-25. As in the blood glucose analysis, the days that are usually non-working days (weekends) are marked with an additional green bar on the horizontal axis. Accu-Chek Smart Pix user's manual 4-27... -
Page 74: Day Graph
On this chart, you will find not only basal rates and boluses but also information about basal rate changes and the selection of basal profiles. 4-28 Accu-Chek Smart Pix user's manual... -
Page 75: Basal Rates
If you want to print the table view, click on the Print Page button. Unlike the graphic view, the table view cannot be selected and printed via the Create Report function (see page 4-2). Accu-Chek Smart Pix user's manual 4-29... -
Page 76: Basal Bolus
The proportion of boluses which have been delivered using bolus advice is represented in a different colour (orange). Means per day Here you will find the basal and bolus means and their percentage of the total amount. 4-30 Accu-Chek Smart Pix user's manual... -
Page 77: Long Term Overview
(and times when the insulin pump was in STOP). The currently active basal profile is marked with a tick Additional information This information contains error messages and warnings (and their number) which were stored in the insulin pump. Accu-Chek Smart Pix user's manual 4-31... -
Page 78: Lists
Boluses which have been delivered using bolus advice are flagged with the corresponding symbol To see all the lists, please use the scroll bar on the right-hand side. The examples opposite have been shortened. 4-32 Accu-Chek Smart Pix user's manual... -
Page 79: Blood Glucose And Insulin Pump: Combined Report
Deviations of ± 5 minutes maximum are tolerated; if the deviation is greater, no combined reports are created. Accu-Chek Smart Pix user's manual 4-33... -
Page 80: Types Of Report
Chapter 4, Accu-Chek Report Types of report The Accu-Chek Smart Pix system creates single-page or multi-page reports for defined periods (e.g. the last 2 or 4 weeks). The period of the combined report is the shortest relevant period set for the blood glucose or insulin pump reports. -
Page 81: Trend Graph
All the information is plotted at the relevant time of day according to the time when the test was performed. The elements used in the display correspond to those in the Trend Graph report. Accu-Chek Smart Pix user's manual 4-35... -
Page 82: Week Graph
• Meter/Insulin pump (symbols): Displays the meter and the insulin pump used. If you are using several meters (see page 2-13), the symbol is displayed next to the insulin pump. 4-36 Accu-Chek Smart Pix user's manual... - Page 83 4 minutes compared to the insulin pump time. If you are using several meters, this information is repeated for each meter. • Stored Results: Total number of test results in the device(s), with timeframe details (from ... to). Accu-Chek Smart Pix user's manual 4-37...
- Page 84 High/low BG index: These figures represent the frequency and the resulting risk of blood glucose levels being too low or too high. Figures should be as low as possible. Additional information This information is only displayed if required. 4-38 Accu-Chek Smart Pix user's manual...
- Page 85 (combined without considering the bolus type). • Changes to basal rates: Number of manual increases and decreases of the basal rate as well as the number of changes to and switches of the basal profile. Accu-Chek Smart Pix user's manual 4-39...
-
Page 86: Record List
This makes it easier to identify insulin doses that were delivered in direct relation to blood glucose tests. Boluses which have been delivered using bolus advice are flagged with the corresponding symbol 4-40 Accu-Chek Smart Pix user's manual... -
Page 87: Analysing Data In External Applications
XML files. The first letter of the file name indicates what data is contained: – Gxxxxxxx.XML: glucose results from meter – Ixxxxxxx.XML: data from insulin pump • Select the desired file and click Open. Accu-Chek Smart Pix user's manual 4-41... - Page 88 Besides the tabular listing, you will also find statistical analyses at the end of the table. You can now save this file for archiving or other purposes on your hard drive. You cannot save this file on the SmartPix removable disk. 4-42 Accu-Chek Smart Pix user's manual...
-
Page 89: Literary References For Reports
Kovatchev BP, Cox DJ, Gonder-Frederick LA and WL Clarke (2002) Methods for quantifying self-monitoring blood glucose profiles exemplified by an examination of blood glucose patterns in patients with Type 1 and Type 2 Diabetes. Diabetes Technology and Therapeutics, 4 (3): pp 295-303. Accu-Chek Smart Pix user's manual 4-43... - Page 90 Chapter 4, Accu-Chek Report 4-44 Accu-Chek Smart Pix user's manual...
-
Page 91: Error Signals And Troubleshooting
If you do not find the required solution here, please contact your local Roche representative. Errors without error signals The Accu-Chek Smart Pix system fails to appear on the PC as a drive: • Check whether your PC and your operating system meet the system requirements for the Accu-Chek Smart Pix system (see page 2-1). -
Page 92: Error Signals On The Device
In the event of error messages associated with data transfer, it is not the Accu-Chek Smart Pix system which is faulty – there is interference with data transfer between the devices. In individual cases, this may be due to the meter or insulin pump. -
Page 93: Maintenance
Chapter 6, Maintenance Maintenance Cleaning the Accu-Chek Smart Pix system Unplug the Accu-Chek Smart Pix device before cleaning it. Use cloths slightly moistened with cleaning fluid and make sure no liquid gets inside the device. Clinical staff: Please observe the regulations applicable at your institution concerning protection against infection. - Page 94 Chapter 6, Maintenance Accu-Chek Smart Pix user's manual...
-
Page 95: Appendix
Protection class Equipment in protection class III Ports 1 infrared port 1 USB port Ambient conditions Operation temperature range: 5°C – 40°C Storage temperature range: -25°C – 70°C Absolute humidity: 5 g/m – 25 g/m Accu-Chek Smart Pix user's manual... -
Page 96: Information About Advice And The Repair Service
Roche representative. Repair service: Please bear in mind that any repairs, configurations or other changes to the Accu-Chek Smart Pix device may only be performed by persons who have been authorised to do so by Roche Diagnostics. If you suspect that the device is faulty, please contact your local Roche representative. -
Page 97: Roche Diagnostics Addresses
Accu-Chek Enquiry line: 1800 251816 Roche Diagnostics GmbH Roche Diagnostics GmbH Austria Engelhorngasse 3, 1211 Wien, Österreich Accu-Chek Kunden Service Center: (01) 277 87-355 Roche Diagnostics Belgium SA/NV Roche Diagnostics Belgium SA/NV Belgium Schaarbeeklei 198, 1800 Vilvoorde, België Tel: 0800-93626 (Accu-Chek Service) Roche Diagnostics Roche Diagnostics, P.O. - Page 98 Γραμμή Εξυπηρέτησης Διαβήτη 800 11 71000 Roche Diagnostics (Hong Kong) Ltd. Roche Diagnostics (Hong Kong) Ltd. Hong Kong, 1316-1325 Metroplaza, Tower 1 New Territories 223 Hing Fong Road Kwai Chung, Hong Kong Enquiry hotline : 852 2485 7512 Accu-Chek Smart Pix user's manual...
- Page 99 Roche Diagnostics N.Z. Ltd Roche Diagnostics N.Z. Ltd New Zealand 15 Rakino Way, Box 62-089 Mt. Wellington, Auckland, New Zealand Accu-Chek Enquiry Line: 0800 80 22 99 Roche Diagnostics Norge AS Roche Diagnostics Norge AS Norway Brynsengfaret 6B Pb 6610 Etterstad 0607 Oslo, Norge Telefon kundestøtte + 47- 815 00 510...
- Page 100 Roche Products (Pty) Ltd. South Africa Roche Products (Pty) Ltd. South Africa South Africa Diagnostics Division Diagnostics Division 9, Will Scarlet Road / Ferndale P.O. Box 1927 Randburg 2125 , South Africa Accu-Chek Care Line 080-DIABETES: dial 080-34-22-38-37 Accu-Chek Smart Pix user's manual...
- Page 101 UK Freephone number: 0800 701 000 ROI Freephone number: 1 800 709 600 1) calls may be recorded for training purposes Roche Diagnostics Roche Diagnostics 9115 Hague Road, Indianapolis, IN 46256, USA Accu-Chek Customer Care Service Center: 1-800-858-8072 Accu-Chek Smart Pix user's manual...
- Page 102 ACCU-CHEK, ACCU-CHEK AVIVA, ACCU-CHEK AVIVA COMBO, ACCU-CHEK AVIVA NANO, ACCU-CHEK AVIVA EXPERT, ACCU-CHEK GO, ACCU-CHEK INTEGRA, ACCU-CHEK MOBILE, ACCU-CHEK PERFORMA, ACCU-CHEK SPIRIT, ACCU-CHEK SPIRIT COMBO, ACCU-CHEK SMART PIX, ADVANTAGE, CAMIT, COMBO, DISETRONIC, D-TRONPLUS, PERFORMA COMBO, PERFORMA EXPERT, PERFORMA NANO, VOICEMATE and LIVE LIFE. THE WAY YOU WANT. are trademarks of Roche.
Need help?
Do you have a question about the Smart Pix and is the answer not in the manual?
Questions and answers