Advertisement
Advertisement
Table of Contents

Related Manuals for SEVIC Blue Laser SBL0103MP4


Summary of Contents for SEVIC Blue Laser SBL0103MP4
- Page 1 BLUE LASER: SBL0103MP4 - User’s Manual...
-
Page 2: Table Of Contents
TABLE OF CONTENTS Safety Information ….…………………………………………………………………….2 Features …………………………………………………………………………………...3 Accessories………………………………………………………………………………..4 Front Panel Description ………………………………………………………………….5 Remote Control …………………………………………………………………………...6 Installation …………………………………………………………………………………8 Unit Removal ……………………………………………………………………………..11 Wire Connection …………………………………………………………………………12 Disc Notes ………………………………………………………………………………..13 Disc Operation …………………………………………………………………………...14 Basic Operations …………………………………………………………………...……15 Radio Operations . …....................18 DVD Player Operation. …..................21 Card Operation . -
Page 3: Safety Information
SAFETY INFORMATION Please read the manual carefully before operating this unit and keep it for future reference. CAUTION: This unit is a class 1 laser product. To prevent direct exposure to the laser system, do not open the unit. The laser beam may hurt your eyes. If the unit requires adjustments, contact an authorized service centre. -
Page 4: Features
FEATURES - ISO/1-DIN Size (178 x 54 mm) - DVD/DVD-R/DVD-RWVCD/CD/CD-R/CD-RW/MP3 Compatible - 3.6" Wide-Screen TFT/LCD Display - High Brightness: 300 cd/m - Colour, Contrast, Brightness, Tint controls - Fully Motorized Slide Down Front Panel - Motorized Viewing Angle Adjustment - Last Angle Memory for Front Panel - Car DVD Slot-in Mechanism - Digital &... -
Page 5: Accessories
ACCESSORIES Mounting Sleeve x 1 Back Strap x 1 5X5 Screws x 4 Keys x 2 Main Wire Harness x 1 Faceplate Case x 1 Remote Control x 1 Operational Manual + Warranty x 1 Trim Bezel x 1 Rear Mounting Bolt x 1 - 4 -... -
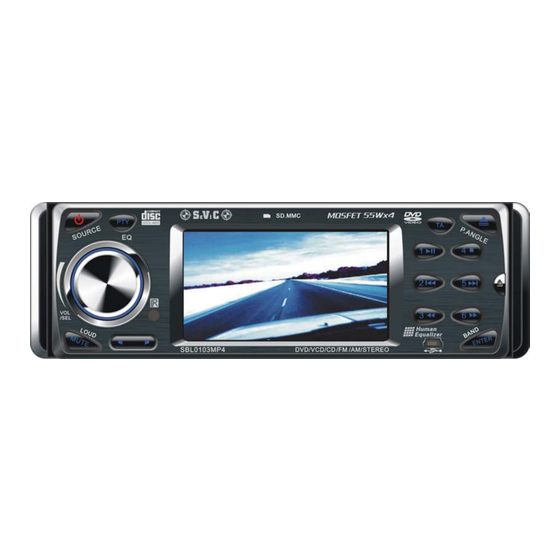
Page 6: Front Panel Description
FRONT PANEL 1. POWER / SOURCE 7. TA(Traffic Announcement) 13. NEXT 2. EQ / PTY(Program Type) 8. EJECT / P.ANGLE 14. F.FWD 3. VOLUME+ / - / SEL 9. PLAY / PAUSE 15. MINI USB 4. LOUD / MUTE 10. STOP 16. -
Page 7: Remote Control
REMOTE CONTROL SBL0103MP4 1. POWER/SOURCE 13. F.FWD 25. SUBTITLE 2. MUTE 14. SLOW 26. PREVIOUS 3. NUMBER BUTTONS 15. RANDOM 27. RIGHT(Seek up) 4. MENU 16. ZOOM 28. NEXT 5. AUDIO 17. SELECT 29. D.ANGLE 6. DISPLAY 18. EJECT / P.ANGLE 30. - Page 8 Replacing the Batteries f the remote control has no function or if the operating range is reduced, replace the old battery with new one. 1. Remove the battery cover. Follow the arrow (1) slide the tab to the right while pulling the cover away at the same time. 2.
-
Page 9: Installation
UNIT INSTALLATION Installation Method 1: Din Front-Mount Install the Mounting sleeve into the dashboard. Bend as many claws outward for tight fit, to lock the sleeve into place. - 8 -... - Page 10 Install the trim bezel to the unit. (Arched surface toward the bottom). Use the Rear Mounting Bolt to support the unit. - 9 -...
- Page 11 Installation Method 2: Using the screw holes at the sides of the unit (ISO Mount). 1. Remove the hooks on both sides. 2. Select a position where the screw holes of the mounting bracket supplied with the car and the screw holes of the main unit become aligned, tighten the screws on each side, and re-mount the brackets with the factory hardware in the original location.
-
Page 12: Unit Removal
UNIT REMOVAL (when installed using the sleeve) 1. Detach the front panel. 2. Insert the keys supplied with the unit on both sides ( as illustrated) as this will release the internal locks so you can slide the unit out. - 11 -... -
Page 13: Wire Connection
WIRE CONNECTION - 12 -... -
Page 14: Disc Notes
DISC NOTES ■ Disc formats supported by this player Handling and cleaning • Dirty, dusty, scratched or warped discs may not play properly. • Do not place stickers or make scratches on discs • Do not warp discs. • Store discs in their cases when not in use. •... -
Page 15: Disc Operation
DISC OPERATION Repairing New Discs with Rough Spots A new disc may have rough edges on its inside and outside edges. If a disc with rough edges is used, the proper setting will not be performed and the player will not play the disc.
Need help?
Do you have a question about the Blue Laser SBL0103MP4 and is the answer not in the manual?
Questions and answers