Advertisement
Advertisement
Table of Contents

Subscribe to Our Youtube Channel
Related Manuals for Daymak Boomerbuggy


Summary of Contents for Daymak Boomerbuggy
- Page 1 Boomerbuggy Covered User Manual...
- Page 2 Daymak warranties, services, and stocks parts for everything it sells. We support our prod- ucts. Please feel free to visit our website. You’ll nd the latest in cool transportation solutions,...
-
Page 3: Table Of Contents
Table of Contents Introduction..............................4 Scooter Part Diagrams ..........................5 Riding Instructions ............................6 Operating Instructions ..........................10 The Battery ..............................12 Technical Data ...............................17 Maintenance and Troubleshooting .......................20... -
Page 4: Introduction
We at Daymak Inc. recognize the importance of your comfort when it comes to mobility, and our Boomerbuggy Mobility Scooters provide just that;... -
Page 5: Scooter Part Diagrams
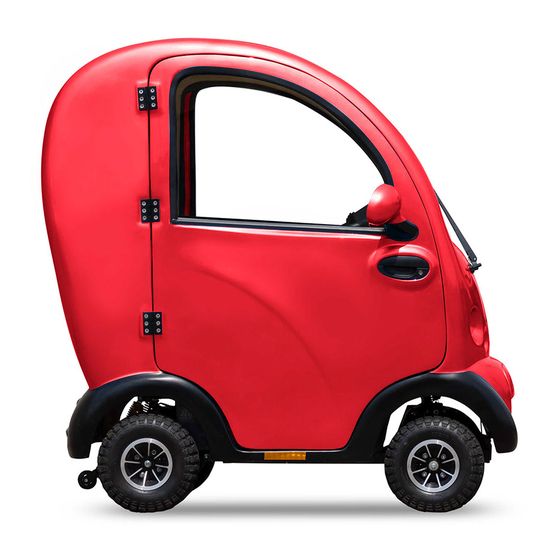
Scooter Part Diagrams Diagram 1: The Boomerbuggy Covered Electric Scooter This diagram illustrates the various parts of your scooter. Please note that many of these parts are not us- er-serviceable and should be repaired only by trained professionals. This is especially true of the electrical systems and the mechanical components. -
Page 6: Riding Instructions
Riding Instructions This guide assumes that you already know how to ride a standard scooter. Before you try to ride an electric scooter, you should be very familiar with controlling and balancing a normal scooter. Caution If you do not have cycling experience, an e-scooter is too dangerous to ride. Do not begin learning to ride a scooter using an e-scooter. - Page 7 Inspecting your Electric Scooter Always inspect your e-scooter before you ride it, to make sure its safety features are op- erating properly. Many accidents can be avoided with routine inspections. Once you are comfortable with your e-scooter, you will be able to detect small changes in the way it feels.
-
Page 8: Safety Tips
- DO NOT use an escalator; please opt for the elevator - DO NOT drive on an incline with oil, water, or ice on it - DO NOT use parts or accessories that are not authorized by Daymak Inc. - DO NOT connect any medical devices to the scooter battery On the Road Please adhere to the following recommendations to ensure your safety. - Page 9 Turning Signal Lights Your e-scooter has turn signal lights. The turn signal activator is on the left handlebar. Push it left or right to activate it to indicate that you are turning in the appropriate direction, and press the middle of the button to turn it o . The turn signals also emit a noise, to ensure that everyone knows you are turning.
-
Page 10: Operating Instructions
Operating Instructions Getting Started Before the rst use, you must charge your scooter completely. This should take approxi- mately 8 to 12 hours. Getting On/Off Before getting on or o your scooter, always make sure that the keys are not in the ignition and that the scooter is o . - Page 11 Steering Steering the scooter is e ortless and simple. Before you begin your practice, ensure that there are no obstacles in the way. To steer, simply rotate the tiller (handlebars) to the desired direction; the more you rotate, the more sharp the turn. Begin by slowly moving forward and steering the tiller at small angles;...
-
Page 12: The Battery
The Battery The Boomerbuggy series utilizes two maintenance free, sealed lead acid batteries. Battery performance is a ected by various factors including: temperature, terrain, the weight of the user, and overall usage for the batteries. The battery level indicator is only a guide for judging the amount of charge in the batteries. - Page 13 If your charger’s LED status light does not change from red to green over an extended period of time, for perhaps more than 14 hours, and the battery is very hot, the battery or charger may need replacing. Stop charging and bring both to your Daymak dealer imme- diately. Do not charge the battery.
-
Page 14: Battery Care
Battery Care Follow these suggestions to maintain your battery’s optimal performance. If you do not follow these suggestions, your battery may lose its ability to maintain a charge and might have to be replaced sooner than would otherwise be necessary. •... - Page 15 Cold Weather and your Battery Below 10 degrees Celsius, the battery will not work as well as it would in warmer tempera- tures. While Lithium-Ion batteries perform better than Lead-Acid batteries in temperature extremes, both will experience reduced performance in cold temperatures. Also, repeatedly riding the e-scooter in cold temperatures may cause your battery to have to be replaced sooner.
- Page 16 1500 charges. When the battery has to be replaced, you will notice that your battery cannot carry as much of a charge as it could initially. Contact your local Daymak dealer to purchase a new battery. When replacing your battery, dispose of it at a proper municipal battery recycling facility.
-
Page 17: Technical Data
Daymak pioneered the development of intelligent component control in e-scooters. The “D- Drive” tech- nology developed by Daymak is the brain of your e-scooter. It allows your e-scooter to achieve faster accel- eration, to climb steeper hills, and to save energy. In future, it will allow for other ways of recharging your e-scooter’s batteries, such as by using solar or wind power. -
Page 18: Wiring Diagram
Basic Statistics Dimensions Weight Loading Capacity Speed and Mileage Wheel Size: 4.0”x13.5” 210 kg without battery Standard: 150 kg Max. Speed: 15 km/h Body Size: 222 kg with battery Maximum: 205 kg Max. Mileage: 40 km 171x82x170cm Seat Height 75cm (29”) Electrical System Statistics Motor Statistics Charger Statistics... -
Page 19: Maintenance And Troubleshooting
When changing a tire, the inner tube must be de ated. Remove the four bolts from the wheel and split the rim. It may be easier – and safer - to have the tubes replaced by your Daymak dealer. General Maintenance Every six months, you may need to tighted certain nuts and bolts.
Need help?
Do you have a question about the Boomerbuggy and is the answer not in the manual?
Questions and answers