Table of Contents
Advertisement
Advertisement
Table of Contents

Related Manuals for Belkin MIRACAST VIDEO ADAPTER


Summary of Contents for Belkin MIRACAST VIDEO ADAPTER
- Page 1 MIRACAST VIDEO User Manual ADAPTER F7D7501v1 • 8820-01467 Rev. D00...
-
Page 2: Table Of Contents
Your Remote ..........25 4. Miracast Video Adapter’s Interfaces ..... . . 26 The Miracast Adapter’s User Interface . -
Page 3: Introduction
INTRODUCTION Thank you for purchasing the Belkin Miracast Video Adapter. Now you can take advantage of this great new technology that lets you watch anything and everything from your mobile device or computer on your big, beautiful, HDTV screen. Benefits of the Miracast Video Adapter Your Belkin Home Network will allow you to: •... -
Page 4: Placement For Optimal Performance
Your wireless connection will be stronger the closer your smart device is to the Miracast Video Adapter. Typical indoor operating range for your Miracast Video Adapter is up to 50 feet if no obstructions are in the way. In the same way, your connection and performance will degrade somewhat as the distance between your Miracast Video Adapter and connected device increases. - Page 5 2. Cordless Phone Placement Your wireless router may cause interference with the Miracast If the performance of your Miracast Video Adapter is impaired after Video Adapter if very close, especially if it is a dual-band router. attending to the above issues, and you have a cordless phone: For optimal performance of the Miracast Adapter, if possible, try •...
-
Page 6: Overview
The Adapter can operate on the 2.4GHz or 5GHz frequency band as 802.11n Wi-Fi products. • 2.4GHz or 5GHz band operation • Micro USB 2.0 port to power the Miracast Video Adapter • WPS™ button for pairing with your smart device • HDCP 1.0, 2.0 and 2.1 •... -
Page 7: Product Specifications
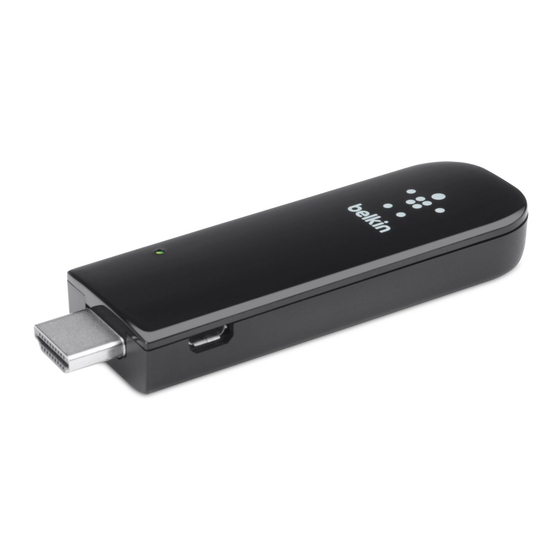
(b) Multipurpose Button Used for Wi-Fi Protected Setup™ handshaking with smart devices. (c) Micro USB Power Connector Used to supply power to the Miracast Video Adapter. (d) HDMI Connector Part of the Adapter that fits into your TV’s HDMI port. -
Page 8: Status Led Behavior
OVERVIEW Status LED Behavior The LED on the Miracast Video Adapter gives you the status on the current state of the Adapter. Please consult the table below for a guide to what the different LED behaviors indicate: LED Behavior What’s on the TV Screen... -
Page 9: Multipurpose Button
OVERVIEW Multipurpose Button The only button on the Miracast Video Adapter can be used for a variety of purposes. Please consult the table below for each application: Adapter State Action Duration of Action Result Adapter is unpowered Until Firmware Update... -
Page 10: System Requirements
− USB port or power supply providing 5V/500mA of power * Video performance will vary based upon the source device’s and television’s capabilities, distance, interference and physical obstructions. Package Contents: Miracast Video Adapter USB Power Cable HDMI Extension Cable Quick Installation Guide... -
Page 11: Installation And Setup
INSTALLATION AND SETUP Android Devices 1. Turn your TV on and power up the Miracast Video Adapter by connecting the USB cable from the Adapter to a USB port on your TV or other USB power source that provides at least 5V, 500mA of power. - Page 12 INSTALLATION AND SETUP 2. Connect the Miracast Video Adapter directly into an HDMI 3. Set your TV’s source/input selector to the HDMI port you port on your TV. If the Adapter can’t fit into the port due to used to connect the Miracast Adapter in step 2.
- Page 13 INSTALLATION AND SETUP 4. Your Miracast Adapter should now start up and 5. On your smart device, go to the settings, then display instructions on your TV screen. Wireless & Networks and find Miracast. If it isn’t already, activate Miracast on your smart device. Note: Miracast may be called Wireless Display, Screen Mirroring, AllShare Cast, or something else depending on the manufacturer.
- Page 14 INSTALLATION AND SETUP Motorola a. Access your phone’s apps by clicking the b. Scroll through your phone’s icon indicated in the image below applications and select Settings c. In your phone’s settings, select the Display option...
- Page 15 INSTALLATION AND SETUP d. Select Wireless display from the list of options e. Turn Wireless Display to ON and select the adapter to which you wish to connect to...
- Page 16 INSTALLATION AND SETUP Samsung Galaxy a. Access the drop-down menu by swiping your finger c. Turn AllShare Cast or Screen Mirroring on if it is off from the top of your phone’s screen to the bottom. and select your TV in the list of available devices. b.
- Page 17 INSTALLATION AND SETUP LG G2 a. Go to Settings. b. Select “Share & Connect” from the list of options under Wireless & Networks.
- Page 18 INSTALLATION AND SETUP c. Make sure Miracast is set to “On” then select “Miracast.” d. Select your TV from the list.
- Page 19 INSTALLATION AND SETUP Google Nexus (Google Android UI) a. Access the drop-down menu by swiping your finger from b. Tap the “Wireless Display” or “Cast Screen” option. the top of your phone’s screen to the bottom and tap the icon in the top right corner of the drop-down menu.
- Page 20 6. In the list of available devices now displayed on your smart device, 7. If prompted to, please press the button on the select the TV that the Miracast Video Adapter is connected to. Miracast Video Adapter or if requested, enter the...
- Page 21 INSTALLATION AND SETUP 8. If the image on your smart device is now being The Miracast Adapter will attempt to pair with your device at this point. mirrored onto your TV, you are done!
-
Page 22: Windows 8.1 Devices
INSTALLATION AND SETUP Windows 8.1 Devices 1. Turn your TV on and power up the Miracast Video Adapter by connecting the USB cable from the Adapter to a USB port on your TV or other USB power source that provides at least 5V, 500mA of power. - Page 23 INSTALLATION AND SETUP 2. Connect the Miracast Video Adapter directly into an HDMI 3. Set your TV’s source/input selector to the HDMI port you port on your TV. If the Adapter can’t fit into the port due to used to connect the Miracast Adapter in step 2.
- Page 24 INSTALLATION AND SETUP 4. Your Miracast Adapter should now start up and 5. At the home screen, swipe your finger from the right display instructions on your TV screen. edge of the screen to the left revealing the pop- up bar. If you aren’t using a touch screen, hover your mouse over the top right corner of the screen.
- Page 25 INSTALLATION AND SETUP 6. Select “Devices” 7. Select “Project” 8. Select “Add a wireless display”...
- Page 26 INSTALLATION AND SETUP 9. This will take you to the Devices page. The Surface will 10. Once the TV is found, select it. begin searching for the TV to which your Miracast Adapter is connected, or you may have to select “Add a device.” Note: If you do not see an option for “Add a device,”...
-
Page 27: Navigating The Miracast Adapter's Home Screen With Your Remote
Home Screen with your Remote If your brand-name TV was not listed here, please consult your The Miracast Video Adapter’s home screen may be able to TV/remote manufacturer to see if it supports HDMI CEC. be navigated using your TV’s remote control. In order to use your TV’s remote control, both the TV and the remote must be... -
Page 28: Miracast Video Adapter's Interfaces
The Miracast Adapter’s User Interface The User Interface is the first screen that is seen prior to pairing your smart device with the Miracast Video Adapter. This screen shows the available smart devices and TVs that the Adapter can see as well as the status of the Adapter. To refresh this list, navigate to the Refresh icon located in the bottom left corner of the screen (next to the gear icon). - Page 29 This option allows the Miracast Adapter to remember the devices that have connected to it previously. Enabling this option will allow your device to pair with the Miracast Video Adapter without having to push the Multipurpose button. (Some handsets do not support this function and may require a button push each time.)
-
Page 30: Advanced Web Interface
“Firmware Update.” To enter Advanced Settings Mode on the Miracast Video Adapter, please follow these steps: 1. Power the Miracast Video Adapter off by unplugging the attached USB cable or turn the TV off if the Adapter is powered by the TV. - Page 31 MIRACAST VIDEO ADAPTER’S INTERFACES 4. Once the Firmware Update page appears, use a laptop or desktop 5. Using a browser, navigate to http://192.168.16.1 with Wi-Fi and connect to a network called ”Wi-Fi-Video-Receiver.”...
- Page 32 MIRACAST VIDEO ADAPTER’S INTERFACES 6. You will be prompted to enter a Username and Password; the Username is “admin” and the password is also “admin.”...
- Page 33 Address, Discovery Channel, and Operating Channel. 2. You must put the Adapter in Advanced Settings Mode. To do this, power the Miracast Video Adapter off by unplugging the USB cable. 3. Press and hold the Multipurpose button located on the side of the Miracast Video Adapter.
- Page 34 MIRACAST VIDEO ADAPTER’S INTERFACES 5. Once the Firmware Update page appears on the TV, use 6. Using a browser, navigate to http://192.168.16.1 a laptop or desktop computer with Wi-Fi and connect to a network called “Wi-Fi-Video-Receiver.”...
- Page 35 MIRACAST VIDEO ADAPTER’S INTERFACES 7. You will be prompted to enter a Username and Password; the 8. The User Interface should appear in the navigation menu Username is “admin” and the password is also “admin.” on the left side. Click on the link to Firmware Upgrade.
- Page 36 MIRACAST VIDEO ADAPTER’S INTERFACES 9. Click on the Choose File button and locate the 11. After pressing the Upgrade button, a bar will appear on the bottom firmware file you downloaded in step one. of your TV screen indicating the progress of the firmware update.
- Page 37 MIRACAST VIDEO ADAPTER’S INTERFACES 12. Once the progress bar is filled, you will need to go back 13. After pushing the reboot button, a screen will appear indicating to your computer and press the Reboot button. that the firmware update is in progress. Do not power off your TV...
- Page 38 Miracast Adapter to choose the channel with the least noise. Note: The Miracast Video Adapter may take 5–10 minutes to complete the update process. During this time please do not power off your TV or unplug the Adapter from its power source.
- Page 39 MIRACAST VIDEO ADAPTER’S INTERFACES Gaming Mode The Gaming Mode option is accessed in the Advanced User Interface. If you do not see this option available, then you will need to upgrade the firmware on your adapter to version 2.4 or newer.
-
Page 40: Troubleshooting
Some TVs may not have come with a built-in USB port to power want to determine if your smart device is compatible with Miracast. the Miracast Video Adapter or the TV may simply be too big The following link contains a list of devices that were tested at Belkin: for the 3-foot cable that was provided with your purchase to http://belk.in/mira1234. - Page 41 Miracast device from any Wi-Fi networks before you start Miracast. EasyLink (Philips) NetCommand for HDMI (Mitsubishi) I can’t navigate the Miracast Video Adapter’s menus using my TV remote. If your brand-name TV was not listed here, please consult To be able to use the TV’s remote control, both the TV and your TV/remote user manual or manufacturer.
- Page 42 10 to 50 feet. In order to determine if wireless issues are http://www.belkin.com/uk/support related to range, we suggest temporarily moving the smart device, if possible, to 5 to 10 feet away from Miracast Video Adapter. If Australia you find that range was the problem, try changing the frequency band to the option that isn’t selected and see if that resolves any...
-
Page 43: Information
However, there is no guarantee that interference will not occur We, Belkin International, Inc., of 12045 E. Waterfront Drive, Playa in a particular installation. If this equipment does cause harmful Vista, CA 90094, declare under our sole responsibility that the... - Page 44 In the event that Belkin is unable to repair or replace the product (for Belkin reserves the right to review the damaged Belkin product. All example, because it has been discontinued), Belkin will offer either a costs of shipping the Belkin product to Belkin for inspection shall be refund or a credit toward the purchase of another product from Belkin.
- Page 45 DIRECT, INDIRECT, CONSEQUENTIAL OR MULTIPLE DAMAGES SUCH AS, BUT NOT LIMITED TO, LOST BUSINESS OR PROFITS ARISING OUT OF THE SALE OR USE OF ANY BELKIN PRODUCT, EVEN IF ADVISED OF THE POSSIBILITY OF SUCH DAMAGES. This warranty gives you specific legal rights, and you may also have other rights, which may vary from state to state.
- Page 46 © 2014 Belkin International, Inc. All rights reserved. All trade names are registered trademarks of respective manufacturers listed. Windows and Windows Vista are either registered trademarks or trademarks of Microsoft Corporation in the United States and/or other countries.
Need help?
Do you have a question about the MIRACAST VIDEO ADAPTER and is the answer not in the manual?
Questions and answers