Zip HydroTap Installation And Operating Instructions Manual
Filtered boiling and chilled drinking water for kitchens and tea rooms
Hide thumbs
Also See for HydroTap:
- Installation instructions manual (20 pages) ,
- Quick start manual (7 pages)
Table of Contents
Advertisement
Advertisement
Table of Contents

Related Manuals for Zip HydroTap


Summary of Contents for Zip HydroTap
- Page 1 Installation and Operating Instructions Zip HydroTap ® Filtered boiling and chilled drinking water for kitchens and tea rooms. This Installation Instruction covers the following HydroTap models: BC series, B series, HT series and their associated Disabled models. 81467 - April 2006...
-
Page 2: Table Of Contents
Warranty Information .......20 NOTE: All plumbing must comply with AS3500.4.1 & AS3500.4.2 All electrical must comply with AS3350.1, AS3350.2.75 All refrigeration must comply with AS3350.2.24 Page 2 of 20 Zip Hydro Tap Installation and Operating Instructions - 81467 - April 2006... -
Page 3: Read These Warnings First
If air vents are not installed in the cupboards housing the removed and their route is the HydroTap, the buffers must be placed on the inside edge of the cupboard door to most direct line between the tap create a slight gap ensuring a minimum airflow. -
Page 4: Models Covered By These Instructions
• Power supply 220-240 Volt AC, for connection to the heater via a 10 amp G.P.O. Page 4 of 20 Zip Hydro Tap Installation and Operating Instructions - 81467 - April 2006... -
Page 5: Special Tools Required
NOTE 2: Under no circumstances should the Tap be twisted after the Spider Clamp and the underside installation is complete. of the sink top. See location as shown. Zip Hydro Tap Installation and Operating Instructions - 81467 - April 2006 Page 5 of 20... -
Page 6: Step B - Installing The Undersink Unit
Before positioning the heater connect the braided water inlet hose (supplied) to the cold water inlet on the unit. This is located at the rear of the unit. Position the Zip HydroTap undersink unit as close as possible to directly beneath the Zip HydroTap tap head. -
Page 7: Step D - Connecting The Water Supply
Filter Flush Mode is in operation. Open the filter access door on the front of the HydroTap and the filter cartridge will be exposed. Located to the rear RHS of the cartridge is a fixed flush line, approx 600mm long and the flush line stop cock. -
Page 8: Font Installation Procedure
Note: A stainless steel washer is supplied to go in between the Spider Clamp and the underside of the benchtop. See location as shown. Page 8 0f 20 Zip Hydro Tap Installation and Operating Instructions - 81467 - April 2006... -
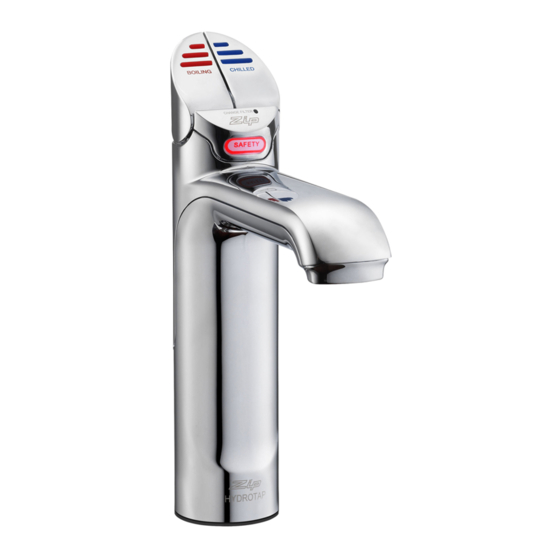
Page 9: Operating The Tap
This indicates that the chilled water is not at the right temperature. Wait up to 20 minutes. When the chilled water is at the right temperature, the light will stop flashing. Note: The Zip HydroTap is designed to dispense chilled water in the temperature range 5°C to 10°C. -
Page 10: Cleaning
Then it asks “are you sure”. Press adjust ∧ again to lock in the command. After approx 10 seconds it will default to the selected mode. Warning: If the Zip HydroTap is switched off for a long period of time (e.g. more than a weekend), run water through the chilled water outlet for at least 5 minutes before consumption. - Page 11 Zip Hydro Tap Installation and Operating Instructions - 81467 - April 2006...
- Page 14 Zip Hydro Tap Installation and Operating Instructions - 81467 - April 2006...
-
Page 15: Setting The Energy Saver Timer
Press ∧ Adjust once and “Litres Filtered” will be reset to 0. Activating Sleep Mode This mode allows the HydroTap to go into Energy Saving mode. In this mode the unit will go to “sleep” after a pre-determined period of inactivity. Press either Mode ∧ or Mode ∨ button until “Sleep Mode”... -
Page 16: Auxilliiary Fan Attachment
Auxiliary Fan Attachment (excluding HT boiling only models) Auxiliary fan The HydroTap is equipped with an auxiliary fan connection point on the rear connection panel close to the cold water inlet / flex and plug area. The fan kit is available as a spare part. -
Page 17: Trouble Shooting
In order to help preserve our environment we ask that you dispose of this product correctly. Please contact your local city council for collection centre details Zip Hydro Tap Installation and Operating Instructions - 81467 - April 2006 Page 13 of 20... -
Page 18: Exploded View B/C-Chiller Module/Spare Parts
2ag-1amp fuse 90625 control panel kit 90187 loom-compressor to fan kit 90628 stop valve and john guess fitting kit filter 91241 filter cartridge kit Page 14 of 20 Zip Hydro Tap Installation and Operating Instructions - 81467 - April 2006... - Page 19 90621 pump kit hot 90622 PCB kit BC 100/125 & BC 150/175 90623 transformrer kit 90624 leak sensor kit 90625 control panel kit Zip Hydro Tap Installation and Operating Instructions - 81467 - April 2006 Page 15 of 20...
- Page 20 Level Sensor Kit Hot Tank H/T 60/85 90186 Loom-Overload Kit 90661 Loom-Solenoids Kit 90189 Loom-Level Sensor Kit Hot 90190 Loom and Gland Main PCB to Tap Page 16 of 20 Zip Hydro Tap Installation and Operating Instructions - 81467 - April 2006...
- Page 21 Double Solenoid Kit P/No. 90615 fot Item 3. 90661 Loom-Solenoids Kit 90189 Loom-Level Sensor Kit Hot 90190 Loom and Gland Main PCB to Tap Zip Hydro Tap Installation and Operating Instructions - 81467 - April 2006 Page 17 of 20...
- Page 22 Notes Page 18 of 20 Zip Hydro Tap Installation and Operating Instructions - 81467 - April 2006...
- Page 23 Notes Zip Hydro Tap Installation and Operating Instructions - 81467 - April 2006 Page 19 of 20...
- Page 24 Furthermore, this warranty does not displace any statutory warranty, but, to the extent to which Zip is entitled to do so, the liability of Zip under any statutory warranty will be limited at Zip's option to the replacement of the appliance or...
Need help?
Do you have a question about the HydroTap and is the answer not in the manual?
Questions and answers