Table of Contents
Advertisement
Advertisement
Table of Contents

Related Manuals for GRE PSR-216


Summary of Contents for GRE PSR-216
- Page 1 PSR-216 200-Channel Portable Scanner OWNER'S MANUAL Page 1 2004/04/08, 16:49...
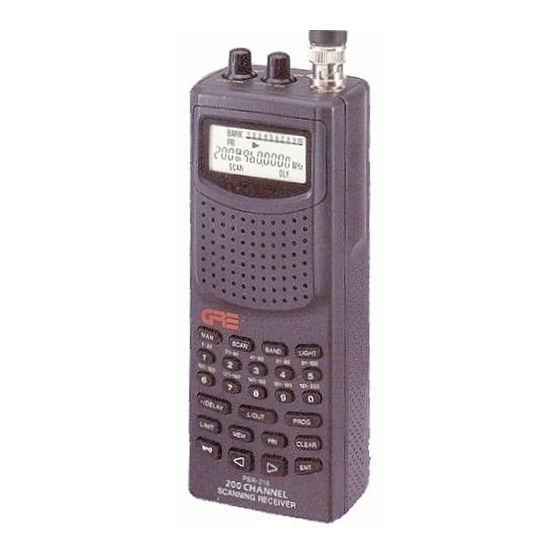
- Page 2 INTRODUCTION Your new PSR-216 Programmable Scanner lets you in on all the action! This scanner gives you direct access to over 35,000 frequencies. You can store frequencies in your scanner's 200 channels, and you can change your selec- tions at any time.
-
Page 3: Table Of Contents
Use of scanners must conform to the requirements of the law of the country where they are utilized. Always check that your intended use is legally permitted. Avoid using your scanner in close proximity to a Radio or TV receiver to prevent unwanted interference. CONTENTS PREPARATION ................ -
Page 4: Preparation
PREPARATION POWER SOURCES You can power your scanner from any of four sources: • Internal batteries (not supplied) with the provided battery holder • A rechargeable scanner battery pack (not supplied) • Standard AC power (using an optional AC adapter) •... -
Page 5: Using Standard Ac Power
symbols (+ and –) marked on the battery holder. 4. Slide the battery holder or battery pack into the compart- ment. Caution: The battery holder or battery pack fits only one way inside the battery compartment. Do not force it. 5. -
Page 6: Connecting The Antenna
• To protect your vehicle's electrical system, always plug the adapter into the scanner before you plug it into your vehicle's cigarette-lighter socket. Always unplug the adapter from the vehicle's cigarette-lighter socket before you unplug it from the scanner. Plug the adapter's barrel plug into the scanner's POWER jack. -
Page 7: Using The Belt Clip
Warning: Use extreme caution when installing or removing an outdoor base station antenna. If the antenna starts to fall, let it go! It could contact overhead power lines, if the an- tenna touches a power line, contact with the antenna, mast, cable or guy wires can cause electrocution and death! Call the power company to remove the antenna. -
Page 8: Your Scanner
YOUR SCANNER A LOOK AT THE KEYPAD Your scanner’s keys might seem confusing at first but this information should help you understand each key’s func- tion. MAN – stops scanning to let you directly enter a channel number. SCAN – scans through the programmed channels. BAND –... -
Page 9: The Display
- turns Keylock feature on or off. < > - selects a scan or search direction. ENT - stores a frequency into channels. THE DISPLAY The display lets you know what your unit is doing. The fol- lowing is a list of display messages you will encounter and what they mean. -
Page 10: Understanding Bank/Bands/Monitor Memory
L/O – appears when you listen to a channel that is locked out of the scan mode. Display Message Error – appears when you make an entry error. –dUPL– – (duplicate) appears when you try to store a fre- quency that is already stored in another channel. –L–... -
Page 11: Search Bands
For example, the fire department might use four frequen- cies, one for each side of town. You could program the fire frequencies starting with Channel 1 (the first channel in bank 1) and program the aircraft frequencies starting with chan- nel 21 (the first channel in bank 2). -
Page 12: Operation
OPERATION TURNING ON THE SCANNER/SETTING VOLUME AND SQUELCH 1. Turn the SQUELCH knob fully counterclockwise. 2. Turn the VOLUME knob clockwise until it clicks and you hear a hissing sound. 3. Turn the SQUELCH knob clockwise until the hissing sound stops. -
Page 13: Scanning Stored Channels
• Your scanner automatically rounds the entered frequency down to the closest valid frequency. For example, if you try to enter a frequency of 151.473, your scanner accepts it as 151.470 • If you entered a frequency that is already stored in an- other channel, the scanner beeps three times and dis- plays the lowest channel number where the frequency is already stored, and –dUPL–... -
Page 14: Searching
SEARCHING Notes: • Press and hold < or > about a second to start search. • Press and release < or > to move the next frequency. • To quickly move upward or dounward through the range of frequencies, press and hold down > or <. The scan- ner tunes through the frequencies until you release >... -
Page 15: Monitoring One Channel
1. Press BAND. The last selected band number (b followed by a number, such as b2) and the associated frequency search range appear on the display. 2. To select a different band, within 2 seconds, enter the de- sired band number or repeatedly press BAND until the desired band number appears on the display. -
Page 16: Deleting A Frequency From Achannel
DELETING A FREQUENCY FROM A CHANNEL 1. Press PROG. 2. Use the number keys to enter the channel number con- taining the frequency you want to delete. 3. Press PROG. 4. Press 0. 5. Press ENT. The frequency is now deleted. To delete other frequen- cies in the same way, use Steps 2-5. -
Page 17: Store The Frequency In Monitor Memory
3. Press the number key of the monitor memory location you want to hear (1-20). 4. Press MEM again. STORE THE FREQUENCY IN MONITOR MEMORY When the scanner stops on an active frequency while search, and you want to temporarily save it, press the MEM button to store it in the monitor memory with the flashing indicator beneath it. -
Page 18: Special Feature
SPECIAL FEATURES LOCKING OUT You can scan existing channels faster by locking out chan- nels that have a continuous transmission. To lock out a channel while scanning, press L/OUT when the scanner stops on the channel. To lock out a channel manually, manually select the channel and press L/OUT un- til L/O appears on the display. -
Page 19: Turning The Key Tone On And Off
You can program a 2-second delay in these ways: • If the scanner is scanning and stops on an active chan- nel, quickly press •/DELAY before it continues scanning again. • If the desired channel is not selected, manually select the channel, then press •/DELAY. -
Page 20: General Guide To Scanning
GENERAL GUIDE TO SCANNING BIRDIE FREQUNCIES Every scanner has birdie frequencies. Birdies are signals created inside the scanner's receiver. These operating fre- quencies might interfere with broadcasts on the same fre- quencies. If you program one of these frequencies, you hear only noise on that frequency. -
Page 21: Troubleshooting
TROUBLESHOOTING If your scanner is not working as it should, these sugges- tions might help you eliminate the problem. If the scanner still does not operate properly, take it to your local store for assistance. . l l l t u e t t s ' r e t t... -
Page 22: Resetting The Scanner
RESETITNG/INITIALIZING THE SCANNER If the scanner's display locks up or does not work properly after you connect a power source, you might need to reset or initialize it. Important: If you have problems, first try to reset the scan- ner. If that does not work, you can initialize the scanner, how- ever, initializing clears all frequencies you stored in the scanner's memory and initialilzes the scanner to its default settings. -
Page 23: Care And Maintenance
CARE AND MAINTENANCE • This unit is to be kept dry at all times. Should the unit become wet, dry immediately with a soft cloth. Electronic circuits may corrode should they come in contact with liquids containing minerals. • Do not drop the unit. Circuit boards may be damaged and cause the scanner to malfunction if it is dropped. -
Page 24: Specifications
SPECIFICATIONS Frequency Coverage 68–88 MHz (in 5 kHz steps) (FM) 108–136.9875 MHz (in 12.5 kHz steps) (AM) 137–143.995 MHz (in 5 kHz steps) (FM) 144–146 MHz (in 12.5 kHz steps) (FM) 146.005–174 MHz (in 5 kHz steps) (FM) 380–512 MHz (in 12,5 kHz steps) (FM) 806–960 MHz (in 12.5 kHz steps) (FM) Operational Channels 200 channels plus... - Page 25 Squelch Sensitivity Threshold less than 1.0 µV Tight (FM) (S+N)/N 25 dB Tight (AM) (S+N)/N 20 dB Antenna Impedance 50 ohms Audio Power 240 mWatts nominal (10%THD) Built-in Speaker 36 mm, 8-ohm, dynamic type Power Req. +9V DC, 6 AA batteries or a suitable adapter (negative ground only) Current Drain (Squelched) 70 mA...
- Page 26 NOTES Page 26 2004/04/08, 16:50...
- Page 27 NOTES Page 27 2004/04/08, 16:50...
- Page 28 GE-00D-3690 Printed in Hong Kong 08G00 Page 28 2004/04/08, 16:50...
Need help?
Do you have a question about the PSR-216 and is the answer not in the manual?
Questions and answers