Table of Contents
Advertisement
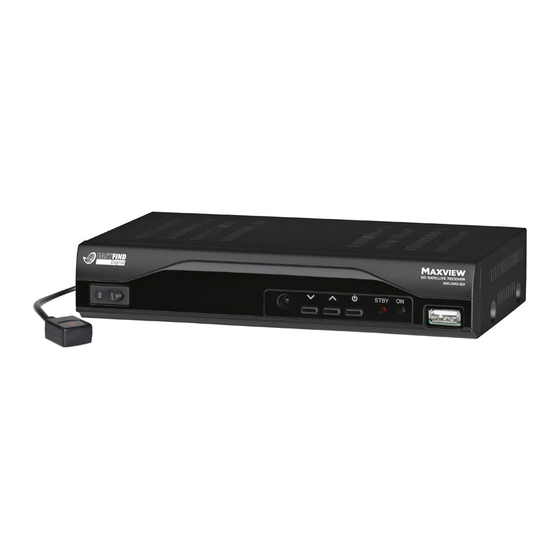
MXL020/HD & MXL020/SD
HD/SD - FREE TO AIR
SATELLITE RECEIVER
OPERATING MANUAL - UK
Important
Please read the safety instructions featured in this manual before installing or operating
this receiver. Keep these instructions for future reference.
Energy saving
This receiver features an On/Off switch. Please turn off at the switch located on the front of the
receiver when not in use. This will reduce any unnecessary drain on your vehicle battery.
MXL020HD INSTRUCTIONS REVISION.indd 1
15/05/2013 14:12
Advertisement
Table of Contents

Related Manuals for Maxview MXL020HD


Summary of Contents for Maxview MXL020HD
-
Page 1: Satellite Receiver
Energy saving This receiver features an On/Off switch. Please turn off at the switch located on the front of the receiver when not in use. This will reduce any unnecessary drain on your vehicle battery. MXL020HD INSTRUCTIONS REVISION.indd 1 15/05/2013 14:12... -
Page 2: Table Of Contents
Editing channel list (symbol: TV) TV channel list 19-21 Radio channel list Delete all Installation (symbol: satellite antenna) Antenna connection Satellite listings Antenna set up Single satellite search Multi satellite search TP List 25-27 Page 2 MXL020HD INSTRUCTIONS REVISION.indd 2 15/05/2013 14:12... - Page 3 V-FMT - TIMER - INFO - SUBT - AUDIO - FIND Keys with PVR functions Editing of recorded programmes Using Receiver with an Easy Find LNB 43-46 General Glossary Trouble shooting 48-49 Specifications Cleaning Disposal Guarantee Customer support - contact us Page 3 MXL020HD INSTRUCTIONS REVISION.indd 3 15/05/2013 14:12...
-
Page 4: Safety Instructions
Disconnect the receiver from the power source in case of operational disruptions. • Spare parts must be ordered directly from the manufacturer. • Modifications of the device lead to an extinction of the manufacturer’s liability. • Remove the protection films. Page 4 MXL020HD INSTRUCTIONS REVISION.indd 4 15/05/2013 14:12... - Page 5 Never throw the batteries into normal household waste. • Never expose the batteries to open fire or strong heat, as otherwise there is a danger of explosion. • Replace the batteries always by batteries of the same type. Page 5 MXL020HD INSTRUCTIONS REVISION.indd 5 15/05/2013 14:12...
-
Page 6: Appropriate Use
• Slovenia • German • Czech • Slovak • Italian • Danish • Swedish • Spanish • Greek • Dutch • Portuguese • Hungarian • French • Polish • Norwegian • Turkish Page 6 MXL020HD INSTRUCTIONS REVISION.indd 6 15/05/2013 14:12... -
Page 7: Connecting The Receiver
> Remove the inner insulation up to 2mm from the wire netting. > Rotate the F connector onto the turned-back wire netting till the connector touches the inner insulation. Page 7 MXL020HD INSTRUCTIONS REVISION.indd 7 15/05/2013 14:12... - Page 8 The wire netting must not protrude from the back of the connector end. > Cut the inner core with a cable cutter in such a manner that it projects maximum 1mm from the connector. LNB cable installation diagram Page 8 MXL020HD INSTRUCTIONS REVISION.indd 8 15/05/2013 14:12...
-
Page 9: Connection With The Hdmi Cable
Connection with a HDMI cable Insert the HDMI cable in the HDMI socket HDMI in the receiver. Connect the HDMI cable to the TV set. Follow the operating manual of the TV set. IR eye Page 9 MXL020HD INSTRUCTIONS REVISION.indd 9 15/05/2013 14:12... -
Page 10: Connection With The Scart Cable
You will have a signal either at the Scart or the HDMI output. The operation of a video device connected to a VCR Scart connection is not possible via the HDMI connection. Page 10 MXL020HD INSTRUCTIONS REVISION.indd 10 15/05/2013 14:12... -
Page 11: Connection With Phono
Your TV set need not be switched on for radio reception. Connection of the coaxial digital output Insert the coaxial cable in the “SPDIF” socket of the receiver. Connect the coaxial cable to the audio-digital receiver. Page 11 MXL020HD INSTRUCTIONS REVISION.indd 11 15/05/2013 14:12... -
Page 12: Getting Started
The remote control transmits infrared signals to the receiver. Please refer to the overview of the remote control for the functioning of the keys. > Point the remote control towards the front side of the receiver and slightly press the co responding key once. Page 12 MXL020HD INSTRUCTIONS REVISION.indd 12 15/05/2013 14:12... -
Page 13: Remote Control Functions
29. Record 30. Stop 31. Play 32. Pause 33. Rewind 34. Fast forward 35. Slow motion forward 36 Slow motion backward 37. Skip backward 38. Skip forward 39. Movie menu 40. USB Page 13 MXL020HD INSTRUCTIONS REVISION.indd 13 15/05/2013 14:12... -
Page 14: Receiver
This will reduce any unnecessary drain on your vehicle battery. External 3A fuse Features an easy to access integral rear mounted blade fuse on rear of receiver box for electrical protection. Page 14 MXL020HD INSTRUCTIONS REVISION.indd 14 15/05/2013 14:12... -
Page 15: Operation
The heart symbol is displayed if you have included the channel in a favourite list. Info Information on the current “Now“ and the following “Next“ programme. Info Information on the currently active channel list. Page 15 MXL020HD INSTRUCTIONS REVISION.indd 15 15/05/2013 14:12... -
Page 16: User Interface On The Tv Screen
By pressing the EXIT key or the MENU key again, you can exit this menu. Navigation within the menus Top (arrow 1): Menu name Left (arrow 2): Menu symbols Middle (arrow 3): Sub menu Page 16 MXL020HD INSTRUCTIONS REVISION.indd 16 15/05/2013 14:12... -
Page 17: Menu Structure
OSD Setting Favourite Other Tools Information (symbol: tools) Factory Setting Software Update Remove USB device safely Games Othello (symbol: game pieces) Sudoku Record Manager (symbol: film reel) Storage Information DVR Configuration Jump Page 17 MXL020HD INSTRUCTIONS REVISION.indd 17 15/05/2013 14:12... -
Page 18: Menu Navigation
Set summer time with the and keys. Exit that menu by pressing the EXIT key. Editing channel list (symbol: TV) Below you will find the description of the menu items of the main menu item Editing channel list. Page 18 MXL020HD INSTRUCTIONS REVISION.indd 18 15/05/2013 14:12... -
Page 19: Tv Channel List
Please Note: In menu item System Setup – Parental Lock the option Channel Lock must be enabled. If it is disabled, the locks will be inactive until the option channel lock has been enabled again. Page 19 MXL020HD INSTRUCTIONS REVISION.indd 19 15/05/2013 14:12... - Page 20 When exiting the menu by pressing the EXIT key and confirming the prompt, the moved channels will be saved. 5. EDIT: Press the blue function key of the remote control. A new menu will open. Page 20 MXL020HD INSTRUCTIONS REVISION.indd 20 15/05/2013 14:12...
-
Page 21: Radio Channel List
After having entered your valid password and confirming the prompt, all saved TV and radio channels will be deleted. By selecting the default setting, you can reset the factory set channel lists. Page 21 MXL020HD INSTRUCTIONS REVISION.indd 21 15/05/2013 14:12... -
Page 22: Installation (Symbol: Satellite Antenna)
> Edit (red function key): Editing of the satellite name and position. Important if you have a rotating antenna > Add (green function key): Manual addition of a satellite. > Delete (blue function key): Deleting of a saved satellite and its channels. Page 22 MXL020HD INSTRUCTIONS REVISION.indd 22 15/05/2013 14:12... -
Page 23: Antenna Setup
> DiSEqC1.1: Setting for multi-satellite reception. > 22K: Will be set automatically by the receiver. > Polarity: The default setting is “AUTO”. However, you can define the horizontal or vertical LNB supply voltage. Page 23 MXL020HD INSTRUCTIONS REVISION.indd 23 15/05/2013 14:12... -
Page 24: Single Satellite Search
Multi Satellite Search Here, you can scan all satellites enabled in the submenu item “Satellite list” at once. The setting of the scan filters is described in the previous submenu item. Page 24 MXL020HD INSTRUCTIONS REVISION.indd 24 15/05/2013 14:12... -
Page 25: Tp List
Enter the frequency 10836 with the keys 0-9 of the remote control. Then, enter the symbol rate 22000 with the keys 0-9 of the remote control. Set the polarity H for horizontal with the or keys. Page 25 MXL020HD INSTRUCTIONS REVISION.indd 25 15/05/2013 14:12... - Page 26 > Press the blue function key of your remote control. The TP search box appears. > Set the scan filters already described. > Start the scan by confirming the OK box with the OK key. Page 26 MXL020HD INSTRUCTIONS REVISION.indd 26 15/05/2013 14:12...
- Page 27 The found channels are added at the end of the general satellite list. The procedure is finished. Page 27 MXL020HD INSTRUCTIONS REVISION.indd 27 15/05/2013 14:12...
-
Page 28: System Setup (Symbol: Gearwheel)
> Teletext: Letter options for Teletext TV system Video Resolution: Selection of the maximum video resolution (default setting: 1080i_25) HDTV quality of HD channels: from 720p Used color scheme in the item “Video signal”:YUV Used connection: HDMI Page 28 MXL020HD INSTRUCTIONS REVISION.indd 28 15/05/2013 14:12... -
Page 29: Local Time Setting
> Summer Time: When enabled, the summer or winter time will be set accordingly. > Date: not enabled > Time: not enabled GMT off: > GMT offset: not enabled > Summer Time: not enabled > Date: enter current date > Time: enter current time Page 29 MXL020HD INSTRUCTIONS REVISION.indd 29 15/05/2013 14:12... -
Page 30: Timer Setting
“Edit channel list – TV channel list/radio channel list”. > New Password: Selection of a new password. (Make sure you will remember the new password) > Confirm Password: Confirm the new password by repeating the entry. Page 30 MXL020HD INSTRUCTIONS REVISION.indd 30 15/05/2013 14:12... -
Page 31: Osd Setting
Do you want that the receiver will not be transmitted to the standby mode, give him a command with the remote control. The adjusted countdown starts again. To disable this feature, select “disabled”. Page 31 MXL020HD INSTRUCTIONS REVISION.indd 31 15/05/2013 14:12... -
Page 32: Information
Hint: The default values are restored if you keep the standby key at the front side of your receiver pressed for more than 10 seconds. Page 32 MXL020HD INSTRUCTIONS REVISION.indd 32 15/05/2013 14:12... -
Page 33: Software Updates
Updating the software may take up to an hour. After the update it is recommended to load the default settings. Please note that by doing this, the channel list you created will be deleted. Page 33 MXL020HD INSTRUCTIONS REVISION.indd 33 15/05/2013 14:12... -
Page 34: Usb Function
Saving the current channel list to a connected USB storage medium. You can edit this list on a PC by using the channel-list editor. The edited list can be re-transferred to the receiver via the following menu item. Re-transfering an edited list via USB storage medium. Page 34 MXL020HD INSTRUCTIONS REVISION.indd 34 15/05/2013 14:12... - Page 35 Select the desired filter and press the OK button. To exit, press the EXIT key (several times). > Remove USB device safely Remove USB devices safely For a safe removal of external USB storage media from the receiver. Page 35 MXL020HD INSTRUCTIONS REVISION.indd 35 15/05/2013 14:12...
-
Page 36: Game (Symbol: Game Pieces)
Game (symbol: game pieces) The listed games are available on this receiver. REC (External memory, symbol: film) For using this main menu item, a USB storage medium must be correctly inserted. Page 36 MXL020HD INSTRUCTIONS REVISION.indd 36 15/05/2013 14:12... -
Page 37: Record Manager
The symbol on the left indicates the reproduction state. The percentage value refers to the disk space needed by the USB storage medium. Page 37 MXL020HD INSTRUCTIONS REVISION.indd 37 15/05/2013 14:12... -
Page 38: Keys With Special Functions
You can go to the sleep timer in normal mode by pressing the 0 key. You have the following setting options by pressing the 0 key again: off, 10, 30, 60, 90, 120 minutes. After this time, the receiver will be switched off automatically. Page 38 MXL020HD INSTRUCTIONS REVISION.indd 38 15/05/2013 14:12... - Page 39 Normal mode: Switching channels one by one. With active channel list: Switching channels one by one. In a menu: Cursor function > Press the FAV key. The screen shows the existing favourites lists. > Select one and confirm with the OK key. Page 39 MXL020HD INSTRUCTIONS REVISION.indd 39 15/05/2013 14:12...
-
Page 40: Epg (Electronic Programme Guide)
The timer is explained in menu item “System Setup – Timer Setting”. With the red function key “Time” you will get information on programmes broadcasted during the next days. Page 40 MXL020HD INSTRUCTIONS REVISION.indd 40 15/05/2013 14:12... -
Page 41: V-Fmt - Timer - Info - Subt - Audio - Find
ll Slow motion (back) MOVIE Direct access to recorded programmes. Only available if the external storage medium has been connected correctly and if programmes have been recorded. USB Enter the USB directory. Page 41 MXL020HD INSTRUCTIONS REVISION.indd 41 15/05/2013 14:12... -
Page 42: Editing Of Recorded Programmes
Further bookmarks can be set wherever you wish. E.g., you can mark an unwanted part of the recorded programme at the beginning and end and skip it by pressing the blue function key. The bookmarks set remain stored for this programme. Page 42 MXL020HD INSTRUCTIONS REVISION.indd 42 15/05/2013 14:12... -
Page 43: Using Receiver With An Easy Find Lnb
You must have this view when standing behind the antenna. In this angle of 90° nearly all common satellite positions, such as ASTRA 2 28° E ASTRA 1 19.2° E, Eutelsat Hotbird 13° E, and Türksat 42° E, can be found. Page 43 MXL020HD INSTRUCTIONS REVISION.indd 43 15/05/2013 14:12... - Page 44 Now, you can go to your antenna to direct it. You will note that the LED on your Easy Find LNB has begun to flash. This means, it is active. Now, the antenna can be directed to the selected satellite. Page 44 MXL020HD INSTRUCTIONS REVISION.indd 44 15/05/2013 14:12...
- Page 45 Repeat these steps until the vertical elevation angle crosses the horizontal azimuth angle, e.g. for ASTRA 2 at 28° East, and the LED on your Easy Find LNB shows a green light without flashing. Page 45 MXL020HD INSTRUCTIONS REVISION.indd 45 15/05/2013 14:12...
- Page 46 OK key of the remote control and then the 1 key. You will see the general channel list “All satellites”. Now, check also if you can receive further channels of the set satellite. The installation process is complete. Page 46 MXL020HD INSTRUCTIONS REVISION.indd 46 15/05/2013 14:12...
-
Page 47: Glossary
The PIDs ensure that a channel is received completely. Swap function Switches between current channel and channel last watched. Transponder Satellite frequency. Several digital channels can be broadcasted simultaneously on a transponder. Page 47 MXL020HD INSTRUCTIONS REVISION.indd 47 15/05/2013 14:12... -
Page 48: Troubleshooting
The satellite antenna has been directed to a wrong signal strength and satellite. signal quality OK. Bad reception of Wireless telephone is disturbing (DECT standard). DSF, etc. Move your telephone to another place. Page 48 MXL020HD INSTRUCTIONS REVISION.indd 48 15/05/2013 14:12... - Page 49 USB storage medium again. Switch over the receiver to normal mode again. The common USB storage media known by us are compatible with this receiver. For larger USB hard disks you should use an external power pack following the Page 49 MXL020HD INSTRUCTIONS REVISION.indd 49 15/05/2013 14:12...
-
Page 50: Specifications
Output voltage power pack 12V, 1.5 A Receiver input voltage Receiver consumption ca. 12W (operating with single LNB) ca.1 W (standby) Operating temperature 0ºC – +40ºC Storing temperature - 40ºC – +65ºC Page 50 MXL020HD INSTRUCTIONS REVISION.indd 50 15/05/2013 14:12... -
Page 51: Cleaning
A crash of the operating software is not considered a malfunction and no guarantee will apply. Should a connected USB storage medium not be compatible with the receiver, it will not be covered by the guarantee. Page 51 MXL020HD INSTRUCTIONS REVISION.indd 51 15/05/2013 14:12... -
Page 52: Customer Support - Contact Us
If you are experiencing any problems with this receiver or have any questions please contact Maxview’s Customer Helpine on 01553 811000. Alternatively email us on support@maxview.co.uk or write to us... Maxview Ltd, Common Lane, Setchey, King’s Lynn, Norfolk, PE33 0AT. MXL020SDHD INS Iss 1 MXL020HD INSTRUCTIONS REVISION.indd 52...
Need help?
Do you have a question about the MXL020HD and is the answer not in the manual?
Questions and answers