Advertisement
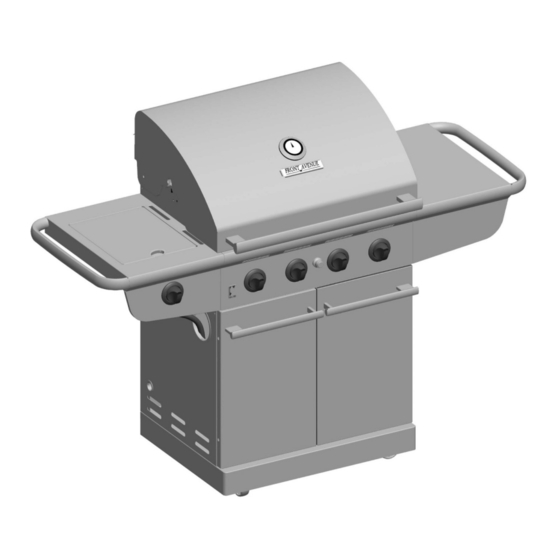
MODEL 463269806 • PRODUCT GUIDE
THIS GRILL IS FOR OUTDOOR USE ONLY.
CAUTION:
Read and follow all safety statements, assembly
instructions, and use and care directions before
attempting to assemble and cook.
INSTALLER/ASSEMBLER:
Leave this manual with consumer.
CONSUMER:
Keep this manual for future reference.
If you have questions or need assistance during assembly, please call
To insure your satisfaction and for follow-up service, register your grill online at www.grillregistration.com
WARNING:
Failure to follow all manufacturer's instructions could
result in serious personal injury and/or property
damage.
CAUTION:
Some parts may contain sharp edges – especially as
noted in the manual! Wear protective gloves if
necessary.
1-888-473-1238
.
463269806 • 80006316 • 02-23-06
Advertisement
Table of Contents
Troubleshooting

Summary of Contents for Front Avenue Front Avenue 463269806
- Page 1 MODEL 463269806 • PRODUCT GUIDE THIS GRILL IS FOR OUTDOOR USE ONLY. CAUTION: WARNING: Read and follow all safety statements, assembly Failure to follow all manufacturer’s instructions could instructions, and use and care directions before result in serious personal injury and/or property attempting to assemble and cook.
- Page 2 DANGER WARNING CALIFORNIA PROPOSITION 65 FOR YOUR SAFETY Combustion by-products produced when using this If you smell gas: product contain chemicals known to the State of California to cause cancer, birth defects, and other 1. Shut off gas to the appliance. reproductive harm.
-
Page 3: Table Of Contents
TABLE OF CONTENTS LIMITED WARRANTY For Your Safety ........2 Manufacturer warrants to the original consumer-purchaser only that this product shall be free from defects in workmanship and materials after correct assembly and under normal and reasonable home use for the... - Page 4 LP Cylinder Valve • A disconnected LP cylinder in USE AND CARE storage or being transported must have a safety cap installed (as shown). DANGER Do not store an LP cylinder in enclosed spaces such as a carport, garage, porch, covered Safety patio or other building.
-
Page 5: For Your Safety
LP Cylinder Exchange Connecting Regulator to the LP Cylinder • Many retailers that sell grills offer you the option of replacing LP cylinder must be properly secured onto grill. (Refer to your empty LP cylinder through an exchange service. Use only assembly section.) those reputable exchange companies that inspect, precision fill, Turn all control knobs to the OFF position. -
Page 6: Grill Service Center
Leak Testing Valves, Hose and Regulator 1. Turn all grill control knobs to OFF. Be sure regulator is tightly connected to LP cylinder. Completely open LP cylinder valve by turning hand wheel counterclockwise. If you hear a rushing sound , turn gas off immediately. - Page 7 WARNING Safety Tips Before opening LP cylinder valve, check the coupling nut for tightness. When grill is not in use, turn off all control knobs and LP For Safe Use of Your Grill and to Avoid Serious cylinder valve. Injury: Never move grill while in operation or still hot.
- Page 8 Burner Flame Check WARNING • Remove cooking grates and flame tamers. Light burners, rotate knobs from HIGH to LOW . You should see a smaller flame in LOW position than seen on HIGH. Perform burner Turn controls and gas source or tank OFF when not flame check on sideburner, also.
- Page 9 Cleaning the Burner Assembly CAUTION Follow these instructions to clean and/or replace parts of burner assembly or if you have trouble igniting grill. NATURAL HAZARD • SPIDERS Turn gas off at control knobs and LP cylinder. 2. Remove cooking grates and flame tamers. FACT: Sometimes spiders and other small insects climb 3.
- Page 10 Indirect Cooking Food Safety Poultry and large cuts of meat cook slowly to perfection on Food safety is a very important part of enjoying the outdoor the grill by indirect heat. The heat from selected burners cooking experience. To keep food safe from harmful bacteria, circulates gently throughout the grill, cooking meat or poultry follow these four basic steps: without the touch of a direct flame.
- Page 11 The methods below are suggestions for cleaning stainless steel surfaces. Choose a cleaning method appropriate for your needs. It is recommended that you use a Char-Broil® grill cover to help prolong the life and prevent discoloration of your grill.
-
Page 12: Parts List
PARTS LIST – Model No. 463269806 Key Qty Description Part # Key Qty Description Part #5 Firebox Bowl..... 80006500 Left Sideburner Shelf ....80006526 Rear Panel, Firebox . -
Page 13: Parts Diagram
PARTS DIAGRAM – Model No. 463269806 463269806 • 13... -
Page 14: Assembly
ASSEMBLY – Model No. 463269806 Insert tabs on left sideburner shelf assembly into rectangular slots in side of firebox. Attach with four 1/4-20x1/2” screws 7mm lock washers 7mm flat washers . Repeat on right side shelf. Repeat on front bracket 1/4-20x1/2”... - Page 15 Remove two screws and lock washers from sideburner valve bracket. Place sideburner valve bracket beneath sideburner shelf with valve stem coming through larger center hole. Secure with lock washers and screws that were removed from bracket. Attach bezel to shelf using two 8x3/8”...
- Page 16 Insert sideburner burner into left shelf, making sure burner tube engages sideburner valve . Center stud on bottom of burner fits into center hole in burner bracket on shelf. See illustration for proper burner-to-valve engagement. Secure burner to bracket using two #10-24x3/8”...
- Page 17 Under sideburner shelf, attach sideburner ignitor wire to electrode Place sideburner wind diverter over sideburner . Align notch in diverter to fit around electrode. Place burner cap onto sideburner. Attach sideburner cap clip . Place sideburner cooking grate onto sideburner shelf, aligning grate legs with holes in shelf.
- Page 18 Place flame tamers over burners by inserting tabs into slots in front of firebox. Opposite ends of flame tamers rest on pins in back of firebox. Open Lid and install warming rack. Warming Rack 18 • 463269806...
- Page 19 Place cooking grates into grill bottom. Grate wires running front to back should be on the top side of square tubes at each end. Note: Warming Rack not shown for clarity Open cart doors to attach condiment basket. Paper Towel Holder Condiment Basket 463269806 •...
- Page 20 On back of grill, slide grease tray into opening in upper back panel. CAUTION Failure to install grease tray will cause hot grease to drip from bottom Grease Tray of grill with risk of fire or property damage. LP CYLINDER IS SOLD SEPARATELY. Fill and leak check the cylinder before attaching to grill and regulator (see Use &...
-
Page 21: Assembly
Design®, Sierra®, and TruFlame® are registered Trademarks of the W.C. Bradley Company. Thermos® is a registered trademark of the Thermos Company and its affiliates. Artisan Collection by Char-Broil ™, C3 and Design™, Char-Broil and Design™, Flame Design™, FlavorTents™, Grill 2 Go™, Grillin’ Stick™, Keeper of the Flame™, Keepers of the Flame™, Natural Grip™, Outdoor Cooking Collection and Design™, Patio Bistro™, PrecisionFlame™, Pro-Check™, QuickSet Grills and Design™, SmokerTents™, The Big Easy™, The Minute Grill™, The Edge™, The Tuscan... -
Page 22: Troubleshooting
EMERGENCIES: If a gas leak cannot be stopped, or a fire occurs due to gas leakage, call the fire department. Emergencies Possible Cause Prevention/Solution Gas leaking from • Damaged hose. • Turn off gas at LP cylinder or at source on natural gas systems. If cracked/cut/burned anything but burned, replace valve/hose/regulator. - Page 23 Troubleshooting ( continued Problem Possible Cause Prevention/Solution Burner(s) will not light ELECTRONIC IGNITION: using ignitor. • No spark, no ignition noise. • See Section I of Electronic Ignition System. (See Electronic Ignition Troubleshooting also) • No spark, some ignition noise. •...
-
Page 24: Troubleshooting
Troubleshooting - Electronic Ignition Problem (Ignition) Possible Cause Check Procedure Prevention/Solution SECTION I No sparks appear at • Battery not installed • Check battery orientation. • Install battery (make sure that “+” and “–” any electrodes when properly. connectors are oriented correctly, with “+” end up ignition button is and “–”... - Page 25 463269806 • 25...
- Page 26 26 • 463269806...
-
Page 27: Registration Card
Please register your product online at: www.grillregistration.com (If you register online, you do not need to send in this registration card.) PLEASE FILL OUT THIS CARD AND RETURN IT WITHIN 10 DAYS OF PURCHASE. FAILURE TO RETURN MAY AFFECT YOUR WARRANTY COVERAGE . - Page 28 Always ensure control knobs are in OFF position and regulator is attached to tank BEFORE opening tank valve to avoid low flames. Perform leak test regularly. Thank You for Your Purchase! Char-Broil, LLC • Columbus, GA 31902 • Printed in China...
Need help?
Do you have a question about the Front Avenue 463269806 and is the answer not in the manual?
Questions and answers