Meiko DV 80.2 Owner's Installation, Operation And Maintenance Manual
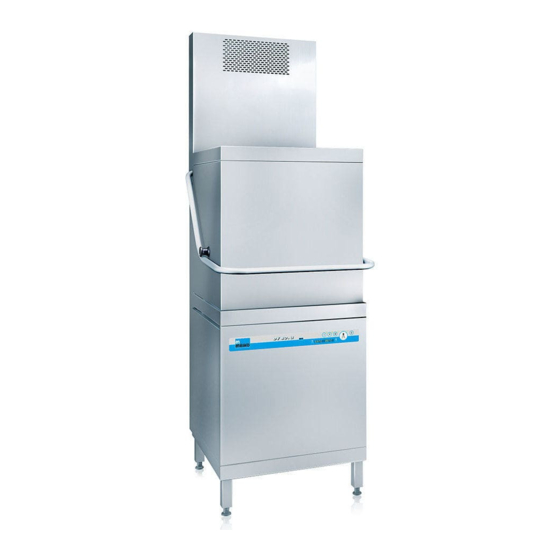
Door-type high temperature sanitizing dishwasher (usa version)
Hide thumbs
Also See for DV 80.2:
- Operating instructions manual (56 pages) ,
- Original operating instructions (48 pages) ,
- Installation instructions manual (8 pages)
Table of Contents
Advertisement
Advertisement
Table of Contents

Related Manuals for Meiko DV 80.2


Summary of Contents for Meiko DV 80.2
- Page 1 DV 80.2 ODEL Door-Type High Temperature Sanitizing Dishwasher (USA Version) ’ WNER NSTALLATION PERATION AND AINTENANCE ANUAL MEIKO • 1349 Heil Quaker Blvd. • La Vergne, TN 37086 • Phone: (615) 399-6600 • (800) 55-MEIKO • Fax: (615) 399-6620 Rev. 9/10...
-
Page 2: Table Of Contents
ANY MODIFICATIONS TO THE APPLIANCE THAT ARE PERFORMED WITHOUT THE WRITTEN PERMISSION OF MEIKO WILL IMMEDIATELY VOID THE MANUFACTURER’S WARRANTY. MEIKO reserves the right to change any specifications without notice at any time. © 2010 MEIKO USA, Inc. All rights reserved. -
Page 3: Introduction
The following symbols and headings are used 1.1 Overview of Equipment throughout this manual to indicate possible The MEIKO Model DV 80.2 is a commercial hazards to persons or to the equipment. The dishwasher designed for cleaning dishes, symbols and headings are shown in order of glassware, trays, cutlery and kitchen utensils importance. -
Page 4: Installation
The area MUST have a firm floor The appliance’s warranty is not valid until a surface. It is possible to compensate for MEIKO Authorized Service Agent performs a uneven flooring by adjusting the feet. Startup and Demonstration on the appliance. -
Page 5: Uncrating, Positioning And Leveling
MEIKO Customer Service at 1-800-868-3840, providing full details on the customer, serial number and extent of damage As panel is present. MEIKO will file a freight claim based Remove removed, disconnect 2 screws on ribbon cable to on this information. -
Page 6: Main Electrical Supply Connection
3 - I ECTION NSTALLATION 3.5 Main Electrical Supply Connection 2. Check that the incoming power leads are long enough to permit the unit to be WARNING! repositioned for servicing. Check that the circuit breaker/fused disconnect is in the OFF position and 3. -
Page 7: Dispensing System Overview
3 - I ECTION NSTALLATION 3.6 Dispensing system overview Figure 3-7: Chemical connections The DV 80.2 is designed for use with a liquid rinse aid, and either solid or liquid detergents. Units equipped with optional liquid internal detergent and rinse aid pumps have two tubes exiting the machine at the lower rear. -
Page 8: Installing An External Detergent System
3 - I ECTION NSTALLATION CAUTION Figure 3-8: Sealing unused chemical tubes (if If the unit will NOT use one or both of not using a liquid detergent or rinse additive) the chemical supply tubes, cut the unused tube(s) close to the point where it exits the machine’s exterior tubing panel and seal it using the supplied... -
Page 9: Installing An External Liquid Rinse Aid System
3 - I ECTION NSTALLATION 3.8 Installing an External Liquid Rinse Aid Figure 3-10: Liquid rinse additive system System A pre-plumbed, blue 1/4” ID tube at the lower rear of the unit serves as the connection point for the rinse aid supply. See Figure 3-10. If a liquid rinse aid system will NOT be used, cut the tubing near the rear panel. -
Page 10: Connecting Chemical Containers Or Dispensers
3-12, be sure to use the supplied wire correctly installed according to the clamps to fasten the chemical supply manufacturer’s instructions. tubes securely. MEIKO STRONGLY 3. If the dishwasher is equipped with factory RECOMMENDS the use of a sealing internal chemical dispensing pumps, two... -
Page 11: Fresh Water Supply Connection
(with a booster pump) or to reduce the pressure (with a reducing valve). 2. Check the type of drain that will be used. Because the DV 80.2 uses a pumped drain, 3. Check the incoming water temperature. either a floor or wall drain is acceptable. -
Page 12: Tabling Attachment
ECTION NSTALLATION 3.13 Tabling Attachment Figure 3-15: Straight-through and corner tabling configurations The DV 80.2 can be positioned in either of two tabling configurations; straight through, or in a corner installation. See Figure 3-15. Control 1. IF the machine will be... - Page 13 3 - I ECTION NSTALLATION CAUTION Figure 3-17: Tabling attachment After adjusting the height of the machine, Lip-in flange MUST always check that it is level to ensure be flush against the proper operation. vertical mounting surface 3. Position each table lip-in at the machine, as shown in Figure 3-17.
-
Page 14: Final Assembly
SETTINGS ARE TO BE PERFORMED 6. Press the START/DRAIN ( )key to start ONLY BY A MEIKO AUTHORIZED priming the liquid detergent lines. A timer SERVICE AGENT. CHANGES BY will count down the time remaining. By default, UNAUTHORIZED PERSONNEL WILL the system will prime for 30 seconds. -
Page 15: Operation
4 - O ECTION PERATION PERATION 4.1 Location and Description of Controls The dishwasher controls are on the keypad on the front panel. See Figure 4-1. Figure 4-1: Dishwasher controls A, B, C - POWER/CYCLE SELECT keys E - STOP/OFF key These keys turn the dishwasher on. -
Page 16: Startup
4 - O ECTION PERATION 4.2 Startup 4.3 Loading The loading guidelines shown here will lead Check the level of the external detergent and to faster, more efficient cleaning of your ware. rinse additive dispensers. If necessary, replace or refill the dispensers. Load plates, soup bowls, etc. -
Page 17: Operation
Open the door slowly until the dishwasher cleaning cycle, open the door. Remove any food particles, scraps or bones from the scrap stops operating, OR screens. MEIKO recommends that the door • Press the STOP/OFF ( ) key to stop the of the dishwasher be left open overnight to wash/rinse cycle before opening the door. -
Page 18: Cleaning
Note the following: screen on the Active Plus filter. The Active Plus filter MUST be rein- 5. MEIKO recommends that the door of the stalled with the slotted end facing dishwasher be left open overnight to allow DOWN. See Figure 5-1. -
Page 19: Exterior Cleaning (As Required)
WARNING! the interior of the dishwasher if it is operated Ensure that ALL residue of the using a hard water supply. MEIKO recommends deliming agent is removed. Residue a hardness of 4-6 grains per U.S. gallon. from the agent can: A deliming or de-scaling process can be used Pose a health hazard;... -
Page 20: Troubleshooting
“kinks” or pinching. Also check that the water supply is turned on. MEIKO Authorized Service Agent You should contact your • The dishwasher encounters a problem but does not display an error code, OR •... - Page 21 Notes ________________________________________________________________________________ ________________________________________________________________________________ ________________________________________________________________________________ _ _ _ _ _ _ _ _ _ _ _ _ _ _ _ _ _ _ _ _ _ _ _ _ _ _ _ _ _ _ _ _ _ _ _ _ _ _ _ _ _ _ _ _ _ _ _ _ _ _ _ _ _ _ _ _ _ _ _ _ _ _ _ _ _ _ _ _ _ _ _ _ _ _ _ _ _ _ _ _ _ _ _ _ _ _ _ _ _ _ _ _ _ _ _ _ _ _ _ _ _ _ _ _ _ _ _ _ _ _ _ _ _ _ _ _ _ _ _ _ _ _ _ _ _ _ _ _ _ _ _ _ _ _ _ _ _ _ _ _ _ _ _ _ _ _ _ _ _ _ _ _ _ _ _ _ _ _ _ _ _ _ _ _ _ _ _ _ _ _ _ _ _ _ _ _ _ _ _ _ _ _ _ _ _ _ _ _ _ _ _ _ _ _ _ _ _ _ _ _ _ _ _ _ _ _ _ _ _ _ _ _ _ _ _ _ _ _ _ _ _ _ _ _ _ _ _ _ _ _ _ _ _ _ _ _ _ _ _ _ _ _ _ _ _ _ _ _ _ _ _ _ _ _ _ _ _ _ _ _ _ _ _ _ _ _ _ _ _ _ _ _ _ _ _ _ _ _ _ _ _ _ _ _ _ _ _ _ _ _ _ _ _ _ _ _ _ _ _ _ _ _ _ _ _ _ _ _ _ _ _ _ _ _ _ _ _ _ _ _ _ _ _ _ _ _ _ _ _ _ _ _ _ _ _ _ _ _ _ _ _ _ _ _ _ _ _ _ _ _ _ _ _ _ _ _ _ _ _ _ _ _ _ _ _ _ _ _ _ _ _ _ _ _ _ _ _ _ _ _ _ _ _ _ _ _ _ _ _ _ _ _ _ _ _ _ _ _ _ _ _ _ _ _ _ _ _ _ _ _ _ _ _ _ _ _ _ _ _ _ _ _ _ _ _ _ _ _ _ _ _ _ _ _ _ _ _ _ _ _ _ _ _ _ _ _ _ _ _ _ _ _ _ _ _ _ _ _ _ _ _ _ _ _ _ _ _ _ _ _ _ _ _ _ _ _ _ _ _ _ _ _ _ _ _ _ _ _ _ _ _ _ _ _ _ _ _ _ _ _ _ _ _ _ _ _ _ _ _ _ _ _ _ _ _ _ _ _ _ _ _ _ _ _ _ _ _ _ _ _ _ _ _ _ _ _ _ _ _ _ _ _ _ _ _ _ _ _ _ _ _ _ _ _ _ _ _ _ _ _ _ _ _ _ _ _ _ _ _ _ _ _ _ _ _ _ _ _ _ _ _ _ _ _ _ _ _ _ _ _ _ _ _ _ _ _ _ _ _ _ _ _ _ _ _ _ _ _ _ _ _ _ _ _ _ _ _ _ _ _ _ _ _ _ _ _ _ _ _ _ _ _ _ _ _ _ _ _ _ _...
- Page 22 Notes ________________________________________________________________________________ ________________________________________________________________________________ ________________________________________________________________________________ _ _ _ _ _ _ _ _ _ _ _ _ _ _ _ _ _ _ _ _ _ _ _ _ _ _ _ _ _ _ _ _ _ _ _ _ _ _ _ _ _ _ _ _ _ _ _ _ _ _ _ _ _ _ _ _ _ _ _ _ _ _ _ _ _ _ _ _ _ _ _ _ _ _ _ _ _ _ _ _ _ _ _ _ _ _ _ _ _ _ _ _ _ _ _ _ _ _ _ _ _ _ _ _ _ _ _ _ _ _ _ _ _ _ _ _ _ _ _ _ _ _ _ _ _ _ _ _ _ _ _ _ _ _ _ _ _ _ _ _ _ _ _ _ _ _ _ _ _ _ _ _ _ _ _ _ _ _ _ _ _ _ _ _ _ _ _ _ _ _ _ _ _ _ _ _ _ _ _ _ _ _ _ _ _ _ _ _ _ _ _ _ _ _ _ _ _ _ _ _ _ _ _ _ _ _ _ _ _ _ _ _ _ _ _ _ _ _ _ _ _ _ _ _ _ _ _ _ _ _ _ _ _ _ _ _ _ _ _ _ _ _ _ _ _ _ _ _ _ _ _ _ _ _ _ _ _ _ _ _ _ _ _ _ _ _ _ _ _ _ _ _ _ _ _ _ _ _ _ _ _ _ _ _ _ _ _ _ _ _ _ _ _ _ _ _ _ _ _ _ _ _ _ _ _ _ _ _ _ _ _ _ _ _ _ _ _ _ _ _ _ _ _ _ _ _ _ _ _ _ _ _ _ _ _ _ _ _ _ _ _ _ _ _ _ _ _ _ _ _ _ _ _ _ _ _ _ _ _ _ _ _ _ _ _ _ _ _ _ _ _ _ _ _ _ _ _ _ _ _ _ _ _ _ _ _ _ _ _ _ _ _ _ _ _ _ _ _ _ _ _ _ _ _ _ _ _ _ _ _ _ _ _ _ _ _ _ _ _ _ _ _ _ _ _ _ _ _ _ _ _ _ _ _ _ _ _ _ _ _ _ _ _ _ _ _ _ _ _ _ _ _ _ _ _ _ _ _ _ _ _ _ _ _ _ _ _ _ _ _ _ _ _ _ _ _ _ _ _ _ _ _ _ _ _ _ _ _ _ _ _ _ _ _ _ _ _ _ _ _ _ _ _ _ _ _ _ _ _ _ _ _ _ _ _ _ _ _ _ _ _ _ _ _ _ _ _ _ _ _ _ _ _ _ _ _ _ _ _ _ _ _ _ _ _ _ _ _ _ _ _ _ _ _ _ _ _ _ _ _ _ _ _ _ _ _ _ _ _ _ _ _ _ _ _ _ _ _ _ _ _ _ _ _ _ _ _ _ _ _ _ _ _ _ _ _ _ _ _ _ _ _ _ _ _ _ _ _ _ _ _ _ _ _ _ _ _ _ _ _ _ _ _ _ _ _ _ _ _ _ _ _ _ _ _ _ _ _ _ _...
- Page 23 Notes ________________________________________________________________________________ ________________________________________________________________________________ ________________________________________________________________________________ _ _ _ _ _ _ _ _ _ _ _ _ _ _ _ _ _ _ _ _ _ _ _ _ _ _ _ _ _ _ _ _ _ _ _ _ _ _ _ _ _ _ _ _ _ _ _ _ _ _ _ _ _ _ _ _ _ _ _ _ _ _ _ _ _ _ _ _ _ _ _ _ _ _ _ _ _ _ _ _ _ _ _ _ _ _ _ _ _ _ _ _ _ _ _ _ _ _ _ _ _ _ _ _ _ _ _ _ _ _ _ _ _ _ _ _ _ _ _ _ _ _ _ _ _ _ _ _ _ _ _ _ _ _ _ _ _ _ _ _ _ _ _ _ _ _ _ _ _ _ _ _ _ _ _ _ _ _ _ _ _ _ _ _ _ _ _ _ _ _ _ _ _ _ _ _ _ _ _ _ _ _ _ _ _ _ _ _ _ _ _ _ _ _ _ _ _ _ _ _ _ _ _ _ _ _ _ _ _ _ _ _ _ _ _ _ _ _ _ _ _ _ _ _ _ _ _ _ _ _ _ _ _ _ _ _ _ _ _ _ _ _ _ _ _ _ _ _ _ _ _ _ _ _ _ _ _ _ _ _ _ _ _ _ _ _ _ _ _ _ _ _ _ _ _ _ _ _ _ _ _ _ _ _ _ _ _ _ _ _ _ _ _ _ _ _ _ _ _ _ _ _ _ _ _ _ _ _ _ _ _ _ _ _ _ _ _ _ _ _ _ _ _ _ _ _ _ _ _ _ _ _ _ _ _ _ _ _ _ _ _ _ _ _ _ _ _ _ _ _ _ _ _ _ _ _ _ _ _ _ _ _ _ _ _ _ _ _ _ _ _ _ _ _ _ _ _ _ _ _ _ _ _ _ _ _ _ _ _ _ _ _ _ _ _ _ _ _ _ _ _ _ _ _ _ _ _ _ _ _ _ _ _ _ _ _ _ _ _ _ _ _ _ _ _ _ _ _ _ _ _ _ _ _ _ _ _ _ _ _ _ _ _ _ _ _ _ _ _ _ _ _ _ _ _ _ _ _ _ _ _ _ _ _ _ _ _ _ _ _ _ _ _ _ _ _ _ _ _ _ _ _ _ _ _ _ _ _ _ _ _ _ _ _ _ _ _ _ _ _ _ _ _ _ _ _ _ _ _ _ _ _ _ _ _ _ _ _ _ _ _ _ _ _ _ _ _ _ _ _ _ _ _ _ _ _ _ _ _ _ _ _ _ _ _ _ _ _ _ _ _ _ _ _ _ _ _ _ _ _ _ _ _ _ _ _ _ _ _ _ _ _ _ _ _ _ _ _ _ _ _ _ _ _ _ _ _ _ _ _ _ _ _ _ _ _ _ _ _ _ _ _ _ _ _ _ _ _ _ _ _ _ _ _ _ _ _ _ _ _ _ _ _ _ _ _ _ _ _ _ _ _ _ _ _ _ _ _ _ _...
- Page 24 If you need service... MEIKO dishwashers are designed for solid reliability as much as for outstanding ware-cleaning ability. With proper care, your dishwasher should provide years of trouble-free operation. If service is necessary, contact your local MEIKO Authorized Service Agent. With factory training, OEM parts and direct support from the factory, MEIKO’s nationwide service network is highly qualified to quickly...
Need help?
Do you have a question about the DV 80.2 and is the answer not in the manual?
Questions and answers