Table of Contents
Advertisement
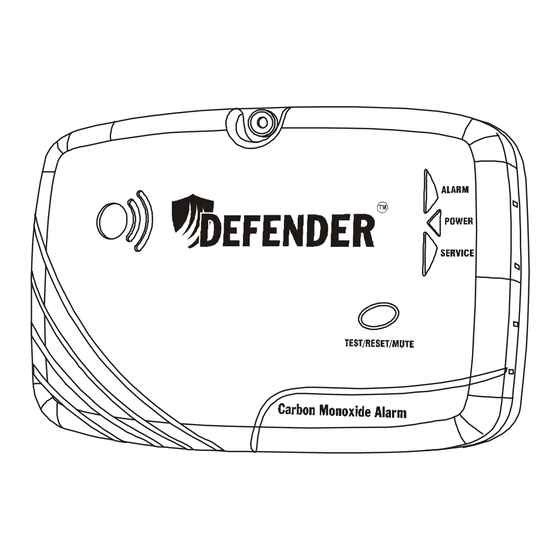
Carbon Monoxide Alarm
Owner's Manual
Owner's Manual
Owner's Manual
Owner's Manual
Sealed Lithium Battery Powered
CA6100
Sealed Lithium Battery
Powered CO Alarm, Single
Station
CA6150
Sealed Lithium Battery
Powered CO Alarm with LCD
Digital Display and Peak Level
Memory, Single Station
Manual P/N: 240-1111
Rev-01 Sep 27, 2013
- 1 -
Advertisement
Table of Contents

Related Manuals for Defender CA6100


Summary of Contents for Defender CA6100
- Page 1 Carbon Monoxide Alarm Owner’s Manual Owner’s Manual Owner’s Manual Owner’s Manual Sealed Lithium Battery Powered CA6100 Sealed Lithium Battery Powered CO Alarm, Single Station CA6150 Sealed Lithium Battery Powered CO Alarm with LCD Digital Display and Peak Level Memory, Single Station...
-
Page 2: Contents Of This Manual
CONTENTS OF THIS MANUAL IMPORTANT MESSAGE AND INSTRUCTIONS WARNING MESSAGES FEATURES AND SPECIFICATIONS INFORMATION ABOUT CARBON MONOXIDE RECOMMENDED LOCATIONS OF ALARMS LOCATIONS TO AVOID INSTALLATION INSTRUCTIONS FUNCTIONS AND OPERATION TEST AND MUTE ALARM 10. WHAT TO DO WHEN THE ALARM SOUNDS 11. -
Page 3: Warning Messages
the other label near a source of fresh air where you plan to gather when the carbon monoxide alarm signals are activated. After installation is completed, TEST the alarm by pressing the TEST/RESET/MUTE button for at least 2 seconds. Detailed testing instructions are outlined in Section 9. DO NOT TRY TO TEST THIS ALARM IN ANY OTHER WAY: If no alarm sounds, or low or erratic sound emits from the alarm during a test, the unit may be defective and should be returned for service. -
Page 4: Features And Specifications
3. FEATURES AND SPECIFICATIONS • Factory Sealed Lithium Batteries with Soldered Connections • Integrated Battery Activation/Deactivation Switch • Accurate and Reliable Water-Based Electrochemical Sensor • Integrated Filter for Removing Nuisance Gases • Samples for Carbon Monoxide (CO) Every 10 Seconds •... - Page 5 SPECIFICATIONS CO Response Times: 70 PPM: 60-240 minutes, 150 PPM: 10-50 minutes, 400 PPM: 4-15 minutes, Sensor Type: Electrochemical Operating Temperature and Humidity: F to 100 F @ 10% to 95% RH Audible Signal: Buzzer Horn Sounds 85 dB at 10 feet Visual Signal: •...
-
Page 6: Information About Carbon Monoxide
4. INFORMATION ABOUT CARBON MONOXIDE WHAT IS CARBON MONOXIDE? Carbon monoxide (CO) is a highly toxic, invisible, odorless, tasteless gas. HOW IS CO GENERATED? Carbon monoxide is generated through incomplete combustion of fuel in various appliances. Faulty ventilation of furnaces, water heaters, fireplaces, wood burning stoves, and space heaters are the major cause of high CO levels in a building. -
Page 7: Recommended Location Of Alarms
RECOMMENDED LOCATION OF ALARMS The Consumer Products Safety Commission (CPSC) recommends the use of "at least one CO alarm per household located outside each sleeping area." (See diagrams "A" and “B”). CO poisoning can happen anywhere in the dwelling, but because most CO poisoning cases occur while people are sleeping, the best location for the CO alarm is near the sleeping area. -
Page 8: Locations To Avoid
6. LOCATIONS TO AVOID NEAR THE COOKING AREA: Do not install the alarm within five feet of cooking appliances. CO may be generated in the cooking process and cause nuisance alarms. Also, cooking grease can build up on the alarm and cause alarm failure. WITHIN FIVE FEET OF A FURNACE, WATER HEATER, OR SPACE HEATER: These devices often spill out small amounts of CO when they first turn on. - Page 9 If the activation switch is not set to ON position, as in diagram (D), the mounting hole at top of alarm will be blocked, and the CO alarm will not be activated. The models CA6100 and CA6150 are a sealed lithium battery powered wall mounted alarm. Two lithium battery cells are permanently sealed with soldered connections, and cannot be removed.
-
Page 10: Functions And Operation
8. FUNCTIONS AND OPERATION OPERATION: The CO alarm is operational once the activation switch is slid to ON position. The green LED will flash once every 60 seconds. The model CA6150 LCD will also continuously display to indicate that the CO alarm’s power is active. LOW BATTERY CONDITION: When the battery voltage drops below an acceptable level, the alarm will chirp once per minute and the green LED will blink 5 seconds every... - Page 11 DISPLAY CO LEVEL BUTTON (FOR MODEL CA6150): To manually display the current and highest CO level detected, press the button once. The DISPLAY CO LEVEL LCD will display the recorded data in the following order: 1. The current CO level detected, and 2.
-
Page 12: What To Do When The Alarm Sounds
30 days, the alarm will return to its normal “End-of-Life” condition; 1 chirp per minute, red LED glows for 5 seconds at the same time, and model CA6150 SERVICE continuously displays “End”. To test the alarm during an “End-of-Life” condition, press and hold TEST/RESET/MUTE button for minimum 2 seconds when audible signal is not sounding. -
Page 13: Limitations Of Carbon Monoxide Alarms
Conditions which can result in transient CO situations: 1) Excessive spillage or reverse venting of fuel burning appliances caused by outdoor ambient conditions, such as: Wind direction and/or velocity, including high gusts of wind. Heavy air in the vent pipes (cold/humid air with extended periods between cycles). ii) Negative pressure differential resulting from the use of exhaust fans. -
Page 14: Good Safety Habits
12. GOOD SAFETY HABITS DEVELOP AND PRACTICE A PLAN OF ESCAPE: Make a floor plan indicating all doors and windows and at least two escape routes from each room. Second story windows may need a rope or chain ladder. Have a meeting with everyone to discuss your escape plan, and show everyone what to do in case an alarm sounds. - Page 15 To remove the alarm for service or disposal, unscrew the mounting screw from the top center of the alarm, and slide the alarm up and off the mounting plate. Insert a small flat-head screwdriver into the slot, lift up the deactivation Stop, and slide the switch to the farthest left end to deactivate the alarm.
- Page 16 14. DESCRIPTION OF AUDIBLE AND VISUAL SIGNALS Condition LCD Readout LEDs Horn CO alarm is Green LED flashes once Displays Silent operational every 60 seconds continuously Beeps 4 times, pauses for 5 ALARM red LED flashes 4 seconds. Repeats this Displays current CO CO gas alarm times in synchronous with...
-
Page 17: Ten-Year Limited Warranty
Proof of purchase is required to obtain warranty service. Dealers, service centers, or retail stores selling Defender products do not have the right to alter, modify or in any way change the terms and conditions of this warranty.
Need help?
Do you have a question about the CA6100 and is the answer not in the manual?
Questions and answers