Table of Contents
Advertisement
Advertisement
Table of Contents

Related Manuals for Epic HD


Summary of Contents for Epic HD
- Page 1 User’s Manual...
-
Page 2: Table Of Contents
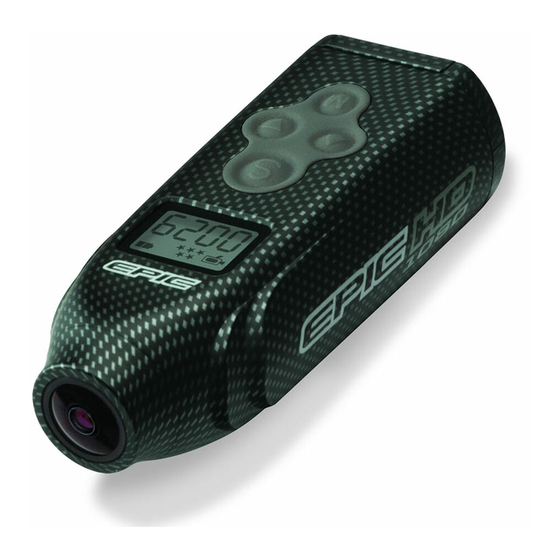
OVERVIEW LCD Menu Icons INITIAL SET UP Installing SD Memory Card Installing Batteries “HOW TO” - INSTRUCTIONS Power ON/OFF Set the Video Resolution Shoot a Video Set the Camera Resolution | 10 Take Still Pictures | 10 ... - Page 3 *** IMPORTANT *** Go to www.epicstealthcam.com to register your new camera. By doing this you will be kept up to date on all the latest news as well as product updates and giveaways. Visit EPIC on Facebook, Twitter and Youtube.
-
Page 4: Overview
OVERVIEW... -
Page 5: Lcd Menu Icons
LCD MENU ICONS (Counter Display) (Video Mode / Resolution) (Still Image / Resolution) (Burst Mode) (View Point Mode) (Zoom/Battery) -
Page 6: Initial Set Up
INITIAL SET UP INSTALLING SD MEMORY CARD Make sure the camera is in the OFF position before adding or removing memory! Push open the USB/TV/SD door located at the rear of the camera. (Figure 1.1) Install a 2, 4, 8 or 16 GB SD memory card into the rear slot. Make sure memory card is firmly seated into the camera by pushing the card until you hear a slight click. - Page 7 Figure 1.1 Figure 1.2...
-
Page 8: Installing Batteries
Insert batteries, then close the battery door first then close top door second. (Figure 2.2) Figure 2.1 Figure 2.2 Helpful tip on batteries: To extend your recording time, EPIC highly recommends Energizer™ Lithium batteries for optimum performance. NOTE: To save battery life, the camera will automatically shut down after 5 minutes of inactivity. -
Page 9: How To" - Instructions
To turn the EPIC OFF, press and hold the (M) button for 2 seconds. NOTE: After the camera is turned off, you will need to wait 5 seconds before turning the EPIC back NOTE: The camera’s LCD display will show four dashes and the battery (as shown) for a few seconds as you toggle between some Menus and Settings. -
Page 10: Set The Camera Resolution
Number count will go up incrementally depending on your Burst Mode settings. DELETE VIDEOS/PICTURES The EPIC allows you to delete some or all your videos or images on the camera. (ERASE ONE) Turn on the EPIC by pressing the (M) button once. -
Page 11: Settings
SETTINGS ZOOMING IN The EPIC also has the ability for 1X, 2X & 4X Zooming. Turn on the EPIC by pressing the (M) button once. Press (M) until the “Counter & Zoom/Battery” icons are on the far right (as shown). -
Page 12: Switch Viewpoints - Upside Down Camera Angle (180')
This feature allows you to rotate the camera angle 180’ degrees in case you require mounting the camera upside down. Turn on the EPIC by pressing the (M) button once. Press (M) until you see the word “SEt” then press (S). -
Page 13: Auto Power-Off Timer
SD memory card inside the camera. The camera display will show USb. Your computer should recognize the EPIC as a USB mass storage device. Simply drag & drop the images or videos to the desired destination folder on your computer. -
Page 14: Viewing Live Video
TV LIVE MODE Power ON the EPIC, connect the camera to the TV via an AV cable (sold separately). The camera will automatically enter TV Live mode to display live viewing on TV. The camera display will show TV-P or TV-N depending on the user setting. -
Page 15: Mounting Options
MOUNTING OPTIONS The EPIC’s ultra light weight and compact size makes it ideal for all kinds of action. We have provided you with some basic mounts to help get you started. All the EPIC mounting accessories utilize a quick clip device that allows the camera to be easily changed between mounting accessories. - Page 16 Curve mount – Permanent 3M adhesive labels adhere to the underside base of our universal quick clip. Ideal for helmets of any size or material finish. Surface Preparation for Curve Mount: Use rubbing alcohol to clean the mounting surface. Wipe dry the surface. Remove adhesive protective label.
-
Page 17: Warranty / Contact Info
WARRANTY / CONTACT INFO The EPIC is covered by a one year limited warranty on parts and labor from the date of original purchase and purchases must be made through an authorized dealer. The warranty covers defects in workmanship and materials. The warranty does not apply to cameras which have been damaged or abused intentionally or unintentionally. -
Page 18: Fcc Compliance
FCC COMPLIANCE This equipment has been tested and found to comply with the limits for Class B digital device, pursuant to part 15 of the FCC Rules. These limits are designed to provide reasonable protection against harmful interference in a residential installation. This equipment generates uses and can radiate radio frequency energy and, if not installed and used in accordance with the instructions, may cause harmful... -
Page 19: Quick Start Guide
Press (S) again to stop recording. STEP 4: Press and hold the (M) button to power off your EPIC. For more details on additional EPIC features please consult the complete User’s Manual. Need Help? Call toll free at 877-269-5490...
Need help?
Do you have a question about the HD and is the answer not in the manual?
Questions and answers