
Related Manuals for Swissvoice Avena 135


Summary of Contents for Swissvoice Avena 135
- Page 1 Avena 135/135 Duo C o r d l e s s a n a l o g u e t e l e p h o n e D E C T User Manual Attention: User Manual contains safety precautions!
-
Page 2: Safety Precautions
Safety precautions This DECT cordless telephone is intended for transmitting speech over the analogue tele- phone network. Any other type of use is not permitted and is considered in violation of the provisions. This User Manual with its safety precautions is part of the product package and must be handed over to the new owner when sold. -
Page 3: Table Of Contents
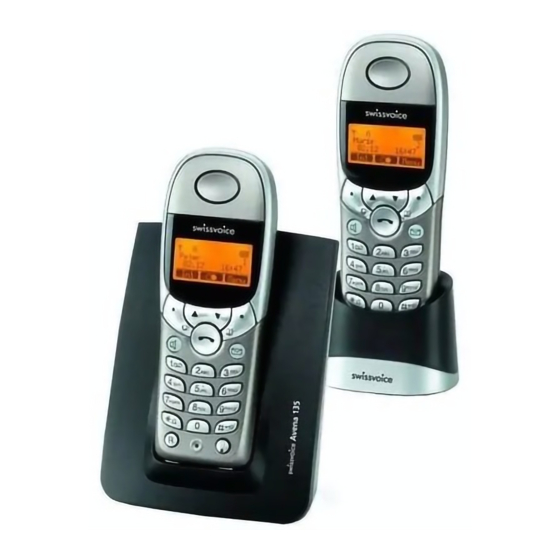
Your Avena 135/135 Duo is designed to be connected to an analogue telephone network. This telephone is available either with one handset (Avena 135) or as a set with two handsets and a charging bay (Avena 135 Duo). Safety precautions Contents ………………………………………………………………………………………1... - Page 4 Contents Set the time and date ……………………………………………………………………19 Make a telephone call ……………………………………………………………………20 Answering a telephone call ……………………………………………………………21 Ending a telephone call …………………………………………………………………21 Missed calls ………………………………………………………………………………22 Handsfree calling …………………………………………………………………………22 Changing the voice volume during a call ………………………………………………23 Muting the handset ………………………………………………………………………23 Message Lists ………………………………………………………………………………24 Comfort dialling ……………………………………………………………………………25 Dialling using the phonebook …………………………………………………………25...
- Page 5 Contents Transferring a call …………………………………………………………………………48 Alternating between calls (brokering) …………………………………………………48 Three-party conference calls ……………………………………………………………49 Call Forwarding ……………………………………………………………………………50 Enable/disable Call Forwarding …………………………………………………………50 Program service codes for Call Forwarding ……………………………………………52 SMS Messages ………………………………………………………………………………53 SMS Gateways ……………………………………………………………………………54 Editing SMS gateway numbers …………………………………………………………55 Writing SMS messages …………………………………………………………………56 Text editor …………………………………………………………………………………58 Receiving SMS messages…………………………………………………………………59 List of incoming SMS messages …………………………………………………………59...
- Page 6 Contents Base Station settings ………………………………………………………………………73 Setting the ring volume (BS) ……………………………………………………………73 Setting the ring melody …………………………………………………………………74 Changing PIN code ………………………………………………………………………75 Time and date ……………………………………………………………………………76 Selecting the Flash time …………………………………………………………………77 Resetting the base station ………………………………………………………………78 Supplementary network services ………………………………………………………80 Subscribe to network services …………………………………………………………80 CLIP Service ………………………………………………………………………………80 Function codes for network services ……………………………………………………80 Using network services through the menu ……………………………………………81...
-
Page 7: Installation
The latest version of the User Manual can be retrieved from the Swissvoice internet site at: www.swissvoice.net). Additional items for “Duo” In case you have purchased the Avena 135 Duo (2 handsets) you will find the following additional items in the package: Second Avena 135 Handset (HS) -
Page 8: Positioning The Base Station /Charging Bay
Installation Depending on the structural surroundings, radio dead spots may occur even within this indoor range caused by the digital transmission in the frequency range. Reduced trans- mission quality results in short interruptions of the transmission. To improve the transmis- sion quality, move the telephone slightly away from the radio dead spot. -
Page 9: Wall Mounting
Installation Wall mounting Your Avena 135 /135 Duo cordless telephone is suitable for wall mounting. Two screws and wall plugs are provided for this purpose. Place the plugs vertically at a distance of 90 mm from each other and insert the screws. Leave approx. 3 mm space between the screw head and the wall. -
Page 10: Connecting The Telephone
Before you can start using your cordless telephone you must connect the power supply and telephone connection cables. Safety note For the Avena 135 /135 Duo base station use only the provided power supply type SNG 05-ea! Telephone connection cable... -
Page 11: Connecting The Charging Bay
Installation To disconnect the telephone first unplug the power supply from of the 230 V mains socket and then disconnect the telephone line cable from the wall connector. To remove the connection cables press the cable grips (e.g. with a ballpoint pen or similar object) towards the connector and simultaneously pull out the plug along with the cable. -
Page 12: Inserting The Batteries In The Handset
Installation Inserting the batteries in the handset The handset will be fully operational only after the batteries have been fully charged for the first time. Battery compartment The battery compartment is located at the bottom of the handset. The battery compart- ment holds two rechargeable NiMH batteries of type AAA. -
Page 13: Charging The Batteries
Installation Charging the batteries The batteries are not yet charged when you first unpack the telephone. To charge the batteries, place the handset in the base station (or in the charging bay). The blinking battery symbol in the handset indicates the charging process. The charging time for the batteries is approx. - Page 14 Installation Note • Make sure to insert batteries in the handset before placing the handset in the base stations / charging bay. • After a call has been made you may place the handset back in the base station /charging bay. Charging of the batteries is controlled electronically as to prevent batteries be damaged by overcharging.
-
Page 15: Display And Keypad
Display and keypad Display and symbols The handset display provides easy to understand information on the current status of your telephone. The 4-line display (with backlight illumination) is capable of showing several graphical symbols and text lines. The meaning of the symbols shown in the upper part of the display is as follows: ∏... -
Page 16: Handset Front View
Display and keypad Handset front view Earpiece (additional loud- speaker is located at the backside) Display with INTERN backlight illumination 17.01 20:53 Navigation keys Soft key Soft key Cancel key Phonebook key Talk key Message key Hands-free key (illuminated) (illuminated) Number pad R-key VIP phonebook... -
Page 17: Handset Keypad
Display and keypad Handset keypad The following illustrations represent the keys on the handset keypad. For each key a short description is provided. Softkeys (left and right) which corresponding to different functions as … displayed on the screen. The navigation keys have different functions: While in a standby: open the redial list. - Page 18 Display and keypad Asterisk (or star) key to enter the “asterisk” symbol. Pressing this key and holding it for approx. 2 seconds switches the ring tone on/off. While editing names or writing text, pressing this key switches between uppercase and lowercase characters. Hash (or pound) key to enter the “hash”...
-
Page 19: Base Station Front View
Display and keypad Base station front view The Avena 135 /135 Duo base station is equipped with a multi-functional paging key used for relocating the handset(s) (see below) and logging handsets on to the base station. Paging key Charging cradle for... -
Page 20: Making The First Call
(chapter “Log on the handset”). Note With this Avena 135 /135 Duo you can operate up to 5 handset on the same base station. This allows internal calls between handsets (logged on to the... -
Page 21: Switching The Key Lock On/Off
Making the first call Switching the key lock on/off When carrying the handset with you, you may want to switch on the key lock. This pre- vents any calls be made unintentionally since all key functions are disabled. Pressing the key for approx. -
Page 22: Make A Telephone Call
Press the talk key. After the connection is established you will hear the ring tone. Note • Your Avena 135 /135 Duo supports the entry of telephone numbers with a maximum of 24 digits. When entering more than 16 digits the additional digits are displayed on the second line of the display. -
Page 23: Answering A Telephone Call
When someone is calling you, you will hear the ring tone and the number (or name) of the calling party is displayed on the Avena 135 /135 Duo handset. Not all service providers support this so-called CLIP service. So ask your service provider about the availability and additional charges of service. -
Page 24: Missed Calls
“Dialling from the call register” for more information on the call register and it’s features. Handsfree calling The Avena 135 /135 Duo handset is equipped with a loudspeaker which enables hands- free calling. Press the loudspeaker key on the handset to activate/deactivate the loudspeaker. -
Page 25: Changing The Voice Volume During A Call
Making the first call Changing the voice volume during a call During a call you can independently adjust both the earpiece and loudspeaker voice volu- mes in five levels. You are conducting a telephone conversation. Press the “Volume” softkey. The current setting is indicated by a tick mark. Select the desired volume level with the navigation keys (1–5). -
Page 26: Message Lists
Message Lists Your Avena 135 /135 Duo has three different message lists: • Network Mailbox This list shows whether you have new messages in your network mailbox (only if available from your service provider!). This network mailbox works like an answering machine similar to what is often used for GSM mobile phones. -
Page 27: Comfort Dialling
Managing the phonebook The handset of your Avena 135 /135 Duo stores up to 60 entries in the phonebook. For each entry you can specify the telephone number (max. 24 digits) and the correspon- ding name (max. 15 characters). - Page 28 Comfort dialling Creating a new entry in the phonebook Press the phonebook key to open the phonebook. Open the phonebook administration menu by pressing the “Options” softkey. New entry Select the menu entry and press the “OK” softkey. Enter number : The display reads .
- Page 29 Comfort dialling Editing entries in the phonebook Press the phonebook key. The first entry in the phonebook is displayed. Scroll to the desired phonebook entry using the navigation keys. Open the phonebook administration menu by pressing the “Options” softkey. Edit entry Select the menu entry and press the “OK”...
-
Page 30: Dialling Using The Vip Phonebook
Comfort dialling Note • The phonebook is stored in the handset. Any changes in the phonebook are thus not seen in other handsets which are logged on to the same base station. • The entire phonebook is cleared when you reset the handset (refer to chapter “Resetting the handset”). -
Page 31: Managing The Vip Phonebook
Comfort dialling Managing the VIP phonebook Editing an entry in the VIP phonebook Press the VIP phonebook key. Scroll to the desired entry using the navigation keys. Press the “Options” softkey. Edit entry Select the menu entry and press the “OK” softkey. Edit the telephone number and finish by pressing the “OK”... -
Page 32: Quick Dial (Network Mailbox)
Press the cancel key for approx. 2 seconds to return to the standby mode. Quick Dial (Network Mailbox) Your Avena 135 /135 Duo offers a quick dial function for a network mailbox (voicebox). Such a network mailbox is a supplementary network service offered by your service pro- vider, acting as an automatic answering machine. -
Page 33: Redialling From The Redial List
Comfort dialling Note • Please note that quick dialling is only supported for the key. • Remember that this quick dial function is only used to access the network mailbox. To activate/de-activate the mailbox you must send appropriate network codes to this mailbox. Ask your service provider for details. Redialling from the redial list The last 20 dialled telephone numbers are stored in the redial list. -
Page 34: Managing The Redial List
Comfort dialling Managing the redial list Deleting entries from the redial list Press the “Redial” softkey. The first entry in the redial list is displayed. Scroll to the desired entry using the navigation keys. Open the redial list administration menu by pressing the “Options” softkey. Delete entry Select the menu entry and press the “OK”... - Page 35 Comfort dialling Deleting the entire redial list Press the “Redial” softkey. The first entry in the redial list is displayed. Scroll to the desired entry using the navigation keys. Open the redial list administration menu by pressing the “Options” softkey. Delete list Select the menu entry and press the “OK”...
-
Page 36: Dialling From The Call Register
Comfort dialling Dialling from the call register If the CLIP service is supported by your service provider then any unanswered calls will be stored in the call register. This call register contains up to 20 entries. If the call register is full, then the newest entry overwrites the oldest one. -
Page 37: Managing The Call Register
Comfort dialling Managing the call register Show details of an unanswered call Press the message key. Call list Select the menu entry and press the “OK” softkey. Scroll to the desired entry using the navigation keys. Open the administration menu by pressing the “Options” softkey. Show details Select the menu entry and press the “OK”... - Page 38 Comfort dialling Deleting an entry from the call register Press the message key. Call list Select the menu entry and press the “OK” softkey. Scroll to the desired entry using the navigation keys. Open the administration menu by pressing the “Options” softkey. Delete entry Select the menu entry and press the “OK”...
- Page 39 Comfort dialling Deleting the entire call register Press the message key. Call list Select the menu entry and press the “OK” softkey. Open the administration menu by pressing the “Options” softkey. Delete list Select the menu entry and press the “OK” softkey. Delete list ? The display reads .
-
Page 40: Making Internal Calls
Comfort dialling Making internal calls If you have more than one handset logged on to the base station then you can make internal telephone calls between these handsets. Such internal calls are free of charge since such calls are routed over the base station but not over the telephone network. Dialling an internal number Press this softkey to open the list of available internal destinations (i.e. -
Page 41: Callback If Busy
Comfort dialling Callback if busy Ask your service provider about the availability and any charges for this service. When the person whom you are calling is engaged in another conversation (you will hear the busy tone), then you may activate this service. When the other party becomes free, your own telephone starts ringing and when you answer, the network automatically sets-up the connection. -
Page 42: Call Anonymously
Press the talk key to dial this number. When dialling, the Avena 135 /135 Duo automatically inserts the pre-defined network control code for this service before the telephone number (this is also shown on the display). -
Page 43: Direct Call
Comfort dialling Direct Call You may switch your Avena 135 /135 Duo into Direct Call mode. In this mode the handset starts dialling a pre-defined telephone number whenever you press any key on the handset. This mode may be helpful for parents with small children. In case when the parents are away, the children can be told that they can reach their parents (or neighbours) simply by pressing any key on the handset. -
Page 44: Multiple Conversations
Multiple conversations Your Avena 135 /135 Duo supports having multiple conversations at the same time. For example, while talking to someone, you can make an inquiry (i.e. put the caller on hold and call someone else). Some of these “multiple conversation” features are using supplementary network services offered by your service provider. -
Page 45: Enable/Disable Call Waiting
The current call waiting status is shown, e.g. Change the status according to your preference. Confirm with the “OK” softkey. Your Avena 135 /135 Duo starts to send the corresponding network service code over the telephone line. Depending on the service provider you may have to wait for a (spoken) confirmation from the network. -
Page 46: Accept A Waiting Call
Multiple conversations Accept a waiting call If you are conducting a conversation, you may accept a second incoming (waiting) call. The procedure is different depending on whether you want to hold or end the first call: End the first call You are conducting a telephone conversation. -
Page 47: Reject A Waiting Call
Multiple conversations Reject a waiting call You are conducting a telephone conversation. A second external party is calling you. You hear the call waiting signal Open the options menu by pressing the “Options” softkey. Reject CW Select the menu entry and press the “OK”... -
Page 48: Making An Internal Inquiry Call
Multiple conversations Making an internal inquiry call When you are conducting an external call, you may want to make an inquiry call to someone else without ending the original conversation. An internal inquiry call is performed entirely in the base station. This means that internal inquiry calls are not depending on the service offerings of your service provider. -
Page 49: Making An External Inquiry Call
Make sure that the cor- rect flash signal period is programmed in your Avena 135 /135 Duo. You are conducting an external call and you want to call another external party without ending the first conversation. -
Page 50: Transferring A Call
Remember that brokering between external calls is performed in the telephone network (supplementary network service). This means that you will have to verify that this service is available from your service provider and that the correct control codes are programmed in your Avena 135 /135 Duo. -
Page 51: Three-Party Conference Calls
Remember that setting up a conference call between external parties is performed in the telephone network (supplementary network service). This means that you will have to verify that this service is available from your service provider and that the correct control codes are programmed in your Avena 135 /135 Duo. -
Page 52: Call Forwarding
Enable/disable Call Forwarding Your Avena 135 /135 Duo provides menus which make it very easy for you to enable or disable Call Forwarding. You may individually activate or de-activate Call Forwarding for the following situations: •... - Page 53 If you selected the entry you do not have to specify the destination telephone number. Your Avena 135 /135 Duo will now connect to the network and send the appropriate network control code(s) to the network. The display shows Listen to info ! to indicate that you may hear a spoken acknow- ledge notification from the network.
-
Page 54: Program Service Codes For Call Forwarding
Program service codes for Call Forwarding Since Call Forwarding is a supplementary network service, special network control codes are required for the Avena 135 /135 Duo to be send to the network to activate/de- activate Call Forwarding. Refer to chapter “Editing/programming network service codes” for details on how to set/modify the control codes for the different Call Forwarding options. -
Page 55: Sms Messages
SMS message, first verify that the person who should receive the message has a telephone with SMS capabilities. SMS messages are stored in the base station of the Avena 135 /135 Duo. These SMS messages are thus available to all handsets which are logged on to this base station. -
Page 56: Sms Gateways
Note • Make sure that the correct telephone number(s) of the SMS gateway(s) are entered in your Avena 135 /135 Duo otherwise you will not be able to send nor receive SMS messages! Ask your service provider about these gateway numbers. -
Page 57: Editing Sms Gateway Numbers
• Caution: Sending and receiving SMS messages only works properly when the gateway telephone numbers are entered correctly! • Check carefully whether you need to specify the network access code in case your Avena 135 /135 Duo cordless telephone is connected to a PBX system. -
Page 58: Writing Sms Messages
SMS Messages Writing SMS messages Your Avena 135 /135 Duo supports SMS messages with a maximum length of 160 characters. Open the menu by pressing the “Menu” softkey. Menu Messages Select the menu entry and press the “OK” softkey. Select the menu entry and press the “OK”... - Page 59 Press the cancel key for approx. 2 seconds to return to the standby mode. Note • Your Avena 135 /135 Duo stores max. 15 SMS messages. If the SMS memory is full, a corresponding warning message is displayed asking you to delete one or more SMS messages first.
-
Page 60: Text Editor
SMS Messages Text editor Your Avena 135 /135 Duo has a text editor with which you can enter and modify texts as well as navigate through the text lines. In the text editor mode, key functions are as follows: Toggle between lowercase, uppercase and digits Press this key to toggle between lowercase, uppercase and digits. -
Page 61: Receiving Sms Messages
Incoming SMS messages are stored together with their reception date and time. Your Avena 135 /135 Duo stores max. 15 SMS messages. If the SMS memory is full, a corres- ponding warning message is displayed asking you to delete one or more SMS messages first. - Page 62 SMS Messages Reading entries from the list of incoming SMS messages Open the menu by pressing the “Menu” softkey. Menu Messages Select the menu entry and press the “OK” softkey. Select the menu entry and press the “OK” softkey. Incoming SMS Select the menu entry and press the “OK”...
- Page 63 • Select this option to delete this incoming SMS. Call this number • If you select this option, your Avena 135 /135 Duo directly dials the tele- phone number of the sender of this incoming SMS message. Store phonebook •...
-
Page 64: List Of Outgoing Sms Messages
SMS message which were send are deleted after successful transmission, unless you have explicitly stored that message. Remember that the SMS storage capacity of your Avena 135 /135 Duo is limited to a total of 15 SMS messages. Viewing entries from the list of outgoing SMS messages Open the menu by pressing the “Menu”... - Page 65 SMS Messages Options for outgoing SMS messages When reading an outgoing SMS message, the following options are available: Open the SMS options menu by pressing the “Options” softkey. Select one of the following menu entries and press the “OK” softkey. Send SMS •...
-
Page 66: Special Sms Features
• Send SMS to a list of recipients (multi-message) • SMS forwarding Ask your service provider about the availability of such special features and any corres- ponding costs/charges. Your Avena 135 /135 Duo does not provide any dedicated menu entries for these special SMS features. -
Page 67: Prevent Unauthorised Use
PIN code cannot log on their handset to your base station (chapter “Log on the handset”). So even if your neighbours also have an Avena 135 /135 Duo cordless telephone, they cannot make any telephone calls at your expense. -
Page 68: Handset Settings
Handset settings Setting the ring volume (HS) You can set the volume of the handset ring tone in 5 levels or turn it off completely. By pressing the key (approx. 2 seconds) the ring tone is switched on/off. The symbol ∂... -
Page 69: Setting The Ring Melody
Handset settings Setting the ring melody You can choose between 10 different ring tone melodies. Open the menu by pressing the “Menu” softkey. Menu Settings Select the menu entry and press the “OK” softkey. HS settings Select the menu entry and press the “OK”... -
Page 70: Enabling/Disabling Warning Tones
Handset settings Enabling/disabling warning tones On the Avena 135/135 Duo you may enable or disable the following audible (warning / acknowledge) signals on the handset: • Low battery low • Key click • Out of range Open the menu by pressing the “Menu” softkey. -
Page 71: Editing The Handset Name
Handset settings Editing the handset name You can edit the name of the handset. This helps to identify the handset e.g. if you have more than one handset. Open the menu by pressing the “Menu” softkey. Menu Settings Select the menu entry and press the “OK”... -
Page 72: Select The Display Contrast
Press the cancel key for approx. 2 seconds to return to the standby mode. Set/modify the emergency numbers Even when the key lock is on, you can still dial emergency numbers. Your Avena 135 / 135 Duo supports up to 4 emergency numbers which you can freely assign and/or modify. -
Page 73: Resetting The Handset
Handset settings Resetting the handset With this procedure you can restore the handset settings to factory defaults. Open the menu by pressing the “Menu” softkey. Menu Settings Select the menu entry and press the “OK” softkey. HS settings Select the menu entry and press the “OK”... - Page 74 Handset settings The following settings are affected when the handset is reset: HS Setting Factory Default Language English Ring tone volume High (level 5) Ring tone melody Melody 1 Voice volume Medium (level 3) Low batt. warning Key click Out of range Display contrast Level 4 Log on...
-
Page 75: Base Station Settings
Base Station settings Setting the ring volume (BS) You can set the volume of the base station ring tone in 5 levels or switch it off completely. Open the menu by pressing the “Menu” softkey. Menu Settings Select the menu entry and press the “OK”... -
Page 76: Setting The Ring Melody
Base Station settings Setting the ring melody You can choose between 10 different ring tone melodies. Open the menu by pressing the “Menu” softkey. Menu Settings Select the menu entry and press the “OK” softkey. BS settings Select the menu entry and press the “OK”... -
Page 77: Changing Pin Code
Base Station settings Changing PIN code The PIN code is a 4-digit secret number to protect your telephone from unauthorised use. At the factory, the PIN code is initially set to “0000”. It is highly recommended to change this PIN code as soon as possible to your own personal code! Open the menu by pressing the “Menu”... -
Page 78: Time And Date
Base Station settings Time and Date To set the date and time on your Avena 135 /135 Duo follow the procedure below: Open the menu by pressing the “Menu” softkey. Menu Settings Select the menu entry and press the “OK” softkey. -
Page 79: Selecting The Flash Time
A so-called ‘flash’-signal is sometimes required to perform special network service func- tions. Ask your service provider for further details on when to use such a flash signal. Your Avena 135 /135 Duo has a dedicated key to generate this flash signal. -
Page 80: Resetting The Base Station
Base Station settings Resetting the base station With this procedure you can restore the base station settings to factory defaults. Open the menu by pressing the “Menu” softkey. Menu Settings Select the menu entry and press the “OK” softkey. BS settings Select the menu entry and press the “OK”... - Page 81 Base Station settings The following settings are affected when the base station is reset: BS Setting Factory Default Ring tone volume High (level 5) Ring tone melody Melody 1 Flash time 250 msec Call register Empty Network access code none PIN code 0000 Note...
-
Page 82: Supplementary Network Services
. In some cases a so-called “flash” character may be required. On your Avena 135 /135 Duo you can enter a flash character by pressing the R-key . This flash character is displayed on the handset as... -
Page 83: Using Network Services Through The Menu
Supplementary network services Using network services through the menu With your Avena 135 /135 Duo you don’t have to remember all these codes. Instead, you may use these supplementary network services through plain softkey or text menu selections! For example, if you want to set up a conference call between three parties, you don’t have to enter the function code which corresponds to this network service. -
Page 84: Editing/Programming Network Service Codes
Editing/programming network service codes Before using any of the supplementary network services please make sure that the cor- rect codes are stored in the Avena 135 /135 Duo. Here is how you can verify and edit these codes: Open the menu by pressing the “Menu” softkey. -
Page 85: Network Mailbox / Voicebox
• Make sure that the correct telephone number of your network mailbox is programmed in your Avena 135 /135 Duo. • In some cases your Avena 135 /135 Duo will not display a text indicating that you have new messages in your network mailbox. This may happen when the communication protocol used by your service provider is not compatible with the protocol supported in the Avena 135 /135 Duo. -
Page 86: Connecting To A Pbx
Connecting to a PBX Specifying the network access digit If your Avena 135 /135 Duo cordless telephone is connected to a PBX telephone system, you may have to specify a network access digit to seize an outside telephone line. If the first digit of a phonenumber matches this network access digit than your Avena 135 /135 Duo will insert a dial pause after this network access digit. -
Page 87: Multiple Handsets
Multiple handsets Log on the handset With the Avena 135 /135 Duo you can operate up to 5 handsets on the same base station . This allows you to make internal calls between handsets free of charge. For each handset a procedure must be followed which sets up a radio connection between the base station and the respective handset. -
Page 88: Log On To Multiple Base Stations
Avena 135 /135 Duo base station at home and another Avena 135 /135 Duo base station at work. When you log on your handset to both these base stations than you can take this handset with you from home to work and be able to make telephone calls at both locations with just one handset. -
Page 89: Switch To Another Base Station
Multiple handsets Switch to another base station After you have successfully logged your handset on to multiple base stations, you still need to assign the active base station through which you want to make your phone calls. At any given time, only 1 base station can be the active base station for your handset. -
Page 90: Appendix
Appendix Table of available characters Character (uppercase) Character (lowercase) [space] 1 € £ $ ¥ ¤ @ & / ( ) < = > % [space] 1 € £ $ ¥ ¤ @ & / ( ) < = > % a b c 2 à... -
Page 91: Technical Data
Appendix Technical data Standard: DECT / GAP Allowable ambient conditions for operation of the handset: Number of channels: 120 Duplex channels 5 ° C to 40 ° C. Frequencies: 1880 MHz to 1900 MHz Allowable ambient conditions for operation of the base station: Duplex process: 5 °... -
Page 92: Approval
Appendix Approval This DECT Cordless telephone complies with the fundamental requirements of R&TTE Directive 1999/5/EC and is suitable for connection and operation in the member country specified on the base station and/or on the packaging. CE-Certification The telephone fulfils the requirements of the EU Directives: Directive 99/5/EC on radio equipment and telecommunications terminal equipment and the mutual recognition of their conformity. -
Page 95: Warranty Certificate
Warranty Certificate Warranty Certificate Garantieschein, Bon de garantie, Certificato di garanzia, Garantiebewijs, Takuutodistus, Garantibevis, Garantisedel, Garantibevis, Certificado de Garantía, Talão de garantia device type: (Gerätetyp, type d’appareil, tipo di apparecchio, toesteltype, laitetyyppi, maskintype, apparattyp, apparattype, modelo del aparato, modelo do aparelho): serial number: (Seriennummer, numéro de série, numero di serie, serienummer, sarjanumero, serienummer, serienummer, serienummer, número de serie, número de série):... - Page 100 Internet: www.swissvoice.net © Swissvoice Ltd. 2004 All rights as well as product availability and technical changes reserved. 20401541en_ba_a0 SV 20401541...
Need help?
Do you have a question about the Avena 135 and is the answer not in the manual?
Questions and answers