BIXOLON SPP-R200II User Manual
Mobile printer
Hide thumbs
Also See for SPP-R200II:
- Command manual (147 pages) ,
- Connection manual (44 pages) ,
- Reference manual (42 pages)
Table of Contents
Advertisement
Quick Links
Advertisement
Table of Contents

Related Manuals for BIXOLON SPP-R200II


Summary of Contents for BIXOLON SPP-R200II
- Page 1 User's Manual SPP-R200II Mobile Printer Rev. 1.02 http://www.bixolon.com...
-
Page 2: Table Of Contents
SPP-R200II ■ Table of Contents ※ Manual Information & Usage Precautions · · · · · · · · · · · · · · · · · · · · · · · · · · · · · · · · · · · · · · · · · · · · · · · · · · · · · · · · · · · · · · · · · · 3 1. -
Page 3: Manual Information & Usage Precautions
This manual provides information on each character code page that can be used with this product. We at BIXOLON maintain ongoing efforts to enhance and upgrade the functions and quality of all our products. In following, product specifications and/or user manual content may be changed without prior notice. -
Page 4: Safety Precautions
SPP-R200II ■ Safety Precautions In using the present appliance, please keep the following safety regulations in order to prevent any hazard or material damage. WARNING Violating following instructions can cause serious injury or death. Do not plug several products in one multi-outlet. - Page 5 SPP-R200II CAUTION Violating following instructions can cause slight wound or damage the appliance. Keep the desiccant out of children’s reach. If you observe a strange smoke, odor or noise from the printer, unplug it before taking following • If not, they may eat it.
- Page 6 5. Do not directly connect the battery to an electrical power outlet not specified by BIXOLON or an automobile’s cigarette lighter jack. Doing so may result in overheating, combustion and/or explosion of the battery by over-current and/or over-voltage. 6. Do not heat the battery or place it near a fire. Doing so may melt insulation materials, damage the safety mechanism/equipment, and/or ignite the electrolytic solution.
- Page 7 SPP-R200II 10. Do not pierce the battery with a pointed object, such as nail or awl, or strike with a heavy object, such as a hammer, and take care not to step on the battery. There is a potential risk of battery overheating, combustion, and/or explosion caused by an internal short circuit.
- Page 8 10. There is a risk of explosion when replacing with an incorrect battery. Only exchange it for another one of the same or equivalent model specified by BIXOLON. Insulate the used battery by attaching insulation tape to its port, and then dispose of the battery according to local regulations.
-
Page 9: Other Precautions
BIXOLON Co., Ltd. is not legally liable for any damages resulting from the use of the information in this manual. BIXOLON Co., Ltd. and its affiliates are not legally liable (United States excluded) for any... -
Page 10: Content Confirmation
SPP-R200II 1. Content Confirmation The following items should all be contained in the printer package. Contact the dealer from which the purchase was made if any item is damaged and/or missing. ※ Basic items SPP-R200II Battery Pack Battery Charger Paper... -
Page 11: Product Part Names
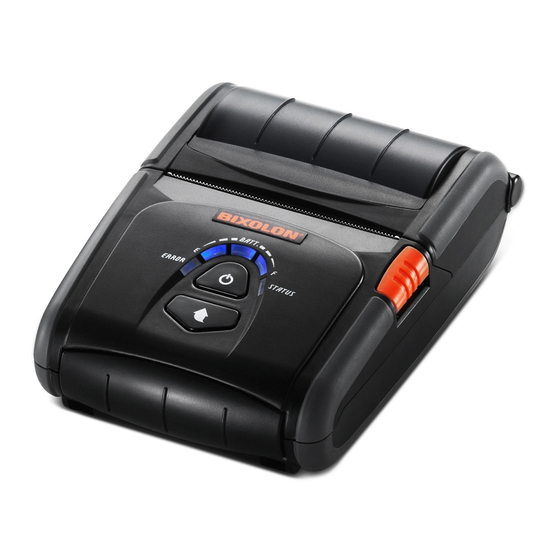
SPP-R200II 2. Product Part Names • Front Paper Cover Power Button Paper Feed Button Open Button MSR Cover • Rear Hole for mounting belt strap / belt clip Battery Interface Cap Cable Connection Power Connection - 11 - Rev. 1.02... -
Page 12: Installation & Usage
CAUTION The printer may incur serious damage if the battery charger provided by BIXOLON is not used. BIXOLON is not legally liable for any such damages. (The voltage and electrical current specifications of the printer and battery charger must match.) -
Page 13: Using Single Battery Cradle (Optional)
① CAUTION The printer may be seriously damaged if a battery charger not provided by BIXOLON is used. BIXOLON is not liable for such damage. WARNING Turn off the power before charging the battery for the printer. - 13 -... -
Page 14: Using Single Docking Cradle (Optional)
SPP-R200II 3-2-4 Using Single Docking Cradle (Optional) 1) Turn the printer off. 2) Slide the printer in the single docking cradle as shown in the picture. 3) Push the printer in until a clicking sound is heard. 4) Charging will begin when the printer is installed. - Page 15 SPP-R200II 3-2-5-2 Charging Battery (Printer) 1) Fasten batteries via the battery hooks into the quad battery charger as shown above. 2) Push the battery in until a snapping sound is emitted. 3) Charging begins as soon as the battery is completely inserted.
-
Page 16: Paper Installation
SPP-R200II 3-3 Paper Installation 1) Press the Open button to open the paper cover. 2) Insert the paper as shown in the image. (Remove any remaining core of a fully used paper roll.) 3) Take care to align the paper correctly. -
Page 17: Using Belt Strap
SPP-R200II 3-4 Using Belt Strap 1) Insert the belt strap screw into the belt strap hole. Belt Strap Coin 2) Use a coin to tighten the belt strap screw as shown in the image. Belt 3) Undo the belt strap Velcro. -
Page 18: Using Belt Clip (Optional)
SPP-R200II 3-5 Using Belt Clip (Optional) 1) Insert the screw of the belt clip to the belt clip mounting hole. Coin Belt Clip 2) Fasten the screw of the belt clip with an object like a coin as shown in the picture. -
Page 19: Using Case (Optional)
SPP-R200II 3-6 Using Case (Optional) 1) Open its top cover 2) Insert the printer in the case in the direction shown in the picture. 3) Close the Velcro. 4) Attach it to the belt using the clip on the back of the case. -
Page 20: Using Protective Case (Optional)
SPP-R200II 3-7 Using Protective Case (Optional) 1) Open its top cover. 2) Insert your printer into the protective case as shown in the figure on the left. 3) Close the Velcro. 4) Attach it to the belt using the clip on the back of the protective case. -
Page 21: Using Vehicle Holding Cradle (Optional)
SPP-R200II 3-8 Using Vehicle Holding Cradle (Optional) 1) Assemble the vehicle holding cradle to the mount. 2) Adjust the vehicle mount properly, put the suction plate close to the glass, and pull the level to fix the position. (Use the disk pad to mount it on the... -
Page 22: Using Control Panel
SPP-R200II 3-9 Using Control Panel • Power Button This button is used to turn the printer on and off. When the printer is off, pressing this button for approximately 2 seconds will turn the power on. When the printer is on, pressing this button for approximately 2 seconds will turn the power off. -
Page 23: Using Msr
SPP-R200II 3-10 Using MSR 1) Press the MSR cover to open. 2) Insert the card as shown in the image and swipe in the direction of the arrow. (can be done in both directions) 3) When finished using, press the MSR cover to close it. - Page 24 SPP-R200II • Self-Test Sample (For Bluetooth) Firmware version : V01.00 STOB 050412 : 128K Bytes Butter Capacity : 100% Print Density Serial Interface - Baud rate : 115200 bps Data bits : 8 bits Parity : None Stop bit : 1 bit or more...
- Page 25 å ç ê ë è ïîìÄ Å É æ Æ ô ö ò û ù ÿ Ö Ü ¢ £ ¥ P t ƒ á í ó ú ñ Ñ - System Name : SPP-R200II ç ê ë è ïîìÄ Å É æ Æ ô ö ò û ù ÿ Ö Ü ¢ £ ¥ P t ƒ á í ó ú ñ Ñ ª...
-
Page 26: Label Printing Function
SPP-R200II 5. Label Printing Function 5-1 Label Function Setting Label paper and black mark paper available at the label mode. • Setting Operations 1) Turn on the printer power. 2) Open the paper cover and press and hold down the paper feed button for longer than two seconds. -
Page 27: Ios Mfi Mode Setting (Optional)
SPP-R200II 6. iOS MFi Mode Setting (Optional) This product supports MFi mode that enables Bluetooth communication with iOS devices. (Applicable to MFi support models only) • How to enable and disable MFi mode 1) Turn on the printer. 2) Open the paper cover and press the power button and paper feed button at the same time for longer than two seconds. -
Page 28: Peripherals Connection
2) Connect the interface cable (optional) ② to the cable connector of the printer. NOTE Use only cables (optional) provided by ① BIXOLON (USB, Serial). 3) Connect the interface cable to the USB port of the device (PDAs, PCs, etc.). ② NOTE... -
Page 29: Printer Cleaning
Warning • Use only the linerless paper that is provided by BIXOLON. Use of other paper voids product warranty. • Use only the cleaning pen (PCP-R200II) provided by BIXOLON for cleaning. -
Page 30: Appendix
SPP-R200II 9. Appendix 9-1 Specifications Item Description Printing Method Thermal printing Printing Speed 90 mm/sec (Receipt Paper), 80 mm/sec (Linerless Paper) Resolution 203 DPI Paper Supply Easy paper loading Mode Character Size Font A: 12 × 24 Font B: 9 × 17 Font C: 9 ×... -
Page 31: Certification
<Warning> The battery has the potential risk of overheating, fire and/or explosion. To avoid such risks, observe the following instructions: • A visibly swollen battery may be dangerous. Contact BIXOLON or your local dealer. • Only use an eligible charger. -
Page 32: Label Types
To avoid incommoding reflexions at visual display workplaces this device must not be placed in the direct field of view 9-3 Label Types The labels used on this product are composed of the following materials; • BIXOLON logo label: PC • Rating Label: PP • Other labels: PET - 32 -...
Need help?
Do you have a question about the SPP-R200II and is the answer not in the manual?
Questions and answers