Table of Contents
Advertisement
Quick Links
Advertisement
Table of Contents

Related Manuals for NSM Music apollo

Summary of Contents for NSM Music apollo
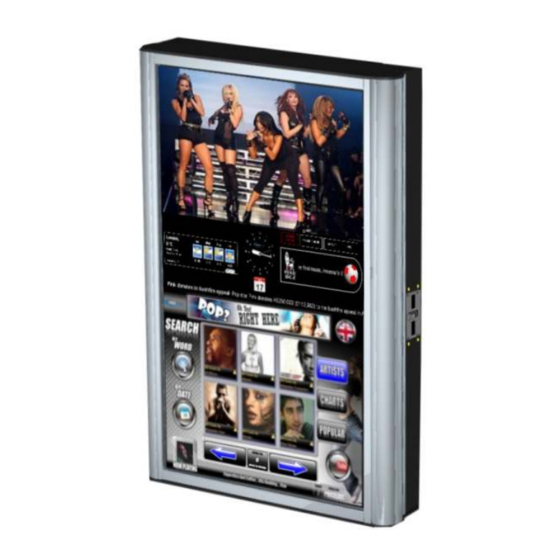
- Page 1 MUSIC SYSTEMS OF THE FUTURE apollo icon a p o l l o USER MANUAL...
-
Page 2: Table Of Contents
Jukebox User Manual a p o l l o Table of Contents USER INTERFACE Main Menu............1 Search...............2 Artists..............6 Charts............... 8 Popular..............9 Feature*..........10 Language Selector..........14 SERVICE MODE Main Menu............15 Monetary............17 Updates............20 Scrolling Message..........22 Popularity............25 Book Keeping...........28 Volume Control..........30 Play Settings............ -
Page 3: User Interface
USER INTERFACE... -
Page 4: Main Menu
Pizza Restaurants, Limousine Hire and of course to advertise your own business. Also if your new Icon Apollo is online and is able to receive updates via the internet, you can easily check to see if your jukebox is currently connected to the internet or not by the... -
Page 5: Search
Search The Icon Apollo has its Search feature split into 2 areas: By Word and By Date. Fig 1.1 below shows the screen the user will see when they press the Search By Word Button. As you will have noticed by now, all the buttons in the jukebox are interactive. - Page 6 fig. 1.1.4 - Search By Word List View The List View in the Search By Word Search screen displays the results of your search. The Background colour of each result changes depending on whether it is an Audio ( Blue background) or Video* ( Purple background).
- Page 7 Advertisements alphabetical like this appear order on all of the Screens on the Icon Apollo. These can be customised to advertise your own premises or products When the user presses the Search By Date button on the Main Menu screen (fig.
- Page 8 Selecting Track to Play Using Search Once the user is happy filtering their search, whichever option they go down and wish to play a Track from their search results, the user simply presses on the track in the List View (fig. 1.1.4), which highlights in Grey to inform you that you have pressed it (fig.
-
Page 9: Artists
Artists The Icon Apollo’s Artists section is accessed via the Main Menu screen (fig.1.0) by pressing the Artists button. This will alter the screen as shown below in fig.1.2. The user is now able to browse the list of Artists using the Scroller Control at the bottom (fig. 1.2.1). You will know when you have selected the... - Page 10 Artist Tracks screen fig. 1.2.2 - Artist Tracks Selection screen On the Artist Tracks Confirmation screen, the user will be presented with the screen shown above which shows them the Image of the Artist they have selected and the Artist name to the right hand side of the image. Below the image will be displayed a list of all the current Tracks by that artist in alphabetical order, whether they are Audio or Video Tracks (if the Jukebox is Video enabled) and Tracks that are available for...
-
Page 11: Charts
Charts The Icon Apollo’s Charts section is accessed via the Main Menu screen (fig.1.0) by pressing the Charts button. This will alter the screen as shown below in fig.1.3. The user is now able to browse the list of current Tracks by Artists that are in the charts using the Scroller Control at the bottom of the screen. -
Page 12: Popular
Popular The Icon Apollo’s Popular section is also accessed via the Main Menu screen (fig.1.0) by pressing the Popular button. This will alter the screen as shown below in fig.1.4. The user is now able to browse the list of Popular Tracks by Artists that are on the Jukebox using the Scroller Control at the bottom of the screen. -
Page 13: You
Feature The Icon Apollo has a new optional feature which allows the user to access YouTube via the Jukebox. This option is only accessible to Jukeboxes who are online and have the optional YouTube Upgrade Kit. The user can access the YouTube feature via the button on the Main Menu screen (fig.1.5). This will then open up a screen which navigates to the YouTube screen homepage (fig.1.5.1) - Page 14 Navigation Buttons fig. 1.5.2 - Main YouTube screen navigation buttons The YouTube screen has three main navigation buttons at the top left hand side. the first button with the YouTube logo is to allow the user to navigate back the main homepage. The other two buttons are used to navigate the pages backward or forward.
- Page 15 Message Screens fig. 1.5.7 - Buy Time Information Message After the initial 15 seconds on the YouTube screen, if there are any existing credits on the Jukebox, this message will appear in the middle of the screen informing the user that in order to use the YouTube site they will need to insert 1 credit.
- Page 16 Ipac. Use the adhesive holding it in place. cable tidies for surplus cable. Please Note: Ensure your Icon Apollo is connected to the internet. Power on, the YouTube logo should appear on the main menu. Enjoy.
-
Page 17: Language Selector
Language Selector The Icon Apollo has the capability of having its entire user interface transformed into another language at the touch of a button via the Main Menu screen (fig. 1.0) by pressing the button with the country flag at the top right hand side* (fig. 1.6.1). This will show the screen show below (fig. 1.6) which allows the user to select a language of their choice from a list of the main European languages. -
Page 18: Service Mode
SERVICE MODE... -
Page 19: Main Menu
Main Menu Once the Icon Apollo’s Service Switch has been pulled on the inside of the Jukebox, the Main Menu screen (fig. 2.0) is displayed. This gives the user access to options to customize their own Jukebox and see how much money the Jukebox has been taking. The service mode section of this user manual is only for Jukebox Operators. - Page 20 fig. 2.0.2 - Screen Calibration screen The screen above shows what happens when the user presses the Screen Calibration Button. When the button is pressed this new screen appears allowing the user to set up the touch screen, or to re-calibrate the touch screen after it has not been functioning as well as it should.
-
Page 21: Monetary
Monetary Once the user presses the Monetary button on the Service Mode Main Menu, The screen in fig. 2.1 will appear. In this screen if any of the numerical fields requires altering, the user presses in the field they wish to alter, which will be highlighted in (In this case in fig. - Page 22 €, £, Rs, ¥, $ (Or to any currency of the Users Choice if specified to NSM Music before production). Preset to country of origin. Clicking either the Before or After button, places the currency symbol either before or after the number.
- Page 23 The Preview Box displays a preview of the current currency symbol and position settings. If any of them are altered the Preview Box automatically updates itself. fig. 2.1.1 - Preview Box The Numerical keypad allows the user to alter any of the numerical monetary settings and any field that requires numerical input in any further Service Mode screens.
-
Page 24: Updates
Updates If the user presses the Updates button on the Service Mode Main Menu screen (fig. 2.0), the following screen is displayed: fig. 2.2 - Updates screen This field displays messages to the user when either of the three The CD/DVD buttons are Update button pressed. - Page 25 The following messages appear when the user inserts a CD/DVD or USB Flash Memory Stick and presses either the CD/DVD Update or USB Update button: fig. 2.2.3 - CD/DVD/USB Update Message 1 If this message occurs, re-insert the CD/DVD or USB Flash Memory Stick and try the update again.
-
Page 26: Scrolling Message
(TV). The Scrolling Message is automatically preset to: “Make your favourite title selections at the New Jukebox from NSM Music : The Icon!” However, this can be altered to anything the user wishes. fig. 2.3 - Scrolling Message screen The Scrolling message can be altered to any message the user wishes by using the On-Screen Keyboard (fig. - Page 27 The Text Box field shows the text entered by the user on the keyboard, if altered, or the default message text. fig. 2.3.2 - Scrolling Message Text Box field The Clear Button The Start button moves the text The End button clears ALL the text in in the Text Box field to the moves the text in the...
- Page 28 fig. 2.3.5 - Scrolling Message Preview When the user presses the Preview Message button, above the Text Box field will commence a scrolling preview of the default message or any message created by the user.
-
Page 29: Popularity
Popularity If the user presses the Popularity button on the Service Mode Main Menu screen, the screen below (fig. 2.4) is shown. The Popularity screen displays a list of all the songs/videos by order of most played. The Popularity screen is set to default to sort the Popularity List by track. fig. - Page 30 The Popularity List displays all the songs in order of Most Played. The Popularity List lists the: Title, Artist, and Number Of Plays the track has received. As you may see, the Popularity List is in 2 colours, Blue Purple .
- Page 31 fig. 2.4.3 - Popularity List displayed by Artist If the user presses Sort By Popularity By Artist button, the Popularity List has now changed colour, displaying only the Artist Name and the Total number of songs played by that Artist. fig.
-
Page 32: Book Keeping
Book Keeping The Book Keeping screen allows the user to find out the total number of paid for songs, over plays, the total number of credits used, and the total amount of cash taken between two specific dates, which can then be saved on a USB Flash Memory Stick for future reference if desired. In fig. - Page 33 fig. 2.5.1 - Book Keeping figures The figures in the four headings in fig. 2.5.1 are calculated when the user changes the Period From and Period To dates (fig. 2.5.2) and clicks the Calculate button. As default the dates are set to when the Jukebox was initially set up till the current date so far.
- Page 34 Settings The Settings Screen allows the user to make changes to the Audio volume and quality of the Jukebox. fig. 2.6 - Settings screen fig. 2.6 - Settings screen The Reset Button The Play Test restores all the Track Button plays Settings to default.
-
Page 35: Volume Control
fig. 2.6.3 - YouTube Volume Box Settings The YouTube Volume box, if the Kit is installed, (fig. 2.6.3) has only one bar (its own separate speaker) with the option to set the maximum volume limit of the YouTube feature to anything from 0-79. They can be adjusted by using the Up and Down arrows on each bar. -
Page 36: Play Settings
Play Settings The Play Settings Screen allows the user alter the AutoPlay delay time, the number of songs to play when the AutoPlay is Enabled. It also lets the user edit the number of credits for the Jukebox. All the values in the fields in fig. - Page 37 fig. 2.7.1 - Play Settings In fig. 2.7.1 the user can set limits for Credits and timing for the AutoPlay of songs. These and all other settings can be altered by using the Numerical keypad on the right hand side of the screen. The Autoplay Interval sets the time interval (e.g.
- Page 38 fig. 2.7.2 - Play Settings buttons The Auxiliary Mode Button enables the The Free Play Button allows the user to auxiliary inputs on the Jukebox so if no select any music on the Jukebox without music is being played on the Jukebox at the charge.
-
Page 39: Price Lists
Price Lists The Price Lists Screen allows the user to set prices for Peak and Off Peak Modes and edit the days and times which the Peak and Off Peak prices apply. fig. 2.8 - Price Lists screen The Reset Button clears ALL the saved Peak and Off Peak days... - Page 40 The numbers here indicate the hours in a day fig. 2.8.1 - Peak/Off Peak Table (e.g. 08 = 08:00am). Days of the week yellow green dots in the table in fig. 2.8.1 identify what time and day the Jukebox prices are Peak and Off Peak. The yellow dots signify Off Peak and the green...
-
Page 41: Network
Jukebox. These fields will be blanked out by default when you receive the Icon Apollo as it is set to DHCP. These settings should only ever be altered if told to do so by NSM Music. If you have any queries, please contact NSM Music. - Page 42 If the user wishes to test to see if there is an active internet connection, they can simply press either of the two buttons NSM Music or Google. These will automatically send a signal to these addresses (www.nsmmusic.com or www.google.com) and bounce back a reply from these websites to see if they are reachable.
-
Page 43: Bgm
2.10 The BGM (Background Music) section accessed via the Service Mode Main Menu screen (fig. 2.0) displays the initial screen below. Here the user will be faced with 4 main options: 1.Playlists – to allow the user to search for and add their music to a custom playlist 2.Mixers –... - Page 44 1. Playlists When the user selects the PLAYLISTS button on the main BGM screen (fig. 2.10) the screen below will be displayed. In fig.2.11 you can see that there is a playlist entitled 'EXAMPLE' in the list box. The list box has 3 headings: ? ID ? PLAYLIST NAME ? # TRACKS...
- Page 45 To Create a New Playlist: To create a new playlist press the button. This will display the following screen: fig. 2.10.2 - Edit/Add Name screen Next enter a name for your playlist using the on-screen keyboard (there is a backspace button and a delete button if you make any errors).
- Page 46 Next you select the tracks you want to add into your playlist. There are 3 main ways you can do this. Firstly, you can scroll through the whole list via the Up & Down Arrows or the Slider control (fig.2.10.3) and touch the tracks you want to add which will then be highlighted in Yellow.
- Page 47 To Copy a Playlist: To copy a playlist, simply select the playlist you want to copy in the Playlist Selector screen (fig.2.10.7) and press the button. fig. 2.10.7 - Playlist Selector screen showing highlighted This will then create a copy towards the top of the list with the text “COPY OF” before your playlist as shown below.
- Page 48 To Edit a Playlist: To edit a playlist you press the playlist you want to edit which will be highlighted in Yellow and then press the button. You will then be presented with the same screen as in fig.2.10.2. Here you can edit the name of the playlist to whatever you want by either clearing the text by pressing the DEL button or by using the BACKSPACE button on the on-screen keyboard.
- Page 49 2. Mixers When the user presses the MIXERS button from the main BGM screen (fig.2.10) the screen below will be displayed: fig. 2.10.11 - Music Mix Selector screen The user will be presented with a list of different mixes to choose from in the List Box. The List Box is ALWAYS arranged in ascending order by ID.
- Page 50 This screen has the following buttons to allow the user to switch between different lists, select all the tracks in the list and show either all the selected tracks in the mix or not. fig. 2.10.13 - Music Mix List View Sort By buttons The 3 buttons opposite the list view allow the user to search for tracks in 3 different and independent databases (Artists, Genres or Years).
- Page 51 fig. 2.10.17 - Music Mix List View This column either displays Tracks column in list view. the Artist, Genre or Year This displays the number of tracks by a particular Artist or in a specific Genre or Year. The user can check the current number of tracks in your playlist by looking in the field in the top right hand corner.
- Page 52 3. Shedules When the user selects the SCHEDULE button on the main BGM screen (fig. 2.10) the screen below will be displayed. The Up and Down arrows can be used to scroll the list and when there are more than 10 Schedules in the list a Slider control appears. fig.
- Page 53 fig. 2.10.19 - Schedule Music Selector screen In the screen above the user is confronted with 2 list views, one displays all of the Playlists you have made in the Playlist Selector section and the other displays all of the Mixes in the Music Mix Selector section that you have made –...
- Page 54 This displays the fig. 2.10.20 - Schedule Allocation screen Hours of the day i.e. the numbers 10 – 12 indicate the hours between 10 and 12 am. This displays the days of the week This is the grid and also has a CLR where you can button for each day allocate your...
- Page 55 fig. 2.10.21 - Example of Schedule Allocated In the above screen you can see, as an example that various blocks have been put in to the Schedule “Example Afternoon” on a Friday from 9am until 11pm. If you made a schedule like this you would have to press the FINISH button to save the changes.
- Page 56 4. Settings When the user presses the SETTINGS button on the main BGM screen (fig. 2.10) the screen below will be displayed: fig. 2.10.23 - BPM Settings screen This screen has 3 settings to set the range of BPM's for various tracks: ? SLOW –...
- Page 57 fig. 2.10.24 - Altering the BPM Settings Use Numerical Keypad to enter a number. Make the same alterations to suit for the rest of the settings.
-
Page 58: Lockouts
2.11 Lockouts When the user presses the Lockouts button on the Service Mode Main Menu screen (fig. 2.0), the screen as shown in fig. 2.11 is displayed. This screen splits up the Lockouts section into 2 parts: Tracks and Genre. These sections will each be discussed in further detail below, firstly the Tracks Lockout section. - Page 59 Tracks Lockouts The Tracks Lockouts Screen enables the user to select any Tracks that the user does not wish to play due to explicit content or of other factors. To lock a Track, all the user has to do is click on the track or artist they wish to lock or type in the Artist/Track using the on-screen keyboard.
- Page 60 fig. 2.11.4 - Track/Artist buttons fig. 2.11.5 - Reset Search/Unlock All Tracks buttons The Track and Artist buttons (fig. 2.11.4) allow the user to The Reset Search button (fig. 2.11.5) clears any toggle the list view to show text entered by the user in the Text Field and either the Tracks or the refreshes the list view back to the start.
- Page 61 Genre Lockouts The Genre Lockouts Screen enables the user to select any genres that the user does not wish to play (e.g. to lock all Rap Music songs). To lock a Genre, all the user has to do is press on the Genre they wish to lock in the List View. Hence, any tracks that appear in this Genre will not be displayed as well as the genre on the main Jukebox Interface.
- Page 62 fig. 2.11.13 - Locking a Selected Genre The Screen above shows a selected Genre which has been 'Locked Out' Yellow (highlighted in ). It can be unlocked by clicking on the Genre again or by clicking the Unlock All Button.
-
Page 63: Admin
2.12 Admin When the user presses the Admin button on the Service Mode Main Menu screen (fig. 2.0), the screen as shown in fig. 2.12 is displayed. The Admin Mode is t o control advanced settings in the BGM music database. Requires authentication - for operators ONLY fig. - Page 65 NSM Music Ltd Unit 4 Maple Park Lowfields Avenue Leeds LS12 6HH United Kingdom Tel. +44 (0)113 2713708 Fax +44 (0)113 2705648 Email: sales@nsmmusic.com...
Need help?
Do you have a question about the apollo and is the answer not in the manual?
Questions and answers