Table of Contents
Advertisement
Flammable Vapor Ignition Resistant Compliant
Power Vented
Gas Water Heater
Installation
Instructions and
Use & Care Guide
WARNING: If the information in these
instructions is not followed exactly, a fire
or explosion may result causing property
damage, personal injury or death.
Do not store or use gasoline or other
flammable vapors and liquids in the
vicinity of this or any other appliance.
WHAT TO DO IF YOU SMELL GAS
•
Do not try to light any appliance.
•
Do not touch any electrical switch;
do not use any telephone in your
building.
•
Immediately call your gas supplier
from a neighbor's telephone. Follow
the gas supplier's instructions.
•
If you cannot reach your gas
supplier, call the fire department.
Installation and service must be performed
by a qualified installer, service agency or
the gas supplier.
To obtain technical, warranty, or service assistance contact
place of purchase or local distributor.
1-800-456-9805
When calling for assistance, please have the
following information ready:
1.
Model number
2.
7 digit product number
3.
Serial number
4.
Date of installation
5.
Place of purchase
Table of Contents
. . . . . . . . . . . . . . . . . . . . . . . . . . . . . . . 2
6510331
September 2004
1
Advertisement
Table of Contents

Summary of Contents for Power Flex Power VentedGas Water Heater
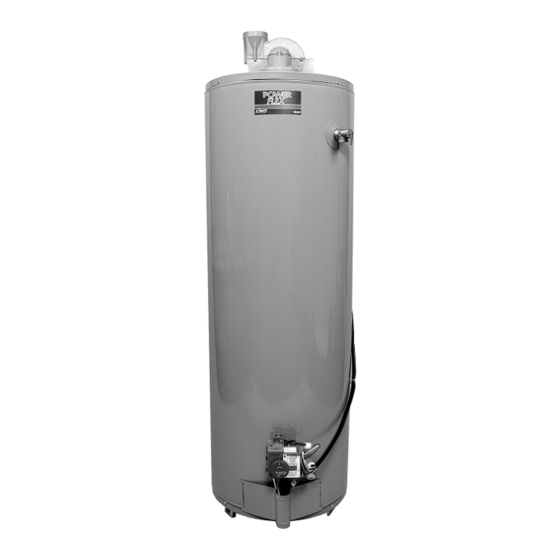
- Page 1 Flammable Vapor Ignition Resistant Compliant Power Vented Gas Water Heater Installation Instructions and Use & Care Guide WARNING: If the information in these instructions is not followed exactly, a fire or explosion may result causing property damage, personal injury or death. Do not store or use gasoline or other flammable vapors and liquids in the vicinity of this or any other appliance.
-
Page 2: Table Of Contents
Your safety and the safety of others are very important. We have provided many important safety messages in this manual and on your appliance. Always read and obey all safety messages. This is the safety alert symbol. This symbol alerts you to potential hazards that can kill or hurt you and others. All safety messages will follow the safety alert symbol and either the word “DANGER”... -
Page 3: Installing Your Gas Water Heater
INSTALLING YOUR GAS WATER HEATER Consumer Information This water heater is design-certified by CSA International as a Category IV, non-direct vented water heater which takes its combustion air either from the installation area or from air ducted to the unit from the outside. This water heater must be installed according to all local and state codes or, in the absence of local and state codes, the “National Fuel Gas Code”, ANSI Z223.1(NFPA... -
Page 4: Location Requirements
Location Requirements Do not use or store flammable products such as gasoline, solvents, or adhesives in the same room or area near the water heater. If such flammables must be used, all gas burning appliances in the vicinity must be shut off and their FIRE AND EXPLOSION HAZARD pilot lights extinguished. -
Page 5: Clearances And Accessibility
FIGURE 1 Important: The water heater should be located in Minimum Clearance Vent an area where leakage of the tank or connections will Locations Top to not result in damage to the area adjacent to the water ceiling heater or to lower floors of the structure. Due to the Back normal corrosive action of the water, the tank will eventually leak after an extended period of time. -
Page 6: Gas Supply
GAS SUPPLY FIGURE 2 Gas Piping Manual gas shut-off valve Install a readily acces- sible manual shut-off valve in the gas supply line as recommended by the local utility. Gas Pressure Important: The gas supply pressure must not exceed the maximum supply pressure as stated on the water heater’s data plate. -
Page 7: Combustion Air Supply/Vent Pipe System
COMBUSTION AIR SUPPLY/VENT PIPE SYSTEM • buildings with indoor pools • water heaters installed in laundry, hobby, or craft rooms • water heaters installed near chemical storage areas Combustion air must be free of acid-forming chemicals such as sulfur, fluorine, and chlorine. These elements are found in aerosol sprays, detergents, bleaches, clean- ing solvents, air fresheners, paint, and varnish removers, refrigerants, and many other commercial and household... -
Page 8: Unconfined Space
Unconfined Space FIGURE 3 Opening Locations A water heater in an unconfined space uses indoor air for Confined Spaces combustion and requires at least 50 cubic feet for each 1,000 BTUH of the total input for all gas appliances. The table below shows a few examples of the minimum square footage (area) required for various BTUH inputs. -
Page 9: Louvers And Grilles
All Air from Outdoors FIGURE 5 All Air From Outdoors: Inlet Air Outdoor fresh air can be provided to a confined area either From Ventilated Crawl Space/ Outlet Air To Vented Attic directly or by the use of vertical and horizontal ducts. The fresh air can be taken from the outdoors or from crawl or attic spaces that freely communicate with the outdoors. -
Page 10: Vent Pipe System
Vent Pipe System American Society for Testing and Materials (ANSI/ASTM) standards in the United States. This water heater has been This water heater must be properly vented for removal of design certified by CSA International for use with the speci- exhaust gases to the outside atmosphere. -
Page 11: The Gas Supplier
In addition to maintaining the minimum clearances , the Vent Termination Locations vent should terminate according to the following guidelines: The exhaust outlet must be installed with the following 1. Do not expose any reducers or bushings to outdoor minimum clearances (see figure 9): ambient temperatures. -
Page 12: Outlet Terminations
OUTLET VENT TERMINATIONS Standard Horizontal Termination Vertical Termination The standard horizontal exhaust outlet termination is a 2 The vertical exhaust outlet requires a return bend or two inch or 3 inch pipe which terminates 12 inches from the medium or long sweep radius 90° elbows to keep the outside wall (see figure 10). -
Page 13: Water System Piping
WATER SYSTEM PIPING Piping Installation FIGURE 12 Typical Water Piping Installation Piping, fittings, and valves should be installed according to the installation drawing (Figure 12). If the indoor installation area is subject to freezing temperatures, the water piping must be protected by insulation. Water supply pressure should not exceed 80% of the work- ing pressure of the water heater. -
Page 14: Temperature And Pressure Relief Valve
Closed System/Thermal Expansion FIGURE 14 Temperature and Pressure Periodic discharge of the temperature and pressure Relief Valve Installation relief valve may be due to thermal expansion in a closed water supply system. The water utility supply meter may contain a check valve, backfl ow preventer or water pressure reducing valve. -
Page 15: Electrical Connections
ELECTRICAL CONNECTIONS Before plugging in the water heater, always make sure: The voltage and frequency correspond to that specified on the water heater wiring diagram. Electrical Shock Hazard The electrical outlet has the proper overload fuse or Disconnect power before breaker protection. -
Page 16: Installation Checklist
INSTALLATION CHECKLIST Water Heater Location • Acceptable size, length, and number of elbows on exhaust outlet pipe. • Centrally located with the water piping system. • Installed in accordance with prevailing provisions of Located as close to the gas piping and vent pipe local codes, or in the absence of such, National Fuel system as possible. -
Page 17: Operating Your Water Heater
OPERATING YOUR WATER HEATER Lighting Instructions L.P.G. (Bottled Propane) Models Liquefi ed petroleum gas is over 50% heavier than air Read and understand these directions thoroughly before and in the occurrence of a leak in the system, the gas attempting to operate the water heater. Make sure the will settle at fl... -
Page 18: Water Heater Operation
Water Heater Operation Figure 15 below shows the water heater’s sequence of operation when a call for heat is initiated. The ignition con- trol module will attempt to light the burner three times. If the ignition control does not detect ignition it will enter lock- out mode, indicated by a three flash error code. -
Page 19: Operational Conditions
Operational Conditions Anode Rod/Water Odor Condensation Each water heater contains at least one anode rod, which will slowly deplete while protecting the glass-lined tank from corrosion and prolonging the life of the water heater. Moisture from the products of combustion condenses on Certain water conditions will cause a reaction between the tank surface and the outside jacket of the water heater this rod and the water. -
Page 20: Maintenance Of Your Water Heater
MAINTENANCE OF YOUR WATER HEATER Draining and Flushing Temperature and Pressure Relief Valve It is recommended that the tank be drained and fl ushed every 6 months to remove sediment which may build up during operation. The water heater should be drained if being shut down during freezing temperatures. -
Page 21: Replacement Parts
Replacement Parts FIGURE 20A Natural Gas Burner Assembly Replacement parts may be ordered through your plumber or the local distributor. Parts will be shipped at prevailing prices and billed accordingly. When ordering replacement parts, always have the following information ready: 1. - Page 22 Removing and Replacing the Gas Control Valve/Thermostat Important: Use only factory authorized replacement parts. 1. On the gas control valve/thermostat turn the tem- perature dial counterclockwise to its lowest setting. Depress the gas control lever to turn it to the “OFF” position (Figure 17).
-
Page 23: Troubleshooting Flowchart
TROUBLESHOOTING FLOWCHART... -
Page 24: Repair Parts Illustration
REPAIR PARTS ILLUSTRATION When ordering repair parts always give the following information: 1. Model, serial and product number 2. Type of gas 3. Item number 4. Parts description Repair Parts List Item Parts Description Blower Outlet Pressure Switch (Not Pictured) Flue Baffle Heat Trap (Cold) Heat Trap (Hot) -
Page 25: Listed Parts Kits And Illustrations
Listed Parts Kits and Illustrations Item 12: Pilot Assembly. (Note: Pilot Assembly is specific to type of gas, please specifiy model for correct assembly.) Item 13: Burner (Natural Gas) Item 14: Burner (L.P. Gas) 42K BTU/Hr & 50T60 Models Item 15: Manifold door assembly which contains the manifold tube, gasket, door, pilot tube, two piece wire connector with retainer clip, and pilot assembly.
Need help?
Do you have a question about the Power VentedGas Water Heater and is the answer not in the manual?
Questions and answers
How to replace the anode rod