Table of Contents
Advertisement
Advertisement
Table of Contents

Related Manuals for VTech KidiGo


Summary of Contents for VTech KidiGo
- Page 1 User’s Manual ® © 2013 VTech Printed in China 91-002866-005...
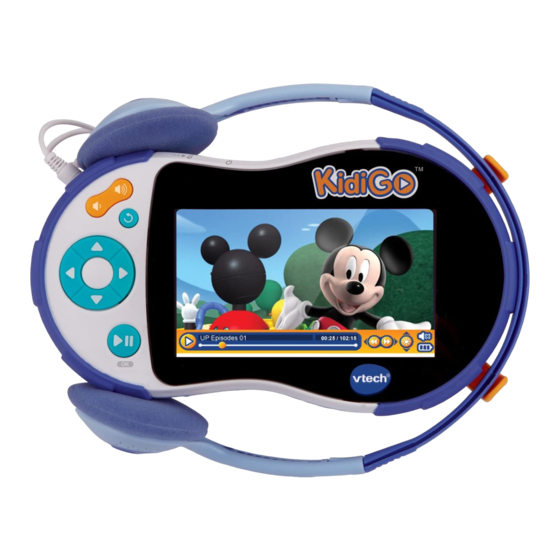
- Page 3 It features 2GB of internal storage, a microSD card slot, headphones and USB cable. You can also play through 5 great built-in games and watch a slideshow of your photos. Connect to the VTech Learning Lodge to access a whole library of great music and entertaining...
-
Page 4: Included In This Package
Plug the included USB cable into this port to connect to your computer. Memory Card Slot Insert a microSD card here for memory expansion. Stand Pull the stand outwards, so that KidiGo can be propped up at the ideal ® viewing angle on a flat surface. Refer to the section “Player Stand”. -
Page 5: Product Specification
Temperature *KidiGo supports MPEG4 SP(XVID) formatted video playback. Most ® video formats can be converted to work with KidiGo using third party ® software (not included). There may be legal restrictions associated with the use of commercial video files, movies, programs and other content for which VTech accepts no responsibility or liability. -
Page 6: Battery Installation
Battery InstaLLatIon Note: Adult assistance is required for battery installation. • Make sure the unit is turned OFF. • Locate the battery compartment door on the bottom of KidiGo . Slide ® the battery compartment door in the direction of the marked arrow to open. -
Page 7: Battery Status
Battery status When the screen shows a Low Battery icon , we recommend installing a fresh set of batteries as soon as possible. The unit will not work properly when it shows the Batteries Exhausted icon New batteries should be inserted before further use. Battery notIce •... -
Page 8: Notice To Parents
• Make sure your KidiGo is turned off. ® • Connect the adaptor to the adaptor jack of KidiGo ® • Plug the adaptor into a mains power socket. Note: The use of an adaptor will override the batteries. When the toy is not going to be used for an extended period of time, unplug the adaptor. -
Page 9: Memory Card Installation
To prevent accidental data loss, make sure you have backed up all important data from your memory card before using. It is recommended to format your memory card before first use. to BegIn usIng kIdIgo ® • Press the ON/OFF Button to turn on the unit. -
Page 10: Online Registration
In the event of registration process failure, KidiGo may be unable to ® connect to the VTech Learning Lodge unless the unit is reset. To do this, enter Settings in the main menu of KidiGo , then press the Left ®... - Page 11 You can connect KidiGo to a PC or Mac computer using the included ® USB cable. Once connected, you can connect to VTech Learning Lodge or transfer files between the unit and computer. Please refer to the following steps.
-
Page 12: Connecting With A Computer
• Turn the unit OFF before connecting to a computer. • Pull up the rubber cover of the USB port on your KidiGo ® • Insert the small end of the USB cable into the USB port on the KidiGo ®... -
Page 13: Main Menu
1. Video Player Here you can watch videos that have been downloaded from VTech Learning Lodge or your own videos stored in the VIDEO folder of the built-in memory or memory card (if inserted). Video should be converted to supported format before transferring to KidiGo . -
Page 14: Music Player
NOTE: The auto-off function will be disabled until the video is stopped or finishes. 2. Music Player Here you can listen to music downloaded from VTech Learning Lodge or your own MP3 files stored in the MUSIC folder of the built-in memory or memory card (if inserted). -
Page 15: Photo Viewer
Press the Return button to return to the Music Home Menu and select another music album or track. While playing music, press the Play/Pause (OK) button to pause it. Press the Left or Right cursor buttons to go to the previous or next track. - Page 16 If a memory card is being used, you can access the photos stored in the internal memory by selecting this icon 4. Games KidiGo includes 5 built-in games. Press the Left or Right cursor ®...
- Page 17 (if inserted). Select the last option in the 'Delete File' menu to switch between memory folders. B. Memory This menu allows you to review the status of your KidiGo ’s internal ® memory or memory card (if inserted). There will be three advanced...
-
Page 18: Care And Maintenance
If there is a valid memory card inserted, the system will show the content of the memory card automatically instead of the content of the internal memory of KidiGo . To view the content of the internal memory, simply ®... -
Page 19: Troubleshooting
® fatigue or discomfort. We recommend that children take a 15-minute break for every hour of play. trouBLeshootIng Go through this section if you experience difficulty in operating KidiGo ® Problem Solution Product stops 1. - Page 20 Can’t view the 1. Check if the Downloaded files are stored in the correct directory of the KidiGo Downloaded video, ® MP3 or photo files memory. Photos should be stored in the PHOTO folder, videos should be stored in the VIDEO folder and MP3 files should be...
- Page 21 wrIst straP attachMent InstructIons Step 1: Locate the thread loop on the end of the strap. Insert it into the groove behind the bar and then push it through Step 2: Feed the end of the strap up through the loop and pull it all the way through Step 3: Make sure the loop is...
- Page 22 PLayer stand Pull out the tip of the stand handle on the back of KidiGo so that it can ® be propped up at the ideal viewing angle on a flat surface. Always replace the stand after use to protect it from damage.
- Page 23 Noted: The headphone holder assembly should be removed by an adult. Tool required: Philips screwdriver (not included) • Locate the screws attaching the headphone holder to the back of KidiGo ® • Loosen the screws with a screwdriver so that the holder can be removed.
-
Page 24: Product Warranty
PRODUCT WARRANTY YEAR Thank you for choosing this quality product from VTech. We hope it will bring many hours of entertainment, imaginative play and learning. This warranty is valid for the UK and Eire only. For products purchased outside the UK and Eire, please contact your local distributor or place of purchase.
Need help?
Do you have a question about the KidiGo and is the answer not in the manual?
Questions and answers