HP 600 User Manual
600 fax series
Hide thumbs
Also See for HP 600:
- User manual (170 pages) ,
- Maintenance and service manual (63 pages) ,
- Services and applications (316 pages)
Table of Contents
Advertisement
Quick Links
Advertisement
Table of Contents

Related Manuals for HP HP 600


Summary of Contents for HP HP 600
- Page 1 HP 600 Fax series User Guide...
- Page 3 HP 600 Fax series User Guide Part number: CB846-90001...
- Page 4 • Telephone lines can develop hazardous voltages. To avoid electrical shock, do not touch the contacts on the end of the cord, or any of the sockets on the HP Fax. Replace damaged cords immediately. • Never install telephone wiring during a lightning storm.
-
Page 5: Table Of Contents
Set up faxing for the HP Fax ........5 2 HP Fax basics ........7 The HP 600 Fax . - Page 6 Distinctive ring (DRPD) ......... . 31 Step 1—Teach the HP Fax the ring pattern......31 Step 2—Set up distinctive ring (DRPD) answer mode .
- Page 7 6 Care and maintenance ......47 Print cartridge information ........47 View ink level .
- Page 8 iv Contents...
-
Page 9: Quick Start
BASIC FAX menu. For more information, see Paper Size on page 13. The HP Fax is designed to work with a variety of plain papers (cotton bond 75– 90 g/m (20–24 lb.)) in A4, Letter, and Legal sizes. -
Page 10: Load Documents To Fax Or Copy
Load documents to fax or copy You can load up to 10 pages in the document feeder. Load the documents face down (printed side toward the machine). Send a fax 1. Place the document to be sent (up to 10 pages) in the document feeder. 2. -
Page 11: Receive A Fax
For more information, see Set rings to answer on page 27. FAX or TAM answer mode The fax machine will answer the telephone, automatically detect fax tones, and receive a fax. TIP: However, if you accidentally answer the telephone and hear fax tones, press the Start button to receive the fax. -
Page 12: Make A Telephone Call
Multiple copies or copies with options/settings 1. Turn the page face down and insert it into the document feeder. 2. Press Copy. Number of Copies then 01 [01-40] will display. 3. If you want more than one copy, use the phone pad to enter the number of copies. -
Page 13: Set Up Faxing For The Hp Fax
Keep your setup poster for later use. In this section, you will learn how to set up the HP Fax so that faxing works successfully with equipment and services you might already have on the same phone line. - Page 14 If you are unsure which kind of telephone system you have (serial or parallel), check with your telephone company. Serial-type fax setup For information on setting up the HP Fax for faxing using a serial-type phone system, see the Fax Configuration Web site for your country/region. Austria...
-
Page 15: Hp Fax Basics
HP Fax basics This chapter lists the basic features of your new HP Fax and introduces you to the machine. The HP Fax features The HP Fax offers the following features: 40 page fax memory • 40 page paper tray •... -
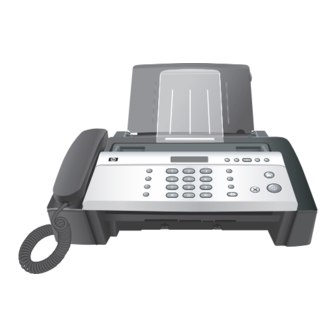
Page 16: The Hp 600 Fax
The HP 600 Fax Parts of the HP Fax Front view Figure 2-1 Rear view Figure 2-2 8 HP Fax basics Document support Paper tray Paper tray cover Document guide Document feeder Handset Paper guide Paper support Power cord socket... - Page 17 Bottom view Figure 2-3 Connect handset to the HANDSET port. Connect telephone line to the LINE port. Connect answering machine or extension phone to the EXT. port. (For parallel-type phone system only.) HP Fax basics 9...
-
Page 18: Control Panel Of Hp Fax
Control Panel of HP Fax Control panel of HP Fax Figure 2-4 Label Icon Name and Description Mode/Contrast: • When no document is loaded, pressing this button changes the Receive Mode. See Answer/receive mode on page 32. • When a document is loaded, pressing this button changes the contrast for faxing and copying. - Page 19 Loudspeaker: Allows you to listen to the telephone while dialing without lifting the handset. Allows you to listen only. There is no speakerphone capability. Menu: Displays the options available for your HP Fax. Scroll/Volume: • When you are entering numbers or text, moves the cursor to the digit or character to be edited.
-
Page 20: The Menus
The menus The menus 12 HP Fax basics... -
Page 21: Overview Of Menu Options
Overview of menu options Your fax machine has settings that you can change. To find out how the options are currently set, print the System Data report (see To change these settings, see The tables below shows the options for a menu in the left column and their setting choices in the right column. - Page 22 Option Settings If you turn the Automatic Reduction option off, you can set the fax machine Discard Size to discard any excess image at the bottom of the page when receiving a document as long as or longer than the paper loaded in your machine. If the incoming fax is out of the margin you have set, it will be printed on two sheets of paper.
-
Page 23: Advanced Fax Menu
Set Delayed Fax Allows you to set up a fax to be polled by another machine. Set Polling Send Cancels all scheduled faxes. Cancel Schedule Allows you to forward incoming faxes to another fax number. Set Fax Forward HP Fax basics 15... -
Page 24: Tools Menu
This feature is especially useful for checking voicemail messages. Your HP Fax does not have speakerphone capabilities. The loudspeaker NOTE: enables you to hear calls but you must speak using the handset. -
Page 25: Navigate The Menus
Navigate the menus Ready mode Whenever the HP Fax is ready for faxing and copying (called Ready mode), it will display the date, time, and answer mode. For example, OCT-05 14:23 FAX. Menu buttons Use the Menu buttons to navigate the menu items. -
Page 26: Enter Dates, Times, Text, And Telephone Numbers
If the date format seems unfamiliar, check that you selected the correct one • for your country when setting up your HP Fax (see page 41). Some items on the display will show up with the blinking cursor under the •... -
Page 27: Fax Header Telephone Number
‘JACQUE’ will display. Enters a space. ‘&’ will display. Enters a space. ‘BAJA’ will display. ‘,’ will display. ‘INC’ will display ‘.’ will display. on page 42), you can enter some punctuation in the number. Set the fax HP Fax basics 19... -
Page 28: Speed Dialing
Press ‘ Speed dialing Your HP Fax has a built-in phone book that allows you to enter up to 100 names and numbers for faxing or telephone use. Once entered, you can dial the number by any of these methods. -
Page 29: Print The Phone Book
Dial from the phone book Dialing works the same for both faxes and telephone calls. If a document is loaded in the document feeder, the HP Fax sends the fax. One-touch dialing Press and hold the number (0 through 9) on the phone pad. -
Page 30: Paper Types And Sizes
When the name and number you want appears in the display, press Start. Paper types and sizes The HP Fax is designed to work optimally with plain paper (cotton bond: 20 lb., 75 g/m ) in the following sizes: A4, Letter, and Legal. -
Page 31: Document Types And Sizes
(such as a label, voucher, etc.) • made of cloth or metal • To send these documents, use an office copier to make a photocopy first, and then send the copy. on page 63. HP Fax basics 23... -
Page 32: Set Document Resolution And Contrast For A Single Copy
(i.e., Broadcasting and Delayed Fax). If you are sending document using one of these methods, SUPER FINE will be changed back to FINE even though you selected SUPER FINE. 24 HP Fax basics on page 13. Document types and sizes Load documents to fax or copy on page 23. -
Page 33: Adjust Volume
To redial now, press Start. Or, press Cancel to stop redialing and the machine returns to Ready mode. when the fax is in Ready mode to adjust the volume of the ringer. to adjust the volume of the speaker. HP Fax basics 25... -
Page 34: Receiving Via An Extension Telephone
Receiving via an extension telephone If you have an extension phone on the same line as your HP Fax you can remotely start receiving a fax. Answer the call on the extension phone. Press *9* (manual fax receive code) in sequence when you hear a fax tone. -
Page 35: Additional Features
This chapter contains information on additional features you may want to set or change for your HP Fax. • Rings to answer: Sets the number of rings before the HP Fax answers the phone. • Caller ID: If you subscribe to Caller ID through your local phone company, you can use it with your HP Fax. -
Page 36: Use Caller Id
The HP Fax rings the set number of times and then answers. It then produces a different sounding ring to alert you to which type of call is incoming. • The additional ring may occur once for a fax call •... -
Page 37: Add A Junk Fax Number
Add a junk fax number 1. Press Menu repeatedly until BASIC FAX appears and press OK. 2. Press 3. Press The machine shows the first Caller ID number. 4. Press and press OK. You can enter up to 20 numbers. Numbers which have already been entered as a junk number are marked by * at the end of the display. -
Page 38: Delete A Document
Delete a document 1. Press Favorites repeatedly until DELETE appears and press OK. 2. Press document ID is displayed, press OK. 3. Select Y and press OK when the machine asks if you are sure. Send a document 1. Press Favorites repeatedly until SEND appears and press OK. 2. -
Page 39: Distinctive Ring (Drpd)
Your HP Fax works with distinctive ring service. Use Distinctive Ring to set your HP Fax to answer one of your phone numbers as a fax only line. The phone number (ring pattern) that you teach the HP Fax will be answered as if the machine is in FAX mode. -
Page 40: Step 2-Set Up Distinctive Ring (Drpd) Answer Mode
Press Mode/Contrast repeatedly until DRPD Mode appears in the display. • In Ready mode, DRPD appears in the right hand corner of the display. • Now, the HP Fax will manage calls and faxes as if it were set to AUTO mode (AUTO mode on page 33) TIP: Distinctive ring must be set up again if you reassign your fax number or connect the machine to another telephone line. - Page 41 Set rings to answer • You must have an answering machine attached to the EXT line mode socket located on the bottom of your HP Fax. • In Ready mode, TAM appears in the right hand corner of the display.
- Page 42 Answer/receive mode 34 Additional features...
-
Page 43: Advanced Faxing
In this chapter, you will learn how to use the advanced fax features of your machine. Broadcasting With Broadcasting you can have your HP Fax send your fax to up to 5 fax numbers at once. The documents are automatically erased from memory when Broadcasting is finished. -
Page 44: Delayed Fax
Delayed fax Delayed fax You can set your machine to send a fax any time in the next 24 hours. For example, it is usually cheaper to send a fax at night because telephone rates are lower than they are during the day. To cancel a scheduled fax, see To cancel the scheduled job on page 38. -
Page 45: Setting Send Polling
You can program your fax machine to send a document when it is requested by a remote fax machine. NOTE: Your HP Fax allows you to set one poll job at a time and it can be retrieved once. 1. Turn the document face down and feed it into the machine. -
Page 46: To Cancel The Scheduled Job
To cancel the scheduled job NOTE: If the other fax machine does not have a poll code, enter 0000. The HP Fax receives and prints the polled document. NOTE: Not all fax machines have polling capability, and polling incompatibility sometimes occurs between fax machines made by different manufacturers. - Page 47 4. If you selected Forward or Forward & Print, Tel: will display. a. Enter the fax number and press OK. Start Date&Time will display. b. Press OK. The current date and time will display. c. Enter the start time and press OK. End Date&Time will display.
- Page 48 Forward faxes 40 Advanced faxing...
-
Page 49: Feature Reference
Feature reference This chapter contains instructions for other features of the HP Fax that you may want to use from time to time. Set the date and time The current date and time are shown in the display when the machine is on and ready for use (Ready mode). -
Page 50: Alarm Sounds
3. Select On and enter the time you want the HP Fax to ring. Press OK. Select Off to turn off WakeUp Sound. Press OK. Alarm sounds Alarm sounds include the fax tones and beeps. 1. Press Menu repeatedly until SET UP SOUND appears and press OK. -
Page 51: Print Reports
• You can include special characters (space, plus sign, etc.). For more information, see 7. Press OK when the name in the display is correct. Print reports Your fax machine can print many reports for your use. Automatic reports These reports print automatically. Report name... -
Page 52: Reprinting Faxes
This report shows the document currently stored for Delayed FAX and Send Polling along with the fax number, starting time and type of scheduled event. This report shows the current settings of your HP Fax. After you have changed any setting, print this report to check your changes. -
Page 53: Clearing Memory
NOTE: Unplugging the fax machine power cord and plugging it back in again clears the memory including all unprinted or unsent faxes. A power outage also clears the fax machine memory. 1. Press Menu repeatedly until REPORTS appears and press OK. -
Page 54: Loudspeaker
This feature is especially useful for checking voicemail messages. NOTE: Your HP Fax does not have speakerphone capabilities. The loudspeaker enables you to hear calls but you must speak using the handset. -
Page 55: Care And Maintenance
To increase its life, we recommend you follow the instructions below: • Always use the HP 701 (CC635A) black inkjet print cartridge. NOTE: Your HP Fax was shipped with a starter ink cartridge. Replace the starter cartridge when it runs out of ink with the HP 701 cartridge. -
Page 56: Print The Self Test
NOTE: If the HP Fax is low on ink (ink level is 1/8), new faxes that come in will not be printed. They will be stored in memory. You must manually print the faxes from memory (see Reprinting faxes on page 44) until you replace the ink cartridge (see Replace the print cartridge on page 48). - Page 57 The cartridge carrier moves to the install position. 3. Open the control panel and cartridge compartment cover (it will click and remain open). 4. Push the cartridge down and remove it. 1 Access Cartridge 1 Control panel 2 Cartridge compartment cover Care and maintenance 49...
-
Page 58: Clear Jammed Documents And Paper
5. To load the cartridge insert the cartridge as shown below. When the cartridge is pushed to the back of the cartridge carrier, push the top of the cartridge until it clicks into place. If the cartridge moves loosely in the carrier, it has not clicked into place. Repeat this step. -
Page 59: To Clear Document Jam
To clear document jam: 1. Open the control panel. 2. Carefully remove the jammed document. 3. Close the control panel firmly until it clicks into place. Paper jams during printing If the fax paper jams while you are receiving or printing, Remove jammed paper and press Cancel appears in the message. -
Page 60: Maintain The Print Cartridge
Maintain the print cartridge To maintain good printing quality, we recommend you occasionally maintain the print cartridge and its associated parts: Clean the print cartridge If characters are not printing completely or white streaks appear in your text, you may have clogged nozzles. Clean the print cartridge as described below: 1. -
Page 61: Clean The Cartridge Carrier Contacts
4. Reinstall the cartridge and close the cover and panel. If you spend a long time cleaning the cartridge, the cartridge carrier may have moved back to the original position. If so, press Access Cartridge again to move the carrier to the install position. 5. -
Page 62: Clean The Document Scanner Area
To keep your machine working properly, occasionally clean the white roller, document feeder rubber piece, and the scanning glass. If they are dirty, documents sent to another fax machine will not be clear. CAUTION: When you turn the power off to clean the scanner, documents stored in memory will be lost. - Page 63 4. Clean the document feeder rubber piece at the back of the control panel. 5. Carefully wipe the scanning glass with a soft, dry, lint free cloth. • If the glass is very dirty, first wipe it with a slightly dampened cloth, then with a dry one.
-
Page 64: Adjust The Scanner
Adjust the scanner The scanner is adjusted at the factory. If, however, you drop your machine while moving it, we recommend you adjust scanner. 1. Press Menu repeatedly until TOOLS appears and press OK. 2. Scroll to Adjust Scanner by pressing 3. - Page 65 Display Status/Solution Print cartridge is not installed or improperly installed. Install ink cartridge The time you set for fax forwarding is wrong. Invalid Time You attempted to cancel a scheduled job but no jobs are Job Not Assigned scheduled. You attempted to delete, print or send the Favorites document when there is no document stored.
- Page 66 Paper jams during printing on page 51. There is an error while sending a fax. The fax machine is busy doing something else. The machine is waiting (three minutes) to automatically redial the fax number that was busy or did not answer.
-
Page 67: Troubleshooting
Use Hewlett-Packard support services on page 70. TIP: (For U.S. only) You can test your HP Fax to make sure it is set up properly for faxing. Place a document in the document feeder, dial 1-888 HP FAX ME (1-888-473-2963) and press will receive a “Fax Back System Test”... - Page 68 Spots or lines missing from the fax you receive. You are receiving poor quality copies. The fax machine sending to you may have a dirty scan glass. Some of the words on the fax you received appear stretched.
-
Page 69: Print Quality Problems
Problem You cannot store a document in memory. Blank areas appear at the bottom of each page or on continuation pages, with only a small strip of material printed at the top. Image TCR is not working Print quality problems Problem Light or blurred characters. -
Page 70: Paper Feeding Problems
Paper feeding problems Problem Paper is jammed during printing. Paper sticks together. Paper fails to feed. Multiple sheets of paper feed. Paper skews or buckles in the paper tray. 62 Care and maintenance Solution Clear paper jam as described in Paper jams during printing on page 51. -
Page 71: Specifications And Regulatory Information
This chapter contains product and supplies specifications, ordering information, and regulatory statements. Paper types and sizes The HP Fax is designed to work optimally with plain cotton bond paper. The following paper sizes and weight can be used with your machine: Paper size... -
Page 72: Print Cartridge
A4 (297 mm/11.69 in.), you must immediately take out each sheet as soon as it has been scanned. Otherwise, the document may jam. Print cartridge The HP Fax uses the following print cartridge. HP 701 black inkjet print cartridge CC635A Product specifications The specifications are subject to change without notice. - Page 73 Super Fine/Photo: 600 x 300 dpi Fine: 200 x 200 dpi Super Fine: 400 x 200 dpi 64 levels 512 Kbyte (capable of 40 pages at ITU#1 test chart) (2.5% coverage on A4) HP 701 (17ml) (CC635A) Specifications and regulatory information 65 Product specifications...
-
Page 74: A Sample Of Itu #1 Test Chart (Reduced To 60.5%)
A sample of ITU #1 test chart (reduced to 60.5%) A sample of ITU #1 test chart (reduced to 60.5%) 66 Specifications and regulatory information... -
Page 75: Environmental Product Stewardship Program
Customers without Internet access should contact their local HP Customer Care Center. Recycling program HP offers an increasing number of product return and recycling programs in many countries, as well as partnering with some of the largest electronic recycling centers throughout the world. HP also conserves resources by refurbishing and reselling some of its most popular products. -
Page 76: Disposal Of Waste Equipment By Users In Private Households In The European Union
Disposal of waste equipment by users in private households in the European Union Disposal of waste equipment by users in private households in the European Union 68 Specifications and regulatory information... -
Page 77: Regulatory Notices
For regulatory identification purposes, your product is assigned a Regulatory Model Number. The Regulatory Model Number for your product is SNPRG-0701. This regulatory number should not be confused with the marketing name (HP 600 Fax series) or product number. Noise emission statement for Germany Geräuschemission... -
Page 78: Use Hewlett-Packard Support Services
• If you do not have the original packing material, you can request a replacement package set from HP Customer Support. Shipping damage caused by improper packaging is not covered under the warranty. -
Page 79: Declaration Of Conformity
DECLARATION OF CONFORMITY according to ISO/IEC 17050-1 and EN 17050-1 Hewlett-Packard Company Emerging Markets, Fax & OEM Division 61 Alexandra Terrace #08-01 Harbour Link Singapore 119936 HP 650 Fax (CB846A) series SNPRG-0701 Specifications and regulatory information 71 Declaration of Conformity Manager... -
Page 80: Hewlett-Packard Limited Warranty Statement
3. HP's limited warranty covers only those defects that arise as a result of normal use of the product, and does not cover any other problems, including those that arise as a result of: a. - Page 81 Index Access Cartridge button 48 alarm sounds 42 align cartridge menu 16 answer ring pattern detection 31 answer/receive mode 32 arrow buttons 1 Auto Journal menu 14 auto reduction menu 13 automatic fax redial 25 block junk faxes 28 bottom view 9 broadcasting 35 menu 15 broadcasting faxes 35...
- Page 82 8 getting help 70 HANDSET port 9 help 70 help list 44 HP Fax parts of 8 HP support 70 image TCR 30 menu 15 ink cartridge maintenance 52 part number 47, 64 replacing 48 ink level 16...
- Page 83 language 13 menu 13 LINE port 9 loading documents 2 loading paper 1 Loudspeaker button 11 loudspeaker 16, 46 button 11 making a copy 3 man fax rcv code menu 14 memory clearing 45 menu BASIC FAX, options 13 button 11 picture 12 using 17 menu setting...
- Page 84 reports 43, 44 Caller ID 44 junk fax 44 phone book 44 printing faxes 44 received journal 44 schedule inform 44 sending confirm 44 sent journal 44 system data 44 reprinting faxes 44 resolution 24 button 10 default 15 menu 15 ring pattern detection 15, 31 ring volume 25 rings to answer 27...
- Page 85 troubleshooting fax problems 59 messages 56 paper feeding 62 print quality 61 unwanted faxes 14 view ink level menu 16 volume ring 25 speaker 25 WakeUp 41 WakeUp sounds 41 warranty 72...
- Page 86 © 2008 Hewlett-Packard Development Company, L.P. www.hp.com Printed in Germany *CB846-90001* *CB846-90001* CB846-90001...