
Related Manuals for GeoVision GV-IP Camera 1.3M


Summary of Contents for GeoVision GV-IP Camera 1.3M
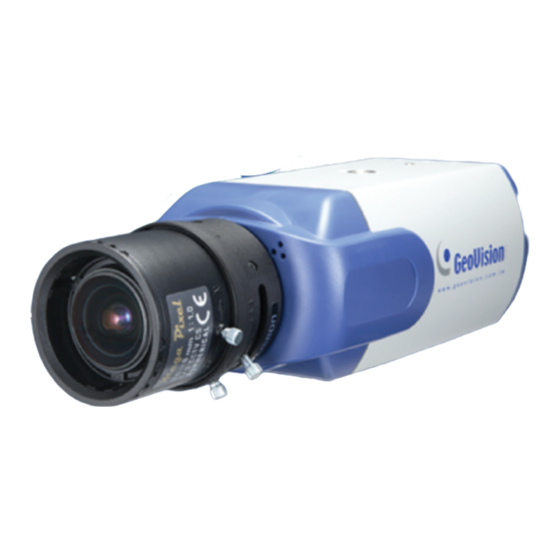
- Page 1 GV-IP Camera 1.3M User's Manual Before attempting to connect or operate this product, please read these instructions carefully and save this manual for future use.
-
Page 2: Table Of Contents
Contents Chapter 1 Introduction ............1 Key Features ......................1 Packing List ......................1 System Requirements ....................2 Back View .......................2 Chapter 2 Getting Started .............3 Installing on a Network ...................3 Assigning an IP Address..................3 Configuration Basics....................5 Chapter 3 Accessing the Camera.........6 Accessing Your Surveillance Images ..............6 Functions Featured on the Main Page..............7 3.2.1 The Live View Window..................8... - Page 3 4.3.2 FTP ......................29 4.3.3 Center V2....................30 4.3.4 VSM ......................31 4.3.5 3GPP ......................33 Monitoring ......................34 Schedule.......................35 4.5.1 Schedule Settings ..................35 4.5.2 I/O Monitoring Settings ................36 Network.........................37 4.6.1 LAN......................37 4.6.2 Advanced TCP/IP ..................39 4.6.3 IP Filter Settings..................41 Management......................42 4.7.1 Date & Time Settings ..................42 4.7.2 GPS Maps Settings..................44 4.7.3...
-
Page 4: Chapter 1 Introduction
Introduction Chapter 1 Introduction 1.1 Key Features • 1.3 megapixel SONY progress CCD • Built-in Web server for monitoring via IE browser • Dual video streams JPEG and MPEG-4 • Up to 15 frames per second in megapixel resolution (1280 x 960) •... -
Page 5: System Requirements
1.3 System Requirements Microsoft Internet Explorer 6.x or later 1.4 Back View Figure 1-1 No. Name Description DC In 12V Connector Connects to power. Switches between a video and DC controlled auto iris Lens Type Switch lens. Provides one digital input and one relay output. For I/O Terminal Block details, see Chapter 8 The I/O Terminal Block. -
Page 6: Chapter 2 Getting Started
Getting Started Chapter 2 Getting Started This section provides basic information to get the GV-IP Camera working on the network. 2.1 Installing on a Network These instructions describe the basic connections to install the GV-IP Camera on the network. 1. Using a standard network cable, connect the camera to your network. 2. - Page 7 1. Open your web browser, and type the default IP address http://192.168.0.10 2. In both Login and Password fields, type the default value admin. Click Apply. 3. In the left menu, select Network and then LAN to begin the network settings. Figure 2-1 4.
-
Page 8: Configuration Basics
Getting Started 2.3 Configuration Basics Once the camera is properly installed, the following important features can be configured using the browser-based configuration page and are discussed in the following sections in this manual: • Date and time adjustment: see 4.7.1 Date & Time Setting. •... -
Page 9: Chapter 3 Accessing The Camera
4. Click Apply. A video image, similar to the example on Figure 3-2, is now displayed in your browser. Note: To enable the updating of images in Internet Explorer, you must set your browser to allow ActiveX Controls and perform a once-only installation of GeoVision’s ActiveX component onto your computer. -
Page 10: Functions Featured On The Main Page
Accessing the Camera 3.2 Functions Featured on the Main Page This section introduces the features of the Live View window and Network Status on the main page. The two features are accessible by both Administrator and Guest. Main Page of Guest Mode ▼... -
Page 11: The Live View Window
3.2.1 The Live View Window Figure 3-3 No. Name Function 1 Play Plays live video. 2 Stop Stops playing video. 3 Microphone Talks to the surveillance area from the local computer. 4 Speaker Listens to the audio around the camera. 5 Snapshot Takes a snapshot of live video. -
Page 12: The Control Panel Of The Live View Window
[Download] Allows you to download the updated programs from the FTP server to the local computer, or install the programs from the hard drive. To download the updated programs from GeoVision FTP server, click Search, select Internet, and type the following information: ftp://gv-update.dipmap.com;... - Page 13 [Camera Adjust] Allows you to adjust the following image quality settings. To adjust the camera image, use the sliders of Bright ness, Contrast, Saturation and Hue. Click the right button to change Figure the pages of Camera Adjust. Figure 3-5 White balance: The camera automatically adjusts the color to be closest to the image you are viewing.
-
Page 14: Snapshot Of Live Video
Accessing the Camera Auto exposure: The camera performs the iris adjustment automatically. You can also choose to set the exposure manually. Flicker less: The camera automatically matches the frequency of your camera’s imager to the frequency of indoor light sources, e.g. -
Page 15: Picture-In-Picture And Picture-And-Picture View
3.2.5 Picture-in-Picture and Picture-and-Picture View The full screen mode provides two types of close-up views: Picture-in-Picture (PIP) and Picture-and Picture (PAP). The two views are useful to provide clear and detailed images of the surveillance area. To access this feature: •... -
Page 16: Accessing The Camera
Accessing the Camera Picture-and-Picture View With the Picture and Picture (PAP) view, you can create a split video effect with multiple close-up views on the image. A total of 7 close-up views can be defined. Figure 3-10 Select PAP. A row of three inset windows appears at the bottom. Draw a navigation box on the image, and this selected area is immediately reflected in one inset window. -
Page 17: Alarm Notification
3.2.6 Alarm Notification After input triggers and motion detection, you can be alerted by a pop-up live video and view up to four captured images. Captured images Pop-up live video Figure 3-11 To configure this function, click the Show System Menu button (No. 9, Figure 3-3), and select Alarm Notify. -
Page 18: Video And Audio Configuration
Accessing the Camera Auto Snapshot: The snapshot of live video is taken every 5 seconds on motion and input-triggered detection. File Path: Assigns a file path to save the snapshots. 3.2.7 Video and Audio Configuration You can enable the microphone and speaker for two-way audio communication and adjust the audio volume. -
Page 19: Camera Name Display
3.2.9 Camera Name Display To display the camera name on the image, click the Show System Menu button (No. 9, Figure 3-3), and select Show Camera Name. 3.2.10 Image Enhancement To enhance the image quality of live video, click the Show System Menu button (No. 9, Figure 3-3), and select Image Enhance. -
Page 20: I/O Control
Accessing the Camera 3.2.11 I/O Control The I/O Control window provides a real-time graphic display of camera status, I/O status, and alarm events. Additionally, you can remotely force output to be triggered. Figure 3-15 • To display the I/O control window, click the I/O Control button (No. 8, Figure 3-3). •... -
Page 21: Network Status
Figure 3- 16 • To access this feature, click the I/O Control button (No. 9, Figure 3-3) and select Visual Automation. • To change the style of the set areas, click the green I/O button on the top left corner. You will have these options: Show All: Displays all set areas. -
Page 22: Chapter 4 Administrator Mode
Administrator Mode Chapter 4 Administrator Mode The Administrator can access the system configuration via the Internet. Seven categories of configurations are involved in the system configuration: Video and Motion, Digital I/O, Events and Alerts, Monitoring, Schedule, Network and Management. ▼ Video and Motion ▼... -
Page 23: Video And Motion
4.1 Video and Motion This section includes the video image settings and how the images can be managed by using Motion Detection, Privacy Mask and Visual Automation. 4.1.1 Video Settings Figure 4-2 [Name] Rename the camera. The camera name will appear on the Live View. To display the camera name on the Live View window, see 3.2.9 Camera Name Display. - Page 24 Administrator Mode [Connection Template] Select the type of your network connection. Unless you select Customized, this option will automatically bring up the recommended video resolution, frame rate, bandwidth and GOP size. [Video Signal Type] There are several options for selecting image resolutions. The frame rate to transmit images can reach 30 fps for all kinds of resolutions, except JEPG resolution of 1280 x 960.
- Page 25 [GOP Structure and Length] Set the maximum number of frames in a GOP structure (the GOP size limit). This function is only available when you select Customized in the Connection Template section. [Overlaid Settings] Overlaid with camera name: Includes camera names on live and recorded videos. Overlaid with date stamps: Includes date stamps on live and recorded videos.
-
Page 26: Motion Detection
Administrator Mode 4.1.2 Motion Detection Motion detection is used to generate an alarm whenever movement occurs in the video image. You can configure up to 8 areas with different sensitivity values for motion detection. Figure 4-3 1. The default sensitivity value is 2 for the whole area. To define a different sensitivity value, click Reset. -
Page 27: Privacy Mask
4.1.3 Privacy Mask The Privacy Mask can block out sensitive areas from view, covering the areas with dark boxes in both live view and recorded clips. This feature is ideal for locations with displays, keyboard sequences (e.g. passwords), and for anywhere else you don’t want sensitive information visible. -
Page 28: Visual Automation
Administrator Mode 4.1.4 Visual Automation This intuitive feature helps you automate any electronic device by triggering the connected output device. When you click on the image of the electronic device, you can simply change its current state, e.g. light ON. Figure 4-5 1. -
Page 29: Digital I/O Settings
4.2 Digital I/O Settings The I/O terminal block, on the rear of the camera, provides the interface to one external alarm and sensor device. For details on the I/O terminal block, see Chapter 8 I/O Terminal Block. 4.2.1 Input Settings To activate the sensor input, select Enable. -
Page 30: Output Settings
Administrator Mode 4.2.2 Output Settings There are six output signals are available: N/O (Open Circuit), N/C (Grounded Circuit), N/O Toggle, N/C Toggle, N/O Pulse and N/C Pulse. Choose the one that mostly suits the device you are using. Set the pulse duration for the pulse mode. Figure 4-8 4.3 Events and Alerts For the events of motion detection or I/O trigger, the Administrator can set up the two... -
Page 31: E-Mail
4.3.1 E-mail After a trigger event, the camera can send the e-mail to a remote user containing a captured still image. Figure 4-9 [Enable] Check to enable the e-mail function. Sever URL/IP Address: Type the URL address or IP address of the SMTP Server. Server Port: Modify the port number of the SMTP Server. -
Page 32: Ftp
Administrator Mode 4.3.2 FTP You can also send the captured still image to a remote FTP server for alerts. Figure 4-10 [Enable] Check to enable the FTP function. Server URL/IP Address: Type the URL address or IP address of the FTP Server. Server Port: Type the port number of the FTP Server. -
Page 33: Center V2
4.3.3 Center V2 After a motion or an I/O triggered event, the central monitoring station Center V2 can get notified by live videos and text alerts. For the Center V2 monitoring, you must already have a subscriber account on Center V2. Figure 4-11 To enable the Center V2 connection: 1. -
Page 34: Vsm
Administrator Mode These options you can also find on this Center V2 setting page: Cease motion detection messages from: When this option is enabled, the camera will not notify Center V2 of motion-triggered events. Cease input trigger messages from: When this option is enabled, the camera will not notify Center V2 of input-triggered events. - Page 35 To enable the VSM connection: 1. Activate Link: Enable the VSM monitoring. 2. Host Name or IP Address: Type the host name or IP address of VSM. 3. Port Number: Match the port to the Video Server port on VSM. Or keep the default value 5609.
-
Page 36: 3Gpp
Administrator Mode 4.3.5 3GPP The 3GPP Server enables video and audio streaming to your 3G-enabled mobile phone. Figure 4-13 Activate Link: Enable the 3GPP service. RTSP/TCP Port: Keep the default value 8554, or modify it if necessary. RTP/UDP Port: Keep the default range from 17300 to 17319, or modify it if necessary. The number of ports for use is limited to 20. -
Page 37: Monitoring
4.4 Monitoring You can start monitoring manually, by schedule or by input trigger. Figure 4-14 [Manual] Manually activates motion detection and I/O monitoring. Select one of the following options and then click the Start button. Select all: Manually starts both motion detection and I/O monitoring. Camera: Manually starts motion detection. -
Page 38: Schedule
Administrator Mode 4.5 Schedule The schedule is provided to activate motion detection and I/O monitoring on a specific time each day. 4.5.1 Schedule Settings You can set the schedule for motion detection to start. Figure 4-15 Span 1- Span 3: Set different time frames during the day to enable motion detection. Each day can be divided into 3 time frames, represented by Span 1 to Span 3. -
Page 39: I/O Monitoring Settings
4.5.2 I/O Monitoring Settings You can set the schedule for I/O monitoring to start. Span 1- Span 3: Set different time frames during the day to enable I/O monitoring. Each day can be divided into 3 time frames, represented by Span 1 to Span 3. Weekend: If you don’t want to apply the span settings to the weekend and need I/O monitoring for the whole day, enable this option and define whether your weekend includes Saturday and Sunday or Only Sunday. -
Page 40: Network
Administrator Mode 4.6 Network The Network section includes some basic but important network configurations that enable the camera to be connected to a TCP/IP network. 4.6.1 LAN According to your network environment, select among Static IP, DHCP and PPPoE. Figure 4-16... - Page 41 [LAN Configuration] Dynamic IP address: The network environment has a DHCP server. This option should only be enabled if you know which IP address the camera will get from the DHCP server, or you have obtained a domain name from the DDNS service provider that always links to the camera’s changing IP address.
-
Page 42: Advanced Tcp/Ip
Administrator Mode 4.6.2 Advanced TCP/IP This section introduces the advanced TCP/IP settings, including DDNS Server, HTTP port, streaming port and UPnP. Figure 4-17 [Dynamic DNS Server Settings] DDNS (Dynamic Domain Name System) provides a convenient way of accessing the camera when using a dynamic IP. DDNS assigns a domain name to the camera, so that the administrator does not need to go through the trouble of checking if the IP address assigned by DHCP Server or ISP (in xDSL connection) has changed. - Page 43 2. Service Provider: Select the DDNS service provider you have registered with. 3. Host Name: Type the host name used to link to the camera. For the users of GeoVision DDNS Server, it is unnecessary to fill the field because the system will detect the host name automatically.
-
Page 44: Ip Filter Settings
Administrator Mode 4.6.3 IP Filter Settings The Administrator can set IP filtering to restrict access to the camera. Figure 4-18 To enable the IP Filter function: 1. Enable IP Filtering: Enable the IP Filter function. 2. Filtered IP: Type one IP address or a range of IP addresses you want to restrict the access. -
Page 45: Management
4.7 Management The Management section includes the settings of data and time and user account. You can also view the firmware version and execute certain system operations. 4.7.1 Date & Time Settings The date and time settings are used for date and time stamps on the image. Figure 4-19... - Page 46 Administrator Mode [Date & Time on GV-IPCam1.3M] Displays the current date and time on the camera. [Time Zone] Sets the time zone for local settings. Select Enable Daylight Saving Time to automatically adjust the camera for daylight saving time. Type the Start Time and End Time to enable the daylight saving function.
-
Page 47: Gps Maps Settings
4.7.2 GPS Maps Settings The Maps Settings allows you to see the location of your GV-IP Camera on Google maps, without a GPS device. To see the location of your GV-IP Camera on maps: 1. It is required to sign up for a Google Maps API key before using the Google Maps. Click Link to the Google Maps API. - Page 48 Administrator Mode 4. Click Open. A warning message appears. Figure 4-22 5. Right-click the warning message and select Allow Blocked Content. The map will be displayed. The icon indicates the location of your GV-Video Server. You may change different map formats, such as Satellite and Hybrid, at the upper right corner for viewing. Figure 4-23...
-
Page 49: User Account
4.7.3 User Account You can change the login name and password of Administrator and Guest. The default Administrator login name and password are admin; the default Guest login name and password are guest. Figure 4-24 4.7.4 Log Information The log contains dump data that is used by service personnel for analyzing problems. Figure 4-25... -
Page 50: Tools
Administrator Mode 4.7.5 Tools You can execute certain system operations and view the firmware version. Figure 4-26 [Host Settings] Enter a descriptive name for the camera. [Firmware Update] This field displays the firmware version of the camera. [System Settings] Clicking the Load Default button will make the camera restore factory default settings. -
Page 51: Chapter 5 Advanced Applications
This chapter introduces more advanced applications. 5.1 Upgrading System Firmware GeoVision will periodically release the updated firmware on the website. The new firmware can be simply loaded into the GV-IP Camera over the Internet or by using the Video Server Utility included in the Software CD. - Page 52 Advanced Applications 5.1.2 Upgrading Firmware by Using the VS_Utility The Video Server Utility provides a direct way to upgrade the firmware to multiple GV-IP Cameras. 1. Insert the Software CD, select IP Device Utility, and follow the onscreen instructions to install the program. 2.
- Page 53 5. Click the Firmware Upgrade tab. This dialog box appears. Figure 5-4 6. Click the Browse button to locate the firmware file (.img) saved at your local computer. 7. If you like to upgrade all the GV-IP Cameras in the list, check Upgrade all video servers.
-
Page 54: Backing Up And Restoring Settings
Advanced Applications 5.2 Backing Up and Restoring Settings With the Video Server Utility included in the Software CD, you can back up the configurations in the GV-IP Camera, and restore the backup data to the current camera or import it to another camera. To back up the settings: 1. - Page 55 To restore the settings: 1. In Figure 5-3, click the Import Settings tab. This dialog box appears. Figure 5-6 2. Click the Browse button to locate the backup file (.dat). 3. Click the Update Settings button to start restoring.
-
Page 56: Chapter 6 Dvr Configurations
DVR Configurations Chapter 6 DVR Configurations The GV-System provides hybrid solution, integrating the digital videos from GV-IP Cameras with other analog videos. For the digital videos, the GV-System provides the complete video management, such as video viewing, recording, playback, alert settings and almost every feature of the system. -
Page 57: Setting Up An Ip Camera
6.1 Setting up an IP Camera To set up the GV-IP Camera on the GV-System, follow these steps: On the main screen, click the Configure button, select General Setting, select Camera / Audio Install and click IP Camera Install. This dialog box appears. Figure 6-1 Check Install IP Camera, select the number of GV-IP Cameras you want to link to, and click Configure. - Page 58 DVR Configurations Type the IP address, username and password of the GV-IP camera. Modify the default HTTP port if necessary. Select GeoVision IPCam from the Brand drop-down list. This dialog box appears. Figure 6-4 Port: Video streaming port number. Stream number: You have the option of single or dual streaming.
- Page 59 Previewing Video and Setting Audio To preview video and activate audio, click the desired camera (see Figure 6-5) and select Preview & Audio Setting. This dialog box appears. Figure 6-6 [Preview selected camera] Drop-down List: Select the desired camera for live preview. Preview dual stream record channel: The option is only available when the dual stream is set, i.e.
-
Page 60: Remote Monitoring With Multi View
DVR Configurations 6.2 Remote Monitoring with Multi View You can use the Multi View to monitor and manage the GV-IP Camera. Connecting to GV-IP Camera 1. On the Multi View window, click the Edit Host button. The Edit Host window appears. 2. -
Page 61: Remote Monitoring With E-Map
6.3 Remote Monitoring with E-Map You can use the Remote E-Map to monitor and manage the GV-IP Camera. Creating an E-Map for GV-IP Camera With the E-Map Editor, you can create an E-Map for the GV-IP Camera. The E-Map Editor is available in the two applications: Main System and E-Map Server. - Page 62 DVR Configurations Connecting to GV-IP Camera Depending on where you save the created E-Map file (DVR, E-Map Server or Control Center), the steps to open the Remote E-Map window for monitoring may vary slightly. The following is the connection example when you store the E-Map file in the DVR. 1.
-
Page 63: Remote Monitoring With Mobile Phones
6.4 Remote Monitoring with Mobile Phones Using a PDA, Smartphone and 3G-enabled mobile phone, you can receive live video streaming from the GV-IP Camera. The list below is the GV mobile applications supporting the GV-IP Camera. Settings Handheld OS Supported Port Device View on GV-IP Camera... - Page 64 DVR Configurations Connecting to GV-IP Camera The following is the example of connecting the PDA based on Windows Mobile 5.0 to the GV-IP Camera. 1. The GV-IP Camera needs to allow the remote access first. On the main page, select Video and Motion and click Video Settings.
-
Page 65: Chapter 7 Cms Configurations
Chapter 7 CMS Configurations This section introduces the related settings to enable connecting to the GV-IP Camera in the central monitoring stations Center V2, VSM and Dispatch Server. 7.1 Center V2 The Center V2 can monitor and manage the camera and I/O devices connected to the GV- IP Camera. - Page 66 CMS Configurations To define how to display the received video on motion detection and input trigger from the GV-IP Camera, click the Preference Setting button and select System Configure. This dialog box appears. Figure 8-3 Manual close channel: Closes the triggered camera view manually. Close the camera view when motion stopped: Closes the triggered camera view automatically when motion stops.
-
Page 67: Vsm
7.2 VSM The VSM can monitor and manage the camera and I/O devices connected to the GV-IP Camera. TCP/ IP GV-IP Camera Text Data GV-IP Camera Figure 7-3 To set the appropriate port connecting to the GV-IP Camera, click Configure on the window menu, and select System Configure to display this dialog box. -
Page 68: Dispatch Server
CMS Configurations 7.3 Dispatch Server The Dispatch Server can manage the camera and I/O devices connected to GV-IP Camera, and distribute them to the Center V2. TCP/ IP Center V2 GV-IP Camera Video Data Text Data Dispatch Server GV-IP Camera Center V2 Figure 7-5 To set the appropriate port connecting to the GV-IP Camera, click the Server Setting... -
Page 69: Chapter 8 The I/O Terminal Block
Chapter 8 The I/O Terminal Block The 4-pin terminal block, located on the back panel, provides the interface to one digital input and one relay output. The I/O terminal block can be used to develop applications for motion detection, event alerts via E-Mail and FTP, and center monitoring by Center V2 and VSM. -
Page 70: Relay Output
The I/O Terminal Block 8.2 Relay Output The relay outputs on the terminal block can only drive a maximum load of 5V. Working in conjunction with the GV-Relay V2 module, it can drive heavier loads. Refer to the figure and table below to connect the GV-Relay V2 module to the GV-IP Camera. Output Devices 1-4 Connect to Power Figure 8-2... -
Page 71: Specifications
Specifications Camera Image Sensor 1/3” progressive CCD Picture Elements 1280 (H) x 960 (V), 1.3 M CCD Resolution 700 TVL 0.2 lux @ F1.2 Minimum Illumination Shutter Speed 1/4 – 1/10000 sec. White Balance Manual / Automatic (1500K – 15000K) Lens Video drive / DC drive (switchblade) Operation... - Page 72 Specifications Mechanical Lens Mounting C / CS-Mount Power DC Jack Ethernet RJ-45 Audio Stereo phone jack, 3.5mm Alarm 2-pin terminal block Auto Iris Video drive and DC drive LED Indicator Power, Link, ACT General Operating Temperature 0 degree C – 50 degree C 10% - 90%, no condensation Humidity Power Source...
Need help?
Do you have a question about the GV-IP Camera 1.3M and is the answer not in the manual?
Questions and answers