
Related Manuals for Hobie Wild Cat


Summary of Contents for Hobie Wild Cat
- Page 1 Ref : MP_WILDCAT_GB Issued by : Alban ROSSOLLIN Date : March 2010 Up-date : 0 Page 1/49 OWNER’S MANUAL : HOBIE WILD CAT HOBIE CAT WILD CAT Copyright HCE 2010...
- Page 2 Report any such power lines to your local power authority and sail elsewhere. We take pride in presenting this Hobie Cat to you and hope that you'll take as much pride in owning her. Fair winds and good sailing! Hobie Cat Europe ...
-
Page 3: Table Of Contents
Ref : MP_WILDCAT_GB Issued by : Alban ROSSOLLIN Date : March 2010 Up-date : 0 Page 3/49 OWNER’S MANUAL : HOBIE WILD CAT Table of content Pages Description Description of the boat Safety advices Further information How to use your Hobie Dealer’s receipt... -
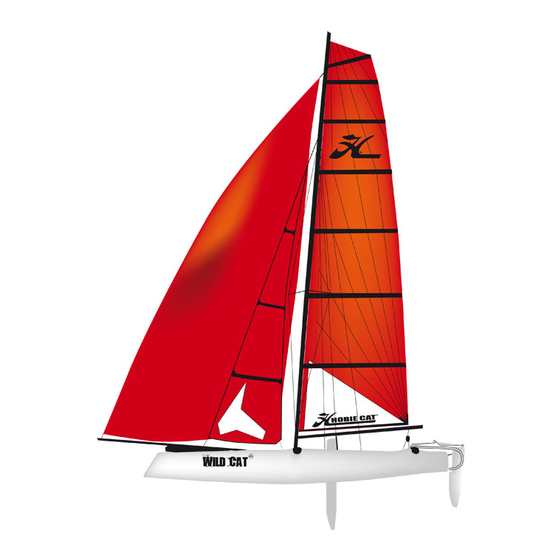
Page 4: Description Of The Boat
Ref : MP_WILDCAT_GB Issued by : Alban ROSSOLLIN Date : March 2010 Up-date : 0 Page 4/49 OWNER’S MANUAL : HOBIE WILD CAT Description of the boat Length m : 5,51 Width m : 2,60 Mast height m :... -
Page 5: Safety Advices
Issued by : Alban ROSSOLLIN Date : March 2010 Up-date : 0 Page 5/49 OWNER’S MANUAL : HOBIE WILD CAT Safety advices Whether on land or on the water, watch for overhead power lines. Contact with power lines can cause serious injury or death. -
Page 6: Further Information
Page 6/49 OWNER’S MANUAL : HOBIE WILD CAT Further information Hobie Cat owners are organised in a world-wide class association : The IHCA (International Hobie Class Association). For Europe, you can contact the EHCA (European Hobie Class Association). Visite their web site : http://ehca.hobieclass.com... -
Page 7: How To Use Your Hobie
In order to avoid hull damages : - Always use a dolley to transport your Hobie Tiger on the beach (even if it is sand beach) and for launching. Step into the water with the dolley and once the cata is afloat take out the dolley. - Page 8 Keep the sail loose and trimmed out Hobie Cat does not recommend leaving your completely until you can power up and steer Hobie in the water on a mooring. Accelerated away from any obstacle. wear to the boat and rigging will be experienced.
-
Page 9: Dealer's Receipt
Please carefully read the warranty conditions written hereafter in this manual. Please carefully and thoughroughly read this manual. Keep it in a safe place and give it to the new owner if you resell your Hobie. Copyright HCE 2010... -
Page 10: Warranty Conditions
HCE’s and that the copy for Hobie Cat Europe be returned to the charge but at the contractor’s charge. factory within 8 days of boat delivery. -
Page 11: Assembly Manual
Ref : MA_WILDCAT_FR Issued by : Alban ROSSOLLIN Date : mars 2010 Up-date : 3 Page 11/49 ASSEMBLY MANUAL : HOBIE WILD CAT List of the necessary tools Driller Lubricant Tape measure Drill Ø 8 Allen key supplied Screw driver... -
Page 12: List Of The Parts
Up-date : 3 Page 12/49 ASSEMBLY MANUAL : HOBIE WILD CAT List of the parts / References Your Hobie Wild Cat is delivered in 5 parcels : 1. Right hull (18756282) 2. Left hull (18756180) 3. Parcel n° 1 including... - Page 13 Ref : MA_WILDCAT_FR Issued by : Alban ROSSOLLIN Date : mars 2010 Up-date : 3 Page 13/49 ASSEMBLY MANUAL : HOBIE WILD CAT List of the parts - Ropes N° Description Reference Quantity Rear trampoline lacing line 18770420 Jib halyard...
- Page 14 Ref : MA_WILDCAT_FR Issued by : Alban ROSSOLLIN Date : mars 2010 Up-date : 3 Page 14/49 ASSEMBLY MANUAL : HOBIE WILD CAT List of the parts – Rigging parts N° Description Reference Quantity Crossbar fixation bolts 99220485 Aluminium washer...
-
Page 15: Right
Ref : MA_WILDCAT_FR Issued by : Alban ROSSOLLIN Date : mars 2010 Up-date : 3 Page 15/49 ASSEMBLY MANUAL : HOBIE WILD CAT List of the parts – Wire set N° Description Reference Quantity Spreader bar kit V2 18760300 Left adjustable spreader wire... - Page 16 Ref : MA_WILDCAT_FR Issued by : Alban ROSSOLLIN Date : mars 2010 Up-date : 3 Page 16/49 ASSEMBLY MANUAL : HOBIE WILD CAT List of the parts – Wire set N° Description Reference Quantity Bridle 18770500 Bolt with eye 99220134 Nylstop nut Ø 6...
- Page 17 Ref : MA_WILDCAT_FR Issued by : Alban ROSSOLLIN Date : mars 2010 Up-date : 3 Page 17/49 ASSEMBLY MANUAL : HOBIE WILD CAT List of the parts – Spi trumpet N° Description reference Quantity Spinnaker trumpet soft 99267755 Spinnaker soft bag...
-
Page 18: Hull / Crossbar Assembly
Date : mars 2010 Up-date : 3 Page 18/49 ASSEMBLY MANUAL : HOBIE WILD CAT Hull and crossbar assembly 1. Place the hulls parallel to each other with the insides face down on the ground. Take the right hull and turn it right side up, one person should stand astride it to hold it in place. -
Page 19: Trampoline Assembly
Issued by : Alban ROSSOLLIN Date : mars 2010 Up-date : 3 Page 19/49 ASSEMBLY MANUAL : HOBIE WILD CAT Trampoline assembly Attach the trampoline onto the front crossbar as indicated on the photo. 2. and hold in place with a bowline knot. - Page 20 Issued by : Alban ROSSOLLIN Date : mars 2010 Up-date : 3 Page 20/49 ASSEMBLY MANUAL : HOBIE WILD CAT Trampoline assembly 6. And again through the loop. 7. Once more through the ring 8. Then pass through the eyelet of the trampoline 9.
- Page 21 Date : mars 2010 Up-date : 3 Page 21/49 ASSEMBLY MANUAL : HOBIE WILD CAT Trampoline assembly 11. Unroll the trampoline towards the back making sure that the fiber glass rod is in place and centred in the band at the back of the trampoline.
-
Page 22: Preparing The Past
Date : mars 2010 Up-date : 3 Page 22/49 ASSEMBLY MANUAL : HOBIE WILD CAT Preparing the mast Place the mast onto supports (trestles) if possible at about 80 cm from the ground, so as not to strain your back while rigging the mast, leaving enough room to go all the way around the mast. - Page 23 Issued by : Alban ROSSOLLIN Date : mars 2010 Up-date : 3 Page 23/49 ASSEMBLY MANUAL : HOBIE WILD CAT Preparing the mast 3. Installation of the spinnaker halyard Insert the thin part of the spinnaker halyard into the spinnaker turret cleat (F) at the base of the mast.
- Page 24 Issued by : Alban ROSSOLLIN Date : mars 2010 Up-date : 3 Page 24/49 ASSEMBLY MANUAL : HOBIE WILD CAT Preparing the mast 4. Installation of spreader cables Unroll the spreader cables. Take the left cable and insert it into the slot at the base of the mast.
- Page 25 Issued by : Alban ROSSOLLIN Date : mars 2010 Up-date : 3 Page 25/49 ASSEMBLY MANUAL : HOBIE WILD CAT Preparing the mast Attach the left cable to the fitting situated on the left-hand side above the spreaders. Slip the spreader into the corresponding slot of the left spreader, taking care that the black plastic disk is above the spreader.
- Page 26 Date : mars 2010 Up-date : 3 Page 26/49 ASSEMBLY MANUAL : HOBIE WILD CAT Preparing the mast Using the small pieces of fine cable provided, secure the ends of the spreaders. Pass through the hole at the end of the spreader, and on one side of the spreader roll two or three times around the spreader cables.
-
Page 27: Stepping The Mast
Issued by : Alban ROSSOLLIN Date : mars 2010 Up-date : 3 Page 27/49 ASSEMBLY MANUAL : HOBIE WILD CAT Stepping the mast CAUTION DANGER – ALUMINIUM MAST Keep away from electric cables Place the mast on the trampoline, the mast base facing its support on the front crossbar. - Page 28 Issued by : Alban ROSSOLLIN Date : mars 2010 Up-date : 3 Page 28/49 ASSEMBLY MANUAL : HOBIE WILD CAT Stepping the mast Position once the mast is raised Once that the mast is upright, while (B) pushes the mast forward, (A) connects the shroud to the stay adjuster.
- Page 29 Issued by : Alban ROSSOLLIN Date : mars 2010 Up-date : 3 Page 29/49 ASSEMBLY MANUAL : HOBIE WILD CAT Cunningham / Righting line 1. Take the cam cleats that are pre-assembled on the end of the Cunningham attached to the front crossbar.
- Page 30 Issued by : Alban ROSSOLLIN Date : mars 2010 Up-date : 3 Page 30/49 ASSEMBLY MANUAL : HOBIE WILD CAT Cunningham / Righting line 5. Pull on the cord while holding the pulley to pass all of the loose cord through 6.
-
Page 31: Mast Rotation
Date : mars 2010 Up-date : 3 Page 31/49 ASSEMBLY MANUAL : HOBIE WILD CAT Mast Rotation Take the simple pulley that is on the n° 4 shackle in the rigging bag and fix it to the end of the rotation arm. -
Page 32: Installation Of The Boom
Issued by : Alban ROSSOLLIN Date : mars 2010 Up-date : 3 Page 32/49 ASSEMBLY MANUAL : HOBIE WILD CAT Installation of the boom Connect the boom on the mast using the gooseneck hinge, the pin and the split ring. - Page 33 Issued by : Alban ROSSOLLIN Date : mars 2010 Up-date : 3 Page 33/49 ASSEMBLY MANUAL : HOBIE WILD CAT Spinnaker kit assembly 1. Installing the spi pole Connect the pole to the front crossbar using the pin and split ring.
- Page 34 Issued by : Alban ROSSOLLIN Date : mars 2010 Up-date : 3 Page 34/49 ASSEMBLY MANUAL : HOBIE WILD CAT Spinnaker kit assembly Spinnaker kit assembly 2. Installation of the spinnaker trumpet Position the spinnaker trumpet on the boom taking into...
- Page 35 Issued by : Alban ROSSOLLIN Date : mars 2010 Up-date : 3 Page 35/49 ASSEMBLY MANUAL : HOBIE WILD CAT Spinnaker kit assembly 3. Spinnaker halyard circuit. Pick up the spinnaker halyard that was left waiting on the halyard cleat of the mast.
- Page 36 Date : mars 2010 Up-date : 3 Page 36/49 ASSEMBLY MANUAL : HOBIE WILD CAT Rigging the boat : Main sail Rigging tension Before hoisting all of the sails, the rigging tension must be adjusted. Please read the tuning guide at the end of this manual.
-
Page 37: Hoist The Main Sail
Date : mars 2010 Up-date : 3 Page 37/49 ASSEMBLY MANUAL : HOBIE WILD CAT Rigging the boat : Main sail 2. Hoist the main sail Undo the ends of the halyard, make a knot at the end of the halyard that comes out of the base of the mast. - Page 38 Issued by : Alban ROSSOLLIN Date : mars 2010 Up-date : 3 Page 38/49 ASSEMBLY MANUAL : HOBIE WILD CAT Rigging the boat : Main sail 3. Mainsheet system Insert the end of the boom into the strap of the clew point of the mainsail.
- Page 39 Issued by : Alban ROSSOLLIN Date : mars 2010 Up-date : 3 Page 39/49 ASSEMBLY MANUAL : HOBIE WILD CAT Rigging the boat : Main sail 4. Cunningham Attach the Cunningham pulleys to the tacking point on each side of the main sail as shown in the photo.
- Page 40 Issued by : Alban ROSSOLLIN Date : mars 2010 Up-date : 3 Page 40/49 ASSEMBLY MANUAL : HOBIE WILD CAT Rigging the boat : Jib 1. Attach the head of the using the shackle positioned on the white halyard rope.
- Page 41 Issued by : Alban ROSSOLLIN Date : mars 2010 Up-date : 3 Page 41/49 ASSEMBLY MANUAL : HOBIE WILD CAT Rigging the boat : Jib Once that the jib is hoisted, replace the yellow halyard by the jib Cunningham rope (B).
- Page 42 Issued by : Alban ROSSOLLIN Date : mars 2010 Up-date : 3 Page 42/49 ASSEMBLY MANUAL : HOBIE WILD CAT Rigging the boat : Jib Jib sheet The jib sheet is pre-mounted on the front crossbar. Attach the spectra line on the block that is pre-...
- Page 43 Issued by : Alban ROSSOLLIN Date : mars 2010 Up-date : 3 Page 43/49 ASSEMBLY MANUAL : HOBIE WILD CAT Rigging the boat : Spinnaker 1. Spinnaker blocks Fix the spinnaker blocks (from the rigging bag) onto the trampoline, put the...
-
Page 44: Rudder Assembly
Issued by : Alban ROSSOLLIN Date : mars 2010 Up-date : 3 Page 44/49 ASSEMBLY MANUAL : HOBIE WILD CAT Rudder assembly 1. Take the pintle and insert it through the rudder arm and the top gudgeon. 2. Place the washer between the gudgeon and the rudder casting. - Page 45 Issued by : Alban ROSSOLLIN Date : mars 2010 Up-date : 3 Page 45/49 ASSEMBLY MANUAL : HOBIE WILD CAT Montage des gouvernails 4. Rudder in the ‘down’ position. 5. Engage the round plastic part into its cavity on the rudder arm.
- Page 46 Issued by : Alban ROSSOLLIN Date : mars 2010 Up-date : 3 Page 46/49 ASSEMBLY MANUAL : HOBIE WILD CAT Tiller crossbar & extension 7. Assemble the tiller system as in the photo. 8. Fix the tiller extension in the middle of the tiller crossbar.
-
Page 47: Tuning Guide : Daggerboards, Cunningham, Rotation, Mast Rake
Ref : MA_WILDCAT_FR Issued by : Alban ROSSOLLIN Date : mars 2010 Up-date : 3 Page 47/49 ASSEMBLY MANUAL : HOBIE WILD CAT Tuning guide : Daggerboard, Cunningham, rotation, mast rake Copyright HCE 2010... - Page 48 Ref : MA_WILDCAT_FR Issued by : Alban ROSSOLLIN Date : mars 2010 Up-date : 3 Page 48/49 ASSEMBLY MANUAL : HOBIE WILD CAT Tuning guide : rig tension Cunningham Opening of Spreader Mast rotation Daggerboards tension (% of Crew weight...
-
Page 49: Contact
Ref : MA_WILDCAT_FR Issued by : Alban ROSSOLLIN Date : mars 2010 Up-date : 3 Page 49/49 ASSEMBLY MANUAL : HOBIE WILD CAT Contact HOBIE CAT EUROPE SAS ZI Toulon Est BP 250 83078 Toulon cedex 9 Tel : +33 (0)494 08 78 78 – Fax : +33 (0)494 08 13 99 Email : info@hobie-cat.net... - Page 50 Fix the elastic cord with a bowline knot to the connection point between the boom and the mast. Black cord assembly Fix the cord to the tackle pulley on the mainsail carriage with a bowline knot. Copyright Hobie Cat Europe 2010...
- Page 51 2 when the sails are full. In general, the sticker should not be placed on the front half of the boom (towards the mast), but on the back half (towards the tackle). Copyright Hobie Cat Europe 2010...
- Page 52 The handle should be assembled on the starboard side so that the port dagger-board can be raised without having to turn leeward. Pass the pulley into the back lacing of the trampo- line. Copyright HCE 2010 - www.hobie-cat.net Copyright HCE 2010 - www.hobie-cat.net .../...
- Page 53 The pulley should be situated in the middle of the trampoline. With the pulley under the trampoline, pass the elastic with the ring into the pulley. Attach the elastic to one of the ends of the tram- poline Copyright HCE 2010 - www.hobie-cat.net Copyright HCE 2010 - www.hobie-cat.net .../...
- Page 54 Pass the line into the fairlead, designed for this purpose, in the hull near the dagger-board Pass the line through the dagger-board and tie a figure of eight knot to hold in place. Copyright HCE 2010 - www.hobie-cat.net...
- Page 55 Insert the eye bolt into the hole under the end of the rotation arm. Insert the nylon washer and the nut and tighten. The eye bolt must be oriented as shown on the photo. Copyright HCE 2010 - www.hobie-cat.net Copyright HCE 2010 - www.hobie-cat.net .../...
- Page 56 To do this, undo the Cunningham pulley atta- chment and insert the ring while replacing the pulleys (see the Wild Cat assembly manual on the page concerning the Mainsail Cunningham). Take the black line with the stop ball on it, and insert the free end into the cleat, then through the ring as shown in the photo opposite.
- Page 57 Attach the simple pulley to the end of the line using a figure of eight knot. Connect this pulley to the mast rotation cords that are attached to the hulls (see the Wild Cat assem- bly manual on the page concerning the rotation arm).
Need help?
Do you have a question about the Wild Cat and is the answer not in the manual?
Questions and answers