
Related Manuals for Projectiondesign F35


Summary of Contents for Projectiondesign F35
- Page 1 WQXGA projector WQXGA projector F35 user’s guide user’s guide Designed and manufactured in Fredrikstad, Norway. www.projectiondesign.com...
- Page 2 This page intentionally left blank. F35 User’s Guide – Introduction...
-
Page 3: Table Of Contents
Contents of this User’s Guide Introduction 1.1 Thank you 1.2 Features SAFETY 2.1 SAFETY 2.2 WARNING 2.2.1 INFORMATION AND WARNING ABOUT POTENTIAL HEALTH ISSUES RELATED TO MERCURY VAPOR (This section only applies to projectors with UHP lamps) 2.3 WEEE INFORMATION 2.4 WARNING 2.4.1 SERVICE PERSONNEL INFORMATION WARNING... - Page 4 Gamma 7.2.3 RealColor™ operating modes 7.2.4 Setting a white point or color temperature 7.2.5 Defining the system color gamut Technical specifications 8.1 Product details Maintenance 9.1 Software upgrades 9.2 Lamp replacement User’s Guide – Introduction F35 User’s Guide – Introduction...
-
Page 5: Thank You
1.1 Thank you Thank you for purchasing a F35 projector. The F35 WQXGA resolution projector sets an industry benchmark for projectors in its size and performance category. Featuring high resolution DLP technology, high performance optics and lenses, updated signal processing and built-in frame-lock synchronisation makes the F35 the ideal projector for multi-channel visualisation and simulation applications, where realism and reliability are key criteria. - Page 6 User’s Guide – Introduction F35 User’s Guide – Introduction...
- Page 7 2 SAFETY This device complies with safety regulations for Information Technology Equipment intended to operate in “normal” environments (offices and homes). Before using the device for the first time, please read the safety instructions thoroughly. 2.1 SAFETY This user guide contains important information about safety precautions and the set-up and use of the projector.
-
Page 8: Weee Information
This product is using projection lamps that shall be recycled properly. Consult your dealer or relevant public authority regarding drop-off points for collection of WEEE. User’s Guide - SAFETY F35 user’s guide - SAFETY... -
Page 9: Remote Control Warning
2.4 WARNING This product contains chemicals, including lead, known to the State of California to cause birth defects or other reproductive harm. Recycle properly, do not dispose of in ordinary waste! 2.4.1 SERVICE PERSONNEL INFORMATION WARNING Use UV radiation eyes and skin protection during serviceing. 2.4.2 REMOTE CONTROL WARNING Laser radiation class II product;... -
Page 10: Service Information
In the event of product failure, please contact your reseller. You should prepare a description of the symptoms of failure you experience. Please also state product number and serial number as printed on the label on the bottom of the projector. User’s Guide - SAFETY F35 user’s guide - SAFETY... -
Page 11: Getting To Know The Projector
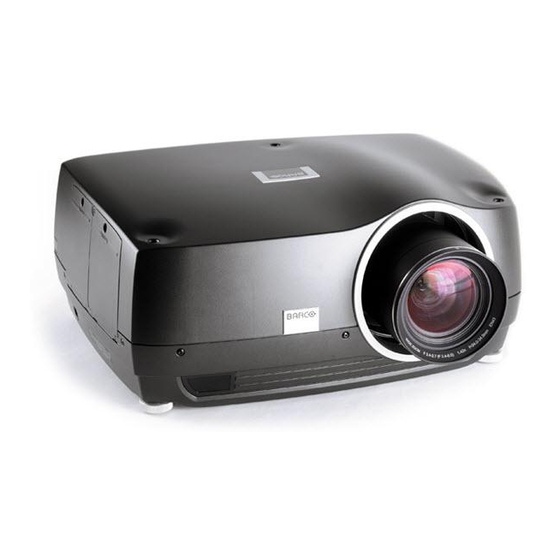
3 Getting to know the projector 3.1 Overview A Lens B IR sensor C Ventilation D Lens release E Power connector F Keypad G Connector panel H LCD Lamp lids J Adjustable feet K Security lock L Ceiling mount Figure 3-1. - Projector front view Figure 3-2. -
Page 12: The Status Indicator
If the projector continues to flash red, you will need to return the unit for service. User’s Guide – Getting to know the projector F35 User’s Guide – Getting to know the projector... -
Page 13: Remote Control
3.2.2 Keypad The projector has an illuminated keypad on the back of the unit. Figure 3-5 shows the keypad. Figure 3-5. Projector keypad The keypad is used to: - navigate the menu system - scroll the information in the LCD panel - directly select input sources - enter pin code (if enabled) - power on/off... - Page 14 HDCP compliant. All video formats specified by the HDMI 1.3a are supported. User’s Guide – Getting to know the projector F35 User’s Guide – Getting to know the projector...
-
Page 15: Graphical User Interface (Gui)
3.2.5 Graphical User Interface (GUI) The projector has an easy-to-use on screen display (OSD) system for controlling the extensive number of features implemented. “Figure 3-8. Top level OSD menu”, shows the top level of the OSD menu. picture installation settings language status Figure 3-8. - Page 16 User’s Guide – Getting to know the projector F35 User’s Guide – Getting to know the projector...
-
Page 17: What's In The Box
4 What’s in the box? The projector comes with the following components: Projector Power Cable (Country Dependant) Remote Control HDMI-cable DVI-cable Ceiling mount Cable Cover User Documentation Please verify that you have all compoents upon unpacking the unit, and its contents. Please save packaging materials for future use, should it be necessary to ship the unit. - Page 18 User’s Guide - What’s in the Box? F35 User’s Guide - What’s in the Box?
-
Page 19: Basic Setup
5 Basic setup 5.1 Lens 5.1.1 Lens and lens mount A range of fixed and zoom lenses is available to cover most applications, both front and rear. The lenses are powered and fitted with a bayonet mount for ease of installation. IMPORTANT! Switch off all equipment before setting-up for proper function. -
Page 20: Adjusting On Screen Image Size And Position
After the correct image size and position is found, please adjust the image focus using the keypad, the remote control, RS-232 or LAN. (C in Figure 5-1). Figure 5-1. Image size ans position adjustment User’s Guide - Basic setup F35 User’s Guide - Basic setup... -
Page 21: Lamp Operation
5.3 Lamp operation The projector is fitted with two individual projection lamps that can be run in various modes. In addition, lamps can be replaced as needed separately. This ensures an optimized cost of ownership. Individual lamp timers are maintained for each lamp. Lamp operation mode is controlled in the INSTALLATION >... -
Page 22: Ceiling Mount Cover
C The cover will snap in place, to release pull the vertical hooks on the cover out of the slots, letting the cover hinge on the horizontal hooks. User’s Guide - Basic setup F35 User’s Guide - Basic setup... -
Page 23: Connecting And Cables
5.5 Connecting and cables NOTE! Before setting up, switch off all equipment and disconnect the power cord. 5.5.1 Setting up a video source For best quality video, connect a digital video source using the HDMI 1.3a interface (A) in Fig- ure 5-4. -
Page 24: Image Alignment
To set the lamp mode, go the menu entry INSTALLATION > LAMP > LAMP MODE Each of the lamps can also be run in ECO mode or dimmed. Go to menu entry INSTALLATION > LAMP for the options. User’s Guide - Basic setup F35 User’s Guide - Basic setup... -
Page 25: Changing The Language Of The Menu System
5.11 Changing the language of the menu system The projector menu system has a total of 11 user-selectable languages embedded for easier use all over the world. The default language is English. The available languages are: • English • French • German • Spanish • Russian... - Page 26 User’s Guide - Basic setup F35 User’s Guide - Basic setup...
-
Page 27: Advanced Setup
6 Advanced setup 6.1 Controlling multiple projectors with remote control ID (RCID) The remote control can be operated either in ‘broadcast mode’, or ‘individual mode’. When several projectors are in use in an installation, individual control may be convenient. Individual control is available either by wired remote control, using the data-jack, or by using an individ- ual number code. -
Page 28: Using Dual Head Input
The projector has 3 IR receivers as shown in chapter “3.1 Overview”. These receivers can be individually disabled if necessary. Go to menu entry INSTALLATION > IR FRONT / IR REAR LEFT / IR REAR RIGHT to disable the receivers. User’s Guide - Advanced setup F35 User’s Guide - Advanced setup... -
Page 29: Controlling Screens With Triggers
6.6 Controlling screens with triggers The projector has to programmable triggers with 3.5 mm2 mini-jack connectors. These can be used to enable or disable screens, curtains or other peripheral equipment. To change trigger settings, go to menu entry INSTALLATION > TRIGGER By default: • Trigger 1 is set to control a screen depending on whether projector is powered on or not. -
Page 30: Disabling Led Indicators
When the projector is starting up, a logo is displayed in the entire image. The logo can also be set to “black” if it is desirable to disable the manufacturers default logo. Go to menu entry SETTINGS > SPLASH to change this setting. User’s Guide - Advanced setup F35 User’s Guide - Advanced setup... -
Page 31: Optimising The Picture
7 Optimising the picture The projector has power features for picture optimization. This chapter describes details in using these features. All color calibration is done using projectiondesign’s proprietary Real- Color™ solution. 7.1 Calibration data All projectiondesign projectors are measured and calibrated with high precision equipment at the factory for the best out-of-box experience. -
Page 32: Working With Realcolor
CAD and visualization. • Computer Balanced: Gives the same brightness as Computer Native, but has a less ag- gressive color boost profile. • Video Native: Gives less brightness than computer, but will appear with significantly less noise in video content. • Video Balanced: Same brightness as Video Native, but with a smoother color boost profile. • Off: Only recommend for applications requiring a pure red, green, blue mix of colors. No secondary color or white are added to the mix. User’s Guide – Optimising the picture F35 User’s Guide – Optimising the picture... - Page 33 7.2.2 Gamma The projector features a set of 6 built in gamma curves: Film 2.2, Film 2.8, Video 1, Video 2, Computer 1, Computer 2. The different gamma curves are displayed below. TIP! The names of the curves are descriptive for their recommended use. Use any of the computer curves for video applications will results in significant image noise.
- Page 34 Figure 7-4. Video 2 gamma Figure 7-5. Computer 1 gamma Figure 7-6. Computer 2 gamma User’s Guide – Optimising the picture F35 User’s Guide – Optimising the picture...
-
Page 35: Realcolor™ Operating Modes
7.2.3 RealColor™ operating modes Before any color correction is applied to the image, the feature must be enabled. Go to menu entry PICTURE > REALCOLOR > COLOR CORRECTION to enable RealColor™. RealColor™ can operate in 3 modes: • Color temperature/white point correction only. • Red, Green, Blue, White correction. In this mode optimal color coordinates for Cyan, Magenta and Yellow will be computed automatically. -
Page 36: Defining The System Color Gamut
TIP! For graphical visualization of the system color gamut and easy color management for a single or multiple projectors, the ProNet software package could be used. A license for the calibration software package of ProNet must be purchased separately. User’s Guide – Optimising the picture F35 User’s Guide – Optimising the picture... -
Page 37: Technical Specifications
8 Technical specifications 8.1 Product details projector DLP® digital projector display technology single chip DMD™ (Digital connectivity computer/video 2x HDMI (1.3) Micromirror Device™) concept sealed, all-glass optical design 2x DVI-D with lens shift available resolutions 2560 x 1600 colours 30-bit colour management ±... - Page 38 User’s Guide - Technical specifications F35 User’s Guide - Technical specifications...
-
Page 39: Software Upgrades
9 Maintenance 9.1 Software upgrades In order to upgrade your projector, please follow the method described below. • You will need a USB stick set up with a FAT-file system to perform this upgrade • Access the upgrade software from the following web-address; www.projectiondesign.com • Download and save the 010.firmware.zip file to your PC desktop • Unzip and extract the firmware file to the root of a USB memory stick • Set the projector in standby mode • Insert the USB stick in the projector and wait for a few seconds • The LCD display will indicate that it has detected an upgrade file on the memory stick. Wait a few seconds while the file is validated • Remove the memory stick when the LCD display instructs you to do so. -
Page 40: Lamp Replacement
9.2 Lamp replacement The LAMP indicators on the keypad will turn red when lamp life expires. Change the lamp when lifetime expires. Always replace lamp with the same type and rating. USE ORIGINAL LAMPS ONLY. The lamp includes an electronic lamp timer that is tracking the life time of the lamp. Allow lamp to cool down before changing. - Page 42 head office regional contacts projectiondesign as USA – Americas Panama – Central and South America Paseo Del Mar Habornveien 53 projectiondesign LLC N-1630 Gamle Fredrikstad, 295 North Street, Bayside, Suite 1301, Costa Del Este, Norway Teterboro, NJ 07608, Panama City ph +47 69 30 45 50 fx +47 69 30 45 80 Republic of Panama sales@projectiondesign.com...
Need help?
Do you have a question about the F35 and is the answer not in the manual?
Questions and answers