Table of Contents
Advertisement
Operating Instructions
GB
English, 1
KD6G35
KDP60E
KDP60SE S
To help you make the best use of your cooker, PLEASE READ THIS BOOKLET CAREFULLY.
Your new cooker is guaranteed and will give lasting service.
The guarantee is only applicable if the cooker has been installed in accordance with the Installation Instructions.
The cooker is designed specifically for domestic use and responsibility will not be accepted for use in any other
installation.
When first using the cooker ensure that the room is well ventilated (e.g. open a window or use an extractor fan)
and that persons who may be sensitive to the odour avoid any fumes. It is suggested that any pets be removed
from the room until the smell has ceased. This odour is due to any temporary finish and also any moisture
absorbed by the insulation.
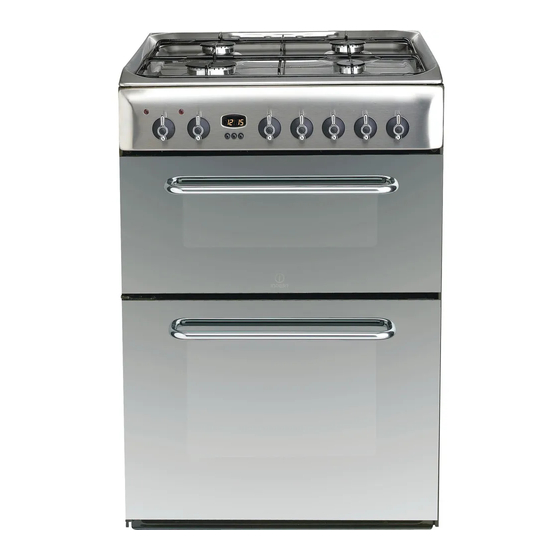
Free Standing Dual Fuel Cooker
Contents
Warning 2
Introduction, 2
Features, 4
Hotplate, 7
Grill, 8
Ovens, 9
Oven Cooking Charts, 10-11
Installation Instructions, 14-17
Guarantee Information, 19
Service Information, 20
GB
Advertisement
Table of Contents

Related Manuals for Indesit KDP60E


Summary of Contents for Indesit KDP60E
-
Page 1: Table Of Contents
Clock and Minute Minder Operation, 6 Hotplate, 7 Grill, 8 Ovens, 9 KD6G35 Oven Cooking Charts, 10-11 KDP60E Care and Cleaning, 12 KDP60SE S Something Wrong with your cooker?, 13 Installation Instructions, 14-17 If it still Won't Work, 18 Guarantee Information, 19 Service Information, 20 To help you make the best use of your cooker, PLEASE READ THIS BOOKLET CAREFULLY. -
Page 2: Warning
WARNING WARNING: The appliance and its WARNING: Ensure that the accessible parts become hot appliance is switched off before during use. replacing the lamp to avoid the possibility of electric shock. Care should be taken to avoid touching heating elements. CAUTION: the use of inappropriate Children less than 8 years of age hob guards can cause accidents. -
Page 3: For Your Safety
For your Safety Please read the precautions below before using your cooker. ALWAYS . . . NEVER . . . ALWAYS make sure you understand the controls NEVER leave children unsupervised where the before using the cooker. cooker is installed as all surfaces will get ALWAYS check that all controls on the cooker are hot during and after use. -
Page 4: Features
Features 2000W 2000W 3000W 1100W Control panel (varies per model) Clock/Minute Minder Conventional Model number & Grill Serial number label Grill pan food support Grill pan with Shelf fixed/detachable handle Top oven shelf supports Oven light Main oven wirework shelf supports Fan blade Main oven rod shelves... -
Page 5: Control Panel
Control Panel MAIN OVEN TOP OVEN PILOT LIGHT PILOT LIGHT K D P 6 0 K D P 6 0 K D P 6 0 K D P 6 0 K D P 6 0 ELECTRONIC* RIGHT LEFT LEFT RIGHT GRILL TOP OVEN TIMER... -
Page 6: Clock And Minute Minder Operation
Clock and Minute Minder CLOCK OPERATION To Set Time of Day 00.00 Step 1 Check that the electricity supply to the cooker is turned on. Step 2 When switched on the display will show 0.00 flashing intermittently. Step 3 Press the " "... - Page 7 Clock and Minute Minder MINUTE MINDER OPERATION 00 . 20 To Set the Minute Minder Step 1 Press the "+" button until the required time is set. A "Bell" symbol will light up. During setting the time adjusts in 10 second intervals up to a maximum of 99mins 50secs.
-
Page 8: Hotplate
Hotplate The hotplate lid is fitted with a safety device which SAFETY REQUIREMENTS FOR DEEP FAT FRYING 1. Never fill chip pans more than one third full with oil cuts off the gas supply to the hotplate burners unless the lid is fully open. Do not use the safety or fat. -
Page 9: Grill
Grill CAUTION - ACCESSIBLE PARTS MAY BECOME HOT WHEN THE GRILL IS USED. YOUNG CHILDREN SHOULD BE KEPT AWAY. TO USE THE GRILL 1. Open the grill/top oven door and place the shelf in the required position. GRILLING SHOULD NEVER BE UNDERTAKEN 2. -
Page 10: Ovens
Ovens Both ovens have a thermostat light that will MAIN OVEN - FAN COOKING illuminate until the oven has reached the set Fan cooking is ideal for large poultry or joints of temperature. It will then switch off and on during meat, reducing cooking times and often eliminating cooking as the thermostat maintains the the need for preheating the oven. -
Page 11: Oven Cooking Charts
Oven Cooking Charts Top Oven Cooking Meat Pre-heat Temperature °C Time (approx.) Position in Oven Beef/ Lamb 170/180 35 mins per 450g (1lb) + 35 mins over. (slow roasting) Beef/ Lamb 190/200 35-40 mins per 450g (1lb) (foil covered) Pork 170/180 40 mins per 450g (1lb) + 40 mins over (slow roasting) -
Page 12: Oven Cooking Charts
Oven Cooking Charts Top Oven Cooking Baking Pre-heat Temperature °C Time in mins. Position in Oven Scones 210/220 10-15 Runner 2 from bottom of oven Small Cakes 180/190 20-25 Runner 2 from bottom of oven Victoria Sandwich 170/180 20-30 Runner 2 from bottom of oven Sponge Sandwich 180/190 20-25... -
Page 13: Care And Cleaning
Care and Cleaning ! To move the cooker forward, open the top oven/grill ! Never use steam cleaners or pressure cleaners door and with both hands positioned under the roof on the appliance. of the compartment, lift and pull forward. Replace by Clean the glass part of the oven door using a pushing the cooker backwards. -
Page 14: Something Wrong With Your Cooker
Something Wrong with your Cooker Before contacting your Service Centre or Installer, check the problem guide below, there may be nothing wrong with your cooker. PROBLEM CHECK Burner will not light: If all burners fail to ignite: Check that sparks appear at the burners; a clicking noise should be heard. -
Page 15: Provision For Ventilation
PROVISION FOR VENTILATION MODEL NUMBERS KD6G35, KDP60E, The room containing the cooker should have an air KDP60SE supply in accordance with BS 5440: Part 2. Category II2H3+ (GB) -
Page 16: Stability Chain
Installation SPACE FOR FIXING LEVELLING The cooker can be close fitted below hotplate level. Four skid feet are fitted which can be adjusted up or This requires a minimum distance of 600mm between down to level the cooker. cupboard units of hotplate height. CONVERSION FOR USE ON BUTANE When installing next to a tall cupboard, partition or (G30) OR PROPANE (G31) -
Page 17: Electrical Connection
Electrical Connection WARNING - THIS APPLIANCE MUST BE EARTHED. The cooker must be connected by a qualified electrician to a suitable double - pole control unit with a minimum rating of 32A and a minimum contact clearance of 3mm, which should be fitted adjacent to (but not above) the cooker, in accordance with IEE regulations. -
Page 18: If It Still Won't Work
If it Still Won't Work Contact the Service Office Disposal of your product To minimise the risk of injury to children please If something is still wrong with your appliance after dispose of your product carefully and safely. you have been through the 'Something Wrong' list: Remove all doors and lids. - Page 19 We have a dedicated team who can provide free advice and assistance with your appliance if you experience any technical difficulties within the first 90 days of ownership. Simply call our Indesit Service Hotline on 08448 224 224 (ROI 0818 313 413) for telephone assistance, or, where necessary, to arrange for an engineer to call.
-
Page 20: After Sales Service
05/2012 - 195103716.00 XEROX FABRIANO After Sales Service No one is better placed to care for your Indesit appliance during the course of its working life than us - the manufacturer. Essential Contact Information Indesit Service We are the largest service team in the country offering you access to 400 skilled telephone advisors and 1100 fully qualified engineers on call to ensure you receive fast, reliable, local service.
Need help?
Do you have a question about the KDP60E and is the answer not in the manual?
Questions and answers