Advertisement
Advertisement
Table of Contents
Troubleshooting

Related Manuals for Mermaid MERMAID MARINE AIR CONDITIONING

Summary of Contents for Mermaid MERMAID MARINE AIR CONDITIONING
- Page 1 MERMAID MARINE AIR CONDITIONING INSTALLATION & OPERATIONS GUIDE Mermaid Manufacturing of Southwest Florida, Inc. 2651 Park Windsor Drive, Suite 203 Fort Myers, FL 33901 (239) 418-0535 (800) 330-3553 Fax (239) 418-0538 E-mail: MMair@Mindspring.com Web site: http://www.mmair.com...
-
Page 2: Table Of Contents
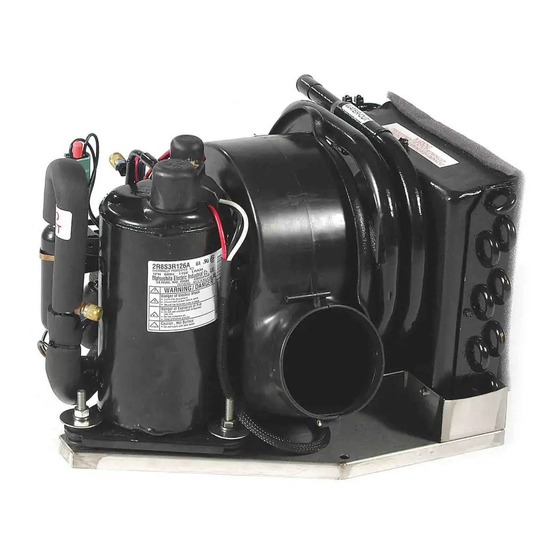
TABLE OF CONTENTS SECTION 1 (OVERVIEW) A. Introduction to Mermaid SECTION 2 (INSTALLATION and OPERATION) A. Air Conditioner Installation B. Operation SECTION 3 (OPERATION and PROGRAMMING) A. Digital, Programmable Thermostat SECTION 4 (PUMP RELAY BOX) A. Introduction B. Installation SECTION 5 (MAINTENANCE and WINTERIZATION) A. - Page 3 Mermaid supplies pleasure boat owners, custom boat builders, yacht brokers, boat dealers and marinas around the world with their marine air conditioning needs. Mermaid air conditioners are manufactured to the highest of quality standards using only top of the line components and materials assembled by long-term technicians. All of our air conditioners are modularized, self contained, prewired, precharged and mounted on a solid foundation of stainless steel.
-
Page 4: Air Conditioner Installation
A. AIR CONDITIONER INSTALLATION: First, and of foremost importance, the air conditioner and electrical box must be installed in a non-explosive, dry environment. SEE THE FOLLOWING WARNING. WARNING IF THE AIR CONDITIONER OR ELECTRICAL BOX ARE PLACED IN AN EXPLOSIVE ENVIRONMENT OR EXPOSED TO AN EXPLOSIVE ENVIRONMENT OR EXPLOSIVE MATERIALS, EXPLOSION COULD OCCUR RESULTING IN SERIOUS INJURY OR DEATH AND/OR DESTRUCTION OF THE BOAT. - Page 5 We will now address each of the above eight requirements in detail: 1. Installing the Air Conditioner Unit: AIR CONDITIONER DIMENSIONS UNIT BTU WIDTH LENGTH HEIGHT 5,200 Cool Only 11.5 Inches 15 Inches 11.5 Inches 5,200 Reverse Cycle 12 Inches 18 Inches 11.5 Inches 6,500...
- Page 6 CONDENSATION WATER CAN COME IN CONTACT WITH IT SHOULD THE CONDENSATION WATER OVER FLOW ITS PAN. NEVER PLACE THE ELECTRICAL BOX BELOW THE AIR CONDITIONING UNIT. WARNING IF CONDENSATION WATER CONTACTS THE ELECTRICAL BOX ELECTRICAL SHORTING COULD OCCUR CAUSING FIRE WHICH COULD RESULT IN SERIOUS INJURY, DEATH AND/OR DESTRUCTION OF THE BOAT.
- Page 7 SMALL PILOT HOLE FIRST WHICH CAN BE EASILY SEALED IF INTERFERENCE EXISTS. If you are using a sea cock assembly furnished by Mermaid, we recommend that a 1-1/16 inch hole saw be used to make this hole. If you are using a sea cock purchased elsewhere, you must use the appropriate hole saw for that specific sea cock.
- Page 8 absorbing sea water into the hull. If the hull is "corded," obtain a fiberglass sealing kit from your local marine supplier to seal the cording before installing the sea cock, eliminating the possibility of "water logging" your hull. This is also true of water out thru-hulls.
- Page 9 The Water Strainer: If you are using a Mermaid furnished water strainer, it will come with (2) 3/4 inch thread to hose barb hose fittings. Attach these fittings to the strainer using an ample amount of marine sealant on the threads. Again, if you are using a Mermaid strainer, locate the strainer mounting bracket.
- Page 10 Never screw the pump directly to the hull. If a stringer or other structure is not handy, you may have to fiberglass a mounting board to the hull to accept the mounting screws. Note: If you are supplying cooling water to more than one air conditioner a larger GPH pump is required.
- Page 11 The "water out" thru-hull can be mounted any place on the boat’s hull that is a minimum of (6) inches above the water line. If using a Mermaid supplied thru-hull fitting, the required hole size is 1-1/16 inches so the same hole saw used for the "water in"...
- Page 12 "GREEN" wires together. Included in the installation kit, if you purchased that option, is a small Mermaid A/C sticker. Place this on your breaker panel to properly denote the air conditioner circuit breaker. The Main Circuit Breaker Panel can now be closed up.
- Page 13 4. Air Ducting and Splitting: Regardless of the btu size of the air conditioner, at least one vent must be within 4 to 5 feet of the unit. Insure though, that the airflow is not directed back towards the return air grill.
- Page 14 Remember once committed, "holes are forever". If you need help or would just like to discuss your installation with an experienced technician, give us a call. Mermaid will be happy to aid you in the layout of your duct and venting scheme.
- Page 15 In many boats it is not possible to drain to the bilge, and the condensation must be removed by other means, such as a “Mermaid Condensator Kit”. Please contact your Mermaid dealer or the factory for other options to remove condensation.
- Page 16 light and not directly in front of a "supply air" vent, nor next to a hatch. It is important that the thermostat be located where it is sensing “true” cabin temperature rather than a “dead” spot, or getting incorrect readings from sunlight or sampling air near a constantly opening/closing hatch thereby reading “outside”...
- Page 17 • Black wire = “Y” connection on thermostat. This wire is for the cooling mode. 9. Putting it all together: At this point the unit can be placed back into its compartment, and all the power, water hoses and ducting should be available and ready to connect: IMPORTANT DO NOT CUT ANY EXCESS WATER HOSE , WIRE OR DUCTING BEFORE DETERMINING THAT ALL REQUIREMENTS CAN BE MET WHEN UNIT IS...
- Page 18 WARNING MAKE SURE THAT ALL AC POWER TO THE BOAT HAS BEEN DISCONNECTED. FAILURE TO REMOVE ALL BOAT AC POWER COULD RESULT IN ELECTRICAL SHOCK CAUSING SERIOUS INJURY OR DEATH. Determine which power cable is from the pump (16 gauge cable) and strip the outside insulation back about six inches.
- Page 19 recommend that you secure it with one or two 1/2 inch s/s screws along with duct tape or foil tape. Now, attach the return air grill and your installation is completed. B. SYSTEM OPERATION: Note: If the boat has not been placed back in the water, do so now. The air conditioner requires proper cooling water to operate.
- Page 20 b) Place the main circuit breaker and the air conditioner circuit breaker in their "ON" positions. 3. Water Out: a) Once the air conditioner starts, immediately go out on deck and check that water is coming out of the "water out" thru-hull. Once all of the latent air is forced from the hoses a steady stream should be present with enough force that the water stream clears the side of the boat hull.
-
Page 21: Introduction
The included mounting pad should eliminate a generous portion of any known / heard vibration. SECTION 3 (OPERATION & PROGRAMMING MANUAL FOR THE MERMAID STANDARD DIGITAL 24V THERMOSTAT) NOTE: THE FX-1 AND NON-PROGRAMMABLE 24V THERMOSTAT MANUAL ARE PROVIDED WITH EACH UNIT A. INTRODUCTION In August of the year 2004 we discovered an unnacceptable amount of failures with the previously provided thermostat. - Page 22 Once you have selected the spot, remove the face of the thermostat from the back panel and install by following these instructions: 6. Depress the thumb tab on the bottom of the thermostat and carefully pull the two pieces apart. 7.
- Page 23 B. SETTING THE CURRENT DAY AND TIME Open the drop down door on the front of the thermostat. Rotate the dial to the SET DAY/TIME position. You should see the display read 12:00 with a flag pointing to a day of the week flashing.
-
Page 24: Installation
(PUMP RELAY BOX) For use with the Mermaid Standard 24v Controls. The Mermaid FX-1 Thermostat requires a different pump relay box. Contact the Mermaid factory for details. The instuctions for the FX-1 Thermostat Relay Box will be included upon the purchase of this product. - Page 25 Pump Relay Box relays located inside the box. (When using the Mermaid FX-1 control, a 110v relay coil is used. A 110v to 110v relay box is required. Contact the Mermaid factory for details) 4.
-
Page 26: (Maintenance And Winterization)
11. Locate the WHITE terminal board on the side of the Pump Relay Box. Using the 16 gage boat cable from the circuit breaker, strip the insulation off about 1/4 inch on the "WHITE" and "BLACK" wires in the boat cable and insert them into the appropriate slots on the side of the terminal board marked "POWER". -
Page 27: Winterization
gradually reduce the efficiency and performance of your air conditioner to a point that it will require professional acid bath cleaning. b) When cleaning the filter, also wipe the unit off with a dry cloth to eliminate dust build up. Check that the air ducting has not sagged or loosened around the air collar or air vents. -
Page 28: (Theory Of Operation And Trouble Shooting)
All Mermaid air conditioners have always been charged with HCFC-22 (R22), similar to your home air conditioner or refrigerator. CFC-12 (R12) has never been used in Mermaid air conditioners. It is unlawful for any technician who is not EPA certified as at least a Type1. - Page 29 Mermaid models. 3. Electrical: a) All Mermaid air conditioner models are available in either 115 vac or 220 vac configurations. Shore power is applied to the air conditioner from the boat’s main circuit breaker through a dedicated air conditioner circuit breaker to the air conditioner electrical box.
-
Page 30: Trouble Shooting
This will cause the evaporator to heat up as described in paragraph 2 above. (Mermaid’s FX-1 Controls utilize a 110v or 220v reversing valve coil that is or will be provided with the use of this control.) - Page 31 d) If both breakers are in the ON position, check to see if boat power source is present. If power source is present, turn on another boat 115 vac accessory to make sure main breaker is operational. e) If main breaker is operational, using an AC voltmeter, check for 115 vac power at the unit electrical box.
- Page 32 Closely check the box for loose or disconnected wires. If all wiring is tight and in place, replace the transformer. A new transformer may be purchased from your nearest Mermaid dealer, refrigeration supply store or direct from the Mermaid factory. 2. Standard 24v Thermostat In COOL Position - Fan Runs - Compressor Does Not: a) Place thermostat in the OFF position.
- Page 33 e) Check for any obstructions in the intake or strainer/water lines. Periodic growth of barnicles or accumulated debris may block the water intakes. f) If this is a new installation, check to make sure that pump, water strainer and sea cock are all below sea level.
- Page 34 8. High Pressure Switch Activates In Cooling Mode: a) Only a lack of cooling water will activate the high pressure switch when the air conditioner is operated in the COOL mode. See paragraph 4 (No Water Out) above. 9. High Pressure Switch Activates In Heating Mode: a) When the high pressure switch activates in the HEAT mode, the evaporator is not being properly relieved of heat.
- Page 35 OUR NORMAL PROCEDURE FOR A WARRANTY ISSUE IS AS FOLLOWS: FIRST AND FOREMOST, DETAIL EXACTLY WHAT THE UNIT IS DOING. NEXT, CALL OUR FACTORY AND ASK TO SPEAK TO ONE OF OUR TECHNICIANS. OUR PHONE NUMBER IS (800) 330-3553. WE HAVE TECHNICIANS AVAILABLE 8-5 EASTERN TIME, MONDAY THROUGH FRIDAY.
- Page 36 INSURANCE ON THE UNIT. THE SECOND SHIPPING OPTION IS TO SIMPLY PACKAGE THE UNIT IN THE BOX WE PROVIDE AND USE ANY OTHER CARRIER OF YOUR CHOICE TO SEND PRODUCT BACK TO US. HOWEVER, BE SURE TO INSURE THE PACKAGE AS WE ARE NOT RESPONSIBLE FOR ANY DAMAGE TO THE UNIT WHILE IN TRANSIT TO OUR FACTORY.
- Page 37 Mermaid Manufacturing of Southwest Florida, Inc. 2651 Park Windsor Drive, Suite 203 Fort Myers, FL 33901 (239) 418-0535 (800) 330-3553 Fax (239) 418-0538 info@mmair.com www.mmair.com...
Need help?
Do you have a question about the MERMAID MARINE AIR CONDITIONING and is the answer not in the manual?
Questions and answers