Advertisement
INSTRUCTIONS FOR INSTALLATION & USE
GETTING STARTED:
STEP 1
Choose a location for your
freezer, away from any
heat sources and
allow adequate
ventilation - 30mm
(1
/
inch) gap above.
1
4
STEP 3
Level the freezer by
adjusting the front feet.
This will stop rocking or
vibration and keep the
door aligned.
STEP 5
Plug in and switch on.
Allow the freezer to cool
before placing food
inside.
The high temperature
light will stay on until the
freezer has cooled down.
All food in the freezer
should be covered.
Read the rest of these instructions to get the best from your appliance
and remember to fill in your guarantee registration.
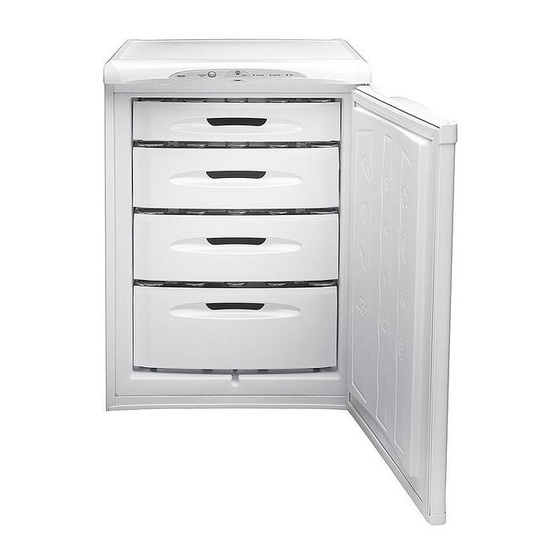
FREEZER - MODELS RZA30, RZM30
To ensure that your freezer runs reliably and efficiently follow these steps.
STEP 7
Your freezer is now
working.
If after 24 hours your
freezer is not operating as
you want, refer to the
TROUBLESHOOTING
section.
Keep this Book in a safe place for quick reference.
STEP 2
Move the freezer into
position, using the sides
of the cabinet. Take care
to avoid damaging the
refrigerant circuit pipe
work on the rear.
STEP 4
Before plugging in and
switching on, leave the
freezer in its final
location for at least 15
minutes to allow it to
settle.
STEP 6
If you are freezing fresh
food, turn on fast freeze
by pressing the switch 24
hours before placing the
food inside. Place the
fresh food inside and
remember to turn off fast
freeze after another 24
hours.
Advertisement
Table of Contents

Related Manuals for Hotpoint RZA30


Summary of Contents for Hotpoint RZA30
- Page 1 FREEZER - MODELS RZA30, RZM30 INSTRUCTIONS FOR INSTALLATION & USE GETTING STARTED: To ensure that your freezer runs reliably and efficiently follow these steps. STEP 1 Choose a location for your freezer, away from any heat sources and allow adequate ventilation - 30mm inch) gap above.
-
Page 2: For Your Safety
Take care when installing or moving the freezer to avoid damaging the pipes on the rear. If you suspect a leak, do not switch on the freezer, but open the windows and doors to ventilate the room. Do not use any electrical devices inside the freezer, for instance for defrosting. -
Page 3: Installation
If preferred the freezer can be positioned so that a gap is not left. This will restrict how far the door can be opened but the furniture can still be removed (see diagram below). - Page 4 15 minutes to allow it to settle. Fitting a Freezer under a Work Top To minimise running costs Hotpoint recommend fitting a vent to the rear of your worktop, which is available from Hotpoint Genuine Parts & Accessories Mail Order Hotline (see KEY CONTACTS, back page).
- Page 5 This freezer is fitted with a special mains lead. If you need to replace the mains lead due to damage, one can be bought from Hotpoint Service (see KEY CONTACTS, back page). It is strongly advised that this work is carried out by a qualified electrician.
- Page 6 Your food should be maintained at -18˚C or colder for long term storage. The setting of the control wheel will depend on the location of the freezer, the room temperature and how often the door is opened. The normal set point (marked by a 3 and N on the dial) is usually suitable.
- Page 7 Check the TROUBLESHOOTING section before calling for advice. The red light may come on for a short period when opening the freezer door to load or unload food, in this case storage times will not be affected.
- Page 8 Fast Freeze Button - Freezing fresh food The top compartment, with or without the drawer, should be used to freeze fresh food. Transfer already frozen food to one of the lower compartments/drawers. - Before loading 2kg or more of fresh food select fast freeze for the required pre-freeze time (see chart below).
-
Page 9: Useful Advice
Maximum conservation time from failure 18 hours Making the best use of your Freezer To ensure that your freezer operates as efficiently as possible : Follow food packaging “best before/use by” instructions or your suppliers advice on a suitable maximum storage time. - Page 10 Once thawed, food should be cooked and eaten within 24 hours or cooked and refrozen. Fully defrost your freezer when the ice is between 3-5mm thick ( CLEANING & MAINTENANCE section). Note : A thick layer of ice will increase the running costs of your freezer. Useful Advice inch) (see...
- Page 11 WARNING: The freezer drawers can become heavy when fully loaded with food. Care must be taken if attempting to lift or carry a full freezer drawer. It is recommended to remove the required food, rather than the whole freezer drawer.
- Page 12 Remove frozen food, wrap or cover and store in a cool place. Remove the storage drawers A defrost tube is stored in the floor of the freezer. Insert the tube into the groove situated in the floor at the front of the freezer. Place a container beneath the tube to collect the defrost water.
- Page 13 WARNING: Do not use detergent, it will damage the seal. Going Away If you are going away and don’t want to use your freezer, switch off electricity supply and pull out the mains plug. Remove food and follow the defrosting and cleaning instructions above.
-
Page 14: Maintenance
You will need a pozi head screwdriver to carry out this procedure. Our Service Department can arrange for an Engineer to do the conversion for you but a charge will be made. Door Reversal WARNING: Switch off electrical supply and pull out the mains plug. Remove loose items/fittings from inside the fridge and place food into insulated containers whilst carrying out this operation. -
Page 15: Troubleshooting
If this is the case refer to ‘Defrosting’ in the CLEANING & MAINTENANCE section and defrost the appliance. If there is still a problem contact Hotpoint Service (see KEY CONTACTS back cover). - Page 16 OPERATING SOUNDS OF A FRIDGE FREEZER These are the normal types of sound that your freezer will make. The motor (compressor) makes a buzzing or humming sound when it is running. This can be louder when it first switches on. This sound will reduce over the first few months.
-
Page 17: Hotpoint Guarantee
All Hotpoint appliances carry a fully inclusive 12 month parts and labour guarantee as well as free replacement parts for the first 5 years (except microwaves, selected integrated appliances and cooker hoods, which have a one year guarantee) provided that they are fitted by a Hotpoint engineer. -
Page 18: After Sales Service
Hotpoint appliance than us - the manufacturer” As part of our commitment to you, all Hotpoint appliances have the added benefit of a fully inclusive parts and labour guarantee for the first 12 months. In addition to this you also have the advantage of free replacement parts for the first 5 years when fitted by a Hotpoint engineer. - Page 19 Notes...
-
Page 20: Key Contacts
Over 1200 trained specialists, directly employed by us, ensure that you can have complete confidence in both the appliances and services we offer. Repair Service and Information Desk (Open 8 to 8 Mon - Fri, 8 to 6 Sat, 10 to 4 Sun & Bank Holidays) Note: Our operators will require the following information: See USEFUL ADVICE SECTION for rating plate position (Open 8-30 to 5-30 Mon - Fri &...
Need help?
Do you have a question about the RZA30 and is the answer not in the manual?
Questions and answers