Casio V-R7000 User Manual
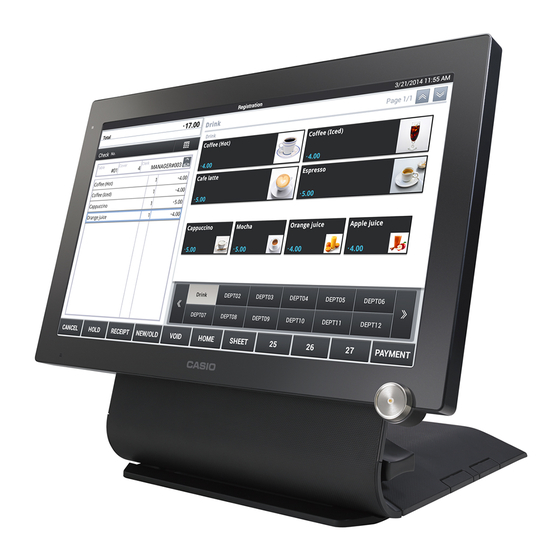
Touch screen terminal
Hide thumbs
Also See for V-R7000:
- Service manual (58 pages) ,
- Programming and reference manual (155 pages) ,
- Reference manual (79 pages)

Related Manuals for Casio V-R7000


Summary of Contents for Casio V-R7000
- Page 1 User’s Manual Manual del usuario Manuel de l’utilisateur Bedienungsanleitung V-R7000 V-R7100 Touch Screen Terminal Terminal de pantalla táctil Borne de l’écran tactile Touchscreen-Terminal...
-
Page 3: Table Of Contents
(if using the optional CASIO drawer)........ -
Page 4: Safety Precautions
’ ● Contact the dealer or the CASIO service representative when the power cord is dam- aged (wire is exposed or disconnected). Using the power cord in such condition may result in fire or electrical shock. - Page 5 ● Disconnect the power plug from the outlet and contact the dealer where the product was purchased or the CASIO service representative when a foreign object or water got inside the product. Using the power cord in such condition may result in fire or electrical shock.
- Page 6 ● Take care not to pinch finger with the tilt knob and its surrounding when adjusting the angle of the display. This may result in injury. Drawer (If using the optional CASIO drawer) ● Take caution with the face of a child or pregnant person when opening a drawer.
- Page 7 Regulatory Information The USA and Canada GUIDELINES LAID DOWN BY FCC RULES FOR USE OF THE UNIT IN THE U.S.A. (Not applicable to other areas) WARNING: This equipment has been tested and found to comply with the limits for a Class A digital device, pursuant to Part 15 of the FCC Rules. These limits are designed to provide reasonable protection against harmful interference when the equipment is operated in a commercial environment.
- Page 8 Caution: Users should also be advised that (i) the device for operation in the band 5150-5250 MHz is only for indoor use to reduce the potential for harmful interference to co-channel mobile satellite systems; (ii) the maximum antenna gain permitted for devices in the bands 5250-5350 MHz and 5470-5725 MHz shall comply with the e.i.r.p.
- Page 9 Responsible within the European Union:CASIO EUROPE GmbH CASIO-Platz 1, 22848 Norderstedt, Germany Please keep all information for future reference. The declaration of conformity may be consulted at http://world.casio.com/ V-R7100 0984 Products are for distribution within all member states of the EU.
-
Page 10: Precautions For Use
Precautions for Use Read the following items thoroughly and use this product properly. CASIO bears no responsibility whatsoever for malfunction or damage caused by handling not following below contents. Please note that it will also result in charged repair, and actual cost required for repair will be charged, even if it is within the warranty period. - Page 11 ● Please note that CASIO bears no responsibility for damage, loss of profit, or any claim from third party due to loss or change of data caused by usage, malfunction, or repair of this product.
-
Page 12: Confirming The Accessories
Confirming the Accessories Stand Display AC adaptor Drawer cable Connector cover Dust cover ● Power cord (US only) ● User’s Manual (this manual) ● Warranty (US only) E-10... -
Page 13: Basic Operation
Adjusting the Angle of the Display . . . . . . . . . . . . . . . . . . . . . . . . . . . . . . . . . . . . E-18 When the Drawer Does not Open (if using the optional CASIO drawer) . . . . . . E-18... -
Page 14: Name Of Parts And What They Do
Name of Parts and What They Do * The operation of the various parts is described with reference to the illustration of the display mounted on the stand. <Front> 1 Indicator Display the status of the power supply. 2 Power switch Turn the power ON. - Page 15 Name of Parts and What They Do <Rear> 6 Rear cover Open when connecting the power supply or various devices. 7 Speaker Output the audio. 8 Main power switch cover Cover for the main power switch. 9 Tilt knob Adjust the angle of the display. 10 Earphone jack cover Cover for the earphone jack.
- Page 16 Name of Parts and What They Do <Left side (when the side cover is opened)> 12 OFF switch Turn the power OFF. 13 USB (host) port (for maintenance) A port for maintenance. Do not use. 14 SD/SDHC memory card slot (for maintenance) A slot for maintenance. Do not use. 15 Reset switch (for maintenance) A switch for maintenance.
-
Page 17: Power On/Off
Power ON/OFF This product has 3 power switches, the main power switch, power switch, and the OFF switch. Daily Use Turning the Power ON Press the power switch. The screen will turn on. Turning to sleep mode Press the power switch while the power is ON. -
Page 18: Moving And Cleaning
Power ON/OFF Moving and Cleaning When moving or cleaning the product, always shut down the main unit before turning OFF the main power switch. Also, always make sure that the main power switch is OFF before removing or inserting the plug. Shut down the main unit. -
Page 19: Description Of The Indicator
Description of the Indicator The status is indicated by the ON, flashing, or OFF of the indicator. Indicator Indicator Status Green light is ON Power is ON/screen is ON Orange light is ON Power is ON/screen is OFF Green and red lights flashing with screen ON Memory protection battery not charged *Do not turn OFF the main power switch or Red and orange lights flashing with screen OFF... -
Page 20: Adjusting The Angle Of The Display
The drawer will not open if it has been locked with the drawer lock key. Unlock the lock. If you are using a CASIO optional L size drawer, it can be opened by turning the drawer key in the drawer lock. -
Page 21: Installation
Installation This chapter is about the installation. Please read these instructions before starting installation. During use of the product, read these instructions if you have disconnected the cables of the product to move it and do not know how to reconnect them. Name of Parts and What They Do . -
Page 22: Name Of Parts And What They Do
Name of Parts and What They Do <Left side on the back of the display> 16 COM3 port Connect device such as customer display, etc. 17 COM2 port Connect device such as printer, etc. 18 COM1 port Connect device such as printer, etc. 19 Drawer port for 24 V Connect the drawer cable. - Page 23 Name of Parts and What They Do <Right side on the back of the display> 23 Mounting holes Hook onto the hook of the stand when using the stand. 24 SD/SDHC memory card slot Insert the SD or the SDHC memory card. 25 HDMI port Connect the HDMI device.
-
Page 24: Connecting The Power Supply And Various Devices
Connecting the Power Supply and Various Devices Connect the power supply and devices to be used. Keep the main power switch in OFF position until all the connections are completed. ● Use a Phillips screwdriver and pliers to make the connections. Prepare in advance. ●... -
Page 25: Connecting The Ac Adaptor
Connecting the Power Supply and Various Devices Connecting the AC Adaptor Route the cable through the stand and connect the AC adaptor to the DC jack located within the back of the display. Connecting Other Devices Connect the optional device to the following connector. Option Connector Remote printer: UP-400B, UP-370B... - Page 26 Connecting the Power Supply and Various Devices Insert the SD Card (1) Insert the SD card, front-side up, into the SD/SDHC memory card slot located within the back of the display. Connecting the HDMI Device (1) Connect the HDMI cable to the HDMI port within the back of the display.
-
Page 27: Preparing The Stand
Connecting the Power Supply and Various Devices Preparing the Stand Loosen the tilt knobs by turning them through at least 1 full rotation in the directions shown. Raise the upper part of the stand. Then, while holding it steady, secure it by tightening the tilt knobs one side at a time in the directions shown. -
Page 28: Setting The Stand And The Display
Connecting the Power Supply and Various Devices Setting the Stand and the Display Loosen and remove the screw for the cable fastener at the bottom of the opening of the stand with a Phillips screwdriver. Route the connected cables into the stand, passing them through the opening. - Page 29 Connecting the Power Supply and Various Devices Fasten the stand to the display with 4 screws. Attach the rear cover to the stand in the direction of the arrow. Loosen and remove the screws for the 3 cable fasteners at the bottom of the stand with a Phillips screwdriver.
-
Page 30: Installation Features
Connecting the Power Supply and Various Devices Raise the display. Then, while holding it steady, secure it by tightening the tilt knobs one side at a time in the directions shown. Connect the AC adaptor with the power cord, and plug into a power outlet. Installation features •... -
Page 31: Mcr Unit (Va-B46Mcre) Installation
• The display may be wall-mounted. In this case, the stand is not used. Screw holes for wall-mounting For further details, contact the CASIO service representative. MCR Unit (VA-B46MCRE) Installation Before installation, be sure to turn the main power switch OFF and remove the plug from the power outlet. -
Page 32: Specification
Specification Item Specification Model V-R7000/7100 Display 15.6 inch WXGA color TFT liquid crystal Type display Resolution 1366 x 768 Backlight White LED Touch panel Method 4-wire resistive film Size 15.6 inch Wireless LAN (V-R7100 only) Standard IEEE 802.11a/b/g/n Bluetooth (V-R7100 only) Supported version Bluetooth standard Ver2.0+EDR... - Page 33 Specification Item Specification Option Remote printer: UP-400B, UP-370B Customer display: VA-B60D Customer display serial cable (40 cm): QT-6061CB-B Customer display serial cable (5 m): QT-6062CB-B Expansion I/F box: VA-B20EB Drawer (M size): DL-2814, DL-2815, DL-2436 (L size): DL-3624, DL-3625 Drawer extension cable: VA-B30CB MCR unit: VA-B46MCRE E-31...
- Page 34 MEMO E-32...
- Page 36 MA1402-A V-R7000*ESFG...
Need help?
Do you have a question about the V-R7000 and is the answer not in the manual?
Questions and answers
Hi, My vr7000 showing screen lock. After rebooting 20 seconds later going in to orange display light from green. Cannot access to system.