Life Fitness T3 Owner's Manual
Hide thumbs
Also See for T3:
- Service manual (68 pages) ,
- Assembly instructions manual (8 pages) ,
- Assembly & user manual (34 pages)
Table of Contents
Advertisement
Advertisement
Table of Contents

Related Manuals for Life Fitness T3


Summary of Contents for Life Fitness T3
- Page 1 T3 TREADMILL Owner’s Manual 8972901 REV B-3...
- Page 3 Service Operating Hours: life fitness IBerIa China and Hong Kong 9:00 - 17:00 (BRT) (Monday-Friday) life fitness asia pacific ltd Store Operating Hours: C/Frederic Mompou 5,1º1ª 9:00 -20:00 (BRT) (Monday-Friday) 08960 Sant Just Desvern Barcelona Room 2610, Miramar Tower...
- Page 4 Before using this product, it is essential to read this ENTIRE operation manual and ALL installation instructions. This will help in setting up the equipment quickly and in instructing others on how to use it correctly and safely. Note: This equipment generates, uses and can radiate radio frequency energy, and if not installed and used in accor- dance with the operation manual, may cause harmful interference to radio communications.
-
Page 5: Table Of Contents
Life Fitness T3 Treadmill Design Illustration ........ - Page 6 Life Fitness Treadmill Model: Thank you for purchasing a Life Fitness treadmill. Before using this product please read this user manual in its entirety to ensure that you have the knowledge to safely and properly operate all of the features on your treadmill. We hope you...
-
Page 7: Important Safety Instructions
To disconnect, turn power OFF at the ON/OFF switch, then remove plug from electrical outlet. • Never operate a Life Fitness product if it has a damaged power cord or electrical plug, or if it has been dropped, damaged, or even partially immersed in water. Contact Life Fitness Customer Services. - Page 8 • Use the handrails whenever additional stability is required. In case of emergency, such as tripping, the user should grab the handrails and place his/her feet on the side platforms. The handrails may be held to enhance stability as needed, but are not for continuous use. •...
-
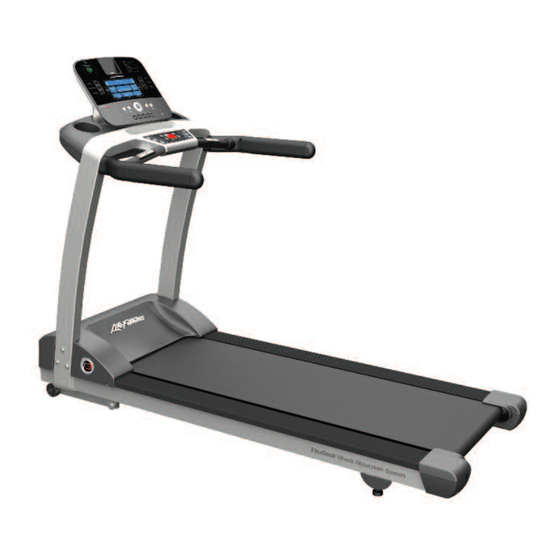
Page 9: Life Fitness T3 Treadmill Design Illustration
T3 T ITNess reADmIll esIGN llUsTrATION T3 with Track Console Roller End Cap... -
Page 10: Assembly
For safety, and to save time and effort, read this Owner’s Manual completely before installing your Life Fitness Treadmill. Place the treadmill near where it will be used before beginning the unpacking procedure. NpACkING These unpacking instructions assume you have already done the following: •... -
Page 11: Component List & Hardware
& H OmpONeNT ArDWAre Identify the following components after unpacking your treadmill: 1. Left Upright Qty: 1 8. M8 X 15MM Bolt (Black) Qty: 4 2. M8 X 60MM Bolt (Silver) Qty: 6 9. M8 X 15MM Tapered Bolt (Silver) Qty: 6 3. -
Page 12: Installing Uprights And Handlebars
NsTAllING prIGHTs AND ANDlebArs Remove the motor cover by removing four Phillips screws. Locate the left upright (1). Position the left upright near the left upright bracket and attach the wire connectors that lead from the bottom of the left upright and the left upright bracket. Be sure the connectors are fully seated together. -
Page 13: Installing The Console
NsTAllING THe ONsOle Remove the pre-installed bolt (A) from the back of the main console (B). Position the main console near the top of the console bridge and attach the connectors leading from the console bridge to the corresponding tabs on the back of the main console. -
Page 14: Attaching The Power Cord
Insert the female plug of your treadmill’s power cord into the male outlet next to your treadmill’s power switch. Note: T3 treadmills shipped in the USA and Canada are supplied with a North American line cord. Attach the cord suited to your area. -
Page 15: Setup
Most Life Fitness Treadmills are intended for use on a normal 120 volt circuit in the United States and Canada. Below is a table that provides the current rating for this product based on supply voltage. Make sure that the treadmill model sup- ports the proper line voltage for the installation location before plugging into the outlet. - Page 16 OWer WITCH Located on the front panel at the base of the treadmill, the ON/OFF switch has two positions - "I" (one) for ON and "0" (zero) for OFF. mmObIlIzING reADmIll When it is necessary to immobilize the treadmill, press and hold both the SPEED DOWN ARROW and the STOP keys on the activity zone.
-
Page 17: Activity Zone And Heart Rate Sensor Overview
CTIVITy ONe AND eArT eNsOr VerVIeW Walk Walk START START STOP STOP INCLINE INCLINE SPEED SPEED High High D. Start: Causes the belt to begin moving at .5 mph and 0% elevation. E. Stop: Causes the belt to slow to a gradual stop. One push pauses the workout, two pushes displays workout infor- mation, and three pushes reset the workout. - Page 18 Ulse eNsOr ysTem The hand pulse sensors (K) are the built-in heart rate monitoring system on the treadmill. During a workout, grasp the sensors that are set into the handlebars. For an accurate reading, use a comfortable grip. The console displays the heart rate after 15 to 20 seconds.
-
Page 19: Service And Technical Data
2. If shaking still occurs, adjust the levelers under the stationary frame on it. until the shaking decreases. See How to Stabilize the Life Fitness Treadmill. Be sure to grasp the sensors firmly and keep hands still. If heart rate seems substantially higher or lower than expected, remove hands from sensors until heart rate disappears. -
Page 21: Preventive Maintenance Tips
3. Using the Silicon lubricant approved by Life Fitness, apply one half of the bottle to the surface of the deck between the belt and the deck. -
Page 22: How To Adjust And Tension The Striding Belt
OlTs The Life Fitness treadmill has access holes in the rear roller guards, which allow access to the tensioning bolts. These tensioning bolts make it possible to adjust tracking and centering of the striding belt (A) without removing the guards. -
Page 23: Using And Testing The Safety Stop Pull Cord
1. Please contact your dealer or Life Fitness Customer Service at 1-800-351-3737. 2. Verify the symptom and review the operating instructions and troubleshooting matrix. 3. Locate and document the serial number of the treadmill. The treadmill’s serial number is located on the front... -
Page 24: Specifications
T3 T ITNess reADmIll peCIfICATIONs Designed use: Home Maximum user weight: 350 pounds / 159 kilograms Speed range: 0.5 - 12.0 mph (0.8 - 19 km/h) in 0.1 increments Elevation range: 0%-15% (in 0.5% increments) Motor: 3 HP continuous duty DC Rollers: Front: 2.6"... -
Page 25: Warranty Information
WHO pAys sHIppING & INsUrANCe fOr serVICe: If the Product or any warranted part must be returned to a service facility for repairs, Life Fitness will pay all shipping and insurance charges during the warranty period (within the United States only). The purchaser is responsible for ship- ping and insurance charges after the warranty has expired. - Page 26 Product. Some states do not allow the exclusion or limitation of implied warranties or of liability for incidental or consequential damages, so the above limitations or exclusions may not apply to you. Warranties may vary outside the U.S. Contact Life Fitness for details. CHANGes IN WArrANTy NOT AUTHOrIzeD: No one is authorized to change, modify or extend the terms of this limited warranty.
Need help?
Do you have a question about the T3 and is the answer not in the manual?
Questions and answers