Canon EOS C100 Instruction Manual
Hide thumbs
Also See for EOS C100:
- Brochure & specs (2 pages) ,
- Basic manual (14 pages) ,
- Setting up (6 pages)
Table of Contents
Advertisement
Quick Links
Advertisement
Table of Contents

Related Manuals for Canon EOS C100


Summary of Contents for Canon EOS C100
- Page 1 PUB. DIE-0429-001C HD Camcorder Instruction Manual...
-
Page 2: Important Usage Instructions
• Danger of explosion if the wrong type of batteries are attached. Use only the same type of batteries. • Do not expose batteries or product to excessive heat such as the inside of a car under direct sunlight, fire, etc. EOS C100 / CA-930 identification plate is located on the bottom. - Page 3 EEE. Your cooperation in the correct disposal of this product will contribute to the effective usage of natural resources. For more information about the recycling of this product, please contact your local city office, waste authority, approved scheme or your household waste disposal service or visit www.canon-europe.com/weee, or www.canon-europe.com/battery.
-
Page 4: Important Safety Instructions
Important Safety Instructions In these safety instructions the word “apparatus” A grounding type plug has two blades and a third refers to the Canon HD Camcorder EOS C100 and grounding prong. The wide blade or the third all its accessories. - Page 5 Highlights of the EOS C100 The Canon HD Camcorder EOS C100 is a versatile camcorder that combines the power of our latest CMOS sensor and interchangeable lenses with the convenience of a compact size. The following are just some of the many features that will help turn your creative vision into reality.
- Page 6 Advanced Professional Features Other Functions Customization Audio The camcorder features several customization When recording at the highest bit rate, you have the options. You can assign often-used functions to option to record sound as 2-channel linear PCM assignable buttons (A 87) so that you can call up audio (16-bit/48 kHz).
-
Page 7: Table Of Contents
Recording 45 Supplied Accessories 13 Names of Parts 14 Onscreen Displays 48 Grip Unit 19 Canon Log Gamma and CINEMA Preset 49 Handle Unit 20 Video Configuration: System Frequency, Bit Rate and Frame Rate 51 2. Preparations 21 Changing Main Camera Functions with the... - Page 8 Recording Audio 74 5. Playback 101 Connecting an External Microphone or External Playback 101 Audio Input Source to the Camcorder 74 Clip Index Screen 101 Using the Built-in Microphone or an External Playing Back Clips 103 Microphone Connected to the MIC Onscreen Displays 104 Terminal 74 Playback Controls 105...
- Page 9 8. Additional Information 129 Menu Options 129 Displaying the Status Screens 137 Resetting the File Numbering 143 Troubleshooting 144 List of Messages 147 Handling Precautions 151 Maintenance/Others 154 Optional Accessories 155 Specifications 158 Index 161...
-
Page 11: Introduction
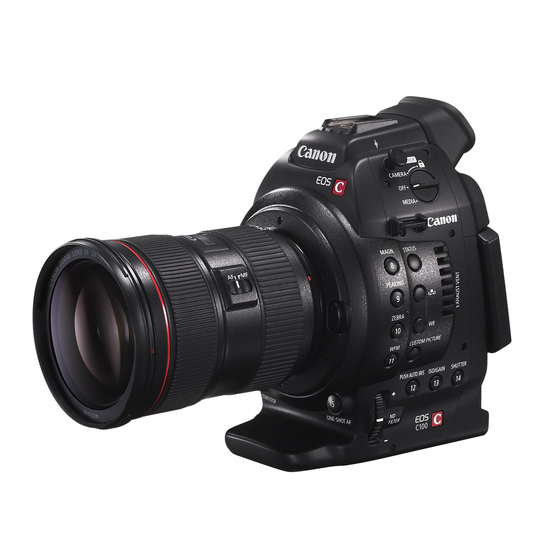
• Photographs in the manual are simulated pictures taken with a still camera. Some screenshots have been altered to make them easier to read. • Illustrations in the manual show the Canon EOS C100 camcorder with a Canon EF 24-70mm f/2.8 L II USM lens attached. -
Page 12: Operating Modes
About this Manual The > arrow is used to abbreviate menu Operating modes selections. For a detailed explanation on how to indicates that a function is available in the use the menus, refer to Using the Menus operating mode indicated and indicates (A 27). -
Page 13: Supplied Accessories
Supplied Accessories Supplied Accessories The following accessories are supplied with the camcorder. Handle Unit Grip Unit BP-955 Battery Pack CA-930 Compact Power Adapter (incl. terminal cover) (incl. power cord) Body Cap Thumb Rest SS-1200 Shoulder Strap DC-930 DC Cable Adapter Base for 0.64 cm (1/4 in.) Tape Measure Hook PIXELA Software CD-ROM Tripods... -
Page 14: Names Of Parts
Names of Parts Names of Parts 1 MAGN. (magnification) button (A 67)/ 8 Exhaust ventilation outlet (A 37) Assignable button 8 (A 87) 9 STATUS button (A 137) 10 Å (white balance adjustment) button (A 63) 2 PEAKING button (A 67) / Assignable button 9 (A 87) 11 WB (white balance) button (A 63) 3 ZEBRA button (A 69)/... - Page 15 Names of Parts 17 EXT (modular unit) terminal (A 32) 22 HDMI OUT terminal (A 114) 18 MIC (microphone) terminal (A 74) 23 DC IN terminal (A 24) 19 × (headphone) terminal (A 79) 24 Grip Unit connection terminal (A 34) 20 REMOTE terminal 25 Grip Unit attachment thread (A 34) For connecting commercially available remote...
- Page 16 Names of Parts 28 START/STOP button (A 45) 35 ONE-SHOT AF (focus automatically once) button 29 EF Lens mount index (A 29) (A 65)/Assignable button 15 (A 87) 30 EF-S Lens mount index (A 29) 36 AV OUT terminal (A 115) 31 EF Lens lock pin (A 29) 32 Lens release button (A 30) 33 EF Lens mount (A 29)
- Page 17 Names of Parts LCD panel fully open LCD panel raised 90° up and turned left 40 46 43 44 45 37 Dioptric adjustment lever (A 33) 48 Speaker (A 105) 38 Viewfinder (A 33, 33) 49 RESET button (A 146) 50 SD card 2 access indicator (A 39) 39 CANCEL button (A 27) 40 MENU button (A 27)
- Page 18 Names of Parts Focal plane mark 60 Accessory shoe with mounting hole for 0.64 cm (1/4 in.) screws Cold shoe for attaching the supplied handle unit or other accessories, such as the optional VL-10Li II Battery Video Light. 61 TB-1 Tripod Base for tripods with 0.95 cm (3/8 in.) 63 Attachment sockets for the optional TA-100 Tripod screws (A 34) Adapter (A 34)
-
Page 19: Grip Unit
Names of Parts Grip Unit The grip unit comes originally attached to the camcorder. If the grip unit is removed, you will not be able to use the joystick, but you can set the joystick's functions (up/down/left/right/SET) to assignable buttons (A 87) to be able to change settings that require the joystick*. -
Page 20: Handle Unit
Names of Parts Handle Unit 3 4 5 1 Microphone holder (A 74) 13 Audio level switches for CH1 (left) and CH2 (right) 2 Microphone lock screw (A 74) (A 75, 78) 3 Front tally lamp (A 45) 14 XLR terminal switches for CH1 (left) and CH2 4 Cold accessory shoe (right) (A 77) 5 Rear tally lamp (A 45) -
Page 21: Preparations
Preparations Preparing the Power Supply You can power the camcorder using a battery pack or directly using the compact power adapter. If you connect the compact power adapter to the camcorder while a battery pack is attached, the camcorder will draw power from the power outlet. - Page 22 Preparing the Power Supply • Charged battery packs continue to discharge naturally. Therefore, charge them on the day of use, or the day before, to ensure a full charge. • We recommend that you prepare battery packs to last 2 to 3 times longer than you think you might need. •...
- Page 23 Preparing the Power Supply Checking the Remaining Battery Charge When the camcorder is turned on, you can check the remaining battery charge by looking at any recording/ playback screen or the [Battery/Hour Meter] status screen (A 140). When the camcorder is turned off, use one of the following methods to check the approximate remaining battery charge of a battery compatible with Intelligent System.
-
Page 24: Using A Household Power Outlet
Preparing the Power Supply Using a Household Power Outlet You can also power the camcorder directly from a power outlet using the supplied CA-930 Compact Power Adapter and DC-930 DC Cable. 1 Set the Q switch to OFF. 2 Connect the DC cable to the DC IN terminal on the camcorder. -
Page 25: Date, Time And Language Settings
Date, Time and Language Settings Date, Time and Language Settings Setting the Date and Time You will need to set the date and time of the camcorder before you can start using it. When the camcorder’s clock is not set, the [Date/Time] screen will appear automatically with the first field selected (month or day, depending on the country/region of purchase). -
Page 26: Displaying The Date And Time While Recording
Date, Time and Language Settings Displaying the Date and Time while Recording [£ LCD/VF Setup] You can display the date and time on the screen. [Custom Display 2] Operating modes: [Date/Time] 1 Press the MENU button. 2 Push the joystick up/down to select [£ LCD/VF Setup]. [Off] 3 Select [Custom Display 2] and then [Date/Time] in a similar fashion. -
Page 27: Using The Menus
Using the Menus Using the Menus mode, many of the camcorder’s functions can be adjusted from the menu for general settings, which opens after pressing the MENU button. You can also register frequently used menu settings in a customized submenu (My Menu) for easy access. In mode, press the MENU button to open the menu for general settings or press the joystick to open the clip menu for clip operations. -
Page 28: Using The Customized Submenu (My Menu)
Using the Menus Using the Customized Submenu (My Menu) You can register up to 14 frequently used menu settings under the My Menu submenu for easy access. Furthermore, if you set an assignable button to [My Menu] (A 87), you can press the button to access your registered menu settings even faster and more easily. -
Page 29: Preparing The Camcorder
Preparing the Camcorder Preparing the Camcorder This section outlines the basic preparations for the camcorder such as attaching a lens and attaching the modular units (handle unit, grip unit, etc.) to the camcorder. The modular units extend the camcorder's functionality so you can choose the configuration that best fits your needs and shooting conditions. Configuration with handle: Attach the handle unit to use the built-in microphone,... - Page 30 • If correction data is not available, [Periph. Illum. Corr.] will appear grayed out. Visit your local Canon Web site and check if there is correction data available for the lens you are using. If so, download the necessary update package and...
- Page 31 - No correction will be applied when correction data is not available for the lens attached. - When using non-Canon lenses, peripheral illumination cannot be corrected. Even if the [Periph. Illum. Corr.] setting is available (not grayed out), setting it to [Off] is recommended.
-
Page 32: Attaching And Removing The Handle Unit
Preparing the Camcorder 6 When the confirmation message appears, press the joystick. IMPORTANT • Be sure to observe the following precautions while the lens firmware is being updated. - Do not disconnect the power source or turn off the camcorder. - Do not remove the lens. -
Page 33: Using The Viewfinder
Preparing the Camcorder Using the Viewfinder Dioptric Adjustment Turn on the camcorder and adjust the dioptric adjustment lever. Dioptric adjustment lever Using the LCD Panel 1 Pull the LCD panel 90° up. 2 Rotate the LCD panel 180° left. 3 Push down the LCD panel to adjust it to the desired angle of view. NOTES •... -
Page 34: Using A Tripod
Preparing the Camcorder Setting the Screen to Black & White [£ LCD/VF Setup] The viewfinder and LCD screen display in color by default but you can set them to black & white. Even when the screen is black & white, onscreen text and icons will still be displayed in color. - Page 35 Preparing the Camcorder Removing the Grip Unit 1 Set the Q switch to OFF. 2 Unscrew the grip unit’s lock screw and gently detach the grip unit. • The grip unit contains an internal connection cable so be sure not to pull it too forcefully. 3 Disconnect the grip unit’s connection plug.
-
Page 36: Attaching A Shoulder Strap
Preparing the Camcorder Attaching a Shoulder Strap Pass the ends through the strap mount and adjust the length of the strap. IMPORTANT • Be careful not to drop the camcorder when attaching or adjusting the shoulder strap. Removing and Attaching the Terminal Covers You can remove the plastic covers of the following terminals to access them more readily. -
Page 37: The Camcorder's Cooling System
Preparing the Camcorder The Camcorder’s Cooling System [w Other Functions] The camcorder’s internal temperature is controlled using a cooling fan that will turn on whenever the camcorder itself is turned on. However, you can [Fan] turn off the cooling fan temporarily if necessary. Operating modes: [On] 1 Open the [Fan] submenu. -
Page 38: Using An Sd Card
Using an SD Card Using an SD Card SD Cards Compatible for Use with the Camcorder You can use the following types of commercially available Secure Digital (SD) cards with this camcorder. The camcorder is equipped with two SD card slots. Initialize SD cards (A 40) when you use them with this camcorder for the first time. -
Page 39: Inserting And Removing An Sd Card
Using an SD Card Inserting and Removing an SD Card You can insert an SD card into SD card slot A or slot B. If you have two SD cards, you can use both slots. 1 Turn off the camcorder. 2 Lift the LCD panel upwards and open the SD card compartment cover. -
Page 40: Initializing An Sd Card
Using an SD Card NOTES • To remove the SD card: Push the SD card once to release it. When the SD card springs out, pull it all the way out. • If you set the [w Other Functions] > [Media Access LED] function to [Off], the access indicators will not illuminate. -
Page 41: Switching Between The Sd Card Slots
Using an SD Card Switching Between the SD Card Slots The camcorder features two SD card slots, SD card slot A and SD card slot B. If both slots contain an SD card, you can switch between them as necessary. Operating modes: Press the SLOT SELECT button. -
Page 42: Checking The Remaining Recording Time On The Sd Card
Using an SD Card Checking the Remaining Recording Time on the SD Card When the camcorder is in mode, the display on the upper left of the screen indicates which SD card slot is in use and the available recording time (in minutes*) that remains on each SD card. On the [Media] status screen (A 139), you can check the total space, SD speed class, used space, available recording time and available number of photos on each of the SD cards. -
Page 43: Adjusting The Black Balance
Adjusting the Black Balance Adjusting the Black Balance You can have the camcorder adjust the black balance automatically when ambient temperature changes considerably or if there is a noticeable change in a true black video signal. Operating modes: 1 Open the [ABB] screen. [~ Camera Setup] [~ Camera Setup] >... - Page 44 Adjusting the Black Balance...
-
Page 45: Recording
Recording Recording Video This section explains the recording basics. Before you begin recording, make a test recording first to check if the camcorder operates correctly. Record for approximately 15 minutes at the default bit rate, 24 Mbps (LPCM) (A 51). Should the camcorder fail to operate correctly, refer to Troubleshooting (A 144). For details on recording audio, refer to Recording Audio (A 74). - Page 46 SD cards. - Do not disconnect the power source or turn off the camcorder. • Be sure to save your recordings regularly (A 119), especially after making important recordings. Canon shall not be liable for any loss or corruption of data.
- Page 47 Recording Video Locking the Controls in Recording Mode mode, you can set the Q switch to C (key lock) to Once in lock all the physical controls (buttons and switches) on the camcorder, save for the START/STOP button*. This is useful in preventing settings from being changed due to inadvertently pressing one of the buttons.
-
Page 48: Onscreen Displays
Recording Video Onscreen Displays Refer to this section for an explanation of the various screen displays that appear in mode. You can use the custom display function ( 99) to turn off individual onscreen displays if they are not required. 1213 31 32 33 34... -
Page 49: Canon Log Gamma And Cinema Preset
Clips recorded using Canon Log gamma need to be processed in post-production. During post-production, you can apply a LUT (look-up table) to clips recorded using Canon Log gamma to view the clips with more natural colors. For details about available LUTs, visit your local Canon Web site. - Page 50 Checking Clips Recorded with Canon Log Gamma (View Assistance) When Canon Log gamma is used, the image displayed on the screen will appear darker than usual. You can use the view assistance function to display an image that approximates the one that would be obtained using a normal gamma setting.
-
Page 51: Video Configuration: System Frequency, Bit Rate And Frame Rate
Video Configuration: System Frequency, Bit Rate and Frame Rate Video Configuration: System Frequency, Bit Rate and Frame Rate Before you record, select the bit rate and frame rate that best match your creative needs. The options available will depend on the system frequency selected: 59.94 Hz (former NTSC broadcast area) or 50.00 Hz (former PAL broadcast area). - Page 52 Video Configuration: System Frequency, Bit Rate and Frame Rate Available bit rate and frame rate settings [System Frequency] [System Frequency] [Bit Rate] set to [59.94 Hz] set to [50.00 Hz] Resolution Audio recording mode setting Available [Frame Rate] settings [24 Mbps LPCM] Linear PCM, 2ch [60i] [50i]...
-
Page 53: Changing Main Camera Functions With The Joystick
Changing Main Camera Functions with the Joystick Changing Main Camera Functions with the Joystick You can adjust three main camera functions –shutter speed, white balance and ISO speed/gain– using only the joystick. This section will explain the basic operation for changing a value. For specific details about the functions please refer to the each function’s section: shutter speed (A 54), white balance (A 63), ISO speed/gain (A 57). -
Page 54: Shutter Speed
Shutter Speed Shutter Speed Set the shutter speed based on the recording conditions. For example, you may want to set slower shutter speeds in darker environments. The camcorder offers the following 5 modes. Operating modes: [Speed]: Allows you to set the shutter speed (in fractions of a second). You can select the increment to use when adjusting the shutter speed between 1/3-stop and 1/4-stop increments. -
Page 55: Changing The Shutter Mode
Shutter Speed Changing the Shutter Mode [~ Camera Setup] 1 Open the shutter [Mode] submenu. [~ Camera Setup] > [Shutter] > [Mode] [Shutter] 2 Select the desired mode and then press the joystick. • If you selected [Speed] (the default value), you can continue the [Mode] procedure to select the increment scale to use when adjusting the shutter speed. -
Page 56: Flicker Reduction
Shutter Speed NOTES • Closing down the aperture when recording under bright conditions may cause the picture to appear soft or out of focus. To avoid the loss of sharpness due to diffraction, use a faster shutter speed, a denser ND filter (A 59) or open up the aperture. -
Page 57: Iso Speed/Gain
The minimum and maximum ISO speeds are available even when the 1-stop increment scale is selected. ISO speed required for a suitable dynamic range for Canon Log gamma. Equivalent to a gain value of 2.5 dB. This value is only available when [Extended Range] is set to [Off]. -
Page 58: Adjusting The Iso/Gain Value
ISO Speed/Gain Adjusting the ISO/Gain Value 1 Press the ISO/GAIN button. • The current ISO/gain value will be highlighted in orange. 2 Push the joystick up/down to select the desired ISO speed or gain value and then press the joystick. •... -
Page 59: Nd Filter
ND Filter ND Filter Using the ND filters allows you keep the aperture within an appropriate range when recording in bright surroundings*. * Closing down the aperture when recording under bright conditions may cause the picture to appear soft or out of focus. To avoid the loss of sharpness due to diffraction, use a denser ND filter or a faster shutter speed (A 54). -
Page 60: Adjusting The Aperture
Adjusting the Aperture Adjusting the Aperture You can affect the brightness of your recordings or change the depth of field by adjusting the aperture. For example, use a small aperture value for a shallow depth of field that isolates the subject in focus and nicely blurs the background. -
Page 61: Momentary Automatic Aperture - Push Auto Iris
Adjusting the Aperture NOTES • When using an EF lens with no lens contacts, such as a Canon Cinema lens, you cannot adjust the aperture using the camcorder. Adjust the aperture using the lens. • You can use the [w Other Functions] > [Custom Function] > [Grip Ctrl Dial Dir.] setting (A 99) to change the direction of the adjustment when you turn the control dial. -
Page 62: Light Metering Mode
Adjusting the Aperture The Exposure Bar You can use the exposure bar as a reference when adjusting the aperture or Optimal exposure AE±0 shutter speed or when compensating the exposure using AE shift. The Î on top of the exposure bar indicates optimal exposure without any shift (AE±0); the scale markings indicate the deviation from optimal exposure in 1/2 EV increments. -
Page 63: White Balance
White Balance White Balance The camcorder uses an electronic white balance process to calibrate the picture and ensure accurate colors under different lighting conditions. There are 4 methods of setting the white balance. Custom white balance: You can use a white object to establish the white balance and set it to one of two custom white balance positions, ÅA or ÅB. -
Page 64: Preset White Balance Settings
White Balance Preset White Balance Settings 1 Press the WB button. • The white balance mode icon will be highlighted in orange. • You can also select the white balance mode icon using only the joystick (A 53). 2 Push the joystick up/down to select the ¼ or É icon and then press the joystick. •... -
Page 65: Adjusting The Focus
Adjusting the Focus Adjusting the Focus The camcorder offers three ways to focus. Manual focus: Turn the focus ring on the attached lens to adjust the focus. The camcorder offers several focus assistance functions to help you focus more accurately when using the manual focus. One-shot AF: With the lens's focus mode switch set to AF, press and hold the ONE-SHOT AF button to let the camcorder focus automatically on the subject at the center of the screen. -
Page 66: Continuous Af
• With some EF lenses, the camcorder may take longer to focus automatically or may not be able to focus correctly. Visit your local Canon Web site for the latest information. • Autofocus may not work well on the following subjects or in the following cases. In such case, focus manually. -
Page 67: Using The Focus Assistance Functions
Adjusting the Focus Using the Focus Assistance Functions In order to focus more accurately, you can use two focus assistance functions – peaking, which creates a clearer contrast by emphasizing the outlines of the subject, and magnification, which enlarges the image on the screen. You can use both functions simultaneously for greater effect. -
Page 68: Onscreen Markers And Zebra Patterns
Onscreen Markers and Zebra Patterns Onscreen Markers and Zebra Patterns Using onscreen markers allows you to make sure your subject is correctly framed and is within the appropriate safe area. The zebra patterns help you identify areas that are overexposed. The onscreen markers and zebra pattern will not affect your recordings. -
Page 69: Displaying Zebra Patterns
Onscreen Markers and Zebra Patterns Grid Center marker NOTES • You can turn off all other onscreen displays, leaving only the onscreen markers (A 48). • If you set an assignable button to [Markers] (A 87), you can press the button to turn the onscreen markers on and off. -
Page 70: Setting The Time Code
Setting the Time Code Setting the Time Code The camcorder generates a time code signal and embeds it in your recordings. You can output the time code along with video output from the HDMI OUT terminal (A 136). For 59.94 Hz recordings, you can also select between a drop frame and non-drop frame time code. -
Page 71: Selecting Drop Or Non-Drop Frame
Setting the Time Code 2 Select [Set] and then press the joystick. • The time code setting screen appears with an orange selection frame indicating the hours. • To reset the time code to [00:00:00.00], select [Reset] instead. If the running mode is set to [Free Run], the time code will be reset the moment you press the joystick and keep running continuously from 00:00:00.00. - Page 72 Setting the Time Code NOTES • When the frame rate is set to 24P, the frames value in the time code runs from 0 to 23. When the frame rate is set to 50i or PF25, it runs from 0 to 24. With other frame rates, it runs from 0 to 29. •...
-
Page 73: Setting The User Bit
Setting the User Bit Setting the User Bit The user bit display can be selected from the date or the time of [¤ TC/UB Setup] recording, or an identification code consisting of 8 characters in the hexadecimal system. There are sixteen possible characters: the numbers 0 to 9 and the letters A to F. -
Page 74: Recording Audio
Recording Audio Recording Audio You can record audio using the built-in stereo microphone*, commercially available microphones (XLR terminal*, MIC terminal) or line input (XLR terminal*). Using the XLR terminals, you can select the audio input independently for channel 1 and channel 2. When the bit rate is set to [24 Mbps LPCM], you can enjoy two-channel linear PCM audio recording with a sampling frequency of 48 kHz. -
Page 75: Adjusting The Audio Level For The Mic Terminal
Recording Audio Adjusting the Audio Level for the MIC Terminal You can adjust the audio recording level of a microphone attached to the MIC terminal to auto or manual. The way to adjust the audio level depends on whether the handle unit is attached to the camcorder. dial When the Handle Unit is Attached With the handle unit attached, the audio level adjustment is done using the... - Page 76 Recording Audio Configuring the Built-in Microphone’s Low-Cut Filter [¡ Audio Setup] 1 Open the [Int. Mic Low Cut] submenu. [¡ Audio Setup] > [Audio Input] > [Int. Mic Low Cut] Audio Input] 2 Select the desired option and then press the joystick. Int.
-
Page 77: Using Audio Input From The Xlr Terminals
Recording Audio Using Audio Input from the XLR Terminals Using the XLR terminals CH1 and CH2, you can record audio independently to the two audio channels from a microphone or analog audio input source. CH1/CH2 Switching Between Microphone and Line Input 1 Set the AUDIO IN switch of the desired channel to EXT. -
Page 78: Adjusting The Audio Level For The Xlr Terminals
Recording Audio Adjusting the Audio Level for the XLR Terminals You can set the audio recording level for audio input from the XLR terminals to automatic or manual independently for each channel. CH1/CH2 Automatic Audio Level Adjustment audio level switches Set the audio level switch of the desired channel to A (automatic) to let the camcorder automatically adjust that channel’s audio level. -
Page 79: Monitoring The Audio With Headphones
Recording Audio Adjusting the Microphone’s Sensitivity You can adjust the microphone’s sensitivity if the XLR terminal switch is set to MIC or MIC+48V. 1 Open the desired XLR terminal’s sensitivity submenu. [¡ Audio Setup] > [Audio Input] > [XLR1 Mic Trimming] or [XLR2 Mic Trimming] 2 Select the desired level and then press the joystick. -
Page 80: Color Bars/Audio Reference Signal
Color Bars/Audio Reference Signal Color Bars/Audio Reference Signal You can have the camcorder generate and record color bars and a 1 kHz audio reference signal and output them from the HDMI OUT terminal, AV OUT terminal and × (headphone) terminal (audio reference signal only). Operating modes: Recording Color Bars [~ Camera Setup]... -
Page 81: Video Scopes
Video Scopes Video Scopes The camcorder can display a simplified waveform monitor or an edge monitor* to help you focus. The video scopes appear only on the LCD screen. They do not appear in the viewfinder or on an external monitor. * The edge monitor looks at the focus of the entire picture and displays the results as a waveform. -
Page 82: Configuring The Edge Monitor
Video Scopes Configuring the Edge Monitor [w Other Functions] Using this video scope allows you to focus with more precision. You can use the edge monitor along with the other focus assistance functions [WFM (LCD)] (A 67). The edge monitor features 2 modes. [Edge Monitor] Operating modes: [Type 1]... -
Page 83: Reviewing A Recording
Reviewing a Recording Reviewing a Recording When the camcorder is in mode, you can review the last clip that [w Other Functions] was recorded. Operating modes: Rec Review] 1 Open the [Rec Review] submenu to set the review length. [Entire Clip] [w Other Functions] >... -
Page 84: Pre-Recording Mode
Pre-recording Mode Pre-recording Mode When pre-recording mode is activated, the camcorder starts recording continuously into a temporary memory of approximately 3 seconds so when you press the START/STOP button, the clip will contain also approximately 3 seconds of video and audio recorded before you pressed the button. This is especially useful when it is difficult to predict when to start recording. -
Page 85: Continuous Recording
* In points and Out points are marks in the continuous recording clips that indicate the beginning and end point of important parts in the recording. **For details about compatible software, visit your local Canon Web site. Operating modes: START... - Page 86 Continuous Recording 5 To stop the continuous recording, open the continuous recording [Start/Stop] submenu. [w Other Functions] > [Continuous Rec] > [Start/Stop] 6 Select [Stop] and then press SET. • Continuous recording will stop. Both tally lamps will go out and the clip will be recorded on the SD card(s). •...
-
Page 87: Customization
Customization Assignable Buttons The camcorder conveniently features 15* buttons to which you can assign various functions. By assigning often- used functions, you can quickly access them with a single press of a button. Assignable button 7 is located on the grip unit, so its availability depends on the camcorder configuration used. * In mode, only assignable buttons 7 to 15 are available. -
Page 88: Using An Assignable Button
Assignable Buttons 4 Navigate the menus to find the menu setting you want to register and then press the joystick. • The selected menu setting will be registered to the customizable slot and to the assignable button. • The name of the selected menu setting will be listed instead of [User Setting (NONE)] and the customizable slot will be marked by a NOTES •... - Page 89 Assignable Buttons Function name Description Ü Ü [Headphone +] Increases the headphone volume. Ü Ü [Headphone -] Reduces the headphone volume. Ü [Speaker +] Increases the built-in speaker's volume. – Ü [Speaker -] Reduces the built-in speaker's volume. – Ü Ü...
-
Page 90: Custom Picture Settings
[C8: Wide DR]: Applies a gamma curve with a very wide dynamic range and an appropriate color matrix that nevertheless do not require post-production processing. [C9: CINEMA]: Uses the Canon Log gamma and color matrix for an outstanding dynamic range and an image suitable for processing in post-production. -
Page 91: Editing A Custom Picture File's Settings
Custom Picture Settings Editing a Custom Picture File’s Settings This procedure describes how to change the custom picture settings in detail when you want maximum control over the image. In addition, the camcorder offers an easier, more intuitive way to adjust only the gamma curve and white balance settings using a simplified graphical interface (A 98). -
Page 92: Transferring Custom Picture Files
Custom Picture Settings 2 Select [Protect] and then press the joystick. • In the custom picture menu, i will appear next to the file name. • To remove protection settings, select [Unprotect] instead. 3 Press the CUSTOM PICTURE button to exit the custom picture menu and apply the selected custom picture settings. -
Page 93: Available Custom Picture Settings
[Standard] (high contrast, vibrant colors). [Wide DR]: Applies a gamma curve with a very wide dynamic range, optimized for playback on an HDTV. [Canon Log]: Applies a logarithmic gamma curve for outstanding dynamic range. Requires image processing in post-production. Gamma... - Page 94 Controls the upper part of the gamma curve (highlights of the image). By compressing the highlights, you can prevent parts of the image from being overexposed. When [Gamma] is set to [Cine 1], [Cine 2], [EOS Std.], [Wide DR] or [Canon Log], this setting has no effect on the picture. [Enable]: Activates/deactivates the setting.
- Page 95 [Knee Aperture]: Allows you to set the sharpness of only the areas above the knee point by adjusting the gain and slope. This is not available when [Gamma] is set to [Cine 1], [Cine 2], [Canon Log] or [EOS Std.].
- Page 96 [Select]: Available options are [Normal 1] to [Normal 4], [Cine 1] and [Cine 2], [EOS Std.], [Wide DR] and [Canon Log]. Generally, this should be the same setting as [Gamma]. After selecting an option, you can make more precise adjustments.
- Page 97 Custom Picture Settings [B-R]: The B-R matrix changes the tint of the picture along the yellow/red and blue/cyan gradations. This setting can be adjusted from -50 to 50. (Default: ±0) [B-G]: The B-G matrix changes the tint of the picture along the yellow/green and blue/magenta gradations. This setting can be adjusted from -50 to 50.
-
Page 98: Simplified Graphical Interface
5 and 6: [Cine 1] and [Cine 2] 7: [EOS Std.] 8: [Wide DR] 9: [Canon Log] 3 Push the joystick left/right to highlight the [H] field or [L] field and then push the joystick up/down to adjust the gamma curve as necessary. -
Page 99: Customizing Functions And Onscreen Displays
Customizing Functions and Onscreen Displays Customizing Functions and Onscreen Displays Customize the camcorder to match your shooting style and needs. Use the [w Other Functions] > [Custom Function] setting to adjust how some of the camcorder’s controls and functions operate in mode. -
Page 100: Saving And Loading Camera Settings
SD card on a computer. In the “PRIVATE\CAMSET” folder, open the file “CAMSET4.TXT”. • When loading camera settings from an SD card, even protected custom picture files in the camcorder will be replaced. • Only camera settings from other Canon C100 camcorders can be used with this camcorder. -
Page 101: Playback
Playback Playback This section explains how to play back clips recorded on an SD card. For details on playing back clips using an external monitor, refer to Connecting to an External Monitor (A 114). For details on viewing photos, refer to Viewing Photos (A 123). - Page 102 Playback Switching Between the SD Card Slots If both SD card slots contain an SD card, you can switch between them as necessary. Operating modes: Press the SLOT SELECT button. • The access indicator of the selected SD card slot will illuminate in green. Switching to Other Index Screens The clip index screen shows AVCHD clips that were recorded on the SD card using the camcorder.
-
Page 103: Playing Back Clips
Playback Playing Back Clips You can play back clips from the clip index screen. You can control the playback with the controls on the camcorder or with the joystick and onscreen joystick guide. 1 Move the orange selection frame to the clip you want to play back. Ò... -
Page 104: Onscreen Displays
Playback Onscreen Displays 1 Remaining battery time (A 49) 9 Bit rate and audio recording mode** (A 51) 2 Temperature warning (A 37) 10 Frame rate (A 51) 3 Joystick guide (A 105) 11 Onscreen displays superimposed on video output 4 Recording date and time* (A 116) 5 Playback operation... -
Page 105: Playback Controls
Playback Playback Controls When you play back a clip, operate the buttons on the camcorder’s body or use the joystick and joystick guide to use fast playback, play back frame-by- frame or skip clips. Refer to the following table. Available Playback Types Playback type Operation Buttons: Press the Ø... - Page 106 Playback NOTES • For details on changing the audio channel, refer to Selecting the Audio Channel (A 117). × (headphone) • If you set an assignable button to [Headphone +], [Headphone -], terminal [Speaker +] or [Speaker -] (A 87), you can press the button to adjust the headphone volume or built-in speaker volume without using the menu.
-
Page 107: Clip Operations
Clip Operations Clip Operations You can use the clip menu to copy* clips, delete clips, and convert* clips to standard definition. Clip menu functions apply only to a single clip. Selecting the same functions from the [w Other Functions] > [Clips] submenu, you can perform the same operations on multiple clips (selected clips or all clips). -
Page 108: Deleting Clips And Shots
Clip Operations Copying a Selection of Clips [w Other Functions] 1 Open the clip selection index screen. [w Other Functions] > [Clips] > [Copy] > [Select] [Clips] 2 Using the joystick, bring the orange selection frame to a clip you wish to copy and then press the joystick. -
Page 109: Converting Clips To Standard Definition
Clip Operations Deleting a Selection of Clips/Shots [w Other Functions] 1 Open the clip selection or shot selection index screen. [w Other Functions] > [Clips] > [Delete] > [Select] [Clips] [w Other Functions] > [Delete Shots] > [Select] 2 Using the joystick, bring the orange selection or shot selection frame to [Delete] a clip you wish to delete and then press the joystick. - Page 110 Clip Operations • The clip will be played back as it is converted. While the clip is being converted, you can press the joystick to cancel. 4 When the confirmation message appears, press the joystick. • The selected clip is converted to an SD movie on the destination card and the screen changes back to the clip index screen.
-
Page 111: Deleting Sd Movies
Clip Operations Deleting SD Movies From the [SD Movies] index screen you can delete clips that were converted to standard definition. Deleting a Single SD Movie 1 Open the [SD Movies] index screen (A 102). 2 Select the desired SD movie and then press the joystick to open the clip menu. 3 Select [Delete Clip] and then press the joystick. - Page 112 Clip Operations...
-
Page 113: External Connections
External Connections Video Output Configuration The video signal output from the HDMI OUT terminal depends on the various menu settings and the capabilities of the external monitor. Video from the AV OUT terminal is output as 480/59.94i (59.94 Hz recordings) or 576/ 50.00i (50.00 Hz recordings). -
Page 114: Connecting To An External Monitor
Connecting to an External Monitor Connecting to an External Monitor When you connect the camcorder to an external monitor for recording or playback, use the terminal on the camcorder that matches the one you wish to use on the monitor. Then, select the video signal output configuration (A 113). -
Page 115: Using The Av Out Terminal
Connecting to an External Monitor Using the AV OUT Terminal The AV OUT terminal outputs a down-converted analog video signal and audio signal for connection to monitors with a composite audio/video input. NOTES • When you play back a clip on a monitor with a 4:3 aspect ratio, the monitor will switch automatically to widescreen mode if it is compatible with the Video ID-1 or WSS system. -
Page 116: Superimposing Onscreen Displays To Appear On An External Monitor
Connecting to an External Monitor Superimposing Onscreen Displays to Appear on an [¢ Video Setup] External Monitor By default, onscreen displays are shown on the viewfinder but you can [Character Display] choose to superimpose onscreen displays on video output from the HDMI OUT terminal or AV OUT terminal. -
Page 117: Audio Output
Audio Output Audio Output The camcorder can output audio from the HDMI OUT terminal, AV OUT terminal or × (headphone) terminal. When audio is output from the AV OUT terminal or × (headphone) terminal, you can configure other settings, such as the output channel. Synchronizing the Video with the Audio being Monitored [¡... -
Page 118: Selecting The Output Level Of The Av Out Terminal
Audio Output Selecting the Output Level of the AV OUT Terminal [¡ Audio Setup] You can select the output level of audio that is output from the AV OUT terminal. [Audio Output] Operating modes: [Level] 1 Open the audio ouput [Level] submenu. [1 Vrms] [¡... -
Page 119: Saving Clips To A Computer
Saving Clips to a Computer Saving Clips to a Computer Using the supplied software Data Import Utility to save your clips, you have the additional advantage of automatically joining clips that were saved as multiple files so you can work with them as single clips with the editing software of your choice. - Page 120 Saving Clips to a Computer...
-
Page 121: Photos
Photos Taking Photos You can take photos when the camcorder is in mode or you can capture a photo from a clip when the camcorder is in mode. The size of the photos recorded on the SD card is 1920 x 1080*. * At this size, the camcorder can save approximately 670 photos on a 1 GB SD card. - Page 122 Taking Photos NOTES • If the LOCK switch on the SD card selected for recording is set to prevent writing, you will not be able to record a photo. Change the position of the LOCK switch in advance. • Even if [w Other Functions] > [Custom Function] > [Scan Reverse Rec] (A 99) is set to a setting other than [Off], photos will not be inverted.
-
Page 123: Photo Playback
Photo Playback Photo Playback You can view the photos that you took with the camcorder. Operating modes: Displaying the [Photos] Index Screen Display the [Photos] index screen to view photos. 1 Set the Q switch to MEDIA. • The camcorder switches to mode and the clip index screen appears. -
Page 124: Photo Operations
Photo Operations Photo Operations You can use the photo menu to copy a photo, delete a photo, or copy a custom picture file embedded in a photo. You can display the photo menu from the [Photos] index screen or photo playback screen. Using the Photo Menu 1 From the [Photos] index screen, select a photo and then press the joystick. -
Page 125: Deleting Photos
Photo Operations Copying a Selection of Photos [w Other Functions] 1 From the [Photos] index screen open the photo selection screen. [w Other Functions] > [Photos] > [Copy] > [Select] [Photos] 2 Using the joystick, bring the orange selection frame to a photo you wish to copy and then press the joystick. - Page 126 Photo Operations Deleting a Photo from the Index Screen 1 Open the [Photos] Index Screen (A 123). 2 Move the orange selection frame to the photo to be deleted. 3 Press the joystick to open the photo menu. 4 Select [Delete] and then press the joystick. 5 Select [OK] and then press the joystick.
-
Page 127: Copying Custom Picture Files
Photo Operations Copying Custom Picture Files You can copy to the camcorder a custom picture file embedded in a photo. Custom picture files can be copied from the photo playback screen or [Photos] index screen. Operating modes: Copying a File from the Playback Screen 1 Display the photo with the custom picture file to be copied (A 123). - Page 128 Photo Operations...
-
Page 129: Additional Information
Additional Information Menu Options For details about how to select an item, refer to Using the Menus (A 27). For details about each function, see the reference page. Menu items without a reference page are explained after the tables. Setting options in boldface indicate default values. - Page 130 Menu Options [¡ Audio Setup] menu Menu item Submenu Setting options Ü [Audio Input] [Int. Mic Low Cut] [Off], [LC1], [LC2] – Ü [Int. Mic Sensitivity] [Normal], [High] – Ü [MIC/Int. Mic Att.] [On], [Off] – Ü [MIC Mode] [Automatic], [Manual] –...
- Page 131 Menu Options [£ LCD/VF Setup] menu Menu item Submenu Setting options Ü Ü [LCD Setup] [Brightness] -99 to 99 (±0) Ü Ü [Contrast] -99 to 99 (±0) Ü Ü [Color] -20 to 20 (±0) Ü Ü [Sharpness] 1 to 4 (2) Ü...
- Page 132 Menu Options Menu item Submenu Setting options Ü [Custom Display 1] [Light Metering] [On], [Off] – – Ü [Custom Picture] [On], [Off] – Ü [Focal Length] [On], [Off] – Ü [ND Filter] [On], [Off] – Ü [AF Mode] [On], [Off] –...
- Page 133 Menu Options [White Balance]: Displays the white balance indicator when set to [On]. [Exposure]: Displays the exposure bar when set to [On]. [Iris]: Displays the aperture setting when set to [On]. [ISO/Gain]: Displays the ISO speed or gain setting when set to [On]. [Shutter]: Displays the shutter speed setting when set to [On].
- Page 134 Menu Options [¤ TC/UB Setup] menu ( mode only) Menu item Submenu Setting options [Time Code] [Mode] [Preset], [Regen.] [Run] [Rec Run], [Free Run] [DF/NDF]* [DF], [NDF] [Setting] [Set], [Reset] [User Bit] [Output Mode] [Fixed], [Pulldown] [Type] [Setting], [Time], [Date] * In the following cases, the time code is set to [NDF] and this setting cannot be changed: - [w Other Functions] >...
- Page 135 Menu Options Menu item Submenu Setting options [Bit Rate] [24 Mbps LPCM], [24 Mbps], [17 Mbps], Ü – [7 Mbps] [Frame Rate] When [System Frequency] is set to [59.94 Hz]: [60i], [PF30], [PF24], [24P] Ü – When [System Frequency] is set to [50.00 Hz]: [50i], [PF25] Ü...
- Page 136 Menu Options [Camera Settings]: Resets the white balance, iris, ISO speed, gain, shutter speed, [~ Camera Setup] settings and custom picture settings to default settings. [Assignable Buttons]: Resets the assignable buttons to default settings. [Tally Lamp]: Allows you to set whether the front and rear tally lamps illuminate while the camcorder is recording. [Media Access LED]: Allows you to set whether the respective SD card access indicator illuminates while the camcorder is accessing an SD card.
-
Page 137: Displaying The Status Screens
Displaying the Status Screens Displaying the Status Screens You can use the status screens to check the camcorder’s various recording- and playback-related settings. You can also output the status screens on an external monitor. Operating modes: 1 Press the STATUS button. •... - Page 138 Displaying the Status Screens [Camera] Status Screen mode only) 1 ISO speed/Gain increment (A 57) 4 Correction for peripheral illumination (A 30) 2 Iris increment (A 60) 5 AF mode (A 65) 3 Shutter speed increment (A 55) 6 Flicker reduction (A 56) 7 Lens model name info (A 29) [Assign Button 1/2], [Assign Button 2/2] Status Screen 1 Assignable buttons 1 to 15* (A 87)
- Page 139 Displaying the Status Screens [Audio] Status Screen mode mode 1 Low-cut filter (built-in microphone) (A 76) 7 Monitor delay (A 117) 2 Microphone's sensitivity (built-in microphone) 8 Headphone volume (A 105) (A 76) 9 Microphone sensitivity (XLR terminal) (A 79) 3 Microphone attenuator (MIC terminal, built-in 10 Microphone attenuator (XLR terminal) (A 79) microphone) (A 76)
- Page 140 Displaying the Status Screens • In mode and when both relay recording and double slot recording mode are turned off in mode, only the information about the SD card currently selected for recording/playback will be displayed. [Video] Status Screen 1 HDMI OUT terminal status 4 Pre-recording mode* (A 84) 2 Onscreen displays superimposed on HD video 5 Onscreen displays superimposed on SD video...
- Page 141 Displaying the Status Screens [/ Data 1/3] Status Screen mode only) 1 Custom picture file name (A 90) 6 Knee settings (slope, point and saturation) 2 Gamma (A 93) (A 94) 3 Master pedestal (A 94) 7 Skin detail settings (hue, chroma, area and Y 4 Master black RGB levels (A 94) level) (A 96) 5 Black gamma settings (level, range and point)
- Page 142 Displaying the Status Screens [/ Data 3/3] Status Screen mode only) 1 White balance R/B gain (A 97) 5 Area B settings (phase, chroma, area and Y level) 2 Color correction (A 97) (A 97) 3 Area A settings (phase, chroma, area and Y level) 6 Area B revision settings (level and phase) (A 97) (A 97) 7 Setup level and press (A 97)
-
Page 143: Resetting The File Numbering
Resetting the File Numbering Resetting the File Numbering mode: Photos and SD movies are automatically assigned consecutive numbers [w Other Functions] from 0101 to 9900, and stored on the SD card in folders containing up to 100 files. Folders are numbered from 101 to 998. You can select the file numbering method to be used but using the default [Continu.] setting is [Photos] recommended. -
Page 144: Troubleshooting
Troubleshooting Troubleshooting If you have a problem with your camcorder, refer to this section. Consult your dealer or a Canon Service Center if the problem persists. Power source The camcorder will not turn on or it turns off by itself. - Page 145 - The camcorder may become hot after using it continuously for long periods of time; this is not a malfunction. If the camcorder becomes unusually hot or it becomes hot after using it only for a short while, it may indicate a problem with the camcorder. Consult a Canon Service Center. Playback Cannot delete clips or photos.
-
Page 146: Picture And Sound
Troubleshooting appears on the screen. - The camcorder and lens cannot communicate normally. Clean the lens’s contacts and reattach the lens. Picture and Sound Screen displays turn on and off repeatedly. - The battery pack is exhausted. Replace or charge the battery pack. - Remove the battery pack and reattach it correctly. -
Page 147: List Of Messages
- The file control information is corrupted or there was a decoder error. Turn off the camcorder and back on again. If this does not solve the problem, consult a Canon Service Center. • Corrupted file control information cannot be recovered. SD cards or clips with corrupt file control information cannot... - Page 148 Change the position of the LOCK switch. Fan error - The cooling fan has stopped working or may not be working properly. Consult a Canon Service Center. File name error - The folder and file numbers have reached their maximum value. Set [File Numbering] to [Reset] (A 143) and delete all the photos on the SD card (A 125) or initialize it (A 40).
- Page 149 Troubleshooting Memory card cover is open - The SD card compartment cover was open when the camcorder was switched to or turned on in mode. Close the compartment cover. No clips - There are no clips on the SD card to play back. Clips must be recorded (A 45) in order to play them back. No photos - There are no photos on the SD card to play back.
- Page 150 Then, remove the SD card being used and reinsert it. Alternatively, replace the SD card. If this does not solve the problem, consult a Canon Service Center. • Corrupted file control information cannot be recovered. SD cards or clips with corrupt file control information cannot be read by the supplied software, Data Import Utility.
-
Page 151: Handling Precautions
If any of the above should get into the camcorder it may damage the camcorder and/or the lens. Consult a Canon Service Center as soon as possible. • Be careful to avoid dust and dirt particles accumulating on the lens or entering the camcorder. When you finish using the camcorder, make sure to attach the body cap to the lens mount and the lens cap and dust cap to the lens. - Page 152 Regarding the use of non-Canon battery packs • We recommend using genuine Canon battery packs bearing the Intelligent System mark. • If you attach to the camcorder battery packs that are not genuine Canon battery packs, the remaining battery time will not be displayed. SD Cards •...
- Page 153 Handling Precautions • SD cards have a physical switch to prevent writing on the card so as to avoid the accidental erasure of the card’s content. To write-protect the SD card, set the switch to the LOCK position. LOCK switch Built-in Rechargeable Lithium Battery The camcorder has a built-in rechargeable lithium battery to keep the date/time and other settings.
-
Page 154: Maintenance/Others
You can use the supplied compact power adapter to operate the camcorder and to charge battery packs in any country with power supply between 100 and 240 V AC, 50/60 Hz. Consult a Canon Service Center for information on plug adapters for overseas use. -
Page 155: Optional Accessories
This product is designed to achieve excellent performance when used with genuine Canon accessories. Canon shall not be liable for any damage to this product and/or accidents such as fire, etc., caused by the malfunction of non-genuine Canon accessories (e.g., a leakage and/or explosion of a battery pack). Please note that this warranty does not apply to repairs arising out of the malfunction of non-genuine Canon accessories, although you may request such repairs on a chargeable basis. - Page 156 Optional Accessories Battery Packs When you need extra battery packs, select from the following: BP-950G, BP-955, BP-970G, BP-975 When you use battery packs bearing the Intelligent System mark, the camcorder will communicate with the battery and display the remaining usage time (accurate to 1 minute). You can only use and charge these battery BP-955 BP-975 packs with camcorders and chargers compatible with Intelligent System.
- Page 157 Using the SBR-1000 for additional support of the camcorder with the neck strap will significantly lighten the load of the camcoder’s weight while shooting. This mark identifies genuine Canon video accessories. When you use Canon video equipment, we recommend Canon-brand accessories or products bearing the same mark.
-
Page 158: Specifications
• Viewfinder: 0.61cm (0.24 in.), wide, color, equivalent to approx. 1,555,000 dots, 100% coverage • Lens Mount Canon EF mount compatible with Canon EF lenses (including EF-S lenses) Lens multiplication factor: approx. 1.53 (for 35mm-equivalent focal length) • ND Filter: Built-in (Off, 2, 4 or 6 stops), manual •... - Page 159 Specifications • Sensor Sensitivity (ISO 640 (0 dB), 2000 lux, 89.9% reflection) F9 (1920x1080 at 60i) F10 (1920x1080 at 50i) • S/N Ratio (ISO 850, using Canon Log gamma) 54 dB (typical, 1920x1080, at PF30 / at PF25) • Subject Illumination (24 dB, with an f/1.2 lens) 0.30 lux (PF30, shutter speed 1/30)
- Page 160 Specifications Modular Units Handle Unit Modular unit includes a cold accessory shoe and socket for 0.64 cm (1/4 in.) screws for other accessories, built- in microphone, XLR terminals and related audio controls. • CH1, CH2 Terminals XLR jack (pin1: shield, pin2: hot, pin3: cold), 2 sets Sensitivity MIC setting: -60 dBu (manual volume center, full scale -18 dB) / 600 Ω...
-
Page 161: Index
Grip belt .......35 Canon Log gamma ..... .49 Grip unit . - Page 162 Key lock ......47, 62 Rec run (time code) ..... 70 Recording Clips .
- Page 163 Video configuration ..... .51 Video output configuration ....113 Video scopes .
- Page 164 B. If the Products are defective as a result of leaking batteries, sand, dirt or water damage; C. If defects or damages are caused by the use of parts or supplies (other than those sold by Canon USA) that cause damage to the Products or that cause abnormally frequent service calls or service problems;...
- Page 165 B. If the Products are defective as a result of leaking batteries, sand, dirt or water damage; C. If defects or damages are caused by the use of parts or supplies (other than those sold by Canon Canada) that cause damage to the Products or that cause abnormally frequent service calls or service problems;...
- Page 166 Bovenkerkerweg 59, 1185 XB Amstelveen, The Netherlands MÉXICO CANON MEXICANA, S DE RL DE CV www.canon.com.mx 52 (55) 5249-4905 Visit your local Canon Web site to download the latest version of this Instruction Manual. 0166W716 © CANON INC. 2014 PUB. DIE-0429-001C...
Need help?
Do you have a question about the EOS C100 and is the answer not in the manual?
Questions and answers