Advertisement
Table of Contents
- 1 Table of Contents
- 2 Setting up Your Microphone with Pivot Mount & Desk Stand
- 3 Preliminary Setup with Mac os X
- 4 Preliminary Setup with Windows XP
- 5 Preliminary Setup with Windows Vista
- 6 Preliminary Setup with Windows 7
- 7 Using Headphones
- 8 Selecting Software
- 9 Setting Your Software Levels
- 10 Positioning Your Microphone
- 11 Protecting Your Microphone
- 12 Specifications
- 13 Warranty
- Download this manual
Cardioid Condenser USB Microphone
Introduction & features
ATR2500-USB
Instruction Manual
ATR2500-USB
Contents
10
13
13
13
13
13
14
15
2
3
4
6
9
Advertisement
Table of Contents

Related Manuals for Audio Technica ATR2500-USB


Summary of Contents for Audio Technica ATR2500-USB
-
Page 1: Table Of Contents
ATR2500-USB Instruction Manual ATR2500-USB Cardioid Condenser USB Microphone Contents Introduction & features Setting up your microphone with pivot mount & desk stand Preliminary setup with Mac OS X Preliminary setup with Windows XP Preliminary setup with Windows Vista Preliminary setup with Windows 7... - Page 2 Equipped with a USB output for easy connection to your computer, the ATR2500-USB offers studio- quality articulation and intelligibility perfect for home studio recording, field recording, podcasting, and voiceover use.
-
Page 3: Setting Up Your Microphone With Pivot Mount & Desk Stand
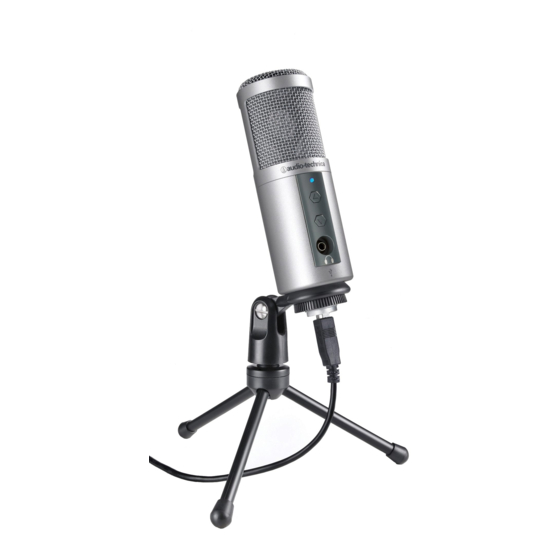
B. Extend the tripod legs to provide a wide, secure base. Place the tripod desk stand on a flat surface. C. Install the ATR2500-USB microphone through the tapered side of the collar of the pivot mount. While holding the microphone in place, screw the threaded ring to the threaded portion of the microphone that extends through the collar, and tighten. -
Page 4: Preliminary Setup With Mac Os X
1. Plug the free end of the provided USB cable into the USB port on your computer. The microphone’s blue LED will illuminate, indicating the microphone is receiving power.Your computer will automatically recognize the USB device and install a driver. 2. To select the ATR2500-USB as your audio input, first, open your System Preferences. - Page 5 Sound preference pane. 4. Click the Input tab and select the ATR2500-USB as the device for sound input. ATR2500-USB Your preferences are now set to use the ATR2500-USB on your Mac with GarageBand or another recording program of your choice.
-
Page 6: Preliminary Setup With Windows Xp
2. In the lower right portion of your screen you may see a message that new hardware was found; or you may see a driver software installation notice. 3. To select the ATR2500-USB as your default recording device, begin at your Start menu. - Page 7 4. Select Sounds and Audio Devices.
- Page 8 Sound recording Default device. ATR2500-USB 7. Through the Wave In window, you can set the computer volume or mute the microphone. ATR2500-USB Your preferences are now set to use the ATR2500-USB with Windows XP with the recording program of your choice.
-
Page 9: Preliminary Setup With Windows Vista
(You should see a green check mark beside the USB microphone icon.) Microphone SigmaTel C-Major Audio Working Microphone ATR USB Mic Working Your preferences are now set to use the ATR2500-USB with Windows Vista with the recording program of your choice. -
Page 10: Preliminary Setup With Windows 7
2. In the lower right portion of your screen you may get a message that new hardware was found; or you may see a driver software installation notice. Start menu > Control Panel > Sound To select the ATR2500-USB as your default recording device, begin at your Start menu. Select Control... - Page 11 4. Select Sound. 5. The following screen will pop up:...
- Page 12 (loudness). You may need to come back to this window to readjust the level after you begin recording. Your preferences are now set to use the ATR2500-USB with Windows 7 with the recording program of your choice.
-
Page 13: Using Headphones
Additional Information Using Headphones " (3.5 mm) headphone jack on the bottom of the microphone allows you to directly monitor your recording with a pair of headphones. When your preliminary setup is completed, and your USB microphone is connected to your computer’s USB port (the microphone’s blue LED is illuminated), plug your headphones into the headphone jack on the bottom of the microphone. -
Page 14: Specifications
ATR2500-USB Specifications † Element: Condenser Polar Pattern: Cardioid Frequency Response: 30 – 15,000 Hz Power Requirements: USB Power (5V DC) Bit Depth: 16 bit Sample Rate: 44.1 kHz/48 kHz Weight: 366 g (12.9 oz) Dimensions: 155.0 mm (6.10") long, 50.0 mm (1.97") maximum body diameter... -
Page 15: Warranty
ATR2500-USB U.S. Lifetime Limited Warranty This product is warranted in the U.S.A. by Audio-Technica U.S., Inc. (A.T.U.S.) for the lifetime of the original purchaser. During the warranty period, A.T.U.S. will repair or replace these products, provided they are sent prepaid to the address below, with proof of original purchase and $15.00 for handling and return to a U.S. - Page 16 Afin de réduire l’impact sur l’environnement de l’impression de plusieurs, les informations concernant les produits sont disponibles sur le site www.audio-technica.com dans une large sélection de langue. Para reducir el impacto al medioambiente, y reducir la producción de documentos en varios leguajes, información de nuestros productos están disponibles en nuestra página del Internet:...
Need help?
Do you have a question about the ATR2500-USB and is the answer not in the manual?
Questions and answers