Table of Contents
Advertisement
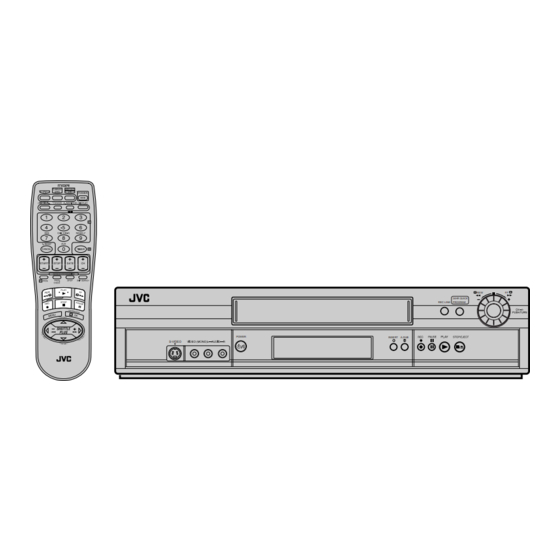
SERVICE MANUAL
VIDEO CASSETTE RECORDER
HR-S5901U,
HR-S5911U, HR-S5911U(C)
SPECIFICATIONS
GENERAL
Power requirement
: AC 120 V
Power consumption
Power on
: 17 W
Power off
: 1.5 W
Temperature
Operating
: 5 C to 40 C (41 F to 104 F)
Storage
: –20 C to 60 C (–4 F to140 F)
Operating position
: Horizontal only
Dimensions (W x H x D) : 435 mm x 94 mm x 247 mm
(17-3/16" x 3-3/4" x 9-3/4")
Weight
: 2.8 kg (6.2 lbs)
Format
: S-VHS/VHS NTSC standard
Maximum recording time
SP
: 210 min. with ST-210 video cassette
EP
: 630 min. with ST-210 video cassette
VIDEO/A UDIO
Signal system
: NTSC-type color signal and EIA
monochrome signal, 525 lines/
60 fields
Recording/Playback
: DA-4 (Double Azimuth) head helical
system
scan system
Signal-to-noise ratio
: 45 dB
Horizontal resolution
VHS
: 230 lines
S-VHS
: 400 lines
Frequency range
Normal audio
: 70 Hz to 10,000 Hz
Hi-Fi audio
: 20 Hz to 20,000 Hz
Input/Output
: RCA connectors (IN x 2, OUT x 1)
S-video connectors (IN x 2, OUT x 1)
POWER
S-VIDEO
, 60 Hz
d
This service manual is printed on 100% recycled paper.
COPYRIGHT © 2002 VICTOR COMPANY OF JAPAN, LTD
REW
FF
24HR QUICK
REC LINK
PROGRAM
INSERT A.DUB
TUNER
Tuning system
: Frequency-synthesized tuner
Channel coverage
VHF
: Channels 2–13
UHF
: Channels 14–69
CATV
: 113 Channels
RF output
: Channel 3 or 4 (switchable; preset to
Channel 3 when shipped) 75 ohms,
unbalanced
TIMER
Clock reference
: Quartz
Program capacity
: 1-year programmable timer/
8 programs
Memory backup for timer is not supported.
ACCESSORIES
Provided accessories
: Infrared remote control unit,
"AA" battery x 2,
S-video cable (4-pin),
RF cable (F-type)
Specifications shown are for SP mode unless specified otherwise.
E. & O.E. Design and specifications subject to change without
notice.
V15S15
No.82911
March 2002
Advertisement
Table of Contents

Related Manuals for JVC HR-S5901U


Summary of Contents for JVC HR-S5901U
-
Page 1: Specifications
SERVICE MANUAL VIDEO CASSETTE RECORDER HR-S5901U, HR-S5911U, HR-S5911U(C) 24HR QUICK REC LINK PROGRAM POWER INSERT A.DUB S-VIDEO SPECIFICATIONS GENERAL TUNER Power requirement : AC 120 V , 60 Hz Tuning system : Frequency-synthesized tuner Power consumption Channel coverage Power on : 17 W : Channels 2–13... -
Page 3: Table Of Contents
3.3.2 Video circuit ............3-5 3.3.2.1 EE Y/PB Y (S-VHS/VHS)level ......3-5 3.3.3 Audio circuit ............3-5 3.3.3.1 Audio REC FM ..........3-5 The following table lists the differing point(s) between models HR-S5901U, HR-S5911U, and HR-S5911U(C). MODEL HR-S5901U HR-S5911U HR-S5911U(C) -
Page 4: Important Safety Precautions
Important Safety Precautions Prior to shipment from the factory, JVC products are strictly inspected to conform with the recognized product safety and electrical codes of the countries in which they are to be sold. However, in order to maintain such compliance, it is equally important to implement the following precautions when a set is being serviced. -
Page 5: Safety Check After Servicing
Safety Check after Servicing Examine the area surrounding the repaired location for damage or deterioration. Observe that screws, parts and wires have been returned to original positions, Afterwards, perform the following tests and confirm the specified values in order to verify compli- ance with safety standards. -
Page 7: Disassembly
SECTION 1 DISASSEMBLY (3) Unload the pole base assembly by manually turning the gear 1.1 Manually removing the cassette tape of the loading motor until the pole base assembly is hidden If you cannot remove the cassette tape which is loaded be- behind the cassette lid. -
Page 8: Removing The Major Parts
1.2 Removing the major parts 1.2.1 How to read the procedure table This table shows the steps for disassembly of the externally Door opener furnished parts and board assemblies. Reverse these steps when re-assembling them. Switch Side lever <Example> frame(R) Switch knob Step/... - Page 9 (S1a) Slot to fit at (L3a) of the Bottom chassis. NOTE) After screwing,execute the adjustment inspection of the tape running. (S3f) Mechanism [3] Drum shield assembly (S2a) Drum Screw(S3f) [3] Drum assembly (S3a) FE head <Note 3c> [1] Top cover <Note 3a>...
-
Page 10: Emergency Display Function
1.3 Emergency display function This unit saves details of the last two emergencies as the EMG 0 : 00 : 00 Normal display (Counter or clock) history and allows the status of the VCR and the mechanism of each emergency to be shown both on the display and as EMG content display (E:Latest:Previous) See 1.3.4. -
Page 11: Details Of The Osd Display In The Emg Display Mode
ROM No. tially different from the mechanism sensor information in EMG detail information <1>. A A : Key code (JVC code) [For MN* only] B B : Deck operation mode (See EMG detail information <1>.) C C : Mechanism operation mode (See EMG detail information <1>.) D D : Sensor information (See sensor information details.) -
Page 12: Emg Content Description
1.3.4 EMG content description Note: EMG contents “E08/E09” are for the model with Dynamic Drum (DD). CONTENT CAUSE E01: Loading EMG If the mechanism mode does not change to the next mode within 4 sec- 1. The mechanism is locked in the middle of the mode transition during a tape loading operation. onds after the loading motor starts rotating in the loading direction, while 2. -
Page 13: Emg Detail Information<1
1.3.5 EMG detail information <1> * 2 : Mechanism operation mode [Table of MN*] The status (electrical operation mode) of the VCR and the status (mechanism operation mode/sensor information) of the mechanism Display Mechanism operation mode Command standby (No command to be executed) in the latest EMG can be confirmed based on the figure in EMG Immediate Power OFF after EMG occurrence detail information <1>... -
Page 14: Emg Detail Information<2
3– : Mechanism sensor information * 5 : Cassette tape type <1> [Common table of MN* and HD*] Display Cassette tape type <1> Mechanism sensor information Display Cassette type not identified Mechansim Start sensor End sensor REC safety SW position sensor Large reel/small reel (T-0 to T-15/T-130 to T-210) not classified Small reel, thick tape (T-120) identified/thin tape (T-140) identified Tab broken... -
Page 15: Service Position
1.4 Service position Jig RCU mode This unit has been designed so that the Mechanism and Main This unit uses the following two modes for receiving remote control codes. board assemblies can be removed together from the chassis assembly. Before diagnosing or servicing the circuit boards, 1) User RCU mode : Ordinary mode for use by the user. -
Page 16: Maintenance And Inspection
1.7.3 Suggested servicing schedule for main components 1.7 Maintenance and inspection The following table indicates the suggested period for such 1.7.1 Cleaning service measures as cleaning, lubrication and replacement. In Regular cleaning of the transport system parts is desirable but practice, the indicated periods will vary widely according to en- practically impossible. -
Page 17: Mechanism
SECTION 2 MECHANISM 2.1 Before disassembling 2.1.3 Setting the mechanism assembling mode The mechanism-assembling mode is provided with this mecha- 2.1.1 Notes nism. When disassembling and assembling, it is required to This model’s mechanism relates closely to the rotary encoder engage this mode. -
Page 18: Layout Of The Main Mechanism Parts
2.1.4 Layout of the main mechanism parts Pole base assy T4 Main brake assy T3 A/C head (take-up Side) (take-up side) Pinch roller arm assy Full erase head Lid guide Pole base assy (supply side) T7 Guide arm assy T8 Brake lever Tension arm assy T9 Drive lever Tension arm base... -
Page 19: Disassembling Procedure Table
2.1.5 Disassembling procedure table This table shows the order of parts removal when replacing each part. For replacement, remove the parts in the order of 1 to 13 shown in the table and install the parts in the reverse order. The symbol number before each part name shows the number in the figure “Layout of the main mechanism parts”. -
Page 20: Replacement Of The Main Mechanism Parts
2.2 Replacement of the main mechanism parts 2.2.1.3 Disassembling (1) Release hook (a) to remove the earth spring (1) from the 2.2.1 Cassette holder top frame. 2.2.1.1 Removal (2) Release the catches (a) and (b) and pull the top frame in the direction shown by the arrow (a) to remove it. -
Page 21: A/C Head
2.2.2 A/C head Screw (b) 2.2.2.1 Removal SIDE FRAME(R) (1) Remove screws (a) and (b). (2) Remove the A/C head together with the head base. (3) Remove the screws (c), (d) and (e) to remove the spring (a) and the A/C head from the head base. Section (a) Screw (e) DRIVE LEVER... -
Page 22: Guide Arm, Pinch Roller Arm
2.2.3 Guide arm, pinch roller arm 2.2.4 Idler arm, idler gear 1/2 2.2.3.1 Removal 2.2.4.1 Removal (1) Remove the spring (a) from the hook (a) and detach the (1) Release the catches (a) and (b) to detach the idler arm. guide arm assembly. -
Page 23: Press Lever, Control Cam, Capstan Brake Assembly,Loading Motor Assembly
2.2.6 Press lever, control cam, capstan brake assembly, loading motor assembly Tension arm assembly Spring (b) Main brake (T) assembly Catch (d) 2.2.6.1 Removal Catch (c) Section (b) Spring (a) BRAKE (1) Remove the slit washer (a) to detach the press lever. Spring (a) LEVER (2) Release the slit washer (b) to detach the control cam. -
Page 24: Capstan Motor, Load Gear, Control Plate
Note: 2.2.6.2 Installation (phase adjustment) When replacing the worm bearing of the loading motor as- • (1) Attach the loading motor assembly to the main deck. sembly, attach it according to the following specification. (2) Secure the screw (a). If worm bearing is not attached correctly, a mechanism (3) Solder the wire to section (a). -
Page 25: Clutch Unit Assembly, Direct Gear
2.2.7.2 Installation (phase adjustment) 2.2.8 Clutch unit assembly, direct gear (1) Place the main deck on the guide hole (a) of the tension arm 2.2.8.1 Removal lever. (1) Remove the slit washer (a) to detach the clutch unit assem- (2) Place the main deck on the guide hole (b) of the brake le- bly. -
Page 26: Mechanism Timing Chart
2.3 Mechanism timing chart REEL MECHANISM MODE SERCH SLOW EJECT PLAY STOP BRAKE /REW /STILL /SLOW /STILL CONTROL PLATE B FR MARK POLE BASE LOCK REEL LOCK FREE TENSION ARM PLAY TENSION STOP FF/REW ARM LEVER (STOP MODE PRESS UP) BRAKE LEVER GUIDE ARM... -
Page 27: Adjustment
SECTION 3 ADJUSTMENT Before adjustment 3.1.4 Color (colour) bar signal, color (colour) bar pattern 3.1.1 Precaution • • Color(colour) bar signal [NTSC] Color(colour) bar pattern [NTSC] • The adjustments of this unit include the mechanism White(100%) (75%) compatibility and electrical adjustments. During the White(75%) performance of this work, be sure to observe the pre- cautions for each type of adjustment. -
Page 28: Manual Tracking Mode (Auto Tracking On/Off) Setting
3.1.6 Manual tracking mode (Auto tracking ON/OFF) setting 3.2 Mechanism compatibility adjustment Notes: (1) In order to set to the manual tracking mode during tape • Although compatibility adjustment is very important, it is not playback, press the “SP/EP(LP)” button on the remote necessary to perform this as part of the normal servicing work. -
Page 29: Fm Waveform Linearity
3.2.2 FM waveform linearity • Proper waveform variation • Signal (A1) Alignment tape(SP, stairstep, NTSC) [MHP] • (A2) Alignment tape(EP, stairstep, NTSC) [MHP-L] • Mode • Equipment Oscilloscope • Improper waveform variation • Measuring point (D) TP106 (PB. FM) Down •... -
Page 30: A/C Head Phase(X-Value)
3.2.4 A/C head phase (X-value) Electrical adjustment • Signal (A1) Alignment tape(SP, stairstep, NTSC) [MHP] Note: • (A2) Alignment tape(EP, stairstep, NTSC) [MHP-L] The following adjustment procedures are not only necessary • after replacement of consumable mechanical parts or board Mode assemblies, but are also provided as references to be re- •... -
Page 31: Video Circuit
(1) Record the signal (A2) in the mode (B1), and play back 3.3.3 Audio circuit the recorded signal. Notes: (2) Set the VCR to the manual tracking mode. • GND (Ground) should be taken from the Tuner shield (3) Set the VCR to the FWD slow (+1/6x) mode. case. - Page 34 JVC SERVICE & ENGINEERING COMPANY OF AMERICA DIVISION OF JVC AMERICAS CORP. Head office (973)317-5000 1700 Valley Road Wayne, New Jersey 07470-9976 10 New Maple Avenue Pine Brook, New Jersey 07058-9641 (973)396-1000 East Coast 705 Enterprise Street Aurora, Illinois 60504-8149...