
Related Manuals for Plextor StorX

Summary of Contents for Plextor StorX
- Page 1 Wireless Network Attached Storage (NAS) From Plextor V1.02 Includes ☆ Features Description ☆ Quick Install ☆ Detailed Setup Guide ☆ Tools Guide 1 of 46...
- Page 2 Consult the dealer or an experienced radio/TV technician for help. Properly shielded and grounded cables and connectors must be used to meet FCC emission limits. Plextor is not responsible for any radio or television interference caused by using other than recommended cables or connectors.
-
Page 3: Table Of Contents
Quick Installation and set up and guide Connecting your Plextor StorX to your Network Copy the Plextor StorX Net-Tool software (supplied on CD) onto your PC Connecting Plextor StorX to a DHCP Router, Hub/Switch Connecting Plextor StorX to a Static IP Address Router, Hub/Switch... -
Page 4: What's In The Box
Power Cable UK Quick Start Guide Introduction Congratulations on purchasing your Plextor StorX Network Attached Storage (NAS) device. With your Plextor StorX you are able to: 1. Easily set up users, groups and folders 2. Set accessibility rights such as; No accessibility to other users, Read only to other users, and Read/Write to other users. -
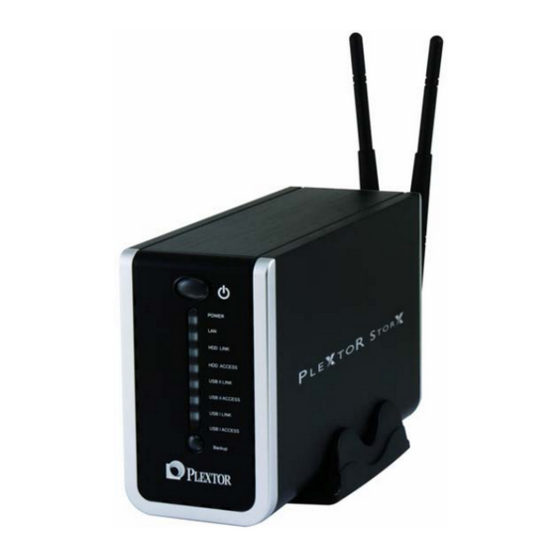
Page 5: Connectors, Buttons And Indicators
Connectors, Buttons and indicators Rear Connections 5 of 46... -
Page 6: Buttons And Indicators
Buttons and Indicators Power Button Power HDD LINK HDD ACCESS USB II LINK USB II ACCESS USB I LINK USB I ACCESS Backup Button LED Indicators Power LED Green – System ready LAN LED Green – Valid Connection at 10/100/1000 Mbps HDD LINK Green –... -
Page 7: Quick Installation And Set Up And Guide
This section shows you how to setup connections and format the hard drive of your Plextor StorX. To set-up users, folders and groups please read the User Manual section. 1. Connect one end of the RJ-45 cable (supplied) to the LAN port on your Plextor StorX 7 of 46... - Page 8 2. Connect the appropriate power cord (supplied) to the power adapter 3. Connect the power adapter end to device 4. Connect the power cord end to outlet socket 5. Push the power button to power on 8 of 46...
-
Page 9: Connecting Your Plextor Storx To Your Network
When you connect your Plextor StorX to a Dynamic Host Configuration Protocol (DHCP) device, the device assigns your Plextor StorX with a unique IP address. You can confirm network connection and view IP address via the Plextor StorX NET- Tool •... -
Page 10: Connecting To Static Ip Router
Connecting Plextor StorX to a Static IP Address Router, Hub/Switch Plextor StorX has a default IP address of 192.168.16.1.In order to change this IP address to one within the range of your static IP address router, hub/switch, you must first connect the Plextor StorX to a PC via LAN connection (please disable any wireless connection on your PC before you attach Plextor StorX. - Page 11 (Ensure no previously configured devices share your chosen IP address) 9: Click Next, then Finished to save your settings (you might lose connection to your Plextor StorX as you have now changed Plextor StorX IP address to be compatible with your router and not PC)
-
Page 12: User Manual
User Manual Administration Section 1: LAN Settings (Dynamic Host Configuration Protocol (DHCP) or Static IP) Section 2: Setting up Wireless Connection Section 3: System (Set Date & time, Change name and description of device) Section 4: FTP Server (Enable FTP server and guest settings) Section 5: USB (Shows USB devices attached and USB printer) Section 6: Users (Create users) Section 7: Group (Create groups of users) -
Page 13: Section 1: Lan Settings
Selecting this option enables the Plextor StorX to request an IP and auto-configure itself to the network when there is a DHCP Server present. NOTE: If DHCP Client is enabled, but there is no DHCP server, the Plextor StorX would fall back to the default IP address of 192.168.16.1. -
Page 14: Section 2: Setting Up Wireless Connection
Section 2: Setting up Wireless Connection Connect your Plextor StorX to your router with the RJ-45 LAN cable provided On your PC (which is also connected to your router) open PleXtor NetTool Select your PleXtor StorX. Enter Administration and select Wireless... - Page 15 The following procedures are dependent on which security key (if any) your router has been set up with. If in doubt, please consult your routers user manual. No Encryption Select Infra (infrastructure) or Adhoc Select, SSID Scan. Then from the drop down menu, select the name of your router. If your router has no encryption select ‘No Encryption’...
- Page 16 If you router does have encryption (security key). Select either, WEP, TKIP or AES. If your router is protected by a WEP KEY, select WEP, then from the pull down menu select the type of WEP key you have. Enter the WEP key then select Apply Remove LAN cable and restart NAS –...
- Page 17 The following procedures are for WPA keys – PSK (previously shared keys). Select either TKIP or AES. TKIP Select TKIP then enter the key in the WPA-PSK box Select, Apply. Remove LAN cable and restart NAS – NAS will now function in wireless mode. Select AES then enter the key in the WPA-PSK box Select, Apply.
-
Page 18: Section 3: System
Section 3: System Some basic device settings of your Plextor StorX can be changed here. Including “Device Name”, “Description”, “Date”, “Time Zone”. Additionally, the “NTP server” can be enabling or disabled. When you first open System under Administrator, you will see this window. - Page 19 If you go to My Network Places you will see the Device Name has been changed The Network Time Protocol (NTP) function allows the Plextor StorX to update Date and Time automatically. This function is enabled by default, and you should select the Time Zone for your area.
-
Page 20: Section 4: Ftp Server
Section 4: FTP Server NOTE: By Setting up Plextor StorX as an external FTP server, this disables the Plextor StorX as a NAS device When the FTP Server is selected under Administration, this window appears The device has an embedded FTP server that allows you and other users to access this device by FTP client. - Page 21 / ftp folder on the network (If you intend to use Plextor StorX as an internal NAS device only, you can delete these ftp user accounts (deleting these ftp user account will not delete users as set up in section To access the ftp server: There are two ways to access the ftp server.
-
Page 22: Section 5: Usb
If external USB HDD or thumb drives are attached and Refresh is selected the display will update. Connecting Printer: 1. Connect printer to Plextor StorX via USB Ensure it is seen in USB Printers 3. Enter My Network Places on PC 4. -
Page 23: Section 6: Users
As can be seen there is a default user “admin” this user cannot be deleted and you must create a password This user has administration rights for all folders within Plextor StorX on the network and ftp (this is not the same user name and password needed to access the setup... - Page 24 Adding Users User name: Enter a user name (you cannot start user name with a number or have spaces) Password: Enter a password for that user Verify password: Enter password again User description: You can enter a description for this user, or can be left blank Select Add user User can now be seen To modify user properties, click on user icon...
-
Page 25: Section 7: Group
Section 7: Group The Group section allows you to setup a number of users into a group; you can then give this group user rights to folders (allowing all members of the group the user rights you have set) When Group is selected under Administration the following window appears Group name: Enter a group name (you cannot start group name with a number or have spaces) Group description:... - Page 26 To add users to a group, click on the group icon A list of users will appear Select users you want add to the group by checking the box next to user icon then select Apply To remove users from group, uncheck the box next to that user icon and select apply To update group name or description, enter new name or description and select Update To return to group list, select return...
-
Page 27: Section 8: Folder
Section 8: Folder In this section you can create folders and set user access rights to those folders When Folder is selected under Administration the following window appears Folder name: Enter a folder name (you cannot start folder name with a number or have spaces) Folder description: You can enter a description for this folder, or can be left blank Select Add folder... - Page 28 Setting user access rights to a folder Click on folder icon A window will appear allowing you to setup user access rights to that folder By default access rights are set to “Set access for individual users” with “No access” selected for all users &...
- Page 29 There are three sections to setting up user access rights to a folder Global settings, Group settings and User settings Global Settings Set access for individual users Allows you to set access rights to individual groups or users No access for all users Allows you set no access to that folder (only accessible via admin in network) Read-only access for all users Allows all users and groups read only access to that folder...
- Page 30 User Settings No access: user can not access the folder Read-only: user can only read from folder Read and write: user can read from and write to folder 30 of 46...
-
Page 31: Section 9: Media
When you want to play your chosen media files on a network PC. • Open your Media Player • Locate your media files on your Plextor StorX • Select Play Note: UPNP compliant media player software required for successful playback... -
Page 32: Section 10: Backup
Section 10: Backup In this section you can backup folders and sub-folders from Plextor StorX to an external USB hard disc drive When BackUp is selected under Administration the following window appears Click on, Add a Backup Job 32 of 46... - Page 33 Select that folder from the second drop down menu (folder name cannot have spaces) You can check that Plextor StorX has recognized the folder or path of sub-folder by selecting Test Availability If Plextor StorX can find that folder the availability result will be OK.
- Page 34 If for example you want to backup a folder every week and you want to keep the last 5 weeks before Plextor StorX starts to over write the first week, you would enter the number 5 in the box. The 6...
-
Page 35: Section 11: Bittorrent
Section 11: BitTorrent BitTorrent Global Settings The User can choose in which folder (public or user’s folder) to place the downloaded torrent files. The max download and upload rate can be limited to the rate you want. Seed infinitely – After the download has finished. The file will seed until you stop seeding. - Page 36 Once you have added the torrent file, click on “Start” to start the download. There are four operations you can do: Start: If you want to start the job Stop: If you want to stop the job Detail: Shows detailed information of the job Delete: Stop and delete the job, then you can add other jobs Refresh...
-
Page 37: Tools
Tools Scheduling Here you can set a day and time for your Plextor StorX to restart. Restart Here you can restart your Plextor StorX immediately 37 of 46... -
Page 38: Ads (Active Directory Service)
Please note, ADS is an administrative tool. Only select this option if you have an understanding of ADS (Active Directory Service). First, ensure that the date and time settings on your PleXtor StorX NAS (In System) are in sync with your server. - Page 39 PleXtor StorX NAS. Note: In ADS mode, Users & Groups cannot be created or modified via your PleXtor StorX Adding /modifying users and groups must be carried out on the server. When you add /remove users or groups on your server, you can update that information to your PleXtor StorX immediately by selecting “ADS Sync”...
- Page 40 ADS Mode Recommended Folder Access methods Method 1 This method involves the use of a logon script, which systems administrator will be familiar with. (Sample logon script below). This file is created in notepad and is saved with a .bat extension i.e. logon.bat The file contains mappings to NAS folders to which the user has access permission.
- Page 41 Method 2 Right click on your desktop and select new, then shortcut. This will bring up this window. Enter the IP address of your NAS and specify the folder you wish to connect to (e.g. projects). Please note you must have permission to access the folder, which can be setup via the NAS GUI.
- Page 42 Method 3 In Windows Explorer or Internet Explorer you can type in the address of the folder you wish to access. (again you need permission) i.e. \\192.168.0.10\projects Obviously the address will depend on your particular setup. This will allow you access to the folder. 42 of 46...
-
Page 43: Hard Disk Utility
Formatting the Hard Disk Drive on your Plextor StorX Once you have selected Harddisk Utility, select SDA PORT: shows the port which the hard disk is connected to within your Plextor StorX. shows the hard disk manufacturer. To format the hard disk drive, select which file system you prefer either;... -
Page 44: Firmware Upgrade
Save Config Once you have setup / configured your Plextor StorX the way you like it, Save Config allows you to save this configuration to your PC so you can restore these settings at a later date (Including the settings in LAN, System and Scheduling). -
Page 45: Factory Default
Select Browse, find and open previously saved file, then select Restore. Factory Default Only use this function when you want to reset your Plextor StorX back to the factory default settings. Your Plextor StorX will reboot for the new settings to take effect. -
Page 46: System Log
System Log The log content can be viewed from here. 46 of 46...
Need help?
Do you have a question about the StorX and is the answer not in the manual?
Questions and answers