Table of Contents
Advertisement
Advertisement
Table of Contents

Related Manuals for Honda HS521


Summary of Contents for Honda HS521
- Page 2 Honda snowthrower this equipment requires special effort to ensure the and the safety of others. operating this equipment; damage. of the HS521 snow- informa- at any time without written permission. part of the snowthrower words: will result if instruc-...
-
Page 3: Table Of Contents
CONTENTS SAFETY ... WARNING LABEL LOCATION SAFETY INFORMATION COMPONENT IDENTIFICATION ENGINE SWITCH A.C. STARTER BUTTON ... FUEL VALVE CHOKE KNOB ... STARTER GRIP ... CHUTE GUIDE HANDLE ... AUGER CLUTCH LEVER ... PRE-OPERATION CHECK ... FUEL LEVEL ... ENGINE OIL LEVEL ... STARTING THE ENGINE ... -
Page 4: Safety
1. SAFETY WARNING LABEL LOCATION Read these labels before operating the snowthrower. CHUTE WHILE... -
Page 5: Safety Information
Honda snowthrowers operated according Owner’s Manual before could result in personal Before operating the snowthrower, going clear snow. snowthrower might strike or throw the snowthrower. Inspect the snowthrower correct any malfunction operating the snowthrower, damage. Damaged equipment ing operation. Do not use the snowthrower poor visibility, there is a greater injury. - Page 6 Know how to stop the snowthrower tion of all controls. Never permit anyone struction. If people or pets suddenly while it is in operation, stop the snowthrower blades. If the snow discharge a trowel or long wooden snow discharge chute while the engine is running; jury could result.
-
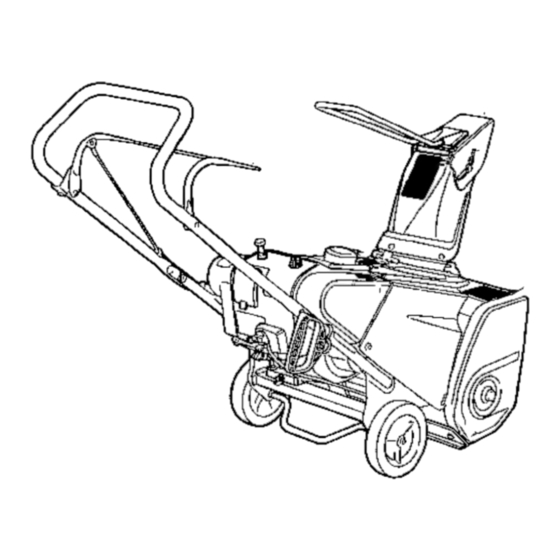
Page 7: Component Identification And Function
2. COMPONENT IDENTIFICATION AND FUNCTION AUGER CLUTCH LEVER CHUTE GUIDE HANDLE AUGER PADDLE - ---Tkllr CENTER’bADDLE ENGINE SWITCH CHOKE KNOB TTON SPARK PLUG COVER =tqciJali/ FUEL VALVE d ENGINE OIL DRAIN PLUG #LADE... -
Page 8: A.c. Starter Button
ENGINE SWITCH Use the engine switch STOP the e A Type A.C. STARTER BUTTON Push the A.C. starter button to operate the electric starter. FUEL VALVE The fuel valve opens and closes the fuel line leading from the fuel tank to the carburetor. -
Page 9: Choke Knob
CHOKE KNOB Close the choke when the engine is cold or difficult to start. CHOKE KNOB STARTER GRIP Pull this grip to start the engine. STARTER... -
Page 10: Chute Guide Handle
CHUTE GUIDE HANDLE The chute guide controls LOW AND NEAR HIGH AND FAR AUGER CLUTCH LEVER When the clutch lever is squeezed, into operation, and the snowthrower AUGER CLUTCH LE NOTE: Never squeeze auger clutch on cleared ground; the snowthrower will start suddenly. -
Page 11: Pre-Operation Check
3. PRE-OPERATION To prevent and disconnect the spark plug cap before inspection. FUEL LEVEL Unscrew the fuel cap. Check the fuel level. Your engine is designed tane number (v ) of 86 or higher, or that has a research octane number of 91 or higher. - Page 12 Gasoline extremely conditions. Refuel in a well-ventilated or allow flames or sparks where gasoline is stored. Do not overfill the fuel tank (there should be no fuel in the filler neck). After refueling, make sure the tank cap is closed properly and securely. Be careful not to spill fuel when refueling.
-
Page 13: Engine Oil Level
ENGINE OIL LEVEL Inspection: With the snowthrower the dipstick clean. Insert the dipstick it in. Remove the dipstick If the level is low, fill to the top of the oil filler neck with the recommended oil. OIL FILLER NECK OIL FILLER CAP AND DIPSTICK OIL CAPACITY: 0.6 ! (0.63 RECOMMENDED... -
Page 14: Starting The Engine
Never run the engine in an enclosed contains poisonous carbon monoxide sciousness and may lead to death. Connect the female end of your power cord to the switch male end to a properly IUSE ONLY WITH GROUNDED OUTLET AN0 R 1 MINUTE WITHOUT 1. - Page 15 2. Turn the fuel valve to the ON position. FUEL ‘VALVE 3. When the engine is cold, move the choke to the CLOSE position. CHOKE KNOB 4. Pull the starter grip lightly until you feel resistance, then pull briskly. Damage may result if the starter grip is pulled while the engine is running.
- Page 16 Push the starter button Do not operate the starter for more than 1 minute. start, release the button before operating it again. To avoid serious engine is running. After the engine starts, outlet first, and then from the switch 5. Let the engine warm up for several minutes. CLOSE position, return it gradually to the OPEN position as the engine warms up.
-
Page 17: Snowthrower Operation
5. SNOWTHROWER Before operating this SAFETY information 1. Hold the handle firmly with one hand. 2. Squeeze the auger clutch snowthrowing mechanism. NOTE: To move the snowthrower from the ground. The snowthrower contacts the ground. To stop, push down on the handle to pivot the auger up and away from the ground, When operating the snowthrower,... - Page 18 3. Start the snowthrowing and is running smoothly. Adjust snow bystanders, windows, of the snow discharge If the snow discharge a trowel or long wooden snow discharge chute while the engine is running; jury could result. NOTE: For most efficient refreezes.
- Page 19 4. When the temperature at reduced ground speed. Walk the snowthrower dle down and forward necessary. 5. When the height of the snow is greater than the height of the snow- throwing mechanism, snow gradually. is high, and the snow is wet and heavy, operate slowly to remove hard or deep snow.
-
Page 20: High Altitude Operation
HIGH ALTITUDE OPERATION At high altitude, the standard carburetor ly rich. Performance High altitude performance main fuel jet in the carburetor always operate the snowthrower sea level, have your authorized carburetor modifications. Even with suitable carburetor proximately 3.5% for each 1,000 foot increase in altitude. altitude on horsepower tion is made. -
Page 21: Stopping The Engine
To stop the engine in an emergency, turn the engine switch OFF im- mediately. To stop the engine in normal circumstances. 1. Turn to the engine switch to the OFF position. AS Type A Type 2. Turn the fuel valve to the OFF position. FUEL VhLVE... -
Page 22: Maintenance
Periodic inspection and maintenance your HS521 Snowthrower Inspect or seivice as described Shut off the engine before performing disconnect the spark plug wire from the plug so the engine cannot started. If the engine must be run, make sure the area is well ventilated. -
Page 23: Maintenance Schedule
MAINTENANCE SCHEDULE SERVICE ITEM Engine Auger paddles Scraper blade Soark olua Bolts, nuts, fasteners Auger clutch cable Drive belt Fuel strainer (sediment cup) Fuel tank and carburetor Apply oil for lubricatiod and rust prevention Fuel line Valve clearance Fuel tank NOTE: These parts... -
Page 24: Tool Kit
TOOL SPARK PLUG WRENCH WRENCH HANDLE... -
Page 25: Engine Oil Change
ENGINE OIL CHANGE Drain the oil while the engine is still warm to assure rapid and complete draining. 1. Remove the drain plug and filler cap, and drain the oil. Retighten plug securely. 2. Fill the crankcase with the recommended the level. -
Page 26: Spark Plug Service
SPARK PLUG SERVICE Recommended spark plug: If the engine has been running, careful not to touch the muffler To ensure proper engine operation, ped and free of deposits. 1. Remove the spark plug cover then the spark plug cap. 2. Clean any dirt from around the spark plug base. 3. - Page 27 5. Measure the plug gap with a feeler gauge. to 0.8 mm (0.027-0.031 Correct as necessary 6. Make sure that the spark plug washer is in good condition the spark plug in by hand to prevent 7. After the spark plug is seated, tighten press the washer.
-
Page 28: Scraper Inspection, Adjustment And Replacement
SCRAPER INSPECTION, If the auger housing guard and the scraper are deformed or improperly justed, the snowthrower should be inspected and adjusted, before it is put back into service impaired. To prevent position and disconnect INSPECTION: 1. Place the snowthrower level ground and check that the scraper blade contacts... - Page 29 2. Set the chute straight position. 3. Tilt the snowthrower chute guide. 4. Loosen the four self-locking 5. Adjust the auger paddle-to-ground NOTE: The holders can be set in four directions. in the same directions. The blade is set at its lowest with the three holes facing up.
- Page 30 6. Tighten the self-locking against the holders. 7. Return the snowthrower scraper blade contacts paddle-to-ground clearance REPLACEMENT The scraper must be replaced if it is worn abnormally exceeded. 1. Turn the engine switch 2. Lift the handle so that the auger housing faces down. 3.
-
Page 31: Auger Clutch Cable Inspection And Adjustment
AUGER CLUTCH CABLE INSPECTION INSPECTION For the auger brake to operate perly, there should be free play in the auger clutch cable clutch set in the “OFF” Check the free play at the tip of the clutch lever. There should (0.59- 1.38 in) of free play at the tip of the lever. - Page 32 4. Adjust auger clutch and/or clutch cable into the other holes in the adjusting spring and cable closer together increase free play. BELT TENSION SPRING 5. Connect the upper cable end to the clutch lever, and check clutch lever free play again (see page 30). Readjust if necessary. If you are unable to adjust free play to specifications Honda snowblower 6.
-
Page 33: Drive Belt Inspection
DRIVE BELT INSPECTION The drive belt is subject to wear and deterioration every year before operation. while operating the snowthrower, problem may be due to belt slippage. 1. Check auger clutch necessary. 2. Remove the belt cover bolts, then remove the belt cover. If the snow discharge or if it is often clogged with snow, the... - Page 34 3. Slide the cable boot upward. length “A” of the drive belt tension spring is less than 30 mm (I. 18 in) with the auger clutch consult your authorized BELT TENS10 The drive belt should be adjusted lever squeezed fully. Honda dealer.
-
Page 35: Paddle Inspection
PADDLE INSPECTION The paddles are subject to wear and deterioration every year before operation. mance, and loose paddles, or loose material from damaged or deteriorated paddles, may damage the auger housing To prevent OFF position and disconnect 1. Drain the fuel as described 2. -
Page 36: Storage
Before storing the snowthrower 1. Be sure the storage area is free of excessive 2. Drain the fuel- Gasoline is extremely tions. Do not smoke Do not drain the fuel tank when a. Turn the fuel valve ON. b. Loosen the carburetor container. - Page 37 3. Remove the spark plug cover and spark plug and pour three tables- poonsful of clean motor oil into the cylinder. Pull the starter grip slowly two or three times to distribute the oil. Reinstall the spark plug. S\PARK PLUG COVER 4.
- Page 38 Apply oil to the following parts for lubrication and rust prevention. UTCH -3 - CHUTE ADJUSTING BOLT WHEEL SHAFT Check all nuts, bolts and fasteners and tighten securely if necessary.
-
Page 39: Troubleshooting
9. TROUBLESHOOTING When the engine will not start: 1. Is the engine switch 2. Is the fuel valve on? 3. Is there enough fuel? If any fuel is spilled, the spark plug or starting 4. Is gasoline reaching the carburetor? To check, loosen the drain screw with the fuel valve on. -
Page 40: Specifications
1.251 (0.33 US gal,, 0.27 Imp gal) BPR5ES (NGK), WIGEPR-U (ND) 1,230 mm (48.4 in) 43.1 kg (95.0 lb AS type) Max. 10 m (32.8 ft) time HS521 Kl Specifications 570 mm (22.4 in) 980 mm (38.6 in) 40.6 kg (89.5 lb), 522 mm (20.6 in) 323 mm (12.7 in) -
Page 41: Warranty
11. WARRANTY Owner Satisfaction Your satisfaction and goodwill Honda warranty details are explained ty. Normally, any problems concerning dealer’s service department. been handled to your satisfaction, action: Discuss your problem with a member of dealership complaints can be quickly already been reviewed the dealership or the General Manager. - Page 42 When you write or call, please provide the following information: • Model and serial numbers • Name of the dealer who sold the Honda power equipment to you • Name and address of the dealer who services your equipment •...
Need help?
Do you have a question about the HS521 and is the answer not in the manual?
Questions and answers