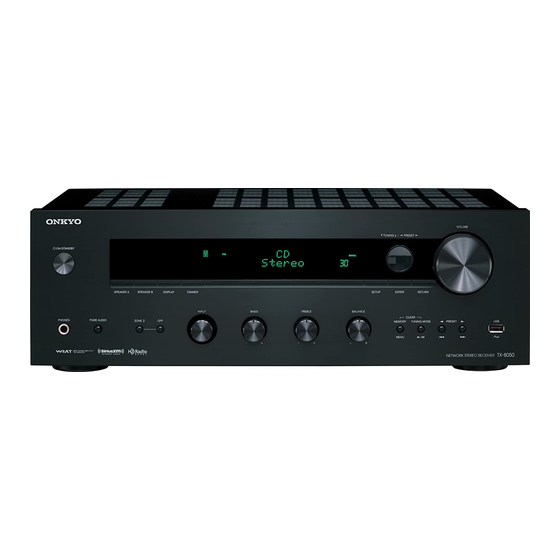
Onkyo TX-8050 Instruction Manual
Network stereo receiver
Hide thumbs
Also See for TX-8050:
- Instruction manual (56 pages) ,
- Manual (24 pages) ,
- Firmware update manual (4 pages)
Table of Contents
Advertisement
Network Stereo Receiver
TX-8050
Instruction Manual
Thank you for purchasing an Onkyo Network Stereo
Receiver. Please read this manual thoroughly before
making connections and plugging in the unit.
Following the instructions in this manual will enable
you to obtain optimum performance and listening
enjoyment from your new Stereo Receiver.
Please retain this manual for future reference.
Contents
Introduction
..................................En-
Connections
.............................. En-
Enjoying Audio Sources
Appendix
Troubleshooting
..................... En-
Specifications
......................... En-
2
10
18
...... En-
51
54
E
n
Advertisement
Table of Contents

Related Manuals for Onkyo TX-8050


Summary of Contents for Onkyo TX-8050
- Page 1 ........En- TX-8050 Instruction Manual Connections ......En- Enjoying Audio Sources ..En- Thank you for purchasing an Onkyo Network Stereo Appendix Receiver. Please read this manual thoroughly before Troubleshooting ..... En- making connections and plugging in the unit. Specifications ......En-...
-
Page 2: Important Safety Instructions
WARNING: WARNING AVIS RISK OF ELECTRIC SHOCK RISQUE DE CHOC ELECTRIQUE TO REDUCE THE RISK OF FIRE OR ELECTRIC DO NOT OPEN NE PAS OUVRIR SHOCK, DO NOT EXPOSE THIS APPARATUS The lightning flash with arrowhead symbol, within an TO RAIN OR MOISTURE. equilateral triangle, is intended to alert the user to the presence of uninsulated “dangerous voltage”... -
Page 3: Precautions
Modèle pour les Canadien are wet or damp. If water or any other liquid gets inside this unit, have it checked by your Onkyo REMARQUE: CET APPAREIL NUMÉRIQUE DE dealer. -
Page 4: Features
Digital Corporation. This HD Radio Ready™ receiver is ready to receive HD Radio broadcasts when connected to the Onkyo UP-HT1 HD Radio tuner module (sold separately). Windows and the Windows logo are trademarks of theMicrosoft... -
Page 5: Table Of Contents
Supported Audio File Formats ........35 About DLNA ............35 Getting to Know the Receiver ......7 Front Panel ..............7 iPod/iPhone Playback via Onkyo Dock ..36 Rear Panel ..............8 Using the Onkyo Dock ..........36 Display ..............8 Controlling Your iPod/iPhone .........37 Remote Controller............. -
Page 6: Supplied Accessories
Specifications and Aiming the Remote Controller operation are the same regardless of color. When using the remote controller, point it toward the receiver’s remote control sensor, as shown below. Remote control sensor TX-8050 30° Approx. 5 m (16 ft.) 30°... -
Page 7: Getting To Know The Receiver
Getting to Know the Receiver Front Panel North American model p q r s t European model For detailed information, see the pages in parentheses. ON/STANDBY button (18, 45, 51) ZONE 2, OFF buttons (45) SPEAKERS A and B switches (19) INPUT selector (19, 22, 23, 27, 45) DISPLAY button (25) BASS control (20) -
Page 8: Rear Panel
Getting to Know the Receiver —Continued Rear Panel For detailed information, see the pages in parentheses. REMOTE CONTROL jack (16) CD IN jacks (15) UNIVERSAL PORT jack (15) TV/TAPE IN/OUT jacks (15, 17) ETHERNET port (15) GAME IN jacks (15) MONITOR OUT jack (15) CBL/SAT IN jacks (15) PRE OUT jacks (11) -
Page 9: Remote Controller
Getting to Know the Receiver —Continued Remote Controller For detailed information, see the pages in parentheses. button (12, 18, 45) INPUT SELECTOR buttons (18, 19, 22, 23, 38, 39, 45) Control buttons (38, 39) REPEAT button (38, 39) LIST button Arrow []/[]/[]/[] and ENTER buttons (12, 23, 38, 39, 40, 44) SETUP button (12, 40, 44) -
Page 10: Connecting The Receiver
Connecting the Receiver Disconnect the power cord from the electrical outlet before making any connections. Speaker Connection Precautions Connecting the Speaker Cables The receiver allows you to connect two sets of speakers. Strip about 5/8" (15 mm) When two sets of speakers are connected, you can select 5/8"... -
Page 11: Connecting A Powered Subwoofer
Connecting the Receiver —Continued Connecting a Powered Subwoofer Connecting a Power Amplifier Using a suitable cable, connect the receiver’s PRE OUT: If you want to use a more powerful power amplifier and SUBWOOFER to the input on your powered subwoofer. use the receiver as a preamp, connect the receiver’s PRE If your subwoofer is unpowered and you’re using an OUT: L, R to the amp’s input, and connect all speakers... -
Page 12: Configuring The Speaker Impedance
Connecting the Receiver —Continued Configuring the Speaker Impedance On the receiver, the factory default for speaker impedance is “6 Ω”. If you need to change the speaker impedance setting, read “Speaker Connection Precautions” on page 10 carefully before performing the procedure below. Note: Be sure to minimize the volume level on the receiver ... -
Page 13: Connecting Antennas
Connecting Antennas This section explains how to connect the supplied indoor FM antenna and AM loop antenna. The receiver won’t pick up any radio signals if no antenna is connected, so you must connect the antenna to use the tuner. Insert the plug fully into the jack. -
Page 14: Connecting Your Components
Connecting Your Components About AV Connections Connecting AV components Video Receiver Audio Blu-ray Disc/ DVD player TV, projector, etc. Game console • Before making any AV connections, read the manuals supplied with your AV components. • Don’t connect the power cord until you’ve completed and double-checked all AV connections. •... - Page 15 Connecting Your Components —Continued No. Jack/Port Connectable components iPod/iPhone, MP3 player, USB flash drive DIGITAL IN OPTICAL 1 (GAME) Game console 2 (CD) TV, CD player COAXIAL 1 (BD/DVD) Blu-ray Disc/DVD player 2 (CBL/SAT) Satellite/cable set-top box, RI dock, etc. UNIVERSAL PORT Universal port option dock (UP-A1 etc.) ETHERNET...
-
Page 16: Connecting Onkyo Components
CD player e.g., Tape deck cable cable • Connect only Onkyo components to jacks. Make sure that each Onkyo component is Connecting other manufacturer’s components may connected with an analog audio cable cause a malfunction. -
Page 17: Connecting A Recording Component
Connecting Your Components —Continued Connecting a Recording Component See “Recording” for an explanation of recording ( page 22). Composite video Analog Analog cable audio cable audio cable Cassette tape VCR, DVD recorder, etc. deck, CDR, etc. Notes: • Copy-protected Blu-ray discs and DVDs cannot be •... -
Page 18: Turning On The Receiver
Turning On the Receiver MON/STANDBY VCR/DVR TV/TAPE GAME Turning On and Standby Changing the Input Display For the [TV/TAPE], [VCR/DVR] and [GAME] buttons, Press the [ON/STANDBY] button. the input display name can be changed as shown below. Alternatively, press the remote controller’s [] When the input display name has been changed for one button. -
Page 19: Enjoying Audio Sources
Enjoying Audio Sources INPUT SELECTOR SPEAKERS A, B VOLUME PHONES INPUT VOLUME F/H MUTING Muting the Receiver Rotate the receiver’s [INPUT] selector, or (remote controller only) press the remote controller’s INPUT You can temporarily mute the output of the receiver. SELECTOR buttons to select the source you want to hear. -
Page 20: Setting The Display Brightness
Enjoying Audio Sources —Continued MODE BASS TREBLE SLEEP BALANCE DIMMER Setting the Display Brightness Using the Tone and Balance Controls You can adjust the brightness of the display. This section explains the following functions that can be used with any input source. Press the remote controller’s [DIMMER] button Adjusting the Bass repeatedly to select: dim, dimmer, or normal... -
Page 21: Selecting The Listening Mode
Enjoying Audio Sources —Continued AUDIO PURE AUDIO Selecting the Listening Mode Enjoying the Pure Audio Sound Press the remote controller’s [AUDIO] Pressing the [PURE AUDIO] button on button repeatedly to select the listening the receiver activates the Pure Audio mode. The setting will change as follows listening mode. -
Page 22: Recording
Recording Unless you have the full consent of the copyright holder, copyright laws prohibit using your recordings for anything other than personal enjoyment! This section explains how to record the selected input source to a component with recording capability, and how to record audio and video from different sources. -
Page 23: Listening To The Radio
Listening to the Radio &/( TUNING F/H Number buttons INPUT TUNING MODE D.TUN Listening to AM/FM Stations Press the TUNING [] or [] button. You can also use the remote controller’s arrow With the built-in tuner, you can enjoy AM and FM radio []/[] buttons to tune the radio. - Page 24 Listening to the Radio —Continued ■ Tuning into Stations by Frequency Presetting AM/FM Stations You can tune to AM and FM stations directly by entering the appropriate frequency. Press the remote controller’s [D.TUN] button. MEMORY TUNING MODE (Actual display depends on the country.) Within 8 seconds, use the number buttons to enter the frequency of the radio station.
- Page 25 Listening to the Radio —Continued ■ Selecting Presets Shift Switches the displayed character. To select a preset, use the number buttons on (Left)/(Right): the remote controller, the remote controller’s CH/ALBUM [+]/[–] buttons or the receiver’s Select these to move the cursor within the Name PRESET []/[] buttons.
-
Page 26: Using Rds (European Model Only)
Listening to the Radio —Continued RDS Program Types (PTY) Using RDS (European model only) RDS only works in areas where RDS broadcasts are Type Display available. When tuned into an RDS station, the RDS None NONE indicator appears. News reports NEWS Current affairs AFFAIRS... - Page 27 Listening to the Radio —Continued Displaying Radio Text (RT) Listening to Traffic News (TP) RT/PTY/TP RT/PTY/TP INPUT ENTER When tuned to an RDS station that’s broadcasting text You can search for stations that broadcast traffic news. information, the text can be displayed. Use the [INPUT] selector to select RDS.
-
Page 28: Using The Usb/Network Device
Using the USB/Network Device Connecting the iPod/iPhone Directly Press [MODE] to switch to Extended to the USB Port Mode A list of your iPod model’s contents appears. To USB can be used to play music files stored on iPod/ open a folder, use []/[] to select it, and then iPhone, which can be plugged into the receiver’s USB press [ENTER]. -
Page 29: Playing The Usb Device
W, K be played. REPEAT RANDOM • Onkyo accepts no responsibility whatsoever for the loss or damage to data stored on a USB device when that device is used with the receiver. We recommend &, (, ENTER that you back up your important music files beforehand. -
Page 30: Listening To The Internet Radio
• If you’re using DHCP, your router may not always (email address and password) on the http://onkyo.vtuner.com/ portal. To verify your MAC allocate the same IP address to the receiver, so if Address, please see “Network Setup” ( page 42). -
Page 31: Playing Music Files On A Server
Using the USB/Network Device —Continued Registering Presets Playing Music Files on a Server You can add the currently playing song or station to “My You need to connect the receiver to your home Favorites”. You can preset up to 40 Internet radio network, see “Network/USB Features”... -
Page 32: Remote Playback
Using the USB/Network Device —Continued Tip: Remote Playback You can also use the receiver’s [MENU], [/], [] or [] buttons as follows. You need to connect the receiver to your home [MENU]: Hold down to move to the top menu. network, see “Network/USB Features”... - Page 33 Using the USB/Network Device —Continued Use []/[] to select “DLNA”, and press [ENTER]. A list of media server appears. Note: Remote playback cannot be used while the music files of another media server are being played. You must stop their playback first. On Windows Media Player 12, right-click on music file.
-
Page 34: Network/Usb Features
Network/USB Features Please consult your ISP or computer dealer if you’re Connecting to the Network unsure. The following diagram shows how you can connect the Notes: receiver to your home network. In this example, it’s • To receive Internet radio with the receiver, your connected to a LAN port on a router, which has a 4-port broadband Internet connection must be working and 100 Base-TX switch built-in. -
Page 35: Usb Device Requirements
Network/USB Features —Continued ■ WMA (.wma or .WMA) Minimum system requirements for Windows WMA stands for Windows Media Audio and is an audio Media Player 11 on Windows XP compression technology developed by Microsoft Operating system Corporation. Audio can be encoded in WMA format by ®... -
Page 36: Ipod/Iphone Playback Via Onkyo Dock
UP-A1 Dock. http://www.onkyo.com • Set your iPod/iPhone in the UP-A1 Dock after the Before using an Onkyo Dock, update your iPod/ receiver turns on. iPhone with the latest software, available from the Apple web site. -
Page 37: Controlling Your Ipod/Iphone
Playback via Onkyo Dock —Continued RI Dock With the RI Dock, you can easily play the music stored Operating Notes on your Apple iPod/iPhone through the receiver and • Use the receiver’s volume control to adjust the enjoy great sound. You can even use the receiver’s playback volume. - Page 38 Playback via Onkyo Dock —Continued If a UP-A1 is connected to UNIVERSAL PORT in Extended mode ( page 8), the PLAY LIST buttons Press the appropriate INPUT SELECTOR first. are used as the page jump buttons. With the page modes, you can quickly locate your favorite songs even when your song lists, artist lists, and so on are very long.
-
Page 39: Controlling Other Components
Controlling Other Components You can use the receiver’s remote controller to control your other AV components. : Available buttons Components Use the REMOTE MODE buttons to select the zone of the component you want to control (MAIN or ZONE 2). Then press the INPUT SELECTOR button of the component you want to control. -
Page 40: Advanced Setup
Advanced Setup Changing the Advanced Setup Turn on the power. Settings Press the [SETUP] button on the remote Here’s how to change the Advanced Setup settings. controller. The setup menu appears in the display. Example: Intelli volume setting procedure Intelli Volume Use the arrow []/[] buttons to select “2. -
Page 41: Advanced Setup Menu
Advanced Setup —Continued 3. Hardware Setup Advanced Setup Menu Speaker Impedance 1. Digital Audio Input See “Configuring the Speaker Impedance” on page 12. If you connect a component to a digital audio input, you AM/FM Frequency Setup (North American model) must assign that input to an input selector. - Page 42 Advanced Setup —Continued 4. Zone2 Setup browser, before accessing the site, your browser uses DNS to translate this into an IP address, in this case Zone2 Out 63.148.251.142. If you have connected your Zone 2 speakers to an amp MAC Address with no volume control, set the Zone 2 Out setting to This is the receiver’s MAC (Media Access Control) Variable so that you can set the zone’s volume, balance,...
- Page 43 • Perform the firmware update only when such an announcement is posted on the Onkyo web site. Visit the Onkyo web site for the latest information. • It takes about 5 minutes to complete the firmware update.
-
Page 44: Zone 2
Zone 2 In addition to your main listening room, you can also enjoy playback in a second room referred to as Zone 2. In addition, you can select a different source for each room. Connecting Zone 2 Zone 2 Out Settings This setup allows 2-channel playback (with the speaker set A and B) in your main listening room and 2-channel stereo playback in Zone 2, with a different source in each... -
Page 45: Using Zone 2
Zone 2 —Continued • While Zone 2 is on, the Auto Power On and Direct Using Zone 2 Change RI functions do not work. This section explains how to turn Zone 2 on and off, how Controlling Zone 2 with the Remote to select an input source for Zone 2, and how to adjust Controller the volume for Zone 2. - Page 46 Zone 2 —Continued To turn off Zone 2, press the [ZONE 2] button, followed by the [] button. Adjusting the Volume of Zone 2 Press the receiver’s [ZONE 2] button, and then use the [VOLUME] control, or remote controller’s [ZONE 2] button, and then use the VOLUME []/[] buttons.
-
Page 47: Connecting Components Not Reached By The Remote Controller Signals (Ir In/Out)
Connecting Components Not Reached by the Remote Controller Signals (IR IN/OUT) Making Sensor Connections In order to use the remote controller to control the receiver from a remote location, you will need to When you place the IR receiver in the main room, connect prepare a multiroom kit (sold separately) such as one the cable from the connecting block to the IR IN terminal. -
Page 48: Firmware Update
The message “Completed!” appears on the legal theory, and whether arising in tort or contract. In no event will Onkyo be liable to you or any third party receiver’s display, indicating that the for any special, indirect, incidental, or consequential update has been completed. -
Page 49: Updating The Firmware Via Usb
USB device, remove it first. receiver will not be able to access the network. Consult your Internet Download the firmware file from the Onkyo Service Provider (ISP). web site. The file name is as follows: • If your modem does not function as a router, you will need a router. - Page 50 Refer to the following table and take appropriate action. Unit 1&12, 9/F, Ever Gain Plaza Tower 1, 88, Container Port Road, Kwai Chung, N.T., Hong Kong Tel: 852-2429-3118 Fax: 852-2428-9039 <http://www.onkyochina.com/> Asia, Oceania, Middle East, Africa Please contact an ONKYO distributor referring to Onkyo SUPPORT site. <http://www.intl.onkyo.com/support/local_support/index.html>...
-
Page 51: Troubleshooting
• An audio cable may be picking up interference. Try If you can’t resolve the issue yourself, try resetting repositioning your cables. the receiver before contacting your Onkyo dealer. The tone controls have no effect To reset the receiver to its factory defaults, turn •... -
Page 52: Up-A1 Dock For Ipod/Iphone
DOCK for the remote controller to work correctly between tracks. page 17). • If it is an Onkyo component, make sure that the Recording cable and analog audio cable are connected properly. Connecting only an cable won’t work ( ... -
Page 53: Usb Device Playback
• Check the “Network Setup”. and then plug it back in again. USB Device Playback Onkyo is not responsible for damages (such as CD rental fees) due to unsuccessful recordings caused by Can’t access the music files on a USB device the unit’s malfunction. -
Page 54: Specifications
Specifications Amplifier Section General Rated Output Power (North American) Power Supply (North American) 80 watts minimum continuous power AC 120 V, 60 Hz per channel, 8 Ω loads, 2 channels (European) driven from 20 Hz to 20 kHz with a AC 230 V, 50 Hz maximum total harmonic distortion of 0.08 % (FTC) - Page 55 1301, 555 Tower, No.555 West NanJin Road, Jin an, Shanghai, China 200041, Tel: 86-21-52131366 Fax: 86-21-52130396 I1103-2 SN 29400685A (C) Copyright 2011 ONKYO SOUND & VISION CORPORATION Japan. All rights reserved. * 2 9 4 0 0 6 8 5 A *...
- Page 56 English ..· ~.;,; ~ ~.· ' , ; f¥~;, " : "' > Using Internet Radio SiriusXM Internet Radio See "Using the SiriusXM Internet Radio (North American only)" (page 2) Pandora Internet Radio See "Pandora Internet Radio -Getting Started (U.S. only)"...
- Page 64 *iPod et iPhone non fourni. UP-Al UP-HTl Dock for iPod® HD Radio™ Module Simply connect and operate Bring HD Radio to your with your Onkyo remote control Onkyo product and to play your iPod or iPhone. enjoy CD quality radio.
- Page 66 Finally, software patents pose a constant threat to the existence c) You must cause the whole of the work be licensed at TERMS AND CONDITIONS FOR of any free program. We wish to make sure that a company no charge to all third parties under the terms of this GNU LESSER GENERAL cannot effectively restrict the users of a free program by License...
- Page 67 If distribution of object code is made by offering access to the user who changes the contents of definitions files 9. You are not required to accept this License, since you have 13. The Free Software Foundation may publish revised and/or copy from a designated place, then offering equivalent in the Library will not necessarily be able to recompile not signed it.
- Page 68 These requirements apply to the modified work as a whole. If TERMS AND CONDITIONS FOR identifiable sections of that work are not derived from END OF TERMS AND GNU GENERAL PUBLIC Program, and can be reasonably considered independent and COPYING, DISTRIBUTION AND separate works themselves, then this License, and its terms, do CONDITIONS...
- Page 70 Onkyo notifies you of the following: following disclaimer. following disclaimer. ansi2knr.c is included in this distribution by permission of L.
- Page 71 (8) llbvorbis The following individuals contributed in part to the (6) libogg There is no warranty against interference with your Network Time Protocol Distribution Version 4 and are enjoyment of the library or against infringement. There is Copyright (c) 2002-2004 Xiph.org Foundation Copyright (c) 2002, Xiph.org Foundation no warranty that our efforts or the library will fulfill any of acknowledged as authors of this work.
- Page 72 24. [26]Frank Kardel [27]<kardel (at) ntp (dot) org> 47. [Sl]Kenneth Stone <ken@sdd.hp.com> HP-UX port 45. mailto: mrapple@quack.kfu.com THJS SOFTWARE IS PROVIDED BY THE OpenSSL PARSE <GENERIC> driver (> 14 reference clocks), PROJECT "AS IS" AND ANY EXPRESSED OR IMPLIED 46. mailto: jack@innovativeintemet.com 48.
- Page 73 Y1 012-1 SN 29400575 11111111111111111111111111111111111111111111111m (C) Copyright 2010 ONKYO SOUND & VISION CORPORATION Japan. All rights reserved. 2 9 4 0 0 5 7 5...
- Page 76 On kyo. EXCLUSIONS: Sf VOUS ACHETEZ UN PRODU/T ON KYO AUPRES D'UN MARCHAND NON AUTORISE, LA GARANTIE ONKYO POURRAIT NE PAS ETRE VAL/DE. Veuillez consulter Ia liste de nos marchands autorises. La presente garantie ne couvre pas les elements suivants 1.
- Page 77 Products used conti nuously or for commercial applications. Onkyo products are intended consumer designed for continuous commercial use. In the event that the products concerned have been used...
Need help?
Do you have a question about the TX-8050 and is the answer not in the manual?
Questions and answers