Table of Contents
Advertisement
Advertisement
Table of Contents

Summary of Contents for Transcend Recon-Zeal
- Page 1 User Manual Recon-Zeal Transcend Version 1.0...
-
Page 2: Table Of Contents
TABLE OF CONTENTS Transcend Basics What You Need Transcend at a Glance Accessories 1.4 Buttons 1.5 Icons 1.6 Connecting and Disconnecting Transcend 1.6.1 Connecting 1.6.2 Disconnecting 1.7 About Transcend’s Battery 1.7.1 Charging the Battery 1.7.2 Charge Time and Battery Life 1.7.3 Different Battery Indicator States 1.7.4 Improving Battery Performance 1.8 Powering On and Off The Status Bar 2.1 GPS Indicator 2.2... - Page 3 The Real-time Dashboard 4.1 Speedometer 4.2 Chrono/Stopwatch 4.3 Configurable Feature 4.4 Pop-ups Chrono/Stopwatch Feature Performance, Elevation, and Mountain Statistics 6.1 Last Run Stats Screen 6.2 Performance Stats Screen 6.3 Elevation Stats Screen 6.4 Mountain Statistics Display Off Mode Graphical User Interface Overview Map Memory and Data Storage 10. Recon Instruments HQ software and HQ Online Community 11. Tips and Troubleshooting 12. Safety, Storage, and Cleaning 12.1 Important Safety Information 13. Support, Service, and More Information 13.1 Firmware Upgrade Information...
- Page 4 14. Warranty Information 15. Regulatory Compliance Information World Time Zones 17. Technical Specifications 17.1 Sensing 17.2 Processing 17.3 Capacity 17.4 Environment / Mechanical 17.5 Environmental Considerations 17.6 Power requirements 17.7 Display and Virtual Image 17.8 RF and Antenna 17.9 Ports and Connectivity 17.10 System Requirements 17.11 Languages 17.12 Included Accessories...
-
Page 5: Transcend Basics
Transcend Basics Thank you for purchasing Transcend and joining an elite group of people to experience the world’s first GPS-enabled goggles! Everything you need to get going is included in the package and in this User Guide. If at any time you need help, please use the many resources at www.reconinstruments.com/support What You Need Transcend can be used after charging right out of the package, but to enjoy the full Transcend experience you’ll need the following: • A Computer with a USB 2.0 port and one of the following operating systems: - Windows PC: Intel Pentium 4 or higher, Windows XP, Vista, 7 or higher - Mac: Intel Core Duo or higher, Mac OS X v10.6 or later • Recon Instruments HQ Software, available at www.reconinstruments.com/support • An Internet Connection... -
Page 6: Transcend At A Glance
Transcend at a Glance Accessories • Goggle Bag • Hard Protective Carrying Case • Micro USB to USB cable, 1 meter • Both NEMA and EU connect AC Adapters... -
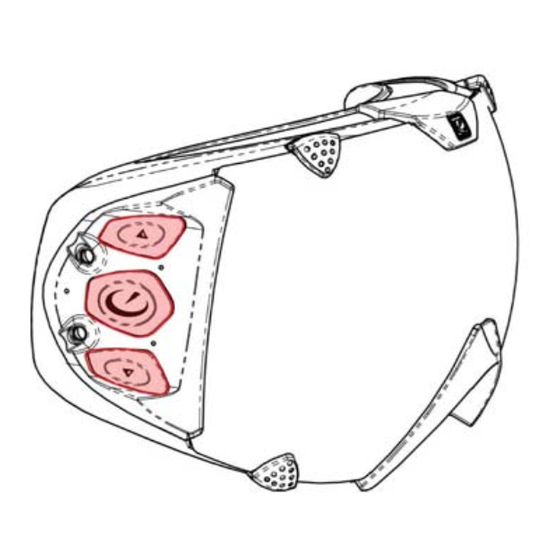
Page 7: Buttons
1.4 Buttons Image Button Function Press to cycle UP or FORWARD through the Up/Forward: feature screens and settings menus Hold for about 2 seconds to POWER ON or Power/Select: OFF. Press to SELECT an item Press to cycle DOWN or BACKWARD through Down/Back: the feature screens and settings menus Icons... - Page 8 & '$()*+$ ),() -./0*%$1 1)()-1)-/1 1*/, (1 ?$+)-/(0 @%72$)$+ /*++$.) )7)(0 5$+)-/(0 %-1)(./$ )+(5$00$%4 (.% )7)(0 .*2A$+ 7' 5$+)-/(0 +*.1 /72#0$)$% & '$()*+$ ),() -./0*%$1 1)()-1)-/1 1*/, (1 )7)(0 B-1)(./$ %-1)(./$ )+(5$00$% (/+711 6+7*.% & '$()*+$ ),() -./0*%$1 1)()-1)-/1 1*/, (1 C,+7.7D")7#8()/, 07.6$1)4 1,7+)$1)4 (.% /*++$.) )-2$% #$+-7% &...
-
Page 9: Connecting And Disconnecting Transcend
@+:)+?+%1 # 3+%,% -? +)?-&;#$+-) $2#$ ,#) 4% J%/%$% *%/%$%* ?&-; 0&#)1,%)* @+:)+?+%1 $2#$ 3&%11+): JKLMI"<=N 5+// 12-5 J-5) ;-&% +)?-&;#$+-) @+:)+?+%1 $2#$ 3&%11+): @E6E=0 5+// /%#* 4#,O "#,O -9$ $- $2% 3&%C+-91 1,&%%) C+%5%* 1.6 Connecting and Disconnecting Transcend To ensure best charging and data transfer performance follow these easy steps. 1.6.1 Connecting To connect Transcend to your Computer to charge, or transfer data: Power on by holding the POWER/SELECT button for 2 seconds Open the USB cover on the goggle’s right side and plug the micro USB cable’s smaller end into the micro USB port located behind the buttons on the inner right side of the goggles Plug the USB cable’s larger end into the USB port in your Computer If your computer does not recognize Transcend you may need to allow... -
Page 10: Disconnecting
To connect Transcend to an outlet to charge: Open the USB cover on the goggle’s right side and plug the micro USB cable’s smaller end into the micro USB port located behind the buttons on the inner right side of the goggles Plug the USB cable’s larger end into the USB port into either the North American or European AC adapter (supplied) Plug the AC adapter into an appropriate wall outlet Upon successful connection the micro USB port on Transcend will il luminate RED for charging 1.6.2 Disconnecting To disconnect Transcend from your Computer, navigate to ‘safely remove’ or’ eject’ the hardware through your Computer then remove the USB cable from Transcend. If you disconnect while data is transferring, you may risk losing the data. Always ensure that the USB port is sealed correctly before use out doors. Environmental damage may occur if this port is not correctly sealed. 1.7 About Transcend’s Battery Transcend features an internal Lithium rechargeable battery in the left hand side. There is nothing to remove or replace, simply charge as per below. -
Page 11: Charging The Battery
Open the USB cover on the goggle’s right side and plug the micro USB cable’s smaller end into the micro USB port located behind the buttons on the inner right side of the goggles Plug the USB cable’s larger end into the USB port in your Computer If your computer does not recognize Transcend you may need to allow some time for it to charge Upon successful connection the micro USB port on Transcend will illuminate RED for charging When Transcend is fully charged the red light will go off Important: If Transcend is connected to a computer that is turned off or in stand-by, it may drain instead of charge the battery. To charge Transcend via power outlet: Open the USB cover on the goggle’s right side and plug the micro USB cable’s smaller end into the micro USB port located behind the buttons on the inner right side of the goggles Plug the USB cable’s larger end into the USB port into either the North American or European AC adapter (supplied) Plug the AC adapter into an appropriate wall outlet Upon successful connection the micro USB port on Transcend will il... -
Page 12: Charge Time And Battery Life
1.7.2 Charge Time and Battery Life In optimal conditions, Transcend can fast charge (battery life reaches 80%) through your computer or AC adapter in 1 hour. You can attain a 100% full charge in 3 to 5 hours. If you charge Transcend while it is powered on, charge time will take longer than 3 hours. Be sure to turn Transcend OFF before charging it. The Transcend can also be charged from the USB port of a Computer using the provided USB cable in 3 to 5 hours. Charge times vary depending on the model of the Computer. For best charging performance, it is recommended that you use the provided AC adapter and USB cable for charging. Transcend’s battery will last 6+ hours in optimal conditions, the equivalent to your average ski day. Simply recharge at any time through your computer or AC adapter. See ‘Improving Battery Performance’ below to get the most out of your battery. 1.7.3 Different Battery Indicator States When Transcend has full or nearly full charge it will be represented by the following icon, located in the top right hand corner of the display at all times. When Transcend has partial battery power it will be represented by a variation of the following icons, located in the top right hand corner of the display at all times. -
Page 13: Improving Battery Performance
When Transcend has low-to-no battery power it will be represented by a variation of the following icons, located in the top right hand corner of the display at all times. Plug in to your computer or power outlet to recharge. If Transcend is nearing complete depletion of battery power, this icon will pop up to indicate it will shut down to preserve your data and settings. Plug in to your computer or power outlet to recharge. 1.7.4 Improving Battery Performance To maximize Transcend’s battery life and performance you can do the following: Turn the brightness down from 3 to 2 or 1 (See ‘Setting the Brightness • section below) Turn the display off completely from time to time (See Display Off • Mode section below) • Power off the Transcend during long breaks of non-use • Do not leave Transcend exposed in cold or winter environments when not in use • Ensure Transcend has been charged fully before storing for long periods of time... -
Page 14: Powering On And Off
1.8 Powering On and Off To Power on, simply hold the POWER/SELECT button for about 2 seconds. You will know the unit is on when the POWER/SELECT button glows blue through the Recon Instruments Logo, and the display screen powers up to show the Dashboard. -
Page 15: The Status Bar
The Status Bar Across the top of the screen are three important pieces of information at all times. This Status Bar appears in all screens and menus and provides the vitals of Transcend: GPS Indicator, Time, and Battery Indicator. 2.1 GPS Indicator Transcend uses GPS technology to determine its speed and location. GPS requires that the device has a line of sight with at least 4 GPS satellites. This means that GPS works best in open spaces with a clear view of the sky. Obstructions such as buildings and trees can degrade the signal quality and impact speed/position reliability. As with any GPS device, when Transcend is powered on it takes some time to locate enough satellites to accurately calculate its position. This delay is known as the Time to First Fix (TTFF). Transcend’s average TTFF ranges between 3 to 5 minutes depending on the conditions. -
Page 16: Time
Transcend’s GPS signal strength is represented by the following states: When Transcend is searching for satellites to gain a GPS signal it is represented by the following icon, located in the top left hand corner of the Status Bar. When Transcend has a moderate-to-strong signal it is represented by the following icon, located in the top left hand corner of the Status Bar. When Transcend has a broken GPS signal it is represented by the following icon, located in the top left hand corner of the Status Bar. It is recommended that you restart Transcend if you experience this icon for more than a few seconds. Time Transcend’s clock is located in the middle of the Status Bar. Read ‘Setting the Time’ below for more information. -
Page 17: Battery Indicator
2.3 Battery Indicator Transcend’s current Battery Power Level is indicated at the top right hand corner or the Status Bar. When Transcend has full or nearly full charge it will be represented by the following icon, located in the top right hand corner of the display at all times. When Transcend has partial battery power it will be represented by a variation of the following icons, located in the top right hand corner of the display at all times. When Transcend has low-to-no battery power it will be represented by a variation of the following icons, located in the top right hand corner of the display at all times. Plug in to your computer or power outlet to recharge. If Transcend is nearing complete depletion of battery power, this icon will pop up to let you know it is about to shut down automatically... -
Page 18: Setting Preferences In Transcend
Setting Preferences in Transcend Once charged, turn on Transcend and navigate to the Preferences screen using the UP/FORWARD or DOWN/BACKWARDS buttons. The ‘Preferences Screen’ has information including the time of the beginning of your trip and the calendar date, as well as the sequentially numbered day currently logged within memory. You will also see the firmware version # in this main area. In the event your Transcend’s memory is full, you will be prompted in this screen as well. Simply download the data to your computer to free up memory. At the ‘Preferences Screen’ SELECT ‘Preferences’. Choose any of the options listed to set your preferences, or SELECT ‘Back’ to return to the main screen. If you stay in any preference screen for more than ten seconds you will be bumped out to the screen you were in previously. -
Page 19: Setting The Configurable Dashboard Feature
3.1 Setting the Configurable Dashboard Feature Transcend offers a configurable dashboard that allows you to choose one of the following Features to be displayed alongside the permanent Features of the main dashboard screen. The default feature viewed is Current Altitude. Choose from: • Current Altitude • Total Vertical Distance Travelled during the current trip • Total Distance Travelled across land (up, down, and sideways) during the current trip • Current Temperature... -
Page 20: Setting The Brightness
To choose which feature you would like displayed on the configurable dashboard: SELECT ‘Dashboard’ from the ‘Preferences’ menu Use the UP/FORWARD or DOWN/BACKWARDS buttons to cycle through which Feature you would like displayed, the white outline acts as a cursor Press SELECT to choose which Feature you would like displayed A red arrow will appear above the icon for the Feature currently displayed on the dashboard 3.2 Setting the Brightness Transcend has 3 modes of brightness to allow you decide what is most comfortable, safe, and easily viewed in your current environment. The default Brightness is 3:High Brightness. Choose from: • 1: Low Brightness • 2: Medium Brightness • 3: High Brightness To choose which brightness best suits your environment: SELECT ‘Brightness’ from the ‘Preferences’ menu Use the UP/FORWARD or DOWN/BACKWARDS buttons to cycle through which brightness you would like displayed, the white outline arrow acts as a cursor... -
Page 21: Resetting Stats
Press SELECT to choose which Brightness you would like displayed A red arrow will appear around the icon for the feature currently displayed on the dashboard 3.3 Resetting Stats Transcend automatically starts recording data to its internal memory as soon as it receives a strong GPS signal; and will continue recording as long as it is on and has a GPS signal. This data is saved so that it can be reviewed on your Computer with your Recon HQ Software (available for download from www.reconinstruments.com). In addition, the goggle keeps track of all recent statistics so that you can review them on the fly. These stats will accumulate until you chose to RESET STATS. At the start of every day (Transcend considers any time past 4 AM in your selected Time Zone as a new day) you will be prompted with: You can also choose to manually reset stats in the preferences menu. -
Page 22: Setting The Language
To reset your stats: SELECT ‘Reset Stats’ from the ‘Preferences’ menu SELECT ‘Yes’ to confirm you would in fact like to reset your stats, or ‘No’ if you would not like to reset your stats If you chose ‘Yes’ a new trip will be added to memory and signified by a number under the Preferences icon. This number will accumulate until your memory is full and is transferred to your Recon HQ software If you chose ‘No’ you will be brought back to the main Preferences menu 3.4 Setting the Language Transcend’s display is available in both English and French. The default Language is English. To choose your Language: SELECT ‘Language; from the ‘Preferences’ menu SELECT ‘English’ or ‘Francais’... -
Page 23: Setting The Units Of Measurement
3.5 Setting the Units of Measurement Transcend’s statistics are available in both Metric and US Imperial units of measurement. The default units of measurement are Metric. Following are the units of measurement used on the Transcend operating system: Metric US Imperial Abbreviation What it is Abbreviation What it is m/km meter Ft/mi feet km/h kilometers per hour miles per hour Celcius Fahrenheit To change the Units of Measurement: SELECT ‘Metric’ from the ‘Preferences’ menu, or if your current setting is ‘Imperial’ SELECT ‘US Imperial’ SELECT ‘Metric’ or ‘US Imperial’... -
Page 24: Setting The Time
3.6 Setting the Time Transcend utilizes Coordinated Universal Time (UTC) upon first strong GPS signal lock. This allows the clock to automatically calculate the proper Greenwich Mean Time (GMT). However, you may have to set the correct hour based on your time zone. A table is provided below to aid you. To set the time on the clock: SELECT ‘Set Time’ from the ‘Preferences’ menu Use the UP/FORWARD or DOWN/BACKWARDS buttons to cycle through which digit (hours or minutes), or AM/PM, you would like to change, a white highlight box acts as your cursor to select. SELECT what you would like to change, the white box will turn red Use the UP/FORWARD or DOWN/BACKWARDS buttons to change the digits, or AM/PM Press SELECT to verify your change and go on to the next change SELECT the ‘back’ icon to exit A World Time Zone has been included at the end of this document to aid in setting Transcend for your particular region. -
Page 25: The Real-Time Dashboard
The Real-time Dashboard Transcend is used in fast-paced environments. As such it is not recommended to cycle through screens and menus during activities that require your full attention. The Dashboard offers pieces of information to aid you in your activities in hands-free fashion, with real-time statistics every second. There is also a configurable area here that allows you to personalize which feature you would like to be included. Speedometer The largest piece of information on the Dashboard is the Speedometer represented by a dial that lights up from the bottom left-hand corner clockwise up to the top part of the Dashboard. The Speedometer shows in digital numbers how fast Transcend is moving in km/h or mph depending on your preference settings. The digital dial lights up several green bars based on your speed. If you reach higher green bars or red bars, it is suggested you adjust your speed appropriately to maintain the safety of yourself and others. Always perform sporting activities within the boundaries of your personal skill and comfort levels. -
Page 26: Chrono/Stopwatch
If there are two dashes where the digits should be, you likely do not have a GPS signal strong enough to supply accurate data. See ‘GPS Signals’ in ‘Tips and Troubleshooting’ to learn more. Chrono/Stopwatch Just beneath the Status Bar, to the right of the Speedometer lies the Chrono/ Stopwatch. When not in use, the numbers are greyed-out as below. Pressing SELECT while viewing the Dashboard will activate Chrono/Stopwatch mode, the numbers will turn yellow and start counting until you press SELECT a second time. Pressing SELECT a second time will stop the counter and freeze the results until you press SELECT for a third time. Pressing SELECT a third time will reset the counter and grey-out the numbers once again so it is ready for another timed activity. Any timed activity will be saved to the memory and can be managed (viewed, flagged, deleted) on the Chrono/Stopwatch screen. See ‘Chrono/Stopwatch Feature’ to learn more. -
Page 27: Configurable Feature
4.3 Configurable Feature Transcend’s Dashboard has a customizable function as well. There is a coloured square area in the bottom right-hand corner of the screen where you can choose to see another feature of your choice along with the Speedometer, Stopwatch/Chrono and Status Bar. The default feature is Altitude, see ‘Setting the Configurable Dashboard Feature’ to learn more. 4.4 Pop-ups Transcend is a smart device, in that it will give you real-time updates of important points of data while you perform an activity. These pop-ups alert you in hands-free fashion so you are aware when something significant or important has occurred. There are five major pop-ups that can occur while viewing the Dashboard. Altitude: Every time you reach another 500 meters/ 1500 ft higher above sea level (since you started your trip) you will see this pop-up... - Page 28 Vertical Odometer: Every time you accumulate another 500 meters/ 1500 ft of vertical distance travelled (since you started your trip) you will see this pop-up Speed: Each time you top your previous maximum speed (since you started your trip) you will see this pop-up All above pop-ups will include Chrono/Stopwatch in the screen if Chrono/Stopwatch is activated during the time of the pop-up...
- Page 29 Transcend will also show a pop-up for system alerts, such as: Battery Critical/Graceful Shutdown: If the battery is within 2-3% of its total power, Transcend will shutdown to ensure your data is not lost and the unit is not harmed. You will see this pop-up Memory Full: Once you’ve filled up Transcend’s memory you will see this pop-up...
-
Page 30: Chrono/Stopwatch Feature
Chrono/Stopwatch Feature Transcend offers a Chrono/Stopwatch feature that allows you to record and save the total time of any activity or part of an activity that you choose. Any timed activity is referred to as a ‘Timed Run’. To use the Chrono/Stopwatch feature: POWER ON Transcend, and in the Dashboard screen, Press SELECT to activate Chrono/Stopwatch mode, the numbers will turn yellow and start counting until you press SELECT a second time. Press SELECT a second time to stop the counter and freeze the results until you press SELECT for a third time. Press SELECT a third time to reset the counter and grey-out the numbers once again so it is ready for another timed activity. Any timed activity will be saved to the memory and can then be managed in the Chrono/Stopwatch screen. Use the UP/FORWARD or DOWN/BACKWARDS buttons to navigate to the Chrono/Stopwatch screen. There your ‘Last Run’ can be viewed, or if you have not yet used the Chrono/Stopwatch since Transcend’s memory was last cleared you will see ‘No Records’. If you do have records, beneath the Chrono/ Stopwatch icon you will see how many records you currently have on Transcend’s memory. - Page 31 To view the details of all records on Transcend press SELECT in the Chrono/Stopwatch screen. Use the UP/FORWARD or DOWN/BACKWARDS buttons to cycle through your recorded Runs. Each Run is designated a number in sequence. You can ‘Flag’ or ‘Delete’ a record by highlighting it and pressing SELECT. Flagging a run will help you recall a specific Run, and it will also be recognized as flagged in Recon HQ software. Deleting a run will clear it from Transcend’s memory and it will no longer be displayed as a record in the Chrono/Stopwatch screen.
-
Page 32: Performance, Elevation, And Mountain Statistics
Performance, Elevation, and Mountain Statistics Alongside the Preferences, Dashboard and Chrono/Stopwatch screens, there are also four additional statistics screens to view specific data you’ve accumulated during your trip. Use the UP/FORWARD or DOWN/BACKWARDS buttons to navigate to these additional screens. Last Run Stats Screen Last Run statistics include the following features and statistics: Maximum Speed: the top speed you’ve realized during your last run • Average Downhill Speed: the average speed you’ve realized during • your last run • Total Vertical Distance Travelled: the total accumulated distance travelled vertically downwards during your last run • Total Distance Travelled: the total accumulated distance travelled across land (TrueStats) during your last run... - Page 33 6.2 Performance Stats Screen Performance statistics include the following features and statistics: • Maximum Speed: the top speed you’ve realized during your trip, or since you last reset your stats Average Downhill Speed: • the average speed you’ve realized during your trip, or since you last reset your stats • Longest Chrono/Stopwatch Run: the longest timed activity you’ve recorded using the Chrono/Stopwatch feature during your trip, or since you last reset your stats • Shortest Chrono/Stopwatch Run: the shortest timed activity you’ve recorded using the Chrono/Stopwatch feature during your trip, or since you last reset your stats • Additional features may be placed here when released by Recon Instruments and downloaded...
-
Page 34: Performance Stats Screen
6.2 Elevation Stats Screen Elevation statistics include the following features and statistics: • Current Altitude: the altitude that Transcend is at in that point in time • Maximum Altitude: the highest altitude realized during your trip, or since you last reset your stats Total Vertical Distance Travelled: the total accumulated distance travelled • vertically downwards during your trip, or since you last reset your stats • Total Vertical Runs: the number of vertically downward runs accumulated before travelling upwards again during your trip, or since you last reset your stats • Total Distance Travelled: the total accumulated distance travelled across land (TrueStats) during your trip, or since you last reset your stats 6.2.1 A Note about Altitude statistics Transcend calculates altitude by measuring air pressure which changes as you move up and down with elevation. In addition, air pressure is constantly changing due to changing weather. To compensate for this, Transcend uses GPS to automatically... -
Page 35: Elevation Stats Screen
Transcend is stationary and has a strong GPS signal. While the altitude is calibrating, the altitude value on the Elevation Stats Screen will flash. If Altitude has been set as the feature to be shown in your Configurable Dashboard, you will see that automatic calibration is occurring with the moving dots on the orange icon itself. Once calibration is complete, the dots will disappear and the altitude value will no longer flash on the Elevation Stats Screen. 6.3 Mountain Statistics Mountain statistics include the following features and statistics: • Current Latitude/Longitude: Your current placement on latitudinal and longitudinal planes according to global positioning system data • Current Temperature: the current outside temperature experienced • Maximum Temperature: the highest temperature realized during your trip, or since you last reset your stats • Minimum Temperature: the lowest temperature realized during your trip, or since you last reset your stats... -
Page 36: Mountain Statistics
TrueStats is real time 3D Speed and Distance...another first from Recon Instruments. Important: all features’ and statistical data are based on advanced sensors within Transcend and are accurate in optimal conditions, however, several variables in non-optimal and harsh environments may lead to slight inaccuracies in data. For best performance use in optimal conditions and learn more below in ‘Tips and... -
Page 37: Display Off Mode
Transcend has been designed to be unobtrusive, and just like the dashboard of any motor vehicle, it is meant not to be continuously focussed on during use, but helpful in offering important information at momentary glances. -
Page 38: Graphical User Interface Overview Map
Graphical User Interface Overview Map... -
Page 39: Memory And Data Storage
Important: Using recording features and modes such as Chrono/Stopwatch will use memory faster. Important: To be sure that no data is compromised while recording, be sure to maintain a strong battery level, and try not to let Transcend’s battery drain completely. To learn more, see ‘About Transcend’s Battery’... -
Page 40: Recon Instruments Hq Software And Hq Online Community
10. Recon Instruments HQ software and HQ Online Community Recon Instruments offers free for download software to manage all data that is recorded with your Transcend. The PC- and Mac-friendly software allows you to keep all of your trips in one place, where they can be sorted, searched and shared. View your trips overlaid on Google maps and Google Earth with an internet connection. Make highlights based on any or all features that you would like to include and share online through HQ Online at www.reconinstruments.com, or popular social networking sites like Facebook and Twitter. To download Recon Instruments HQ or learn more, visit www.reconinstruments.com/support and be sure to view the HQ Online tutorial online. -
Page 41: Tips And Troubleshooting
11. Tips and Troubleshooting Display is temporarily washed out and hard to read Avoid exposing the display to direct sunlight, this reacts with the liquid crystals momentarily causing that ‘washed out’ appearance Display should become clear again when protected from sunlight, allow it to sit until bright colours return Display fails to reactivate after selecting “DISPLAY OFF” Hold the Power/Select button to power Transcend off, then power back GPS Fix takes longer than 10 minutes GPS technology works best in open spaces with a clear view of the sky. Obstructions such as buildings and trees can degrade the signal. If you are having difficulty acquiring a GPS fix try moving to a more open location. If Transcend still does not acquire a location fix, hold the Power/Select button to power Transcend off, then power back on Transcend fails to charge fully in 4 hours Ensure red light around micro USB port is activated to indicate charging When charging with PC/Mac, use a high-power USB 2.0 port (not a USB port intended for keyboard) Transcend may not charge when connected to a PC/Mac that is powered off or in standby mode Transcend was designed for use with the provided USB cable and AC adapter. Transcend may not charge properly using 3rd party cables or adapters For the fastest and most reliable charging, use the AC adapter instead of PC/Mac and power off Transcend before charging... - Page 42 Transcend displays the following icon when not connected to PC/Mac Hold the Power/Select button to power Transcend off, then power back on Transcend displays solid RED or GREEN screen when not connected to PC/Mac Hold the Power/Select button to power Transcend off, then power back on Data is not logged properly or MEMORY FULL popup appears Transcend can store up to 50 hours of data in onboard memory. If data is missing when you connect to Recon HQ and/or you see the MEMORY FULL popup appear on the screen of the goggle, then it is time to empty Transcend’s memory. You can use Recon HQ to clear space on your Transcend. Simply check the box “DELETE AFTER DOWNLOAD” when you download data to your PC/Mac Recon Instruments recommends frequently transferring data to your PC/Mac to maintain the health and performance of Transcend...
- Page 43 GPS Broken icon appears instead of GPS fix icon Hold the Power/Select button to power Transcend off If the problem persists, visit www.zealoptics.com/contact.php for support Transcend’s speedometer displays inaccurate speeds Transcend uses GPS to determine speed. GPS technology works best in open spaces with a clear view of the sky. Obstructions such as buildings and trees can degrade the signal. If you observe unusual speeds, try moving to a more open location. GPS performance is poorest when it is first powered on. GPS reliability should improve as more GPS satellite are located by Transcend View of the display is obstructed on one or more edges Transcend’s optical module has been optimized to fit the majority of facial types, if your view of the screen is obstructed try moving around Transcend to find that perfect spot Try tightening the strap to ensure the display is in view and Transcend fits properly Transcend’s battery runs out of charge sooner than expected To prolong the battery life power Transcend off when not in use. You can also lower the brightness or use the DISPLAY OFF feature to save power. Transcend’s battery can last 6+ hours depending on environment. Below -20°C (-4°F) the battery life may be impacted. It is not recommended for extended use at these lower temperatures...
- Page 44 Ensure you properly charge the battery before using Transcend. See “Transcend fails to charge fully in 4 hours” for tips on charging the battery. Display frequently flashes white or is solid white Connection from the board to the display may be loose or broken from mishandling or misuse. Contact www.zealoptics.com/contact.php for support information. Temperature displayed in goggle is too high/low Like any thermometer, Transcend’s temperature sensor takes some time to adjust to the ambient air temperature. The sensor is located near the display inside the goggle. To improve the accuracy of the sensor, ensure that the bottom right vents on the goggle are unobstructed. This will allow air to flow inside to reach the temperature sensor. Cleaning the windshield or optic lens Do not touch the optic lens or the inside of the windshield. Always clean the optic with a soft cloth, lens cloth, or with the goggle bag provided with Transcend. Always store the goggle in the provided goggle bag and case to reduce the chance of scratches Transcend has GPS fix but still displays “--“ instead of valid speed The dashboard speedometer displays “--“ until it can calculate a valid speed from GPS data. If the speedometer still displays “--“ for more than a few minutes after the GPS indicator turns green, hold the Power/Select button to power Transcend off, then power back on If the problem persists, contact www.zealoptics.com/contact.php for support...
- Page 45 Transcend is not recognized by my PC/Mac Try unplugging the USB cable and plugging it back in Hold the Power/Select button to power off. Plug Transcend into PC/ Mac and then hold the Power/Select button to turn it on Ensure you are using a high-power USB 2.0 port (not a USB port intended for keyboard) Transcend displays unusual or unreasonable statistics Accuracy of statistics is affected by GPS reliability. For best performance, use Transcend in open spaces with a clear view of the sky To reset statistics, navigate to “RESET STATS” in the Preferences menu and choose “YES” when prompted with “SAVE AND RESET STATS?” Incorrect time on power up after Transcend has been in storage If you have set the clock to local time, Transcend will automatically remember the time every time you power it on. However, if Transcend has been in storage for many days without charging, the battery may drain completely and shut off the internal clock. If this occurs, the clock will not be set properly after charging and powering up Simply set the time in the “SET TIME” screen under “PREFERENCES” if you encounter this problem Display does not turn on If the goggle has been powered off and stored in temperatures below -20°C (-4°F), the display may not activate when powered on. Try warming up the display by moving indoors, or by wearing Transcend for 10 minutes before turning on. Try charging Transcend using the Recon AC adapter for 1 hour, then attempt to power on. Contact www.zealoptics.com/contact.php if problem persists...
- Page 46 Chrono does not start after pressing the Power/Select button The chrono needs to be reset before it can be started again. After you have stopped a chrono, use the Power/Select button to reset it. The numbers should return to 0:00:00 and be coloured GREY. To start a new chrono, press the Power/Select button again. The numbers will change colour to YELLOW and the timer will begin counting. Clock adjusts itself automatically Transcend uses GPS time to automatically adjust the clock to the nearest time zone. This occurs immediately after acquiring a GPS fix. Display is too bright while skiing at night You can adjust the display brightness in the “BRIGHTNESS” menu under “PREFERENCES”. There are 3 brightness options: High, Med, and Low. Additionally, you can use the “DISPLAY OFF” feature to quickly deactivate the display, while continuing to record to memory. Altitude inaccuracy Transcend calculates altitude using a combination of air pressure and GPS data. When Transcend is stationary, it adjusts the altitude reading obtained from the pressure sensor to match the GPS altitude reading. However air pressure can change significantly with varying weather. This can cause altitude readings to be different from the actual altitude. If altitude is inaccurate after you have been in an open area for more than 30 minutes, try turning off the Transcend and turning it back on. The altitude reading should become more accurate within 10 minutes. In general, clear weather will cause an increase in the displayed altitude, and stormy weather will cause a decrease in the displayed altitude.
-
Page 47: Safety, Storage, And Cleaning
12. Safety, Storage, and Cleaning Transcend is a pair of winter alpine goggles, and must be cleaned, dried, and stored as such to ensure long life. Transcend is also a piece of electronics and should be handled safely, cleaned and stored properly. It is advised to handle Transcend as if it were an MP3 player or Smart Phone; protecting and charging in a safe place after use. Put away dry and protected in a room-temperature location away from sharp and harmful, or magnetic items. Do not store outside or exposed over night. Do not lay directly in the sun for long periods of time. Do not place items directly on top of Transcend. It is not advised to store or pack Transcend for travel with other hardgoods such as skis or snowboards, or inside of ski and snowboard bags. Ensure Transcend has been charged fully before storing for long periods of time. Have fun, but take care of Transcend for optimal long life! 12.1 Important Safety Information Recon Instruments’ customized optics platform boasts a virtual image focused at infinity, which means eye strain is not a concern to the majority of users. Testing has shown that eye strain is no different than viewing the flatscreen television in your home. If at any time you experience nausea or eye strain when using Transcend, take a break for several minutes. If you experience or have a history of any other health issues that would stop you from participating in recreational alpine activities such as skiing or snowboarding, please consult your physician before using Transcend. Transcend fits most faces, and eye types, but it is not advised to wear glasses inside of Transcend as they may harm your face, eyes, or the optical display in a crash. Transcend does not fit all helmet types, try on helmets with Transcend before settling. Always choose a helmet and goggles combination that works for your face type and does not compromise safety and comfort. -
Page 48: Support, Service, And More Information
13. Support, Service, and More Information For all Support, service information please go to www.zealoptics.com/support Zeal Optics will handle all support requests with the help of Recon Instruments. Both Zeal Optics and Recon Instruments offer FAQ’s, direct email queries, and a direct phone line for support at any time. Please read this User Guide thoroughly for answers to general questions before consulting other means of support. 13.1 Firmware Upgrade Information Recon HQ software will automatically detect if Transcend has a Firmware Upgrade available for free download from reconinstruments.com. Simply plug the unit in to your computer, ensure you have Recon HQ Software downloaded, and that you have an internet connection. Upon connection, if there is an available Firmware Upgrade, simply follow the prompts and you will be guided quickly through the next few steps. Do not disconnect the USB cable from either Transcend or your computer during a firmware upgrade, this could cause serious issues. -
Page 49: Warranty Information
14. Warranty Information LIMITED WARRANTY INFORMATION: The Transcend GPS™ goggle (the “Product”) by Zeal Optics Inc. (“Zeal”) & Recon Instruments Inc. (“Recon”, and together with Zeal, “We”) is guaranteed against defects in material or workmanship under normal use for one (1) year from the original date of purchase. This warranty is a valid only for the original purchaser and is non transferable. All subsequent purchasers acquire the Product “as is” without benefit of this limited warranty. The date on your sales receipt is the date of purchase. The sole obligation of Zeal in the event of such defects during this period is to either repair or replace the defective part or Product with a comparable part or Product at the sole discretion of Zeal. Replacement parts are warranted to be free from defects in material or workmanship for 90 days or for the remainder of the limited warranty period of the Product or part(s) thereof they are replacing or in which they are installed, whichever is longer. This limited warranty covers all defects in material and workmanship in the Product, except for (i) damage resulting from accident, misuse, abuse, neglect or from other than normal and ordinary use of the Product; (ii) damage resulting from failure to clean or use the Product in accordance with the instructions accompanying the Product; (iii) damage resulting from the repair or attempted repair by anyone other than Zeal or Recon; (iv) any Product where the serial number has been removed or that has been damaged or rendered defective as a result of misuse, abuse, contamination, improper or inadequate maintenance or calibration, or other external causes; (v) software, interfacing or parts not supplied by Zeal or Recon; or (vi) virus infection. Do not under any circumstances open the housing or try to repair the Transcend GPS™ on your own. Any attempt to do so will void this warranty and the Product will be returned without repair. Please review your instructions carefully and take proper care... - Page 50 to maintain the Product. We are not responsible for damage that occurs as a result of failure to follow the instructions intended for the Product. Returns or replacements of parts and/or Products may be subject to shipping, handling, replacement and/or restocking fees. In the unlikely event our Product has recurring failure, We may, at our sole discretion, give you a refund of your purchase price or a replacement of the Product. This is your exclusive remedy for defective Products. We do not warrant that the operation of the Product will be uninterrupted or error- free. LIMITATION OF IMPLIED WARRANTIES AND EXCLUSION OF CERTAIN DAMAGES Recon Instruments warrants that the product will meet the specifications stated in the instructions. Recon Instruments agrees if the product does not conform to the specifications to warrant the product as stated herein. Notice for replacement must be given within 60 days of the discovery of the defect. In consideration of the above promises by Recon Instruments, the buyer agrees to and accepts the following conditions: • That this warranty is in lieu of all other warranties, expressed or implied; • That ALL WARRANTIES OF MERCHANTABILITY OR OF FITNESS FOR A PARTICULAR PURPOSE ARE HEREBY EXCLUDED AND/OR WAIVED; • That the buyer’s sole remedy shall be to obtain replacement of the product free of charge from Recon Instruments; and That this remedy is in lieu of all other remedies or claims for damages, consequential or otherwise, which the buyer may have against Recon Instruments. Recon and Zeal shall have no liability for Any loss or injury caused, in whole or in part, by its actions, omissions, or negligence, or for contingencies beyond its control; The warranty extends only to you, the original purchaser. It is not transferable to anyone who subsequently purchases the Recon Instruments from you.
- Page 51 THIS LIMITATION OF LIABILITY APPLIES WHETHER DAMAGES ARE SOUGHT, OR A CLAIM MADE, UNDER THIS LIMITED WARRANTY OR AS A TORT CLAIM (INCLUDING NEGLIGENCE AND STRICT PRODUCT LIABILITY), A CONTRACT CLAIM, OR ANY OTHER CLAIM. THIS LIMITATION OF LIABILITY CANNOT BE WAIVED OR AMENDED BY ANY PERSON. THIS LIMITATION OF LIABILITY WILL BE EFFECTIVE EVEN IF YOU HAVE ADVISED ZEAL OR RECON OF THE POSSIBILTY OF ANY SUCH DAMAGES. WE ASSUME NO LIABILITY FOR ANY ACCIDENT, INJURY, DEATH, LOSS, OR OTHER CLAIM RELATED TO OR RESULTING FROM THE USE OF THIS PRODUCT. WARRANTY RETURNS We will replace your Product or part free of charge if your Product or part has a manufacturing defect that is covered by the limited warranty described above. You are responsible for paying shipping costs associated with warranty returns. Please make sure to contact Customer Support before sending any warranty returns back as we are often able to solve the problem over the phone, via email or through our FAQ section on our website. Returns that do not qualify for warranty coverage will be returned to you or replacement parts/repair service will be offered. It is important that you communicate with us before sending in your return. All warranty return requests or questions should be first sent to Zeal Customer Support using the contact form found in the FAQ section at www.zealoptics.com -- we will contact you within 2 business days. If your return qualifies for warranty coverage you must include your original receipt and the explanation form including the RMA # you receive when you fill out the form on the Zeal site. All Product parts must be included with your return. Send your original receipt and all Product parts to by a registered courier with a tracking # to the address below. Zeal Optics is not responsible for lost goods. For USA Zeal Optics Warranty Returns 4843 Pearl Street 1A Boulder, CO 80301 USA www.zealoptics.com t. 888.454.9325 t.303.449.9325 f.303.449.9328...
-
Page 52: Regulatory Compliance Information
15. Regulatory Compliance Information The Transcend GPS conforms to the following standards: • FCC 15:2009 • ICES-003, Issue 4, February 2004 • EN 55022/2006 + A1(2007), Class B • EN 55024/1998 + A1(2001) + A2(2003) • I.S EN 60950-1:2006... -
Page 53: World Time Zones
16. World Time Zones Abbreviation Full name Location Time zone ACDT Australian Central Daylight Time Australia UTC + 10:30 hours ACST Australian Central Standard Time Australia UTC + 9:30 hours Atlantic Daylight Time North America UTC - 3 hours Australian Eastern Daylight Time or AEDT Australian Eastern Summer Time Australia... - Page 54 Heure Avancée de l'Est North America UTC - 4 hours Heure Avancée du Pacifique North America UTC - 7 hours Heure Avancée des Rocheuses North America UTC - 6 hours HAST Hawaii-Aleutian Standard Time North America UTC - 10 hours Heure Avancée de Terre-Neuve North America UTC - 2:30 hours...
-
Page 55: Technical Specifications
17. Technical Specifications 17.1 Sensing • Global Positioning System (GPS) Receiver • Single axis Gyroscope • Tri-axial Accelerometer • Temperature sensor • Barometric pressure sensor 17.2 Processing ARM-based processor 17.3 Capacity Holds 50 hours of recorded sensor data (3.77 Mb) 17.4 Environment / Mechanical Weight of the unit ~250 Grams (~7.1oz) Overall Dimensions of the unit 185mm W x 102mm H x 91mm D (7.3”W x 4.0”H x 3.6“D) Storage Temperature range -20°C to 60°C (-4°F to 140°F) Optimal Operating Temperature range: -20°C to 30°C (-4°F to 86°F) Vibration resistance 6g rms 10 Hz to 2000 Hz Shock / drop resistance 100 g, 8 ms, ½ sine (1 m vertical drop) Enclosure Water Resistant enclosure 17.5 Environmental Considerations RoHS compliant Brominated flame-retardant-free Mercury-free 17.6 Power requirements... -
Page 56: Display And Virtual Image
Battery size and life 1200 mAHr / 8 Hours 17.7 Display and Virtual Image Display resolution QVGA- 320X240 Display Type LCD Microdisplay Virtual image size 11” Diagonal from 5 feet away Max Horizontal field of view (FOV) : 8° Vertical FOV: 6°Horizontal FOV Diagonal FOV 10° Color Depth 16 Bit Brightness & Contrast control 3 mode brightness, with video chain sleep mode 17.8 RF and Antenna GPS Receiver: 65-Channel Ultra Low Power GPS IC Cold start of 2-5 minutes in typical outdoor environment Multipath detection and suppression 17.9 Ports and Connectivity Micro-USB plug for data connection and charging 17.10 System Requirements Windows PC: Intel Pentium 4 or higher, Windows XP, Vista, 7 or higher Mac: Intel Core Duo or higher, Mac OS X v10.6 or later 17.11 Languages English and French 17.12 Included Accessories Micro USB to USB cable, 1 meter Universal AC adapter Protective carrying case...
Need help?
Do you have a question about the Recon-Zeal and is the answer not in the manual?
Questions and answers