Table of Contents
Advertisement
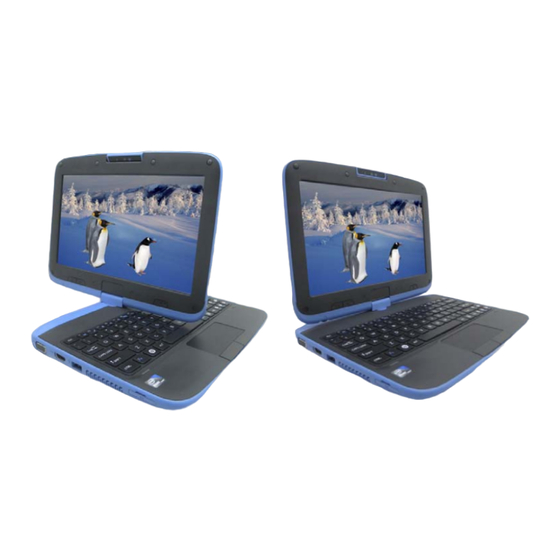
Quick Links
Advertisement
Table of Contents

Related Manuals for ECS Intel-powered Convertible Classmate PC


Summary of Contents for ECS Intel-powered Convertible Classmate PC
- Page 2 Preface Copyright 2011 All Rights Reserved. The information in this document is subject to change without prior notice in order to improve reliability, design and function and does not represent a commitment on the part of the manufacturer. In no event will the manufacturer be liable for direct, indirect, special, incidental, or consequential damages arising out of the use or inability to use the product or documentation, even if...
-
Page 3: Table Of Contents
Table of Content ....2 TTENTION EACHERS ARENTS AND DULT UPERVISORS ............. 6 GENCY EGULATORY OTICES ................... 7 ODIFICATIONS ..........7 ONNECTIONS TO ERIPHERAL EVICES SAR E ................. 7 XPOSURE ............7 ECLARATION OF ONFORMITY ... - Page 4 PC ......34 SING NTEL POWERED ONVERTIBLE LASSMATE LCD C ..................34 ) ............35 UNCTION UICK ) ............35 UNCTION UICK ..............37 OUCH RECAUTIONS : ............38 O ROTATE THE DISPLAY PANEL ...
-
Page 6: Supervisors
This product is an educational tool designed for school children, ages 6 and up. There must be supervision by an adult on school children under 10 when using this Intel-powered classmate PC. It is a must to have a thorough explanation to students on safe and proper handling of the Intel-powered classmate PC, power supply, battery pack, and power cord. - Page 7 The following are lists of precautionary measure the students must understand before using this computer inside the classroom or home environment: Do not place near the fire or other sources of heat. Do not expose to magnetic fields. Do not expose to direct sunlight. Do not expose to rain or moisture.
- Page 8 Do not clean while the computer is “on” or plugged into a wall socket. Caution students to avoid using this device under wet conditions and also to protect the unit when carrying under this condition. Be sure the touch pad does not come into contact with dirt, liquids, or grease.
-
Page 10: Agency Regulatory Notices
You are cautioned that changes or modifications not expressly approved by the party responsible for compliance could void your authority to operate the equipment. This device complies with Part 15 of the FCC Rules. Operation is subject to the following two conditions: (1) this device may not cause harmful interference and (2) this device must accept any interference received, including interference that may cause undesired operation. -
Page 11: Modifications
RFI/EMI connector hoods to maintain compliance with FCC Rules and Regulations. SAR Exposure Intel-powered convertible classmate PC has been tested for and found to be in compliance with FCC RF Exposure Limit. During extended periods of use the integrated antenna located at the top left corner of the display screen should be positioned at least 20cm from users or nearby persons. -
Page 12: Canadian Notice
EN61000-3-3: 1995+A1: 2001+A2: 2005 EN55024: 1998+A1: 2001+A2: 2003 IEC61000-4-2: 2001 ED. 1.2 IEC61000-4-3: 2006 ED. 3.0 IEC61000-4-4: 2004 ED. 2.0 IEC61000-4-5: 2005 ED. 2.0 IEC61000-4-6: 2006 ED. 2.2 IEC61000-4-8: 2001 ED. 1.1 ... -
Page 13: Power Cord Requirement
The equipment must also be installed using an acceptable method of connection. The customer should be aware that compliance with the above conditions may not prevent degradation of service in some situations. Repairs to certified equipment should be coordinated by a representative designated by the supplier. -
Page 14: Battery Pack Safety
Other Countries The cord set fittings must bear the certification mark of the agency responsible for evaluation in a specific country. Acceptable agencies are: CCC (China) The flexible cord must be of a HAR (harmonized) type HO5VV-F 3-conductor cord with a minimum conductor size of 0.03 square inches. -
Page 15: Lithium Battery Warning / Bridge Battery Warning
Do not charge the battery pack if the ambient temperature exceeds 45℃ (113℉). To obtain a replacement battery, contact your local dealer. Do not expose the battery pack to high storage temperatures (above 60℃, 140℉). When discarding a battery pack, contact your local waste disposal provider regarding local restrictions on the disposal or recycling of batteries. - Page 16 This page is intentionally left blank...
-
Page 18: G T Ktb
Congratulations on your purchase of Intel-powered classmate PC. Intel-powered convertible classmate PC features the latest advances in portable computing technology. Intel-powered convertible classmate PC modular design provides maximum expandability without compromising portability. Never try to use this computer with the battery removed thus exposing the battery compartment which might cause hazardous accidents to the kids if it is powered by an AC adapter. -
Page 19: Front View
3. Be sure the system is turned off or in suspend mode before you close the display panel. With the LCD screen open, you will see several features important for operating your Intel-powered convertible classmate PC. Front View Built-in Rotating Camera... -
Page 20: Built-In Rotating Camera
Built-in Rotating Camera The built-in rotating camera can rotate from -35 ~ +200 degrees. You can rotate the built-in rotating camera back and forth using on both sides of the display panel. The built-in rotating camera must be returned to its original position for the display panel to close properly. - Page 21 System and Power Status Indicators LED Graphic Indication Symbol Blue light indicates the numeric keypad is activated. Blue light indicates the cap-lock is activated. Blue light indicates the is reading/writing data. Blue light indicates the WLAN module is active. The battery LED reflects according to the following status: Blue light indicates the battery is fully charged and the AC Adapter is plugged in.
-
Page 22: Quick Menu
Quick Menu Brightness Control – Decrease or increase the screen brightness after you click the + / - key. Volume Control – Decrease or increase the volume when you click on the + / - key. Switch Display – This function applies when you are connecting a projector. -
Page 23: Water Resistance Precautionary Measures On Keyboard, Power Button And Touch Pad Buttons
Works like the two buttons on an ordinary mouse. Water Resistance Precautionary Measures on Keyboard, Power Button and Touch pad Buttons The Intel-powered convertible classmate PC features a spill- resistance function on keyboard, power button and touch pad buttons to ensure greater protection against spills in the classroom or anywhere. -
Page 24: Left Views
Please take note that it can cause a severe damage to the system if the user uses the abnormal procedure (pressing the Ctrl-Alt-Del key combination) and forcibly shut down the system. Left Views External Monitor Port Use this port to connect to an external monitor. HDMI Port (USB 2.0 port is optional, either one) Compact audio/video interface for transmitting uncompressed digital data. -
Page 25: Right View
USB 2.0 Port This port conforms to the latest USB2.0 plug-and-play standards. Ventilation Opening The ventilation opening allows the computer to cool off and prevent overheating. Do not block this opening when the computer is turned on. 2 in 1 CardReader Supports SDHC / MMC memory card. -
Page 26: Rear View
Stereo Headphone Jack Use the headphone jack to connect an external headphone set. Microphone Jack Use the microphone jack to connect an external microphone. USB 2.0 Ports This port conforms to the latest USB2.0 plug-and-play standards. Ethernet / LAN Port When using a LAN, please use an EMI Shielding Cable to minimize an interference when transmitting. -
Page 27: Bottom View
LCD Display Rotating Bar This bar is used to rotate the LCD display. Scroll Bar Use the scroll bar when the system is in tablet mode. Scroll from left to right: for scrolling up function Scroll from right to left: for scrolling down function Kensington Security Slot Attach a Kensington lock to this slot to secure your computer to a fixed location. - Page 28 This page is intentionally left blank...
-
Page 30: Started
Do not use inferior extension cords as this may result in damage to your Intel-powered classmate PC. Intel-powered convertible Classmate PC comes with its own AC adapter. Do not use a different adapter to power the computer and other electrical devices. - Page 31 Whenever possible, keep the AC adapter plugged into the Intel- powered classmate PC and an electrical outlet to recharge the battery. Never turn off or reset your Intel- powered classmate PC while the hard disk is in use; doing so can result in loss or destruction of your data.
-
Page 32: To Remove The Battery Pack
To Remove the Battery Pack: Slide the battery lock switch left into unlocked position. The battery pack will pump up from the battery bay. - Page 33 Slide and hold the battery release latch then slide the battery pack up. Lift up the battery pack from the battery bay. Your Intel-powered classmate PC uses a Lithium-Ion battery pack that provides power when you don’t have access to an AC outlet.
-
Page 34: Battery Low-Power Warning
You must charge the battery pack for at least six hours before using it for the first time. In the Standby Suspend mode, a fully charged battery loses its power in roughly 1/2 day or less. When not being used, the battery’s power will deplete in one to two months. -
Page 35: Checking The Battery Level
It will take about 5 hours to charge the battery to 100% capacity while Intel-powered classmate PC is powered on. When the battery is fully charged, the battery charge indicator becomes blue. If system runs at heavy loads or in a high temperature environment, the battery may not be fully charged. -
Page 36: Standby Suspend
20 seconds. Intel-powered convertible classmate PC power button can be set to turn off the system or activate the suspend mode. -
Page 38: Using Intel - Powered Convertible Classmate Pc
The LCD screen display can be adjusted by the following key combinations. - Changes Display Mode: LCD-only, CRT-only, LCD/CRT simultaneously - Decreases the brightness level of the screen. It also disables the auto brightness (Light Sensor) adjustment. - Increases the brightness level of the screen. -
Page 39: Function Keys (Quick Keys)
Do not press on, or store any objects on the cover when it is closed. Doing so may cause the LCD to break. Function Keys (Quick Keys) Function Keys (Quick Keys) - WLAN/3G/BT on/off. - Enters the Suspend Mode. ... - Page 40 - Increases the brightness level of the screen. - Hotkey for system recovery. Please refer to the Chapter 8 on how to execute in recovering your system. The touchpad is a rectangular electronic panel located just below your keyboard. You can use the static-sensitive panel of the touchpad and slit it to move the cursor.
-
Page 41: Touchpad Precautions
TouchPad Precautions The TouchPad is a pressure sensitive device. Please take note of the following precautions. Make sure the TouchPad does not come into contact with dirt, liquids or grease. Do not touch the TouchPad if your fingers are dirty. ... -
Page 42: To Rotate The Display Panel
Your computer can be rotated up to 180 degrees, clockwise or counterclockwise. Fold it down with the display facing up to use it as writing pad. You can rotate the screen horizontally or vertically to suit your needs. To rotate the display panel:... - Page 43 Do not try to turn the display panel more than 180 degrees. If you start to rotate the display panel in clockwise position, you must also turn it in counterclockwise position to return to its original position or vice versa.
- Page 44 Make sure the display panel is rotated to 180 degrees. Hold the display panel upper corners and gently lower the display panel to close position. The Hard-Disk Drive (HDD) Protection application protects the system’s HDD from damage caused by sudden harmful shocks. It monitors system movements that exceed the defined shock threshold.
-
Page 46: Bios Setup And Security Feature
The Setup Utility is a hardware configuration program built into your computer’s BIOS (Basic Input/Output System). It runs and maintains a variety of hardware functions. It is menu-driven software, which allows you to easily configure and change the settings. The BIOS contains manufacturers default settings for the computer’s standard operations. -
Page 47: Main Setup
Legend Alternate Function Displays the General Help window. It can be enabled from anywhere in the BIOS. Jumps to the Exit menu or returns to the Main menu from a submenu. Selects the menu item to the left. Selects the menu item to the right. - Page 48 Due to various configurations on this model, your system may show different information. System Date: Type in the current date, in MM/DD/YY format. System Time: Type in the current time, in HH:MM:SS format.
-
Page 49: Advanced Setup
Advanced Setup... -
Page 51: Security
Security Boot Setup... -
Page 52: Exit Setup
Exit Setup Exit Saving Changes: After you have completed the BIOS settings, select this item to save all settings, exit BIOS Setup utility, and reboot. New system settings will take effect on next power-up. F10 key can be used for this operation. ... -
Page 54: Connection (Option )
3G is the third generation of mobile phone standards and technology. 3G enable users a wide range of more advanced services while achieving greater network capacity through improved spectral efficiency. - Page 55 Procedures in installing the application Insert the SIM card into the SIM slot. Execute the application by pressing the Mobile Partner icon From the Mobile Partner display window, click on the “Tools” item Select the “Options”.
- Page 56 Double click on the “Profile Management” and click on the “New” tab Click on the “OK” tab.
- Page 57 On the next window, click on the “Connect” tab. All configuration settings were completed, please click save icon to save all settings. The HSPA is successfully connected...
- Page 58 Remove the battery from its compartment.
- Page 59 Press the two knobs inside the battery compartment to release the keyboard. Turn the computer over facing you and lift up the keyboard from its compartment. Slide the plate to left direction.
- Page 60 Locate the Wimax\WiFi connector as shown in the illustration. Remove the screw to release the Wimax\WiFi card.
- Page 62 This page is intentionally left blank...
-
Page 64: O B R
This program is a powerful, easy-to-use, Linux-based data recovery program that can help users to prevent from losing data when their PC is crashed. The system includes four main functions, “Recovery”, “Backup”, “Restore”, and “Tools”. It is also intended for the users who are executing the recovery tool, with knowledge of: ... - Page 65 Record Management Review, edit, and manage backup records. Requirement for OBR Minimum of 10GB internal hardware space is required to run the recovery code. An external storage is required for backup use. Resolution support depends on graphic card driver. ...
-
Page 66: Ackup
Backup As user adds new software and data files, they should continue to back up their system on a regular basis to maintain a reasonably current backup. In this section, users are able to backup the whole PC including commonly used software applications. Therefore, users can restore the PC to any state it has been backed up. -
Page 67: Backup Folder
Select an action what PC will do when the recovery process has been completed. Reboot: PC reboot once the process is completed. Shutdown: PC shutdown once the process is completed. Main Page: Go back to Main Page once the process is completed. -
Page 68: Restore
Restore In this section, even if the Windows operating system is not functioning, OBR able users to access the utility by restarting their computer and restore the OS or folders to its previous backup point. Restore OS: Restore the operating system to its previous backup point. Restore Folder Restore the selected data folders to its previous backup point. - Page 69 Plug in the storage device which you have stored the previous backups. Select: Restore>Restore OS or Restore>Restore Folder Select a destination where the backup data saved. Select a system state/folder you wish to restore from the Backup record review.
-
Page 70: Tools
Tools This section provides a backup partition management tool for users to format the data storage partitions on the external USB device and a backup records management tool for users to manage previous backup projects. Recovery Recovery has the main function which can restore the system to its original factory settings. - Page 71 Project Viewer: Allow users to manage and edit their previous backup projects. Plug in the external storage device on which you’ve saved the backup data. Select: Management Tools>Record Viewer Select type of backup projects, either OS or Folders. ...
-
Page 72: Storage Management
Storage Management: OBR limits its data storage format to EXT3; therefore, the type of file system and compression attributes of the volume must match. This sector provides users a tool to create an EXT3 partition to save their backup files or folders. ... -
Page 74: Troubleshooting
Your computer has been fully tested and complies with the system specifications before shipping. However, incorrect operations and/or mishandling may cause problems. You may also encounter simple setup or operating problems that can solve by considering the following suggestions. If the problem persists, contact your dealer for service. -
Page 76: Specification
Operating System Support Windows 7 Starter, Home Basic, Home Premium, Professional. Intel® Atom processor Cedarview N2600 CPU: 1.6GHz/512K L2, 3.5W N2800 CPU: 1.86GHz/512K L2, 6.5W (Optional) Memory DDR3 Single Channel, 800/1066 So-DIMM DRAM module 1GB/2GB Core Logic ... - Page 77 LAN Controller Supports 10 and 100 Mb/sec. Full and half Duplex operation Wireless LAN Half Mini-card form factor Wi-Fi 802.11 B/G/N 1x1 Wi-Fi 802.11 A/G/N 2x2 Open mesh support on Linux only PCI-E interface Keyboard ...
- Page 78 Touch Screen Resistive type (ETT/Catcher) Capacitive type (N-trig) 3.75G / WIMAX (Optional) Wireless Broadband module support USB interface, Mini-card type HSPA/ modules support Connection Manager AP support for Broadband section HSPA module w/ 2 antenna support ...
- Page 79 Support external USB flash memory card boot up. Physical Outline Dimension: 269 x 208.5 x 30.2~36.1mm (W/O Rubber Foot) Weight: 10.1" W LCD /HDD/ CAM/ 6cell battery pack: 1.6 Kg 10.1" W LCD /HDD/ CAM/ 3cell battery pack: 1.5 Kg ...
Need help?
Do you have a question about the Intel-powered Convertible Classmate PC and is the answer not in the manual?
Questions and answers