
Related Manuals for V-fit Home Gym


Summary of Contents for V-fit Home Gym
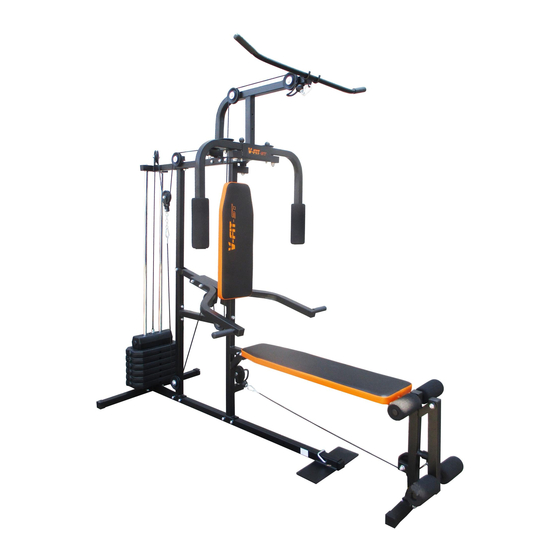
- Page 1 Compact Home Gym Assembly & User Manual Please ensure that you read this manual carefully before attempting to assemble or use your new product and retain for future use...
-
Page 3: Table Of Contents
Contents Section Page General Information ..4 Before you start ..5 Safety ....6 Exercise Information . -
Page 4: General Information
Should you encounter any difficulty with the assembly, (at the purchaser's cost). operation or use of your V-fit exercise product or if you c). Replace the product if it is deemed (by us) to be think that you may have parts missing, please DO NOT economical to do so. -
Page 5: Before You Start
Please note that some of the parts may be pre-fitted to major components, so please check carefully before contacting our CUSTOMER SUPPORT team. In any event, please do not return the product to your retailer before contacting us first. Compact Home Gym Page 5... -
Page 6: Safety
V-fit product, but contact CUSTOMER SUPPORT by any of the means listed on the opposite page. * Before use, always ensure that your V-fit product is positioned on a solid, flat surface. If necessary, use a rubber mat underneath to reduce the possibility of slipping in use. -
Page 7: Exercise Information
Work at your own, comfortable pace and the results will come. The better your aerobic fitness the harder you will have to work to stay in your target zone. Compact Home Gym Page 7... - Page 8 125 - 145 135 - 155 45-49 120 - 140 130 - 150 50-54 115 - 135 125 - 145 55-59 110 - 130 120 - 140 60 and over 105 - 125 115 - 135 Page 8 Compact Home Gym...
-
Page 9: Cool Down
Stretch forward toward the right foot and hold for 10 seconds. Relax and then repeat with the left leg extended. Repeat 2 - 3 times. Compact Home Gym Page 9... - Page 10 Warm Up 5 - 10 Minutes Exercise 2 minutes at 'A' Cool Down 5 Minutes Exercise slowly 1 minute Repeat entire cycle 2 or 3 times This is only a suggested programme and may not suit every individual’s needs. Page 10 Compact Home Gym...
-
Page 11: Getting Started
• The resistance (weight) settings should be in positions 1 - 3. • This exercise programme should take you approximately 20 minutes. • Follow this exercise programme with 5 minutes of proper cool down exercises. Compact Home Gym Page 11... - Page 12 • The resistance (weight) settings should be in positions 4 - 8. • This exercise programme should take you approximately 40 - 50 minutes. • Follow this exercise programme with 5 minutes of proper cool down exercises. Page 12 Compact Home Gym...
- Page 13 Exercise Notes Compact Home Gym Page 13...
-
Page 14: Assembly
Assembly Compact Home Gym Page 14... - Page 15 CROWN PLATE WASHER ......1 CROWN PLATE PIN ......1 Compact Home Gym Page 15...
-
Page 16: Tools Required
M10 Nylon Locknut ........10 Part NO.68 Page 16 Compact Home Gym... - Page 17 Assembly Page 17 Compact Home Gym...
-
Page 18: Stage B
M10 Nylon Locknut ........2 Page 18 Compact Home Gym... - Page 19 Assembly Page 19 Compact Home Gym...
-
Page 20: Stage C
M8 x 45mm Hex Bolt ........2 Page 20 Compact Home Gym... - Page 21 3 3 1 1 / / 3 3 2 2 1 1 7 7 1 1 7 7 4 4 2 2 1 1 2 2 3 3 3 3 2 2 4 4 3 3 4 4 Compact Home Gym Page 21...
-
Page 22: Stage D
Secure the free end of the cable to the lower part of the assembled Jockey Pulley Bracket (52) using 1 x M10 x 25mm Hex Bolt (121), 2 x M10 Flat Washers (102) and 1 x M10 Nylon Locknut (103). Page 22 Compact Home Gym... -
Page 23: Lower/Centre Cable Fitment
Pec Cable end and one before fitting the nut) and 1 x M10 Nylon Locknut (103). Note Use the chain to remove slack from the cable system by using fewer links. Page 23 Compact Home Gym... - Page 24 M10 x 25mm Hex Bolt ........3 Part NO.102 Part NO.79 Part NO.81 Part NO.82 Part NO.103 Part NO.111 Part NO.84 Part NO.83 Part NO.112 Part NO.75 Part NO.28 Part NO.47 Part NO.29 Part NO.46 Page 24 Compact Home Gym...
- Page 25 1 1 0 0 2 2 1 1 0 0 2 2 4 4 7 7 1 1 0 0 6 6 4 4 6 6 2 2 9 9 7 7 5 5 1 1 0 0 3 3 Page 25 Compact Home Gym...
-
Page 26: Stage E
M8 Nylon Locknut ........1 Part NO.90 Part NO.91 Part NO.89 Part NO.117 Page 26 Compact Home Gym... - Page 27 1 1 1 1 7 7 M M 8 8 1 1 0 0 8 8 x x 4 4 9 9 0 0 M M 1 1 0 0 x x 8 8 0 0 Page 27 Compact Home Gym...
- Page 28 Beny Sports Co. UK Ltd. Unit 8, Riparian Way, The Crossings, Cross Hills, West Yorkshire. BD20 7BW CUSTOMER SUPPORT is open from 9.00am to 5.00pm from Monday to Friday Tel: 0871 222 0881 Fax: 01535 637722 E-mail: Support@benysports.co.uk Copyright Beny Sports Ltd. 2006 Printed November/2006...
Need help?
Do you have a question about the Home Gym and is the answer not in the manual?
Questions and answers