Table of Contents
Advertisement
Quick Links
Advertisement
Table of Contents

Related Manuals for Lifetime Sentinel 6416


Summary of Contents for Lifetime Sentinel 6416
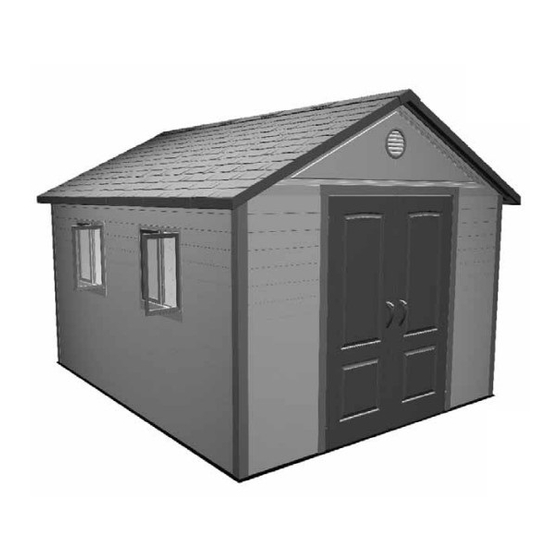
- Page 1 OWNER’S MANUAL with Assembly Instructions Storage Building...
-
Page 2: Safety Instructions
You could win $200! B. Remove Parts List from the center of these instructions and Register your product at www.lifetime.com and receive three important benefi ts: make sure all parts are present and in good condition. 1. You automatically will be entered to win $200 in our monthly drawing! 2. -
Page 3: Important! Please Read
IMPORTANT! Please Read... -
Page 4: Site Selection
Cut Plywood into sizes called for on previous page. Site Selection Arrange the Plywood according to the diagram and nail into place with 8d x 1 1/2” nails. The actual dimensions of your shed (at its widest and longest points) are 11’ x 13 1/2’. Be sure to select a site that will accomodate these measurements. - Page 5 Before Beginning! Inserting Wall Panels Remove the Parts List from the center of this manual, and organize Shed Parts. Assemble Floor This Step uses: 2-Inner Floor “A” Panels (AO) Fit together an “A” and “B” Outer Floor Panel (AO & 2-Inner Floor “B”...
- Page 6 Window Locations Assemble Next Corner Step 5 Hardware Install next two Wall Panels (JF) at the back right corner of FE (18) the shed. Then connect with a Corner Channel (AI). See Assembly Tip #2 (p. 9). Hardware Bag: 1009126 Screwdriver Window Wall Panels can be installed on either side (or the back) of the shed, in any of the highlighted locations (not in the corners).
- Page 7 Assemble Next Corner Assemble Last Corner Step 7 Hardware Step 9 Hardware Install Next two Wall Panels (JF) at the back left corner of Install Next two Wall Panels (JF) at the front left corner of FE (18) FE (18) the shed.
- Page 8 11 Assemble Windows Step 11 Hardware Step 11 Hardware (Continued) Place a Window (JL) onto the Window Frame (JI). Fasten the Window to the Frame with #10 x 1/2” Pan Head Screws (CN) Use this step to install windows into both and #10 x 1/2”...
- Page 9 Step 11 Hardware (Continued) Step 11 Hardware (Continued) Attach a Mounted Window Stay (KF) to the bottom of the Window Frame (JI). KB (8) CN (4) CK (4) CA (4) Hardware Bag: 1009109 Screwdriver CJ (8) Fit a Window Latch Bearing (KH) into a Window Latch (KI). Hardware Bag: 1009109 Screwdriver Attach the Window Latch to the upper latch location with a screw (KB).
- Page 10 12 Assemble Truss Frames Installing Truss Assemblies Step 12 Hardware Fit two Truss Support Strips (AV) together. Bolt Truss Use the Support Strips, Center Gutter Connector (FD) and two holes in Gutter Channels (AH). FB (40) CC (40) column Hardware Bag: 1009121, 1009124 7/16”...
- Page 11 14 Left Door Assembly Step 14 Hardware CD (2) CK (3) FE (9) Holes for CF (2) handle CC (2) CJ (3) (Not Actual Size) 7/16” Wrench Screwdriver Hardware Bags: 1011134, 1009126 Rest Left Door (NC) with front side down. Position Deadbolt Latches (CF) in slots at top and bottom of door then slide Door End Channel (AY) onto the door.
-
Page 12: Parts List
Parts List Shed Hardware Box 3 Box 1 (Actual Size) Shed Ends Hardware Bag [1009126] 1007995 Center Roof Cap Part # Description BS07500 1/4” x 5/8” Screw 1007984 Gutter Channel Main Hardware Shelf Hardware Bag [1009125] 1007977 Wall Support Channel 1007977 Wall Support Channel BS05900... - Page 13 15 Right Door Assembly Step 15 Hardware FE (9) Hardware Bags: 1009126 Screwdriver 7/16” Wrenches (2) Rest Right Shed Door (NB) with front side down, then slide Door End Channel (AY) onto the door. Holes for handle Back of Door Attach three Door Braces (AX) to the back of the door with 1/4”...
- Page 14 16 Assemble Gables Step 16 Hardware Step 15 Hardware (Continued) Assemble two halves A and B of a Gable (AF & AN). CJ (3) CH (2) FE (8) CJ (10) CK (10) CI (1) Hardware Bags: 1009159, 1009126 CK (3) (Not Actual Size) Screwdriver CM (2)
- Page 15 18 Install Front Gables 17 Assemble & Install Wall Support Channels Step 18 Hardware Step 17 Hardware Set a Gable on the top of the Front Wall and screw into place. Hardware Bags: 1000427 FE (10) Also screw the Vertical Extension Channels (AJ) into the Gable. BUILD TWO SUPPORTS: Attach a Short Vertical Extension Hardware Bags:...
- Page 16 Identify Left and Right Door Hinges Screw the Door Frame Floor Brackets (at the Step 19 Hardware (continued) bottom of each hinge) to the fl oor. Insert the remaining screws into the Door Hinges. CN (2) CB (1) CA (1) FE (14) WARNING Hardware Bags: 1011134, 1009126...
- Page 17 Step 19 Hardware (continued) Step 19 Hardware (continued) WARNING Look for overhead power lines before climbing ladders, or lifting shed parts over your head. CN (2) CC (2) Failure to do so may result in electrical shock CD (2) CC (2) CD (2) CV (2) CV (2)
- Page 18 21 Install Rear Gable Step 21 Hardware Install Rear Wall Supports Install Rear Gable. Screw the Gable to the wall and to all four Vertical Extension Channels (AJ & AE). FE (22) CN (2) Hardware Bags: 1009127, 1011134 Use the Screwdriver holes in column...
- Page 19 Step 22 Hardware (Cont.) Fold End Roof Cap (AQ) along its hinge. Install it at the Connect Outer Roof Panels to the Gable and Truss front of the shed. FE (6) Note: You may need to apply pressure Hardware Bags: 1009127 to walls or roof panels to get screw pilot Screwdriver Only use a hand...
- Page 20 23 Install Center Roof Sections 24 Install Rear Roof Section Step 24 Hardware Position the Outer Roof Panel A (AC) and secure to Gable and Truss. Repeat on the other side with Outer Roof Panel B (AG). BG (20) FE (50) See Assembly Tip #10 (p.
- Page 21 Shelf Installation Pegboard Installation Step 23 Hardware Step 26 Hardware Use a Level, and position both 16” Pegboard Strips (BA) Insert Shelf Brackets (BE and BF) into notches in any Wall Support Channel. Place the Shelves on brackets and secure in the desired locations.
-
Page 22: Cleaning And Care
® Congratulations on your Lifetime Outdoor Shed purchase. By following the instructions below, your new Lifetime shed should provide you with years of service and enjoyment. Cleaning and Care The polyethylene walls and shelves are stain- and solvent resistant. To clean, use a mild soap and a soft- bristled brush. - Page 23 CLAIMS IF PARTS ARE UNAVAILABLE OR OBSOLETE. 1. Lifetime outdoor sheds are warranted to the original purchaser to be free from defects in material or workmanship for a period of ten years from the date of original retail purchase. The word “defects” is defi ned as imperfections that impair the use of the product.
Need help?
Do you have a question about the Sentinel 6416 and is the answer not in the manual?
Questions and answers