Table of Contents
Advertisement
Advertisement
Table of Contents

Related Manuals for HP df1010v2


Summary of Contents for HP df1010v2
-
Page 2: Copyright
HP Digital Picture Frame About this Manual This manual is designed to demonstrate the features of your HP Digital Picture Frame. All information presented is as accurate as possible but is subject to change without notice. HP shall not be liable for technical or editorial errors or omissions contained herein. -
Page 3: Safety Instructions
HP Digital Picture Frame the following measures: · Reorient or relocate the receiving antenna. · Increase the separation between the equipment and receiver. · Connect the equipment to an outlet on a circuit different from that to which the receiver is connected. ·... - Page 4 HP™ Digital Picture Frame such as a microwave oven. The electromagnetic interference may cause this product to malfunction. Do not drop or apply shock/vibration to this product. Strong impacts may damage the components inside. Do not insert objects other than compatible memory cards into the memory card slots of this product.
-
Page 5: Table Of Contents
HP Digital Picture Frame Table of contents Copyright ..................... i Disclaimer ....................i Safety Instructions..................ii Table of contents..................iv Key Features ....................1 What’s in the box ..................2 Overview ..................... 3 Operating the Picture Frame............... 5 Using the control buttons..............5 Using the remote control............... - Page 6 HP™ Digital Picture Frame Rotating photos..............17 Applying photo effects ............17 Viewing photos..................18 Running a slideshow by using the TIMELINE album......20 Using Smart Energy Saver™ ..............21 Using CLOCK (EZ Access Button)..............22 Selecting a clock skin ................22 Switching between Clock view and Slideshow view......22 Using SCRAPBOOK ..................23 Using SETTINGS ..................24 Date and Time page ..............24...
-
Page 7: Key Features
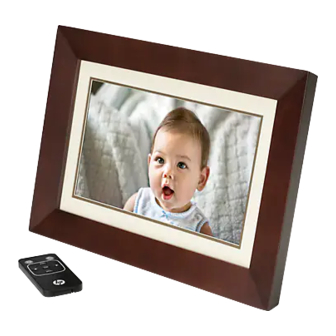
HP Digital Picture Frame Thank you for bringing our HP Digital Picture Frame into your home. Now you will be able to view your growing digital picture library in stunning clarity and share great memories with friends and family. It's a totally new and easier way to enjoy seeing your favorite photos. -
Page 8: What's In The Box
HP Digital Picture Frame What’s in the box Carefully open the packing box and ensure that you have the following items. 1. Digital Picture Frame 2. AC power adapter 3. Remote control x 1 4. Quick Start Guide The appearance and accessories included may vary based on model number. -
Page 9: Overview
HP™ Digital Picture Frame Overview Right view Description Adjustable back stand Power button Press the Power button to turn on/off the Picture Frame. USB Port Allows f a USB flash drive. Play back photos stored on the inserted drive. ... -
Page 10: Rear View
HP Digital Picture Frame Rear view Description MENU button See "Using the control buttons" on page 5 f details. EZ Access Button See "Using the control buttons" on page 5 f details. ESC button (ESCAPE button) See "Using the control buttons" on page 5 f details. -
Page 11: Operating The Picture Frame
HP™ Digital Picture Frame Operating the Picture Frame You can use the control buttons on the back or the supplied remote control to operate the picture frame In this user manual, instructions or examples provided are based upon operation with the remote control. To know how to use the control buttons, refer to "Using the control buttons"... -
Page 12: Using The Remote Control
HP Digital Picture Frame Using the remote control Use only the specified battery type [CR2025]. The batteries are highly flammable; keep away from excessive heat or moisture. Please remove the plastic strip under the battery before using the remote control for the first time. -
Page 13: Getting Started
HP Digital Picture Frame Getting started Step 1: Using the adjustable stand Gently pop out the back stand as shown below To place the Picture Frame horizontally or vertically, you can rotate the back stand by aligning the triangle mark with the rounded points (1 or 2). -
Page 14: Step 2: Connecting To Power
HP Digital Picture Frame Pull out the back stand and adjust accordingly to the preferred viewing angle It is recommended to place the Picture Frame h izontally, because this direction provides the best viewing and operating experience. By using the wall mount holes, you can hang the Picture Frame h izontally ... -
Page 15: Step 3: Basic Setup
HP™ Digital Picture Frame Step 3: Basic setup Using the main menu From the main menu, you can scroll to select the desired option, and then press OK. To exit back to the main menu, press "ESC". Description Smart Energy Saver™ Allows you to select a power-saving option f the Picture Frame. -
Page 16: Managing Photos
HP Digital Picture Frame Managing photos You can use the ALBUM menu to manage photos on the internal memory, memory card or USB flash drive. Manually copying photos to the internal memory In addition to the automatic “Smart Copy” feature, you can manually copy photos from external storage devices to the internal memory and tag photos to an album. - Page 17 HP™ Digital Picture Frame Repeat Step 6 to select m e photos as desired. If you wish to select all the photos shown on the current page, select "Select press All" in the pop-up menu and OK. Then continue with Step 7. 7.
-
Page 18: Tagging Photos To An Album
HP Digital Picture Frame Tagging photos to an album In the main menu, press to select ALBUM, and then press ◀ ▶ The screen shows: The file source, including USB, Memory Card and Internal Memory. The default albums on the internal memory, including TIMELINE, ... -
Page 19: Removing Photos From An Album
HP™ Digital Picture Frame Press OK to enable the selection mark Press to move to the photo you wish to select, and then ◀ ▶ press OK to confirm the selection. The selected photo will have a selection mark. Repeat Step 5 to select more photos as desired. -
Page 20: Managing Photos By Using The Timeline Album
HP Digital Picture Frame If you wish to select all the photos shown on the current page, select “Select All” in the pop-up menu and press OK. Then proceed to Step 5. 5. From the pop-up menu, press to select Uncategorized, and ◀... -
Page 21: Creating A New Album
HP™ Digital Picture Frame 3. Press to move to the Month field, and repeat Step 2 to adjust the ▶ settings. 4. Press to move to , and then press OK to start playback. ▶ The photos taken in the time span you specified above will appear on the screen. -
Page 22: Modifying An Album
HP Digital Picture Frame Modifying an album press In the ALBUM menu, to select an album f which ◀ ▶ wish to modify the album name, and then press MENU. Select Modify Name, and then press OK In the Album Name field that appears, use the on-screen keyboard to enter a desired name. -
Page 23: Rotating Photos
HP™ Digital Picture Frame Rotating photos From the pop-up menu, press to select Rotate, and then press OK. ◀ ▶ The photo will be rotated 90 degrees clockwise. Repeat Step above if you wish to rotate the photo into other angles. Applying photo effects From the pop-up menu, press to select Photo Effects, and then... -
Page 24: Viewing Photos
HP Digital Picture Frame Viewing photos In the main menu, press to select SLIDESHOW, and then ◀ ▶ press OK. The “USB” and “Mem y Card” albums only appear when a USB flash drive and a memory card have been inserted to the Picture Frame. Press to select the album that contains the photos you wish ◀... - Page 25 HP™ Digital Picture Frame The default transition effect “Pan & Zoom” does not allow customized interval settings. Brightness: selects the level of screen brightness. Contrast: selects the level of contrast. Saturation: selects the level of saturation. EN‐19 ...
-
Page 26: Running A Slideshow By Using The Timeline Album
HP Digital Picture Frame Running a slideshow by using the TIMELINE album In the SLIDESHOW menu, press to select TIMELINE, and then ◀ ▶ press OK. In the pop-up screen, specify a time span to include the photos you wish to display in slideshow. -
Page 27: Using Smart Energy Saver
HP™ Digital Picture Frame Using Smart Energy Saver™ The Smart Energy Saver™ menu provides various predefined power-saving options. In the main menu, press to select Smart Energy Saver™, ◀ ▶ and then press OK. Press to select a desired option, and confirm with OK ◀... -
Page 28: Using Clock (Ez Access Button)
HP Digital Picture Frame Using CLOCK (EZ Access Button) Selecting a clock skin The Picture Frame provides various preloaded clock and calendar skins. To set a default clock skin to be displayed in Clock view, follow the steps below. In the main menu, press to select CLOCK, and then press OK. -
Page 29: Using Scrapbook
HP™ Digital Picture Frame Using SCRAPBOOK HP DIGITAL SCRAPBOOK feature provides a brand new user experience in enjoying photo slideshows. In the main menu, press to select SCRAPBOOK, and then ◀ ▶ press OK. Press to select a template, and then press OK. ◀... -
Page 30: Using Settings
HP Digital Picture Frame Using SETTINGS The SETTINGS menu allows you to configure the settings of the Picture Frame. In the main menu, press to select SETTI NG, and then press ◀ ▶ OK. The Date and Time page appears. Press to toggle among Date and Time, General Settings and ◀... -
Page 31: General Settings Page
HP™ Digital Picture Frame General Settings Page Item Option Description Allows you to select the level of screen Brightness brightness. Smart Copy Determines how photos are copied from the external age devices to the internal mem y when using the Smart Copy feature. -
Page 32: Selecting A Language
HP Digital Picture Frame Selecting a language Select a language and set the date and time during the first use of the Picture Frame. 1. In the main menu, press to select SETTINGS, and then press ◀ ▶ 2. Press , the General Settings page appears. -
Page 33: Setting The Date And Time
HP™ Digital Picture Frame Setting the date and time In the main menu, press to select SETTINGS, and then press ◀ ▶ OK. The Date and Time page appears. Press OK to highlight the Year field, press to select a year, ◀... -
Page 34: Step 4: Copying Photos To Internal Memory
HP Digital Picture Frame Step 4: Copying photos to internal memory When inserting a memory card or a USB flash drive, you will be prompted to copy all photos to the internal memory. If “Smart Copy” is set to “Resize” in the settings menu, photos will be resized to the screen resolution when copied to the internal memory to... -
Page 35: Step 5: Connecting To A Computer
HP™ Digital Picture Frame Step 5: Connecting to a computer You can connect the Picture Frame to a computer using the mini USB cable to easily manage the files in the internal memory. 1. Start the computer and power on the Picture Frame. 2. -
Page 36: Frequently Asked Questions
HP Digital Picture Frame Frequently asked questions What memory card formats are compatible with the Picture Frame? SD/SDHC, MMC, MS and MS PRO are compatible with the Picture Frame. Why do some photos load faster than others? Higher resolution photos load slower. Using a lower resolution when taking photos will speed up loading time. - Page 37 HP™ Digital Picture Frame press power button again. Why isn't the TIMELINE feature accessible for photos on my USB drive? The TIMELINE feature only applies to photos stored on the internal memory Please copy any photos on the USB drive to the internal memory if you wish to access this feature.
-
Page 38: Appendix
HP Digital Picture Frame Appendix Specifications Specifications are subject to change without pri notice Model 10" Screen Size 10" Backlight type Aspect ratio 16:9 Panel interface Digital Screen resolution 1024x600 Built-in internal 256MB memory Supported memory SD/SDHC, MMC, MS, MS PRO card formats Supported image JPEG, BMP...