
Related Manuals for EdgeStar CWD1510S


Summary of Contents for EdgeStar CWD1510S
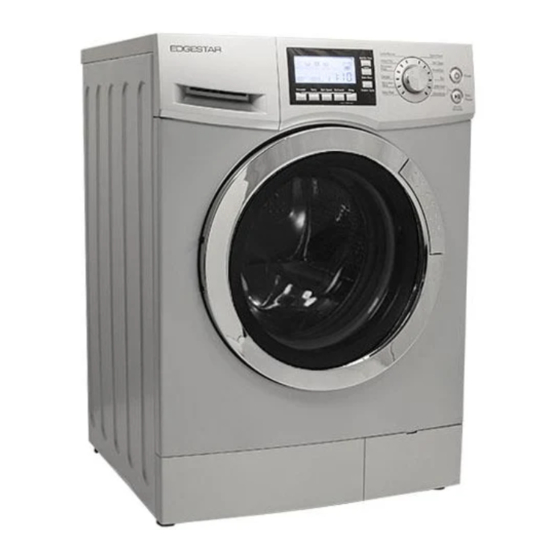
- Page 1 Combo Washer/Dryer CWD1510S Owner’s Manual For more information on other great EdgeStar products on the web, go to http://www.edgestar.com...
- Page 2 Improper handling can cause serious damage to the EdgeStar combo and/or injury to the user. This combo washer/dryer is designed for domestic indoor use only. Do not use the unit for industrial or commercial use. Any other use may invalidate the warranty. Please review the ratings label located on the rear panel of the unit for electrical and other technical data related to this unit.
- Page 3 Disconnect from the power socket before cleaning or maintenance. Make sure that all pockets are emptied. Remove all foreign objects from pockets of clothing. Sharp and rigid items such as coins, nails, screws, stones etc. may cause serious damage to this machine. EdgeStar Washer/Dryer Combo...
- Page 4 Disconnect power and water supply after operation. Pull out its plug and cut off water supply after the operation. Please check whether the water inside the drum has been drained before opening its door. Please do not open the door if there is any water visible. ...
-
Page 5: Table Of Contents
TROUBLESHOOTING TIPS ................23 TROUBLESHOOTING TIPS CONTINUED… ............. 24 SPECIFICATIONS ....................25 EDGESTAR LIMITED WARRANTY ..............26 This owner’s manual is provided for reference use only. Specifications may change without prior notice. Refer to the product label on the back of your combo for the latest technical information. -
Page 6: Introduction
Thank you for purchasing this EdgeStar combo washer/dryer. We are glad you chose us. We believe that your purchase of this product opens a relationship between you and EdgeStar. We will provide the customer support needed to nurture that relationship. -
Page 7: Parts Identification
Note: To properly wash and dry the unit should not be overloaded. Control Panel with LED Display- LED Display Panel and Control Dial allow you to choose the correct setting and customize your wash cycle. EdgeStar Washer/Dryer Combo... -
Page 8: Back View
Back View Hot Cold Electrical Plug- This unit is supplied with a three prong plug. Please check electrical requirements before connecting the unit. Drain Hose- The drain hose directs the flow of water after the wash cycle. The drain hose should always be properly secured to avoid risk of flooding and/or property damage. -
Page 9: Detergent Dispenser
Release Tab- To remove the dispenser drawer from unit, push down on the release tab and pull drawer out. Main Detergent and Bleach Compartment -Fabric Softener Compartment -Pre-Detergent and Washing Powder Compartment EdgeStar Washer/Dryer Combo... -
Page 10: Electrical Requirements
Electrical Requirements Failure to follow electrical requirements can cause personal injury, fire, or electrical shock. Install the combo washer/dryer according to the manufacturer’s instructions and local codes. To reduce the risk of severe injury or death, follow all installation instructions. Save these instructions even after installation is complete. -
Page 11: Installation Clearances
Additional spacing of 1 inch on all sides of the washer is recommended to reduce noise transfer Make sure the combo is installed in a location where you are able to access the electrical outlet. Washer Dimensions: The dimensions shown are for recommended spacing and custom undercounter installation. EdgeStar Washer/Dryer Combo... -
Page 12: Tools And Parts
Tools and Parts Water Hoses (2) Gather the required tools and accessories (Water hoses (2) and Transportation “Shipping” Plugs are supplied with unit) before starting installation. The accessories supplied are located in the washer drum. 6mm nut driver 10mm socket with ratchet 10 mm open-end wrench ... -
Page 13: Connect Inlet Pipe
Note: After connection, if there is any leakage from hose, then repeat the steps to connect inlet pipe. The most common type of tap should be used to supply water. If tap is square or too big, a new tap is required. EdgeStar Washer/Dryer Combo... -
Page 14: Drain System Options
Drain System Options: Standpipe drain system - wall or floor (views A & B) - The standpipe drain requires a minimum diameter standpipe of 2" (50 mm). The minimum carry-away capacity can be no less than 17 gal. (64 L) per minute. The top of the standpipe must be at least 24”... -
Page 15: Level The Washer
If it is still unstable, repeat steps above until unit has no give. At this time, double check by placing a level on top surface of the unit to ensure unit is properly adjusted. EdgeStar Washer/Dryer Combo... - Page 16 Electrical Connection As the maximum current through the unit is 12A when you are using its heating function, please make sure the power supply system (current, power voltage and wire) at your home can meet the normal loading requirements of the electrical appliances. ...
-
Page 17: Operating Instructions
Delicate- Select this option for fabrics/articles that are more delicate. In this setting the drying time will increase and wash at a lower temperature. Recommended fabric types- Dress shirts/blouses, nylons, sheer or lacy garments. EdgeStar Washer/Dryer Combo... - Page 18 Hand Wash/ Wool: Select this option to wash the wool textiles labeled with “Machine Wash” only. It is suggested to wash only small loads and with wool-safe detergent. In this cycle the tumble action will agitate less and will be at a lower spin speed. Baby Wear- Select this option for baby clothes and people with skin allergies.
-
Page 19: Led Display
- Delay Timer is active Water Temperature- Indicates the selected temperature. Spin Speed- Indicates the selected spin speed. Pre-wash- Press if you want your cycle to include pre-wash. Temperature- Press to increase water temperature in increments of 10 degrees. EdgeStar Washer/Dryer Combo... - Page 20 Spin Speed- Press to increase spin speed time, the washer drum spins at a speed up to 1200RPM. This reduces drying time and saves energy. Press the button until desired speed is lit, speed increases in increments of 200, 400-1200 rpm. Some fabrics such as delicates require a slower spin speed.
-
Page 21: Tips Before Washing
Please take items out of your clothes pockets. Please check the pockets of the clothes to be washed, remove any loose items to avoid possible damage or unnecessary service call. EdgeStar Washer/Dryer Combo... - Page 22 Secure fasteners, zips should be zipped close and buttons or hooks should be fastened. Any loose ribbons or ties should be tied together. Clothes should always be washed/separated according to the NOTE: It is normal if you following characteristics- fabric Type, color, size, and sensitivity. clothes feel slightly Always wash according to label instructions.
-
Page 23: Washing/Drying Capacity
Do not overload the unit; otherwise it may diminish the washing effects. Please confirm the maximum affordable washing quantity according to the following table. DO NOT WASH ANY SINGLE LARGE ITEM AS IT WILL DAMAGE UNIT. Incorrect loading: Correct Loading (1/2 to 2/3 Fill): EdgeStar Washer/Dryer Combo... -
Page 24: Operating The Washer
Before washing clothes for the first time, the washing machine should be run through a full cycle with detergent without articles of clothing. Once you have loaded the washer and added laundry products, you are now ready to wash! Start up washing machine Make sure the unit is connected to power and ensure water lines are connected properly;... -
Page 25: Cycle Guide
Cycle Guide EdgeStar Washer/Dryer Combo... -
Page 26: Cleaning The Exterior Of The Unit
Periodic cleaning and proper maintenance will ensure efficiency, top performance, and long life and is recommended. Disconnect plug from outlet and close water tap before performing any cleaning/maintenance to your combo washer/dryer. Cleaning the exterior of the unit Never use solvent based, abrasive cleaners, harsh chemicals or steel wool to clean your unit as they can damage the finish. -
Page 27: Clean Inlet Filter
Step 1: Open coin trap Step 2: Turn knob door clockwise Step 3: Pull out coin trap Step 4: Place drain pan and remove articles under for excess water EdgeStar Washer/Dryer Combo... -
Page 28: Troubleshooting Tips
Before Calling for Service If the unit appears to be malfunctioning, the issue could be solved by following the suggestions in the “Solution” column. APPENDIX... -
Page 29: Troubleshooting Tips Continued
Care Label Appendix EdgeStar Washer/Dryer Combo... -
Page 30: Specifications
Description of product Combo Washer/Dryer Model CWD1510S Voltage/Frequency AC 115V~60Hz Rated Current Color Silver cabinet with chrome door Washing Capacity/ 15 lbs. / 7.7 lbs. Dry Capacity Drum Size 2.0 cu. ft. Standard Water Pressure 0.05MPa-1MPa Weight 188 lbs. Note: Technical data and performance information provided for reference only. -
Page 31: Edgestar Limited Warranty
Once an EdgeStar authorized representative has confirmed that your product is defective and eligible for warranty service, the product must be returned to an EdgeStar authorized repair facility. EdgeStar is not responsible for damage resulting from shipper mishandling or improper packaging. Do not return a defective product to the place of purchase. - Page 32 Web: http://www.edgestar.com E-mail: service@edgestar.com Register your product, download owner’s manuals, access additional troubleshooting resources, and obtain more information on other great EdgeStar products on the web at: http://www.edgestar.com Product contents and specifications may change without notice. Copyright © 2014 Living Direct, Inc. All rights reserved.
Need help?
Do you have a question about the CWD1510S and is the answer not in the manual?
Questions and answers