DSPeaker ANTI-MODE 2.0 DUAL CORE Owner's Manual
Audio processor/usb dac with room correction
Hide thumbs
Also See for ANTI-MODE 2.0 DUAL CORE:
- Owner's manual (28 pages) ,
- Owner's manual (28 pages)
Table of Contents
Advertisement
Advertisement
Table of Contents

Related Manuals for DSPeaker ANTI-MODE 2.0 DUAL CORE


Summary of Contents for DSPeaker ANTI-MODE 2.0 DUAL CORE
- Page 1 Anti-Mode 2.0 Dual Core Owner's Manual...
- Page 2 Recycling information The product you have purchased is marked according to the Waste Electrical and Electronic Equipment Directive (WEEE Directive). There are take-back systems in place that help to preserve nature and natural resources when products are disposed of appropriately. If you need to dispose of this product, use the take-back system that has dedicated collection facilities for electronic equipment.
-
Page 3: Table Of Contents
2.0 D WNER ANUAL Table of Contents 1.Introduction......................4 1.1 What's included in the box..................4 2.Overview......................5 2.1 Front Panel......................5 2.2 Rear Panel......................5 2.3 Getting Started....................6 2.4 Typical Room Calibration..................7 3.Home Screen View..................11 4.Settings Menu....................13 4.1 House Curve Tool....................14 4.2 Tilt Curve Tool.................... -
Page 4: Introduction
Perfection in sound can only be achieved through the mastery in the art of room acoustics! We have worked hard to ensure that the Anti-Mode 2.0 Dual Core is not only powerful and versatile but also intuitive and easy to use. However, it is a good idea to read this manual in whole before operating the unit. -
Page 5: Overview
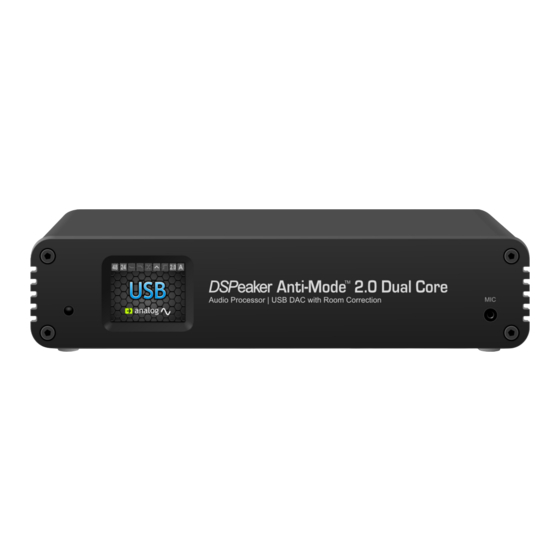
(6) USB connector (7) S/PDIF Toslink input (8) S/PDIF Toslink output (9) DSPeaker datalink connector *) see the warning below. IMPORTANT: Never connect both RCA and XLR inputs (1) and (3) at the same time! The analog INPUT connector types are meant to be exclusive alternatives to each other. -
Page 6: Getting Started
WNER ANUAL 2.3 Getting Started Anti-Mode 2.0 Dual Core can be utilized in many different kinds of configurations. Before powering the device, please connect all the inputs and at least one of the outputs that are relevant to your system. -
Page 7: Typical Room Calibration
2.0 D WNER ANUAL MAIN MENU 2.0 CALIBRATION Multi-point Advanced Typical Calibration 2.4 Typical Room Calibration Typical calibration is the default process, where the listening room is analyzed and corrected automatically. The optimal frequency limit of the correction is automatically detected based on the room response. - Page 8 2.0 D WNER ANUAL Do not hold the microphone or the microphone cable in your hand during the measurement! Rather find a secure position where the microphone stays intact throughout the whole calibration process. ➢ Make sure either analog or digital output is connected to powered speakers or subwoofers.
- Page 9 2.0 D WNER ANUAL ➢ Depending on configuration, the calibration procedure may start with a speaker distance detection. If the distance detection is successful, room acoustic analysis begins immediately after it. ➢ During the acoustical analysis phase, Anti-Mode generates several frequency sweeps.
-
Page 10: Home Screen View
2.0 D WNER ANUAL PLEASE NOTE: After Anti-Mode gets rid of the room resonances, the results may appear good but lacking some bass. One possible reason is that the listener has grown used to the exaggerated bass response previously caused by room resonances. If you feel the need to increase the overall bass level, you can do this using the house curve tool or designing a custom EQ to lift the low-frequency band. - Page 11 2.0 D WNER ANUAL (9) The Currently active sound profile (designations “A” to “D”). Press the corres- ponding button on the remote to select a new active sound profile. See the ”Using Sound Profiles” section for further information. ➢ The active input can be switched by pressing the INPUT button on the remote. Note : You can also select next or previous input using arrow buttons, if you assign the INPUT function to the buttons from the Homescreen menu.
-
Page 12: Settings Menu
System Info: Display firmware version and CPU usage information. PC link: export the measurements to a computer via USB or perform system update. System update requires separate software which is currently www.dspeaker.com available for Windows only. Visit for more information. -
Page 13: House Curve Tool
2.0 D WNER ANUAL PLEASE NOTE: Any changes made in the various EQ editors are generally not updated in real-time. In order to hear the difference in the sound output, accept the changes and close the corresponding editor by pressing OK on the remote controller. House Curve Tool The House curve tool provides a method of changing the target curve of the bass response. -
Page 14: Tilt Curve Tool
2.0 D WNER ANUAL EXAMPLE: Boosting the lower bass under 50Hz by about 3 dB How to do it step-by-step: ➢ Open main menu by pressing the MENU button on the remote controller. ➢ Navigate to the Settings menu using the arrow buttons and press OK to select it. -
Page 15: Infrasonic Filter
2.0 D WNER ANUAL EXAMPLE: Adding a -3dB treble tilt-down above 5 kHz Background: Some recordings seem too bright or 'toppy' in their tonal balance. To compensate this the high frequencies can be toned down using a subtle high frequency attenuation filter. How to do it step-by-step: ➢... -
Page 16: High/Lowpass Filters
ANUAL High/Lowpass filters The Anti-Mode 2.0 Dual Core features fully customizable highpass and lowpass filters. These filters can be used to control the pass-band of the speaker or subwoofer. For example, with a custom lowpass, it is easy to implement a more precise digital cross- over filter for a subwoofer. - Page 17 2.0 D WNER ANUAL inactive filter to create a new custom filter, or select an existing filter to change its parameters, then press the OK button to accept the selection. Note that there are more slots than the 6 visible ones, just scroll down with the DOWN button. Active filters are represented with green boxes in the filter list, inactive filters are grayed out.
- Page 18 2.0 D WNER ANUAL EXAMPLE: Adding a psycho-acoustic 3 kHz dip Background: The idea behind making a 3 kHz dip originates from the human auditory system and diffuse field characteristics. The human hearing is less sensitive to diffuse fields in the neighborhood of 3 kHz. Because of a flat microphone response, compared to the original listening situation for example in a concert hall, many recordings have too much energy around 3 kHz.
-
Page 19: Homescreen And Quicktone
2.0 D WNER ANUAL Homescreen and QuickTone The Homescreen menu configures the operation of the arrow and OK buttons when the Home screen is visible. The QuickTone controls are the quickest and easiest way to control bass and treble. The default assignment for the UP/DOWN buttons is bass, and treble for the LEFT/RIGHT buttons. -
Page 20: Audio Settings
2.0 D WNER ANUAL When you use the QuickTone controls at the home screen, the applied curve is briefly shown on the screen as a simplified shape of the frequency response. You can adjust the level of the applied curve between flat (no curve) and very strong curve using 1dB steps. -
Page 21: Input Settings
2.0 D WNER ANUAL Input Settings Input settings can be configured from this menu. USB VOLUME CTRL VOLUME TRIM INPUT SETTINGS ANALOG S/PDIF USB Volume By Computer Volume Trim 00.0 dB By Remote In-Sens: Low Close USB Volume controller defines how the volume is controlled during USB audio mode. By Remote keeps the volume control in the hands of the user. -
Page 22: Factory Reset
By selecting “PC Link” , you can export the measurements of the currently selected profile to a PC or Macintosh computer via USB. Anti-Mode 2.0 Dual Core will appear as a removable disk and you can copy the measurements as text files that can be imported to popular PC / MAC measurement programs. -
Page 23: Using Sound Profiles
ANUAL 5.Using Sound Profiles The Anti-Mode 2.0 Dual Core supports up to four independent sound profiles. A sound profile includes everything that affects the sound: the room correction filters and all possible custom filters – highpass/lowpass filters, house curve, tilt curve, and PEQs. -
Page 24: Advanced Calibration
2.0 D WNER ANUAL 6.Advanced Calibration Advanced calibration gives the user more control over the calibration parameters. The procedure is similar to the typical calibration, but with some additional steps. Refer to ”Typical Calibration” section of this manual for an overview of the basic process. To perform the advanced calibration, choose the Advanced Calibration option at the Calibration menu. -
Page 25: Multi-Point (Wide Area) Calibration
“too early” compared to the other, whereas manual adjustment of the delays allows delaying both channels. This is of course unnecessary for any systems where all of the audio is going through Anti-Mode 2.0 Dual Core. ➢ Press the OK button to proceed to the next dialog. -
Page 26: Room Response Menu (Measurements)
2.0 D WNER ANUAL ➢ To perform a multi-point calibration, the first step is to calibrate the device normally, following either the Typical or Advanced procedure. ➢ After the first calibration, you can add more points by choosing the “Multi-point” option at the Calibration dialog. - Page 27 2.0 D WNER ANUAL To make a custom measurement, navigate to the Room Response (Measurements) in the Main menu. ➢ Highlight “Make New” and press the OK button. ➢ In the next menu, you can define the range of the measurement: bass (16Hz – 200Hz), bass-midrange (16-500Hz) or full-range (20Hz - 20000Hz).
-
Page 28: Audio Connections
Consider the following guidelines when connecting Anti-Mode 2.0 Dual Core. ➢ Anti-Mode 2.0 Dual Core as a 2-channel pre-amplifier and DAC Connect your audio sources to the Anti-Mode 2.0 Dual Core's inputs. You can connect up to three sources using USB, Toslink (S/PDIF) and one of the analog inputs. -
Page 29: Troubleshooting
In other words, if you want to store settings such as default volume level, input volume trim etc., simply press the red stand-by button on the remote controller. After that, the Anti-Mode 2.0 Dual Core will remember the stored settings even after power down. - Page 30 Note: when using the USB input, the PC decodes any compressed format before passing the audio in PCM format to the Anti-Mode 2.0 Dual Core. ✗ Not enough bass after calibration: a rather common first impression after listening to years of resonance-infested bass. You slowly get used to the missing resonances, but if the bass level is still too low, use the following methods.
- Page 31 Dual Core. ✗ The Anti-Mode 2.0 Dual Core does not show up in USB The unit will only act as a USB device when the USB audio input is selected, or when you have selected the PC Link option from the Settings menu.
-
Page 32: Technical Specifications
• House Curve, Linear-Phase Tilt, Parametric EQs, Adjustable Infrasonic Filter • Toslink S/PDIF input: 24-bit 32 / 44.1 / 48 kHz and 88.2 / 96 kHz compatible • USB input: 24-bit 44.1 / 48 kHz 12.Contact Website: http://www.dspeaker.com/ Technical Support: support@dspeaker.com Sales Support: info@dspeaker.com Rev.
Need help?
Do you have a question about the ANTI-MODE 2.0 DUAL CORE and is the answer not in the manual?
Questions and answers