Table of Contents
Advertisement
Advertisement
Table of Contents

Related Manuals for AirLive N450R


Summary of Contents for AirLive N450R
- Page 1 N450R 3T3R Wireless-N Dual Band Gigabit Router User’s Manual...
- Page 2 OvisLink Corp. has made the best effort to ensure the accuracy of the information in this user’s guide. However, we are not liable for the inaccuracies or errors in this guide. Please use with caution. All information is subject to change without notice All Trademarks are properties of their respective holders. AirLive N450R User’s Manual...
-
Page 3: Fcc Statement
IMPORTANT NOTE FCC Radiation Exposure Statement: This equipment complies with FCC radiation exposure limits set forth for an uncontrolled environment. This equipment should be installed and operated with minimum distance 20cm between the radiator & your body. AirLive N450R User’s Manual... -
Page 4: Table Of Contents
3.2.2 DHCP Server .....................42 3.2.3 Wireless 2.4G Settings ................44 3.2.4 Wireless 5G Settings .................52 3.2.5 Change Password ..................59 3.3 Forwarding Rules................59 3.3.1 Virtual Server .....................60 3.3.2 Special AP ....................61 3.3.3 IP CAM ......................62 3.3.4 Miscellaneous ....................62 AirLive N450R User’s Manual... - Page 5 3.7 Tool Box .....................97 3.7.1 System Info....................98 3.7.2 USSD......................99 3.7.3 Firmware Upgrade ..................99 3.7.4 Backup Setting ..................100 3.7.5 Reset to Default ..................100 3.7.6 Reboot .....................101 3.7.7 Miscellaneous – Wake on LAN & Ping ............101 Appendix A: Troubleshooting..............102 AirLive N450R User’s Manual...
-
Page 6: Introduction
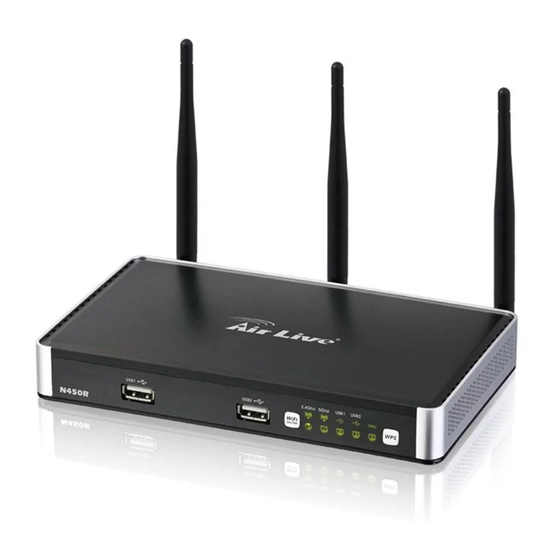
Introduction Introduction Thank you for purchase of this AirLive product. AirLive N450R is a 802.11n concurrent dual band broadband router with USB slots for USB storage and 3G USB modem support. It features Gigabit LAN and WAN ports that can work with 10/100Mbps devices also. -
Page 7: Firmware Upgrade And Tech Support
The tech support FAQ are frequently updated with latest information. In addition, you might find new firmwares that either increase software functions or provide bug fixes for N450R. You can reach our on-line support center at the following link: http://www.airlive.com/support/support_2.jsp Since 2009, AirLive has added the “Newsletter Instant Support System”... -
Page 8: Package List
Supports Smartphone tethering to share 3G bandwidth Supports UPnP Media server, iTunes Server AirLive IPCAM Plug-and-Play IPv6, SNMP, Static Route, RIP UPnP, Virtual Sever, ALG, DMZ and SPI Firewall etc Supports IPSec, L2TP and PPTP VPN Pass-Through AirLive N450R User’s Manual... -
Page 9: Specification Table
FAT16/FAT32, EXT2, NTFS ( Read only) Samba server, FTP server Media server UPnP AV media server, iTunes server Scheduling Download FTP, HTTP , BitTorrent management Management SNMP, UPnP IGD, syslog, DDNS Administration Web-based UI, remote login, backup/restore setting AirLive N450R User’s Manual... -
Page 10: Hardware Installation
Environment & Certification Package Information Package dimension (mm) Package weight (g) Operation Temp. Temp.: 0~40oC, Humidity 10%~90% non-condensing Temp.: -10~70oC, Humidity: 0~95% non-condensing EMI Certification CE/FCC compliance RoHS RoHS compliance 1.5 Hardware Installation 1.5.1 Front View AirLive N450R User’s Manual... -
Page 11: Rear View
Ethernet LAN 1~4 Data packet transferred via Ethernet Green and Blinking Data packet transferred via 2.4G Green and Blinking WiFi Green and Fast 2.4GHz In WPS PBC mode Blinking 2.4GHz wireless radio is disabled AirLive N450R User’s Manual 10 10... -
Page 12: Button Definition
WiFi on/off Continually press 8 seconds to switch on/off for 5G wireless radio Continually press 6 seconds to reset device settings to factory Reset default Power Push down the button to turn on the power AirLive N450R User’s Manual... -
Page 13: How To Operate
2: Plug the RJ45 cable into LAN port 1~4 and connect with your PC or NB. Step 3: Plug your RJ-45 into the WAN port and connect with your xDSL modem. Step 4: Plug the power jack into it. AirLive N450R User’s Manual... -
Page 14: Wireless Operation Modes
1.6.2 AP Only When operating in the Access Point mode, the N450R becomes the center hub of the wireless network. All wireless cards and clients connect and communicate through N450R. This type of network is known as “Infrastructure Network”. Other N450R can connect to AP mode through “Adapter Mode”. -
Page 15: Wds Only
1.6.5 Adapter Mode This mode is also known as “Client” mode. N450r acts as if it is a wireless adapter to connect with a remote Access Point. Users can attach a computer or a router to the LAN port of N450R to get network access. -
Page 16: Getting Start
2.1 Easy Setup by Windows Utility Step 1 Install the Easy Setup Utility from the provided CD. Click the “Install Driver & Utility” and then follow the steps to configure the device. Step 2 Select Language then click “Next” to continue. AirLive N450R User’s Manual... - Page 17 Getting Start Step 3 Then, click the “Wizard” to continue. Step 4 Click “Next” to continue. AirLive N450R User’s Manual...
- Page 18 Getting Start Step 5 Type-in password and then click “Next”. Default password is airlive. Step 6 Configure the wireless interface and then click “Next”. AirLive N450R User’s Manual...
- Page 19 Getting Start Step 7 Configure 2.4GHz wireless interface SSID, Channel and Security, and then click “Next”. Step 8 Configure 5GHz wireless interface SSID, Channel and Security, and then click “Next” AirLive N450R User’s Manual...
- Page 20 Getting Start Step 9 Click Next. Step 10 Click “Next” to detect the WAN automatically. AirLive N450R User’s Manual...
- Page 21 Getting Start Step 11 Click “Next”. Step 12 Click “Next”. AirLive N450R User’s Manual...
- Page 22 Getting Start Step 13 Click “Next”. Step 14 Click “Next” to test the internet connection. AirLive N450R User’s Manual...
- Page 23 Getting Start Step 15 You have completed the configuration. Click “Finish” and you can surf on the internet now. AirLive N450R User’s Manual...
-
Page 24: Easy Setup By Configuring Web Ui
Type in the IP Address (http://192.168.1.254) Type the default password ‘airlive’ in the System Password and then click ‘login’ button. Select “Wizard” and then “Enter” for basic settings in simple way. Press “Next” to start the Setup Wizard. AirLive N450R User’s Manual... -
Page 25: Configure With Setup Wizard
You can change the admin password here, clicks “Next” to continue. Step 2: Setup Time Zone Select Time Zone, clicks “N ext” to continue. tep 3: Select WAN Type Choose “Auto Detecting” o r “Manually” Setup WAN Type AirLive N450R User’s Manual... - Page 26 Wireless WAN and the WAN type as “3G”, and then click Next to continue. Step 5: For 3G Mode Select Auto-Detection , and then click Next to continue. Step6: Wireless Settings Set up your Wireless Netwo rk, select which wireless band you want to configure. (e.g. Wireless 2.4G) AirLive N450R User’s Manual...
- Page 27 Setup your SSID and Wireless C hannel. Step 8 Setup W ireless Authentication and Encryption, then click Next to continue. Step 9 Apply yo ur Setting. Clicks Apply Settin g if finished, or click Back to previous settings. AirLive N450R User’s Manual...
- Page 28 Getting Start tep 10 Check th e information again, click “Apply Setting” to finish all settings or “Back” to the previous settings. Step 11 Click “Fin ish” to complete it. AirLive N450R User’s Manual...
-
Page 29: Configuration
Enter the default password “airlive” in the System Password and then click ‘login’ button. Then, you can browse the “Advanced” configuration pages for configuring this device. 3.2 Basic Setting There are four options: Network Setup, DHCP Server, Wireless and Change Password. AirLive N450R User’s Manual... -
Page 30: Network Setup
“Load Sharing” to use Ethernet WAN and 3G WAN simultaneously. The combo WAN status will be showed here. Press “Settings” button to configure this feature. 2. WAN Interface Select Ethernet WAN or Wireless WAN to continue. Ethernet WAN AirLive N450R User’s Manual... - Page 31 ISP, such as 3G (WCDMA, HSxPA, HSPA+, CDMA2000, EV-DO, TD-SCDMA), iBurst, or Wi-Fi Hotspot. iBurst, or Wi-Fi Hotspot. *For 3G/Smarphone Tethering compatibility list, please visit the N450R product page on *For 3G/Smarphone Tethering compatibility list, please visit the N450R product page on www.airlive.com www.airlive.com.
- Page 32 You can disable NAT feature if required. 7. IGMP Proxy Enable this feature allows multicast stream (e.g. IPTV stream) to pass-through this device. NOTE: The items with * above are only available when choosing Manual for Dial-up Profile. AirLive N450R User’s Manual...
- Page 33 Manually The device won’t try to connect to Internet until users press “connect” button at Status page. Once Internet connection is established, this device will drop the connection if maximum idle time is reached. AirLive N450R User’s Manual...
- Page 34 Input the IP address of WAN gateway you got from ISP. 5. Primary DNS Input the IP address of primary DNS you got from ISP. 6. Secondary DNS Input the IP address of secondary DNS you got from ISP. AirLive N450R User’s Manual...
- Page 35 Manually The device won’t try to connect to Internet until users press “connect” button at Status page. Once Internet connection is established, this device will drop the connection if maximum idle time is reached. AirLive N450R User’s Manual...
- Page 36 You can indicate IP address of secondary DNS if required. 6. Maximum Idle Time The amount of time of inactivity before disconnecting your PPPoE session. Set it to zero or enable “Auto-reconnect” to disable this feature. AirLive N450R User’s Manual...
- Page 37 The IP address, subnet mask, and IP address of gateway your ISP assigned to you. 4. Server IP Address/Name The IP address of the PPTP server. 5. PPTP Account and Password The account and password your ISP assigned to you. AirLive N450R User’s Manual...
- Page 38 Most ISP offers MTU value to users. The default MTU value is 0 (auto). 11. IGMP Proxy Enable this feature allows multicast stream (e.g. IPTV stream) to pass-through this device. NOTE: The items with * above are only available when choosing Static IP Address in IP mode. AirLive N450R User’s Manual...
- Page 39 Manually The device won’t try to connect to Internet until users press “connect” button at Status page. Once Internet connection is established, this device will drop the connection if maximum idle time is reached. AirLive N450R User’s Manual...
- Page 40 Internet Setup page. Press “Settings” button to configure this feature. At Combo WAN setting page, you can choose Disable, Load Sharing, or Failover options. This Combo WAN feature will be deactivated if you select “Disable” from the list. AirLive N450R User’s Manual...
- Page 41 Press “New Add” button to add the secondary WAN. If the primary WAN is 3G or iBurst, then you can choose one of Static IP, Dynamic IP, and PPPoE as the secondary WAN. However, 3G can be the secondary WAN if primary WAN is Static IP, Dynamic IP, or PPPoE. AirLive N450R User’s Manual...
- Page 42 Press “New Add” button to add the secondary WAN. If the primary WAN is 3G or iBurst, then you can choose one of Static IP, Dynamic IP, and PPPoE as the secondary WAN. However, 3G can be the secondary WAN if primary WAN is Static IP, Dynamic IP, or PPPoE. AirLive N450R User’s Manual...
-
Page 43: Dhcp Server
Optional. This feature allows you to assign a WINS Servers Gateway Optional. Gateway Address would be the IP address of an alternate Gateway. This function enables you to assign another gateway to your PC, when DHCP server offers an IP to your PC. AirLive N450R User’s Manual... - Page 44 Click on “Save” to store your settings or click “Undo” to give up the changes. Press “Clients List” and the list of DHCP clients will be shown consequently. Press “Fixed Mapping” and the DHCP Server will reserve the special IP for designated MAC Address. AirLive N450R User’s Manual...
-
Page 45: Wireless 2.4G Settings
Wireless settings allow you to set the wireless configuration items. 1. Wireless Module You can enable or disable wireless function. 2. Wireless Operation Mode You can select the wireless operation mode such as AP Router, AP Only, and WDS Hybrid and WDS Only..etc. AirLive N450R User’s Manual... - Page 46 Check Box was used to switch the function of the WPA. When the WPA function is enabled, the Wireless user must authenticate to this router first to use the Network service. RADIUS Server IP address or the 802.1X server’s domain-name. Select AirLive N450R User’s Manual...
- Page 47 Select the appropriate category. Once you set up that type of encryption, second LAN PC must enter the same encryption type as the first one. By pressing “WPS Setup”, you can configure and enable the easy setup feature WPS (Wi-Fi Protection Setup) for your wireless network. AirLive N450R User’s Manual...
- Page 48 6. WPS status According to your setting, the status will show “Start Process” or “No Used”. By pressing “WDS Hybrid Mode” and “WDS Only Mode”, you can connect this device to another AP via WDS connection. AirLive N450R User’s Manual...
- Page 49 “Disable”, the wireless clients cannot find the device from beacons. 6. Wireless Mode Choose “B/G mixed”, “B only”, “G only”, “N only”, “G/N mixed” or “B/G/N mixed”. The factory default setting is “B/G/N mixed”. AirLive N450R User’s Manual...
- Page 50 Another encryption options for WPA-TKIP and WPA2-AES, the others are same the WPA. 8. Encryption Select the appropriate category. Once you set up that type of encryption, second LAN PC must enter the same encryption type as the first one. AirLive N450R User’s Manual...
- Page 51 This is followed by an authentication response from the AP/router containing a success or failure message. An example of when a failure may occur is if the client's MAC address is explicitly excluded in the AP/router configuration. AirLive N450R User’s Manual...
- Page 52 PC must enter the same encryption type as the first one. 7. Remote AP MAC 1~4 Enter the MAC address for remote AP that you want to connect via WDS. Press “Wireless Clients List” and the list of wireless clients will be shown consequently. AirLive N450R User’s Manual...
-
Page 53: Wireless 5G Settings
Choose “A/N mixed”, “A only”, “N only”. The factory default setting is “A/N mixed”. 8. Authentication You may select one of authentication to secure your wireless network: Open Shared, Auto, WPA-PSK, WPA, WPA2-PSK, WPA2, WPA-PSK/WPA2-PSK, or WPA /WPA2. AirLive N450R User’s Manual... - Page 54 9. 802.1X You can enable or disable 802.1X function. 10. Encryption type Select the appropriate category. Once you set up that type of encryption, second LAN PC must enter the same encryption type as the first one. AirLive N450R User’s Manual...
- Page 55 It shows the status of your configuration. 5. Config Method You can select the Config Method here from “Pin Code” or “Push Button”. 6. WPS status According to your setting, the status will show “Start Process” or “No used”. AirLive N450R User’s Manual...
- Page 56 The router will broadcast beacons that have some information, including SSID so that wireless clients can know how many AP devices by scanning the network. Therefore, if this setting is configured as “Disable”, the wireless clients cannot find the device from beacons. AirLive N450R User’s Manual...
- Page 57 WPA-PSK2 user AES and TKIP for Same the encryption, the others are same the WPA-PSK. (G) WPA2 WPA2 add uses AES and TKIP for encryption, the others are same the WPA. (H) WPA-PSK/WPA-PSK2 Another encryption options for WPA-PSK-TKIP and WPA-PSK2-AES, the others are same the WPA-PSK. AirLive N450R User’s Manual...
- Page 58 Choose “B/G mixed”, “B only”, “G only”, “N only”, “G/N mixed” or “B/G/N mixed”. The factory default setting is “B/G/N mixed”. 5. Authentication You may select one of authentication to secure your wireless network: Open, Shared, Auto, WPA-PSK, WPA, WPA2-PSK, WPA2, WPA-PSK/WPA2-PSK, or WPA /WPA2. AirLive N450R User’s Manual...
- Page 59 Select the appropriate category. Once you set up that type of encryption, second LAN PC must enter the same encryption type as the first one. 7. Remote AP MAC 1~4 Enter the MAC address for remote AP that you want to connect via WDS. AirLive N450R User’s Manual...
-
Page 60: Change Password
We strongly recommend you to change the system password for security reason. Click on “Save” to store your settings or click “Undo” to give up the changes. 3.3 Forwarding Rules There are three options: Virtual Server, Special Application and Miscellaneous. AirLive N450R User’s Manual... -
Page 61: Virtual Server
A virtual server is defined as a Service Port, and all requests to this port will be redirected to the computer specified by the Server IP. Virtual Server can work with Scheduling ules, and give use r more flexibility on Access control. For the details, please refer to Scheduling Rule AirLive N450R User’s Manual... -
Page 62: Special Ap
Check the checkbox to activate each of rule. This device provides some predefined settings. Select your application and click “Copy to” to add the predefined setting to your list. Click on “Save” to store your settings or click “Undo” to give up the changes. AirLive N450R User’s Manual... -
Page 63: Ip Cam
Windows XP, you can see the following icon when the client computer gets IP from the device. lick on “Save” to store your settings or click “Undo” to give up the changes. AirLive N450R User’s Manual... -
Page 64: Security Setting
3.4 Security Setting The security setting includes Packet Filter, Domain Filter, URL Blocking , MAC Address Control , L2TP/PPTP Client, and Miscellaneous. 3.4.1 Status ou can see the security log on the status page as following, AirLive N450R User’s Manual... -
Page 65: Packet Filters
Access control. For Detail, please refer to Scheduling Rule. Each rule can be enabled o r disabled individually. Click on “Save” to store your settings or click “Undo” to give up the changes. AirLive N450R User’s Manual... -
Page 66: Domain Fitters
Check “Drop ” to block the access. Check “Log” to log this access. Enable Check to enable each rule. lick on “Save” to store your settings or click “Undo” to give up the changes. AirLive N450R User’s Manual... -
Page 67: Url Blocking
"sex". Enable Check to enable each rule. Use Rule# You can set a schedule rule for each of rule. Click on “Save” to store your settings or click “Undo” to give up the changes. AirLive N450R User’s Manual... -
Page 68: Mac Control
"deny" to allow or deny the clients, whose MAC addresses are not in the "Control table", to associate to the wireless LAN. Click on “Save” to store your settings or click “Undo” to give up the changes. AirLive N450R User’s Manual... -
Page 69: Miscellaneous
The PPTP passthrough is enabled by default. You can disable here. Disable L2TP passthrough The L2TP passthrough is enabled by default. You can disable here. Disable IPSec passthrough The IPSec passthrough is enabled by default. You can disable here. AirLive N450R User’s Manual... -
Page 70: Advanced Setting
Click on “Save” to store your settings or click “Undo” to give up the changes. 3.5 Advanced Setting The Advanced Setting includes System Log, Dynamic DNS, QoS, SNMP, Routing, System Time, Schedule Rule, IPv6, and VLAN settings. AirLive N450R User’s Manual... -
Page 71: Status
IP Address for Sys log Host IP of destination where sys log will be sent to. Check Enable to enable this function. Setting of E-mail Alert Check if you want to enable Email alert (send syslog via email). AirLive N450R User’s Manual... -
Page 72: Dynamic Dns
Dynamic DNS will map the name of your host to your current IP address, which changes each time you connect your Internet service provider. Before you enable Dynamic DNS, you need to register an account on one of these Dynamic DNS servers that we list in Provider field. AirLive N450R User’s Manual... -
Page 73: Qos
Click on “Save” to store your settings or click “Undo” to give up the changes. 3.5.3 QoS Quality of Service is the ability to provide different priority to different applications, users, or data flows, or to guarantee a certain level of performance to a data flow. (A) Smart QoS AirLive N450R User’s Manual... - Page 74 IPTV, then he will get the same priority with his son, and share the bandwidth. Disable Flexible Bandwidth Management If you disable this management, system will allow you to input percentage of bandwidth manually. (B) User defined QoS Rule AirLive N450R User’s Manual...
- Page 75 Class: You can create your own QoS rule by different classes as below. Class: You can create your own QoS rule by different classes as below. Class Description IP address base TCP port UDPPORT UDP port MAC base DSCP DSCP base AirLive N450R User’s Manual Manual...
- Page 76 BOTH inbond & outbond DSCP setting: You can set your own DSCP value here. DiffServ Code Point: you can select code value. Service Type: You can select their service type. Function: PRI Function data- Priority: 1~6 AirLive N450R User’s Manual...
- Page 77 NOTE: You can move up or down the priority of all rules by pointing the ‘↑’or ’↓’ if you want to change the priority. NOTE: You can unmark any rule if you do not want it enable now. Provide different priority to different users or data flows, or guarantee a certain level of performance. AirLive N450R User’s Manual...
-
Page 78: Snmp
3.5.4 SNMP In brief, SNMP, the Simple Network Management Protocol, is a protocol designed to give a user the capability to remotely manage a computer network by polling and setting terminal values and monitoring network events. AirLive N450R User’s Manual... -
Page 79: Routing
If you have more than one routers and subnets, you will need to enable routing table to allow packets to find proper routing path and allow different subnets to communicate with each other. The routing table allows you to determine which physical interface address to use for outgoing IP data grams. AirLive N450R User’s Manual... -
Page 80: System Time
Sync with my PC Click on the button if you want to set Date and Time using PC’s Date and Time manually. .Click on “Save” to store your settings or click “Undo” to give up the changes. AirLive N450R User’s Manual... -
Page 81: Scheduling
Rule, Policy, and set the schedule time (Week day, Start Time, and End Time). The following example configures “ftp time” as everyday 14:10 to 16:20. Click on “Save” to store your settings or click “Undo” to give up the changes. AirLive N450R User’s Manual... -
Page 82: Ipv6
Configuration 3.5.8 IPv6 This device supports several IPv6 applications. You can choose Static IPv6, DHCPv6, PPPoEv6, 6to4, and IPv6 in IPv4 tunnel according to your requirements. (A) Static IPv6 AirLive N450R User’s Manual... - Page 83 You may obtain IPv6 DNS automatically or set DNS address manually for Primary DNS address and secondary DNS address. LAN IPv6 address settings You can add LAN IPv6 address, and IPv6 Link-Local address will be showed automatically. AirLive N450R User’s Manual...
- Page 84 LAN IPv6 address, and IPv6 Link-Local address will be showed automatically. Address auto configuration setting Disable or enable this auto configuration setting. You may set stateless or stateful ( Dynamic IP v6), and also check if need to send Router advertisement messages periodic ally. AirLive N450R User’s Manual...
- Page 85 LAN IPv6 address, and IPv6 Link-Local address will be showed automatically. Address auto configuration setting Disable or enable this auto configuration setting. You may set stateless or stateful (Dynamic IPv 6), and also check if need to send Router advertisement messages periodically. AirLive N450R User’s Manual...
- Page 86 LAN IPv6 address, and IPv6 Link-Local address will be showed automatically. Address auto configuration setting Disable or enable this auto configuration setting. You may set stateless or stateful (Dynamic IPv 6), and also check if need to send Router advertisement messages periodically. AirLive N450R User’s Manual...
-
Page 87: Vlan
LAN ports belong to one VLAN by default. If you want to divide them into different VLAN, you just need to assign different “VID” for them. If ISP requests a “VLAN Tag” with your outgoing data, please remember to check the checkbox of “Tx TAG”. AirLive N450R User’s Manual... -
Page 88: Advanced Wireless Settings
The NAT function is deactivated, and WAN traffic will be transferred to local LAN port which has sam e VID. 3.5.10 A dvanced Wireless Settings Regulatory Domian The legal frequency and channels varies between countries. Please select one which is allowed in your country. AirLive N450R User’s Manual... - Page 89 N450R. The higher the output power, the larger cov erage N450R can deliver. However, it is advised that you use just enough output power so it will not create excessive interference for the environment. Also, using too much power at close distance can create serious performance dro due to signal distortion.
-
Page 90: Nas
This action will clear all your data in this partition. You will not be able to recover it any more. 2. Check This utility could help you check the partition, find the lost files, try to fix some problems. AirLive N450R User’s Manual... -
Page 91: Samba Server
We have the ability to rece ive the request on non-standard FTP port, but please be noted, some NAT router could not support non-standard FTP port, that means some of your clients might have to use passive mode to get file. AirLive N450R User’s Manual... -
Page 92: Access Control
If you want to delete an account, select it and click “Delete” button. 3.6.5 iTunes Server This function could enable the built-in iTunes Server to support iTunes which is a media player released by Apple. AirLive N450R User’s Manual... -
Page 93: Download Assistant
With Download Assistant, you don’t need to turn the computer all day on to wait for download to be finished. This device will help you download files from remote FTP server or HTTP server automatically. You can also choose BT for P2P file download. AirLive N450R User’s Manual Manual... - Page 94 FTP download on the time that you specified. The schedule job that is saved could be check on Status page by selecting “View Scheduled Download Status”. Once: the FTP download would be started immediately. AirLive N450R User’s Manual...
- Page 95 Schedule: this device will start FTP download on the time that you specified. The schedule job that is saved could be check on Status page by selecting “View Scheduled Download Status”.At Once: the FTP download would be started immediately. AirLive N450R User’s Manual...
- Page 96 Configuration By pressing “E-mail Alert Configuration”, (C) BT (Bit Torrent) You can download file by using BT (Bit Torrent). AirLive N450R User’s Manual...
-
Page 97: Download Status
You could Stop (Pause), Resume, or Remove a job with this sub menu. 3.6.7 Download Status Here shows all jobs for download assistant. AirLive N450R User’s Manual... -
Page 98: Web Hdd
‘guest’ to enter the ‘public’ area only. (A) Miscellaneous This setting is for Media Server service. 3.7 Tool Box There are seven options: System Log, Firmware Upgrade, Backup Setting, and Reset to Default, Reboot and Miscellaneous. AirLive N450R User’s Manual... -
Page 99: System Info
Configuration 3.7.1 System Info You can view the Sy stem Information and System log, and download/clea r the System log. Press “Setting” button. AirLive N450R User’s Manual... -
Page 100: Ussd
SMS, and this device can’t deal with any SMS message. If you don’t get any response after sending the command, please call your ISP/carrier to confirm you request has been accepted. 3.7.3 Firmware Upgrade You can upgrade firmware by clicking “Upgrade” button. AirLive N450R User’s Manual... -
Page 101: Backup Setting
3.7.5 Reset to Default You can also reset this device to factory default settings by clicking the Reset to default function item. Press “OK” to reset to factory default settings. AirLive N450R User’s Manual... -
Page 102: Reboot
Allow you to configure an IP, and ping the device. You can ping a specific IP to test whether it is alive. Click on “Save” to store your settings or click “Undo” to give up the changes. AirLive N450R User’s Manual... -
Page 103: Appendix A: Troubleshooting
8. Select the Hardware Tab. 9. Click Device Manager. 10. Double-click on “Network Adapters”. 11. Right-click on Wireless Card bus Adapter or your specific network adapter. 12. Select Properties to ensure that all drivers are installed properly. AirLive N450R User’s Manual... - Page 104 (C) Try changing the channel on the WiFi Combo Router, and your Access Point and Wireless adapter to a different channel to avoid interference. Keep your product away from electrical devices that generate RF noise, like microwaves, monitors, electric motors, etc. AirLive N450R User’s Manual...
- Page 105 It depends on what service your ISP provide. Please check your ISP to know this information. 11. Why my 3G connection is keep dropping? Please check 3G signal strength from your ISP in your environment is above middle level. AirLive N450R User’s Manual...
- Page 106 Appendix A: Troubleshooting Q: How to configure the iTunes Server? Step1 Please check the USB HDD has installed to N450R properly. Step2 Click iTunes Server, then enable iTunes Sever, type-in Service Name, Service Port and Access password. Click “Save” to apply settings.
- Page 107 Appendix A: Troubleshooting Step4: Start iTunes player on your PC. Step5: There will appear a shared folder: AirLive, which you create Step6: Please type the login password. AirLive N450R User’s Manual...
- Page 108 Appendix A: Troubleshooting Step7: The music files will appear, click on the song to start to play. AirLive N450R User’s Manual...
Need help?
Do you have a question about the N450R and is the answer not in the manual?
Questions and answers