Table of Contents
Advertisement
Advertisement
Table of Contents

Summary of Contents for Cannon Security Products Wall Safe
- Page 1 TV Mount Wall Safe OWNERS MANUAL Rev (9/13)
-
Page 2: Table Of Contents
Index Safe Information……………………………………………………………...……………Pg. 2 Warning Standard Features Installation/Mounting…………………………………………………...………………...Pg. 3 Set Up………...……………………………………………………...……………………...Pg. 4 Opening the Door with the Key Installing the Batteries Opening the Door with the Keypad Lock Out (Wrong Try Penalty) Changing the Access Codes Locking/Closing the Door Warranty………………………………………………………...…………………………..Pg. 6 Unit Information/Record DO NOT LOCK THIS IN YOUR SAFE Important: Taking the time to fill out the information below and stapling a copy of your receipt... -
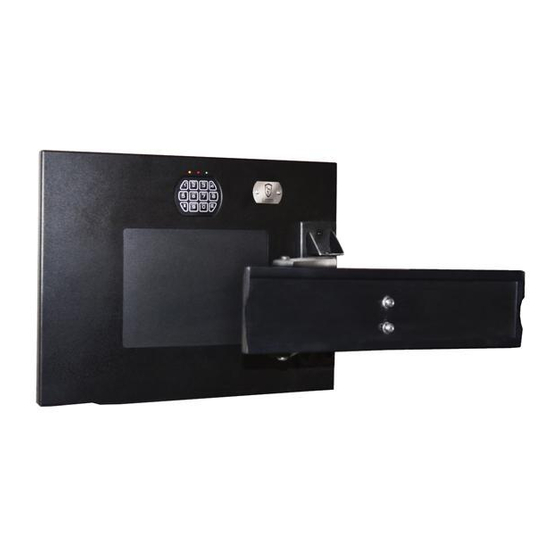
Page 3: Safe Information
Safe Information Warning Install safe before using. After installing, change the default factory codes. Don’t put emergency key(s) or manual in the safe. Standard Features TV Mount for TV’s holds up to 65 inches and 80lbs. Maximum VESA of 400 x 400. ... - Page 4 Included Hardware...
- Page 5 Mounting the Wall Safe The Wall Safe can be mounted into a standard residential wall with a depth of at least 7.88 inches and a wall area of at least 22.84 inches (horizontal position) X 26.78 inches (vertical position). ...
- Page 6 Installing the TV Mount Arm The TV Wall Safe requires the TV arm to be attached after installation. Locate the TV arm, Shaft (K), and two (2) M8x16 Button Head Socket Screws (J) in preparation of the installation. Insert the end of the TV arm into the mounting bracket on the safe (as pictured below).
- Page 7 Fitting the Brackets to the TV Installation of the TV brackets may require the use of Plastic Sleeves (B) if the back of the TV is not flat or the mounting holes are recessed. Locate the TV brackets, M6 Flat Washers (M), Scews (D, E, F, G, H, or I), and Plastic Sleeves (B).
- Page 8 Mounting the TV to the Wall Safe CAUTION : YOU WILL NEED INSTALLATION ASSISTANCE WITH THESE STEPS. Lift TV onto bracket as shown in Diagram 1, making sure it is secure to the top lip of the bracket. ...
-
Page 9: Opening The Door With The Key
Setting Up the Wall Safe Opening the Door with the Key In an emergency or electronic failure, the safe can be accessed by using a backup key. The key slot is hidden behind the logo name plate on the front of the safe. -
Page 10: Opening The Door With The Keypad
Opening the Door with the Keypad If opening for the first time, the default access codes are ‘1234’ and ‘123456’. Batteries must be installed to work. Enter the current one (1) to eight (8) digit code followed by the (#) button. ... -
Page 11: Warranty
Warranty 1. Cannon Security Products, LLC (the “Company”) warrants to the original consumer (the “Purchaser’) that this product (the “Product”) will be free from defects in workmanship and materials for a period of ninety (90) days from the date of purchase. These warranties are not assignable or transferable to any other person. - Page 12 WWW.CANNONSECURITYPRODUCTS.COM...
Need help?
Do you have a question about the Wall Safe and is the answer not in the manual?
Questions and answers