Table of Contents
Advertisement
Advertisement
Table of Contents

Subscribe to Our Youtube Channel
Related Manuals for Intermec 1011CM01


Summary of Contents for Intermec 1011CM01
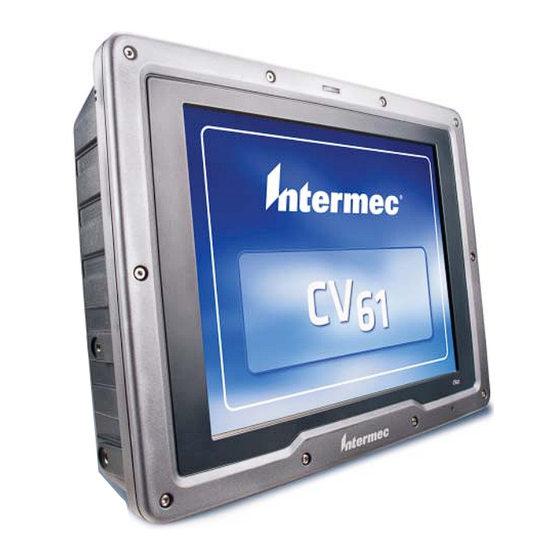
- Page 1 CV 61 Vehicle Mount Computer (Windows 7) Model 1011CM01 User Guide...
- Page 2 Intermec Technologies Corporation. Information and specifications contained in this document are subject to change without prior notice and do not represent a commitment on the part of Intermec Technologies Corporation. © 2012 by Intermec Technologies Corporation. All rights reserved.
-
Page 3: Table Of Contents
Contents Contents Before You Begin..............v Safety Information . - Page 4 About Intermec Terminal Emulator (ITE) ........21...
- Page 5 About the Structure of Intermec Settings ........
- Page 6 Contents Reboot the Computer ........... . 70 Reset the Computer .
- Page 7 Contents 2D Configuration Bar Codes..........100 1D Configuration Bar Codes.
- Page 8 Contents viii CV61 Vehicle Mount Computer (Windows 7) User Guide...
-
Page 9: Before You Begin
Global Services and Support Warranty Information To understand the warranty for your Intermec product, visit the Intermec website at www.intermec.com and click Support > Returns and Repairs > Warranty. -
Page 10: Send Feedback
Before You Begin Visit the Intermec technical knowledge base (Knowledge Central) at www.intermec.com and click Support > Knowledge Central to review technical information or to request technical support for your Intermec product. Send Feedback Your feedback is crucial to the continual improvement of our documentation. -
Page 11: Patent Information
Before You Begin Patent Information Product is covered by one or more of the following patents: 5,218,191; 5,233,172; 5,241,488; 5,243,602; 5,258,606; 5,288,985; 5,308,966; 5,342,210; 5,359,185; 5,389,770; 5,397,885; 5,414,251; 5,416,463; 5,442,167; 5,464,972; 5,468,947; 5,468,950; 5,477,044; 5,486,689; 5,500,516; 5,502,297; 5,504,367; 5,514,858; 5,534,684; 5,536,924;... - Page 12 CV61 Vehicle Mount Computer (Windows 7) User Guide...
-
Page 13: About The Vehicle Mount Computer
About the Vehicle Mount Computer This chapter introduces the CV61 Vehicle Mount Computer with Windows® 7 operating system. Use this chapter to learn about the basic features and available accessories. -
Page 14: About The Cv61 Vehicle Mount Computer
Chapter 1 — About the Vehicle Mount Computer About the CV61 Vehicle Mount Computer The rugged CV61 Vehicle Mount Computer is designed for real-time data collection applications in warehousing, distribution, work-in-process, time and attendance, and stationary applications. The CV61 is highly configurable and runs on the Microsoft Windows 7 or Microsoft Windows XP Professional operating system. - Page 15 Chapter 1 — About the Vehicle Mount Computer • 1 GB of RAM for Windows XP, 2 GB of RAM for Windows 7, both expandable to 3 GB of RAM • Customer-accessible SD slot for memory cards up to 32 GB •...
-
Page 16: Cv61 Accessories
Microphone/line out Connect a microphone to the CV61. jack CV61 Accessories The CV61 does not ship with any accessories. All accessories are sold and ordered separately. For help, contact your local Intermec sales representative. CV61 Accessories Accessory Description AC Power Supply Use this power supply kit to supply AC power to the CV61. - Page 17 Chapter 1 — About the Vehicle Mount Computer CV61 Accessories (Continued) Accessory Description DC/DC (6-60 VDC) Power Supply Use this power supply kit with 6-60 V powered vehicles requiring a 60 V or higher DC interface. This kit also provides power to the defroster. DC/DC (15-96 VDC) Power Use this power supply kit with 15-96 V Supply for Non-Heated Displays...
-
Page 18: Mount The Cv61
• Desktop Mounting Kit For more information on installing the mounting kits, see one of the mounting kit instructions located on the Intermec website at www.intermec.com. Connect the CV61 to Power For the CV61 to operate, you must provide power to the CV61 through a DC/DC or AC/DC power supply. -
Page 19: Understand The Backup Power System
Use the CV61 adapter cable to connect the CV61 to an existing CV60 DC/DC installation. If you are using the CV61 with the Desktop Mounting Kit, use the AC power supply and power cord. For more information on power supply options, contact your local Intermec representative. Understand the Backup Power System... -
Page 20: About The Ready-To-Work Indicator
Chapter 1 — About the Vehicle Mount Computer If the Backup Battery Status displays Fault, you need to replace the backup battery. About the Ready-to-Work Indicator The Ready-to-Work indicator shows the status of the CV61. Ready-to-Work Indicator Location Ready-to-Work indicator CV61 Vehicle Mount Computer (Windows 7) User Guide... -
Page 21: Adjusting The Volume
Chapter 1 — About the Vehicle Mount Computer Use the following table to learn about the indicator default status. For further customization, you can enable or disable the Ready-to-Work indicator in Intermec Settings. For more information, see “Start Intermec Settings” on page... -
Page 22: About The Touch Screen
Chapter 1 — About the Vehicle Mount Computer About the Touch Screen The CV61 has a 12.1” color XGA touch screen display with a resolution of 1024 x 768 pixels. The display may also come with an optional heated touch screen defroster to reduce condensation on the external surface of the display when moving between sub-freezing temperatures and normal temperatures. -
Page 23: Enable The Heated Touch Screen Defroster
Chapter 1 — About the Vehicle Mount Computer 4 To manually adjust the screen brightness, make sure Adaptive Brightness Control is not selected and use the slider to change the screen brightness. To enable the ambient light sensor, select Adaptive Brightness Control and enter a response time in the text box. -
Page 24: Install An External Antenna
Chapter 1 — About the Vehicle Mount Computer 3 Double-tap CV61 Properties. The heater information is shown in the Heater section of the CV61 Properties screen. 4 Select Heater On, Heater Off, or Automatic On/Off. 5 Tap Apply to save your changes. 6 Tap OK to exit the CV61 Properties menu. -
Page 25: Force The Use Of An External Antenna Connection
Chapter 1 — About the Vehicle Mount Computer 2 Secure the antenna to the CV61 antenna plug. 3 Using your own hardware, secure the external antenna to a wall, forklift, or other flat surface. Force the Use of an External Antenna Connection If an external antenna is connected, the CV61 automatically detects the connection and disables the internal antenna and uses the external antenna. -
Page 26: Attach An External Keyboard
6 Tap OK to exit the CV61 Properties menu. Attach an External Keyboard You can use either a PS/2 or USB keyboard with the CV61. Intermec recommends you use the CV61 rugged keyboard to input text. For more information on purchasing an Intermec keyboard, contact your local Intermec representative. -
Page 27: Understand The User Interface And Intermec Applications
Use this chapter to learn about the Windows 7 user interface and how to interact with the screen. You can also use this chapter to learn about the Intermec applications on the CV61, as well as additional Intermec applications you can download. -
Page 28: About The User Interface
Chapter 2 — Understand the User Interface and Intermec Applications About the User Interface The user interface for the Windows 7 operating system is similar to using your desktop PC. The interface is touch-friendly and easy to navigate. Use the following sections to understand how to interact with Windows 7 on the CV61. -
Page 29: Learn The Basic Skills
Chapter 2 — Understand the User Interface and Intermec Applications Learn the Basic Skills Learning to use the computer is easy. This section describes the basic concepts of using and customizing the vehicle mount computer and Windows 7. Use the Touch Screen Use your finger or stylus to move around the CV61 user interface. -
Page 30: About Pop-Up Menus
Chapter 2 — Understand the User Interface and Intermec Applications Windows 7 Taskbar For more information on Windows 7 icons, tap Start > Help, then select a topic on the computer to find additional information on Windows 7 components. About Pop-Up Menus Use pop-up menus to quickly perform an action on an item. -
Page 31: Use Transcriber
Chapter 2 — Understand the User Interface and Intermec Applications Input panel If the input panel is not displayed, tap and hold your stylus or finger on the taskbar until a circle appears, and remove your stylus or finger from the screen. A pop-up menu appears. -
Page 32: About Intermec Applications
You can also download additional applications from the Intermec website to help you use all of the features of your computer. Applications Available on the CV61 Use this table to understand some of the Intermec applications on the CV61. -
Page 33: Applications You Can Download
About Intermec Session Persistence Server (SPS) Intermec Session Persistence Server enables persistence of an ITE session on a computer when a client is momentarily disconnected, which includes Intermec computers that go out of range, go to sleep, or are suspended. About Intermec Terminal Emulator (ITE) -
Page 34: About Smartsystems Foundation
Chapter 2 — Understand the User Interface and Intermec Applications ITE is packed with enhancements that improve productivity, reduce errors, and deliver fast return on investment. It supports multiple emulation protocols in a single client and has new features such as... -
Page 35: Manage The Computer
Manage the Computer Use this chapter to learn how to remotely update, configure, and monitor the CV61. You will also find information on installing and developing software applications as well as how to upgrade the system software. -
Page 36: Manage The Computer In Your Network
When you have multiple computers and peripherals in your network, it is essential to have an easy way to manage updates, configure all of the devices, and remotely troubleshoot problems. Intermec provides a free device management software platform called SmartSystems™... -
Page 37: Develop And Install Applications
Intermec sales representative. Develop and Install Applications Use the Intermec Resource Kits to develop applications to run on the computer. The Resource Kits are a library of C++, .NET, Java, and web components grouped by functionality that you can use to create applications for the computer. -
Page 38: Install Applications Using A Usb Storage Device
To connect a USB storage device to the CV61, you need to purchase a CV61 USB cable. For more information, contact your local Intermec representative. 1 Copy your application file to the USB storage device. -
Page 39: Update The System Software
You can use the SmartSystems console to update the operating system or system software on your computer. The console is part of SmartSystems Foundation and is available from the Intermec website. Before you can update your computer, you need: •... -
Page 40: Updating Individual Computers Using A Usb Storage Device
USB storage device. Before you can update your computer, you need: • the SmartSystems bundles you want to install. These SmartSystems bundles are available from the Intermec website at www.intermec.com. Go to Support > Downloads > OS/Firmware/Drivers list. •... - Page 41 Chapter 3 — Manage the Computer 3 Insert the USB storage device into the CV61. 4 Run the CV61 installer .exe from within the bundle. 5 Follow the onscreen instructions to update your computer. CV61 Vehicle Mount Computer (Windows 7) User Guide...
- Page 42 Chapter 3 — Manage the Computer CV61 Vehicle Mount Computer (Windows 7) User Guide...
-
Page 43: Configure The Computer
Configure the Computer Use this chapter to learn about the available methods for configuring the CV61 and how to use Intermec Settings. You can also use this chapter to learn how to configure network communications and wireless security. -
Page 44: How To Configure The Computer
There are several ways to configure the computer: • Directly on the computer. You can use Intermec Settings directly on the computer to change only the settings on that computer. For more information, see the next section. -
Page 45: Start Intermec Settings
Main Menu appears. About the Structure of Intermec Settings Use the tables below to help find the parameters in Intermec Settings that you want to configure. Each table contains the parameters for one of the Intermec Settings Main Menu options. - Page 46 Chapter 4 — Configure the Computer Data Collection Menu Data Collection Options Parameters You Can Configure • Tethered Scanner (COM 1) Enable scanner port • Symbologies • Symbology options • Scanner port settings • Imager settings • Decode security • Tethered Scanner (COM 2) Enable scanner port •...
- Page 47 Chapter 4 — Configure the Computer Communications Options Parameters You Can Configure • 802.11 Radio Radio enabled • Security choice • Wireless security • IP Settings • Certificates • Radio bands • Allow security changes Ethernet Adapter IP settings (DHCP, DHCP client identifier, IP address, subnet mask, default router, primary DNS, and secondary DNS)
- Page 48 Chapter 4 — Configure the Computer RFID Menu RFID Options RFID Enable RFID service Virtual Wedge Menu Virtual Wedge Options Parameters You Can Configure Enable Virtual Wedge Enable virtual wedge Virtual Wedge Method Virtual wedge method • Bar Code Scanner Wedge Bar code scanner grid •...
- Page 49 Associated server IP Broadcast Name Broadcast name Port Port (read-only) Keep Alive Ping Interval Keep alive ping interval For more information on all parameters in Intermec Settings, see the Intermec Settings Command Reference Manual. CV61 Vehicle Mount Computer (Windows 7) User Guide...
-
Page 50: Navigate In Intermec Settings
After several minutes, all of the default settings are restored. Hide Menu Items in Intermec Settings You can hide items in the Intermec Settings menus if you do not want to have them available for other users to access. Hidden items are not saved when you back up your settings in the SmartSystems console. -
Page 51: Use Intermec Settings Remotely With Smartsystems Foundation
Menu > Unhide All Items. Note: When you restore default settings in Intermec Settings, only the settings for visible items are restored to defaults. The settings for hidden menu items are not affected. -
Page 52: About Network Communications
Intermec Developer Center website at www.intermec.com/developer/resources/CustomProfiles.aspx 1 Make sure you have created a custom profile for your computer. 2 Tap Start > All Programs > Intermec > Profile Settings. 3 Select the profile you want to enable. About Network Communications You can easily add the computer to your wireless or wired data collection network. -
Page 53: Configure Bluetooth Communications
2 Select the Radio Enabled check box and tap OK. By default, the computer uses Microsoft security and enables DHCP. 3 Use Intermec Settings to configure any other parameters you need to use for communication with your network. 4 Configure 802.11 security. For help, see “About Wireless... -
Page 54: Connect To A Bluetooth Printer
• create an application that opens the wireless printing COM port on your computer. For help, see the Bluetooth Resource Kit, which is part of the Intermec Developer Library (IDL), available from the Intermec website at www.intermec.com/idl. • select the current wireless printer on your computer. For help, see the next procedure. -
Page 55: Create A Vpn Server Connection
Chapter 4 — Configure the Computer 3 Tap Bluetooth Printing. 4 Select Search, Manual, Previous Devices, Bluetooth COM Port and tap Acquire Printer. Follow the onscreen instructions to select the current wireless printer. 5 (Optional) Tap Print Test Page. The printer prints out a test page. Create a VPN Server Connection You can create a Virtual Private Network (VPN) connection to securely connect to servers, such as a corporate network, through the Internet. -
Page 56: Connect A Scanner To The Cv61
After you have connected a scanner, you can configure certain parameters such as bar code symbologies through the CV61. If you are using an Intermec scanner, you can configure it using EasySet™. For more information, go to www.intermec.com/EasySet. Connect to a USB Scanner To use a USB scanner with the CV61, you need to enable HID. -
Page 57: Connect To A Serially Tethered Scanner
Use this procedure to connect your computer to connect a tethered scanner and enable RS-232 communications. 1 Connect the scanner to the COM1 or COM2 port. 2 From the Intermec Settings main menu, select Tethered Scanner (COM 1 or COM 2). CV61 Vehicle Mount Computer (Windows 7) User Guide... - Page 58 Chapter 4 — Configure the Computer 3 Tap Scanner Settings. CV61 Vehicle Mount Computer (Windows 7) User Guide...
-
Page 59: Connect To A Bluetooth Scanner
5 Tap Enable scanner port. 6 Check the Enable scanner port check box and tap OK. Connect to a Bluetooth Scanner You can connect the computer to an Intermec Bluetooth scanner, such as the SF51 or SR61. 1 Enable Bluetooth communications. -
Page 60: About Wireless Security
802.1x • This section explains how to configure wireless security on your computer. Intermec recommends that you implement WPA2 security using PSK (Personal) or 802.1X (Enterprise) key management as appropriate. You must use either Wireless or Microsoft security to implement your security solution. -
Page 61: Choose Between Microsoft And Wireless Security
By default, the active profile is Profile 1. Select a Wireless Security Profile Use the following procedure to select a Wireless security profile. 1 Start Intermec Settings. For help, see “Start Intermec Settings” on page 2 Choose Communications > 802.11 Radio > Security Choice. - Page 62 1 Make sure the communications and radio parameters on your computer are configured. 2 Make sure Wireless security is selected as your security choice. 3 Start Intermec Settings. 4 Choose Communications > 802.11 Radio > Wireless Security. 5 Select the profile you want to configure.
- Page 63 1 Make sure the communications and radio parameters on your computer are configured. 2 Make sure Wireless security is selected as your security choice. 3 Start Intermec Settings. 4 Choose Communications > 802.11 Radio > Wireless Security. 5 Select the profile you want to configure.
- Page 64 Chapter 4 — Configure the Computer Configure 802.1x Security With Wireless Security Use the following procedure to configure 802.1x-WEP security with Wireless security. Intermec recommends that you use WPA2-802.1x instead of 802.1x-WEP if possible. 1 Make sure the communications and radio parameters on your computer are configured.
- Page 65 Configure Static WEP Security With Wireless Security Use the following procedure to configure static WEP security with Wireless security. Intermec recommends that you use WPA2-PSK instead of WEP if possible. 1 Make sure the communications and radio parameters on your computer are configured.
-
Page 66: Select Microsoft As Your Security Choice
• Static WEP Select Microsoft Security Use the following procedure to select Microsoft security. 1 Start Intermec Settings. For help, see “Start Intermec Settings” on page 2 Choose Communications > 802.11 Radio > Security Choice. CV61 Vehicle Mount Computer (Windows 7) User Guide... - Page 67 Chapter 4 — Configure the Computer 3 From the Security Choice list, select Microsoft Security. An alert box appears telling you that you must save your settings and reboot the computer for the new security choice to take effect. 4 Tap Yes. The computer resets and starts with Microsoft Security as the Security Choice.
- Page 68 Chapter 4 — Configure the Computer 9 If you choose PEAP or EAP-FAST: a Load a root certificate of the authentication server on your computer. For help, see “Load a Certificate” on page b Tap Settings. The Properties screen appears. c Select Validate server certificate.
- Page 69 7 Tap OK to save the Microsoft Security settings. Configure 802.1x Security with Microsoft Use the following procedure to configure 802.1x security with Microsoft security. Intermec recommends that you use WPA2-802.1x instead of 802.1x-WEP if possible. 1 Make sure the communications and radio parameters on your computer are configured.
- Page 70 Tap OK to save the Microsoft Security settings. Configure Static WEP Security With Microsoft Use the following procedure to configure static WEP security with Microsoft security. Intermec recommends that you use WPA2-PSK instead of WEP if possible. 1 Make sure the communications and radio parameters on your computer are configured.
-
Page 71: Load A Certificate
Chapter 4 — Configure the Computer 6 In Encryption type, choose WEP. 7 In Network Security Key, enter the pre-shared key or the passphrase. 8 Tap OK to save the Microsoft Security settings. 9 For Network Key Setting, choose Enter Key and Index. Use Open (No Security) Associations With Microsoft Use the following procedure to configure your computer for open security using Microsoft WZC. - Page 72 Chapter 4 — Configure the Computer CV61 Vehicle Mount Computer (Windows 7) User Guide...
-
Page 73: Troubleshoot And Maintain The Computer
Troubleshoot and Maintain the Computer If you encounter any problems while using the computer, look in this chapter to find a possible solution. You will also find information on routine maintenance. -
Page 74: Troubleshoot Your Computer
Note: If you send the computer in for service, it is your responsibility to save the computer data and configuration. Intermec is responsible only for ensuring that the hardware matches the original configuration when repairing or replacing the computer. -
Page 75: Troubleshoot 802.1X Security
Chapter 5 — Troubleshoot and Maintain the Computer Troubleshoot 802.1x Security Use the following table to troubleshoot problems with your 802.1x security that will prevent you from connecting to your network, such as an incorrect password. Problems With 802.1x Security Problem Solution The computer indicates it is not... -
Page 76: Troubleshoot Reading Bar Codes
5 Tap the Global tab to view the global property values of the Wi-Fi connection. Troubleshoot Reading Bar Codes Use this section to troubleshoot problems that may prevent you from being able to read a bar code with an Intermec scanner. If you cannot CV61 Vehicle Mount Computer (Windows 7) User Guide... - Page 77 Good Read light remains on, there may be a problem. Press one of the Scan buttons or pull the trigger again without scanning a bar code label. If the light is still on, contact your local Intermec representative. •...
- Page 78 • The scanner does not read the bar Check to see if the Scanner Port Settings in Intermec code or is corrupted when it is Settings match those settings programmed in the scan enabled as an ASCII scanner.
-
Page 79: Troubleshoot Operating The Computer
SR30 or SR61T (Gen II) does not • USB Auto-detect is enabled on the CV61. For more help, see show up in Intermec Settings. “Use Intermec Settings on the Computer” on page • Enable the HID profile, by scanning one of the following bar codes:... -
Page 80: Call Product Support
If you still need help after visiting Knowledge Central, you may need to call Product Support. To talk to an Intermec Product Support representative, call: 1-800-755-5505 Before you can call Intermec Product Support, make sure you have the following information ready: • Configuration number Serial number •... -
Page 81: Find Your System Component Versions
Use the following procedure to find your system component versions on your computer. • From the Intermec Settings main menu, tap Device Settings > System Component Versions. The System Component Version screen appears. Find Your Operating System, BIOS and MCU Versions Use the following procedure to find your operating system, BIOS and MCU versions. -
Page 82: Find Your Service Pack Version
Chapter 5 — Troubleshoot and Maintain the Computer Find Your Service Pack Version Use the following procedure to find your Service Pack version. 1 Tap Start > Control Panel. The Control Panel appears. 2 In the View by: drop-down menu, select either Large or Small icons. -
Page 83: Reset The Computer
Chapter 5 — Troubleshoot and Maintain the Computer Reset the Computer If the computer does not reboot, reset the computer. When you reset the computer, the CV61 does a full shutdown and removes power from the processor. 1 Using a small pointed object such as a paper clip, push in hold the Reset button and the Power button. - Page 84 Chapter 5 — Troubleshoot and Maintain the Computer CV61 Vehicle Mount Computer (Windows 7) User Guide...
-
Page 85: Upgrade The Cv61 Vehicle Mount Computer
Upgrade the CV61 Vehicle Mount Computer Use this chapter to learn how to upgrade the CV61 hard drive, memory, or install an SD card. -
Page 86: Upgrade The Cv61
• Small Phillips torque screwdriver After you install the hard drive, you also need to load Microsoft Windows 7 and the Intermec system software. 1 Turn off the CV61. 2 Remove the power cable. 3 Remove the eight screws that secure the back cover to the CV61. - Page 87 Chapter 6 — Upgrade the CV61 Vehicle Mount Computer 4 Disconnect the two cables connected to the CV61. 5 Remove the four screws that secure the hard drive bracket to the CV61. CV61 Vehicle Mount Computer (Windows 7) User Guide...
- Page 88 Chapter 6 — Upgrade the CV61 Vehicle Mount Computer 6 Remove the four screws that secure the hard drive to the hard drive bracket. 7 Remove the two cables that are connected to the hard drive. CV61 Vehicle Mount Computer (Windows 7) User Guide...
- Page 89 0.73 Nm (6.5 lbf-in). 9 Reconnect the power cable. 10 Install Microsoft Windows 7. 11 Install the Intermec system software. For more information, see “Update the System Software” on page CV61 Vehicle Mount Computer (Windows 7) User Guide...
-
Page 90: Upgrade Memory
The CV61 supports a maximum of 3 GB of SODIMM memory. You can purchase your own SODIMM memory or purchase it from Intermec. For more information, contact your local Intermec representative. To upgrade the memory, you need the following parts and tools: •... - Page 91 Chapter 6 — Upgrade the CV61 Vehicle Mount Computer 4 Remove the memory by pushing on the two prongs that secure the memory onto the CV61. 5 Remove the memory from the CV61. CV61 Vehicle Mount Computer (Windows 7) User Guide...
- Page 92 Chapter 6 — Upgrade the CV61 Vehicle Mount Computer 6 Insert the new memory and close the CV61. Use the next illustration for the tightening sequence for the back cover. Tighten the screws to a final value of 0.73 Nm (6.5 lbf-in). CV61 Vehicle Mount Computer (Windows 7) User Guide...
-
Page 93: Install An Sd Card
Chapter 6 — Upgrade the CV61 Vehicle Mount Computer Install an SD Card You can use an SD card to increase file storage and install software. The computer supports an optional 32 GB maximum capacity SD card. To install an SD card, you need to have a small Phillips screwdriver. - Page 94 Chapter 6 — Upgrade the CV61 Vehicle Mount Computer Screw (8 places) 4 Gently lift up the radome cover to expose the SD card slot. 5 Insert the SD card into place. 6 Close the radome cover and replace the 8 screws. 7 Reattach the power cord.
- Page 95 Chapter 6 — Upgrade the CV61 Vehicle Mount Computer 8 Press the Power button. The computer turns on. CV61 Vehicle Mount Computer (Windows 7) User Guide...
- Page 96 Chapter 6 — Upgrade the CV61 Vehicle Mount Computer CV61 Vehicle Mount Computer (Windows 7) User Guide...
-
Page 97: Specifications And Default Settings
Specifications and Default Settings... -
Page 98: Physical And Environmental Specifications
Appendix A — Specifications and Default Settings Physical and Environmental Specifications Physical Dimensions CV61 dimensions 27.4 x 34.3 x 8.4 cm (10.8 x 13.5 3.3 in) CV61 weight 5.2 kg (11.5 lbs) Environmental Specifications Standard operating Non-condensing: -20 °C to 50 °C temperature (-4 °F to 122 °F) Extreme operating... -
Page 99: Touch Screen Specifications
Appendix A — Specifications and Default Settings • Memory Standard 1 GB DDR2 (Windows XP) • Standard2 GB DDR2 (Windows 7) User-upgradeable to 3 GB DDR2 memory. • Mass storage 16, 26, or 36 GB solid state drive (Windows XP) •... -
Page 100: Default Configuration
The settings are grouped by function and reflect the organization of Intermec Settings. Not all of the configuration settings are listed in this appendix. For detailed information on most of the settings, see the Intermec Settings Command Reference Manual. - Page 101 Appendix A — Specifications and Default Settings Symbology Settings (Continued) Symbology Default Value Code 128/GS1-128 Enable Code 128, GS1-128, GS1-128 identifier DataMatrix Enable DutchPost Disable EAN/UPC Enable UPC A, UPC E, EAN 8, EAN 13 GS1 Composite Disable GS1 DataBar Expanded Disable GS1 DataBar Limited Disable...
- Page 102 Appendix A — Specifications and Default Settings Scanner Settings Scanner Settings Default Value Scanner Model SR Intermec Scanner Trigger Mode Level Aimer Mode Typical aimer Hardware Trigger Enable Trigger Timeout (sec) Aiming Duration (msec) Turn Off After Good Read Enable/One-shot...
-
Page 103: Communications
Center Decoding Tolerance Communications Use communications settings to configure how the computer communicates with the network. Communications Settings Communications Setting Default Value Device Name Intermec CV61 802.11 Radio Settings 802.11 Radio Setting Default Value Radio Enabled Security Choice Microsoft Security Microsoft Security... -
Page 104: Device Settings
Appendix A — Specifications and Default Settings 802.11 Radio Settings (Continued) 802.11 Radio Setting Default Value Import User Certificates False Radio Bands a/b/g/n (2.4 and 5.0 GHz) Allow Security Changes Enabled Bluetooth Settings Bluetooth Setting Default Value Bluetooth Power Device Settings Use device settings to configure settings on the computer. -
Page 105: Core Messaging Service Settings
Core Messaging Service Settings Core Messaging Service Setting Default Value Associated Server IP Null Broadcast Name INTERMEC Port 62241 Keep Alive Ping Interval 30 Seconds RFID Settings Use RFID settings to enable the RFID service. -
Page 106: Common Lockdown Service Settings
Appendix A — Specifications and Default Settings Virtual Wedge Settings (Continued) Virtual Wedge Settings Default Value Barcode Scanner Wedge Barcode Scanner Grid Null Label Encoding 1252(D)-ANSI Win3.1 US RFID Reader Wedge Read Command READ REPORT = DIRECT User-Defined Read Command Read Date (YYYY-MM-DD) Disable... -
Page 107: Device Monitor Settings
Appendix A — Specifications and Default Settings Device Monitor Settings Use device monitor settings to configure how the computer monitors the network. Device Health Controls Device Health Setting Default Value Enable Health Data Collection Enable Blue Light (LED) Off for Ready-to-Work Set Rule File Location \SmartSystems\HealthRules.txt Set Data Refresh Periods... -
Page 108: Usb Port
Appendix A — Specifications and Default Settings COM 1 and COM 2 Port Pin Assignments Signal Description Signal/power ground Data set ready (input) Request to send (output) Clear to send (input) +5 VDC or RI Bar code scanner power (500 mA max) or Ring indicator (input) Shell CGND... -
Page 109: Canbus Port
Appendix A — Specifications and Default Settings USB Ports (Continued) Signal Description Common ground Common ground CANBUS Port CANBUS Port Signal Description No connect CAN_L CAN_L bus line dominant low Ground No connect Ground Ground CAN_H CAN_H bus line dominant high No connect CAN V+ Optional CAN external power supply... - Page 110 Appendix A — Specifications and Default Settings Power Supply Connector Signal Description Chassis ground 12 V, 4 A from external DC supply DC-/V In- Input - HTR- Input - HTR+ 12 V, 4 A from external DC supply (only required if the CV61 has optional heated defroster) V In+ 10 to 60 V (Input to internal DC/DC power...
-
Page 111: Scanngo Wi-Fi Configuration Bar Codes
ScanNGo Wi-Fi Configuration Bar Codes You can use the ScanNGo Wi-Fi configuration bar codes to quickly configure the 802.11 radio in your computer. -
Page 112: Radio Configuration Bar Codes
Use the following ScanNGo bar codes to enable the 802.11 radio and set the defaults for either Wireless security or Microsoft security. After you scan the bar codes, you will still need to use Intermec Settings or another configuration program to set network-specific settings on your computer and to configure the wireless security. -
Page 113: D Configuration Bar Codes
Appendix B — ScanNGo Wi-Fi Configuration Bar Codes 1D Configuration Bar Codes You can configure the computer with a 1D imager. 1 Scan the START HERE bar code from the table and wait for the program to start. 2 Scan the 1/9 bar code. 3 Scan the rest of the bar codes in any order. - Page 114 Appendix B — ScanNGo Wi-Fi Configuration Bar Codes 1D Imager Radio Configuration Bar Codes When You Want To: Scan This Bar Code • Set all communication settings to defaults (Wi-Fi, WWAN if applicable) • Enable Wi-Fi - set Wireless security to defaults CV61 Vehicle Mount Computer (Windows 7) User Guide...
- Page 115 Appendix B — ScanNGo Wi-Fi Configuration Bar Codes When You Want To: Scan This Bar Code • Set all communication settings to defaults (Wi-Fi, WWAN if applicable) • Enable Wi-Fi - set Wireless security to defaults CV61 Vehicle Mount Computer (Windows 7) User Guide...
- Page 116 Appendix B — ScanNGo Wi-Fi Configuration Bar Codes When You Want To: Scan This Bar Code • Set all communication settings to defaults (Wi-Fi, WWAN if applicable) • Enable Wi-Fi - set Microsoft security to defaults CV61 Vehicle Mount Computer (Windows 7) User Guide...
- Page 117 Appendix B — ScanNGo Wi-Fi Configuration Bar Codes When You Want To: Scan This Bar Code • Set all communication settings to defaults (Wi-Fi, WWAN if applicable) • Enable Wi-Fi - set Microsoft security defaults CV61 Vehicle Mount Computer (Windows 7) User Guide...
- Page 118 Appendix B — ScanNGo Wi-Fi Configuration Bar Codes CV61 Vehicle Mount Computer (Windows 7) User Guide...
- Page 120 Worldwide Headquarters 6001 36th Avenue West Everett, Washington 98203 U.S.A. tel 425.348.2600 fax 425.355.9551 www.intermec.com © 2012 Intermec Technologies Corporation. All rights reserved. CV61 Vehicle Mount Computer (Windows 7) User Guide *935-043-001* P/N 935-043-001...
Need help?
Do you have a question about the 1011CM01 and is the answer not in the manual?
Questions and answers