
Related Manuals for Buffalo AirStation Nfiniti WLAE-AG300N


Summary of Contents for Buffalo AirStation Nfiniti WLAE-AG300N
-
Page 1: User Manual
User Manual AirStation Wireless-N Nfiniti Ethernet Converter, Access Point, & Bridge WLAE-AG300N www.buffalotech.com 35011293 ver.01... -
Page 2: Table Of Contents
Contents Chapter 1 Product Overview ........... 5 Features .................. 5 AirNavigator CD Requirements ..........6 300 Mbps High Speed Mode ........... 6 Package Contents ..............6 Hardware Overview ..............7 Front View ..................7 Rear View ..................8 Bottom .................... 10 Chapter 2 Placing Your AirStation ........ - Page 3 WPS ....................29 AOSS ..................... 30 11n/a/g/b ..................32 Advanced ..................36 WMM ....................37 MAC Filter ..................39 Multicast Control ................40 WDS ....................41 Admin Config ................43 Name ..................... 43 Password ..................44 Time/Date ..................45 NTP ....................46 ECO ....................
- Page 4 Manual Setup ................62 Windows 7 (WLAN AutoConfig) ............. 62 Windows Vista (WLAN AutoConfig) ..........63 Windows XP (Wireless Zero Configuration) ........66 Connecting 2 WLAE-AG300Ns (Manual Setup) ......67 Chapter 6 Trouble Shooting ..........68 Cannot connect to the Internet (wired connection)....68 Cannot access the web-based configuration interface.
- Page 5 Appendix E Restoring the Default Configuration ..88 Appendix F Regulatory Compliance Information ..89 Appendix G Environmental Information ......95 Appendix H GPL Information .......... 96 Appendix I Warranty Information ........97 WLAE-AG300N User Manual...
-
Page 6: Chapter 1 Product Overview
Chapter 1 Product Overview Features Supports IEEE802.11n and IEEE802.11a/b/g With support for current Wireless-N, Wireless-A, Wireless-G, and Wireless-B standards, the AirStation can transfer data to and from all standard 2.4 GHz and 5 GHz wireless clients. This device does not support simultaneous communication on the 2.4 GHz and 5 GHz bands. Supports AOSS and WPS Both AOSS (AirStation One-touch Secure System) and WPS (Wi-Fi Protected Setup) are supported. -
Page 7: Airnavigator Cd Requirements
Chapter 1 Product Overview AirNavigator CD Requirements The AirStation wireless access point works with most wired and wireless devices. However, the automatic installation program on the CD requires a connected Windows 7, Vista, or XP computer to run. If you use the AirStation with a different operating system, you will have to configure your network settings manually from a browser window. -
Page 8: Hardware Overview
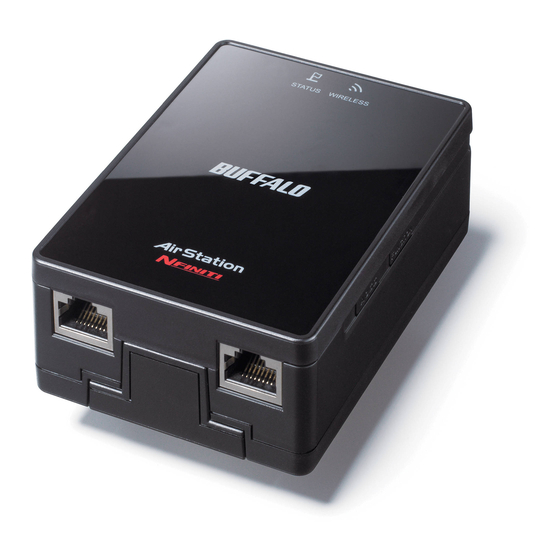
Chapter 1 Product Overview Hardware Overview Front View Reset Button To restore the AirStation back to factory default settings, press and hold this button until the red status LED flashes (about 3 seconds). LAN Ports Connect your computer, hub, or other Ethernet devices to these ports. This switching hub supports 10 Mbps and 100 Mbps connections. -
Page 9: Rear View
Chapter 1 Product Overview Rear View AOSS/WPS Button To initiate AOSS/WPS, hold down this button until the wireless LED flashes (about 1 second). Then, push or click the AOSS or WPS button on your wireless client device to complete the connection. - Page 10 Chapter 1 Product Overview Status LED Shows AirStation status. On (Green) : WDS is enabled as Master, or WDS is enabled as a Slave connected to the Master. 2 blinks (Green) : WDS is enabled as a Slave, not connected to the Master. 1 blink (Red) RAM error.
-
Page 11: Bottom
Chapter 1 Product Overview Bottom Wall Mount Plate Slide this plate out to wall mount. Attach to the wall with the 2 screws (included). Then, slide the AirStation onto the plate. Factory Default This sticker shows the AirStation’s SSID, default encryption key, and WPS Settings PIN code. -
Page 12: Chapter 2 Placing Your Airstation
Chapter 2 Placing Your AirStation Horizontal Placement Place the unit as shown. Wall-Mounting Slide the plate out from the bottom of the AirStation. WLAE-AG300N User Manual... - Page 13 Chapter 2 Placing Your AirStation Secure the plate to the wall with the two screws in your package. 7.5 cm (~2.95 inches) Slide the AirStation onto the wall-mounting plate. WLAE-AG300N User Manual...
-
Page 14: Chapter 3 Installation
Chapter 3 Installation Automatic Setup The AirNavigator CD can step you through installing your AirStation. Insert it into your Windows 7, Vista, or Windows XP PC and follow the instructions on the screen. If your computer uses a different operating system, use manual setup instead. Manual Setup Access Point mode To use the AirStation as an access point, configure as below. - Page 15 Chapter 3 Installation Connect the power cable to the AirStation, then push the power button to turn it on. Wait 60 seconds, then power on your computer. AirStation 1) connect 2) push After the computer has booted, the LEDs on the AirStation should be in the following condidition: Wireless glowing green or amber.
-
Page 16: Using Airstation As An Ethernet Converter Or A Repeater
Chapter 3 Installation Using AirStation As An Ethernet Converter or A Repeater To use the AirStation as an Ethernet converter or a repeater, follow the directions below. Using as an Ethernet Converter: wireless wired router AirStation computer Using as a repeater: wireless wireless router... - Page 17 Chapter 3 Installation Connect the AirStation and your computer with a LAN cable. LAN cable 1) connect AirStation 2) connect Connect the power cable to the AirStation, then push the power button to turn it on. Wait 60 seconds, then power on your computer. AirStation 1) connect 2) push...
- Page 18 Chapter 3 Installation Enter the LAN IP address of the AirStation in the address field, then press the [Enter] key. Notes: • The default IP address of the AirStation is 192.168.11.100. • If you previously used the AirNavigator CD in the package to set up the AirStation, then its IP address may be set as [Automatically obtain from DHCP server]. • If you have changed the IP address of the AirStation, enter that IP address. When this screen appears, enter [root] (in lower case) for the user name and the password that you set during initial setup.
- Page 19 RI TY W EI DI AG router AirStation BUFFALO Wireless AirStation router with WDS Once the list of the access points is displayed, select the access point you are going to connect to, then click [Select]. If the access point you are going to connect to is not displayed, click [Search again].
- Page 20 Chapter 3 Installation Enter the encryption settings and password (“key”) for the access point you are connecting to, then click [Apply]. The AirStation’s LEDs whould be as follows: Wireless - glowing green or amber Status - glowing green Note: If the status LED flashes twice, the information that you entered for the the encryption settings may be wrong.
-
Page 21: Chapter 4 Configuration
Chapter 4 Configuration The web-based configuration tool lets you change AirStation settings. Don’t change these settings unless you know what you’re doing. Accessing the Web-based Configuration Interface To configure the AirStation’s advanced settings manually, log in to the web-based configuration interface as shown below. - Page 22 Chapter 4 Configuration Highlight an AirStation to configure and click [Next]. Check [Obtain IP address from DHCP server] to have DHCP obtain an IP address automatically, or you may enter IP address settings manually. Click [Next]. Note: This screen may not be displayed depending on your computer’s IP address settings.
- Page 23 Chapter 4 Configuration This is the configuration interface, where most AirStation settings can be configured. Help is always displayed on the right side of each screen. Refer to the Help screens for more information on using the configuration interface. WLAE-AG300N User Manual...
-
Page 24: Configuration Interface Menus
Chapter 4 Configuration Configuration Interface Menus The following settings may be changed from the configuration interface. Please refer to the pages listed at right for explanations of each item. Main screen Descriptions Page LAN Config LAN side port configuration. Page 27 Route Configure the AirStation’s IP communication route. - Page 25 Chapter 4 Configuration Packet Info View all packets transferred by the AirStation. Page 56 Client Monitor View all devices currently connected to the AirStation. Page 57 Ping Test the AirStation’s connection to other devices on the network. Page 58 Logout Click this to log out of the AirStation’s configuration screens.
-
Page 26: Setup
Chapter 4 Configuration Setup This is the home page of the configuration interface. You can verify settings and the status of the AirStation here. Parameter Meaning LAN Config Displays the configuration screen for the LAN ports. Wireless Config Click this button to display the configuration screen for wireless settings. - Page 27 Chapter 4 Configuration Parameter Meaning WPS Setup Click this button to display the WPS configuration screen. [Network Services] Displays the list of the network devices for which information is provided from the network on the LAN-side. Language Enables you to select the language you use. [Flash LED] Clicking this to flash Status LED of the AirStation you are currently setting for 30 seconds.
-
Page 28: Lan Config
Chapter 4 Configuration LAN Config Configure LAN-side port. Parameter Meaning LAN Side IP Address By default, the LAN side IP address is 192.168.11.100 with subnet mask 255.255.255.0. You may change it here. Default Gateway Set the default gateway IP address. DNS Server Address Set the DNS server IP address. -
Page 29: Route
Chapter 4 Configuration Route Configure the AirStation’s IP communication route. Parameter Meaning Destination Address Adds a destination IP address and subnet mask to a routing table. Gateway Adds a gateway address to a routing table. Metric The metric is the maximum number of router hops a packet may take on the way to its destination address. -
Page 30: Wireless Config
Chapter 4 Configuration Wireless Config WPS Status and Settings. Parameter Meaning Enable to use WPS automatic configuration. External Registrar Enable to accept the external configure requests from other WPS devices. Note: External configure requests will not be accepted if AOSS is in use. AirStation PIN Displays the PIN code of the AirStation. -
Page 31: Aoss
Chapter 4 Configuration AOSS AOSS Status and Settings. WLAE-AG300N User Manual... - Page 32 Chapter 4 Configuration Parameter Meaning Initiates AOSS automatic wireless configuration. Click this, then press or click the AOSS button on your AOSS-compatible wireless client. Repeat for additional AOSS clients. Click this button to disconnect AOSS connections. Note: If AOSS connections are disconnected, the SSID and encryption keys will be restored to their most recent settings before using AOSS.
-
Page 33: 11N/A/G/B
Chapter 4 Configuration 11n/a/g/b The screen to configure a basic wireless settings. Parameter Meaning Wireless Determines whether to allow wireless communication. If this is unchecked, then no wireless connections will be allowed. Wireless Channel Sets a channel (a range of frequencies) used for wireless connections. - Page 34 Chapter 4 Configuration Parameter Meaning Broadcast SSID If [Allow] is checked, then the AirStation will respond to SSID searches from wireless devices by broadcasting its SSID. If [Allow] is unchecked, then the AirStation ignores SSID searches from wireless devices. [Allow multiple SSIDs] Clicking [Allow multiple SSIDs] will enable Multi Security, allowing [Use Single SSID] the use of multiple SSIDs, each with different wireless security...
- Page 35 Chapter 4 Configuration Parameter Meaning Wireless encryption You may use any of the following types of encryption: No encryption Data is transmitted without encryption. Avoid this option since any communication may be intercepted. [No encryption] can be selected only when [No authentication] is selected for Wireless authentication.
- Page 36 Chapter 4 Configuration Parameter Meaning Set up WEP encryption key A WEP encryption key (passphrase) may have any of four different formats. A character (ASCII) passphrase may use either 5 or 13 alphanumeric characters (case-sensitive). A hexadecimal passphrase may use either 10 or 26 digits using 0 to 9 and a to f (not case-sensitive). WLAE-AG300N User Manual...
-
Page 37: Advanced
Chapter 4 Configuration Advanced Configure advanced wireless settings. Parameter Meaning Multicast Rate Set the communication speed of multi-cast packets. DTIM Period Set the beacon responding interval (1 -255) for which the AirStation responds to a wireless device. This setting is effective only when power management is enabled for the wireless device. -
Page 38: Wmm
Chapter 4 Configuration Set priorities for specific communications. WLAE-AG300N User Manual... - Page 39 Chapter 4 Configuration Parameter Meaning WMM-EDCA Parameters You don't usually need to change these settings. Using the default settings is recommended. Priority The following priorities may be applied to individual transmission packets: (Highest) 8, (High) 4, (Normal) 2, and (Low) 1. From the queue, these packets are processed in order of priority.
-
Page 40: Mac Filter
Chapter 4 Configuration MAC Filter Restrict access to specific wireless devices. Parameter Meaning Enforce MAC Filtering Enable to restrict wireless connections to devices with registered MAC addresses. Registration List Displays the MAC addresses of registered devices which are permitted to connect wirelessly. [Edit Registration List] Click to add a wireless device to the list of permitted devices. -
Page 41: Multicast Control
Chapter 4 Configuration Multicast Control Configure restrictions on unnecessary multicast packets sent to the wireless LAN port. Parameter Meaning Snooping If enabled, snooping supervises multicast administrative packets such as IGMP and restricts unnecessary multicast transfers to wired or wireless ports. Multicast Aging Time Set the time to hold the data from multicast snooping in the range of 1 to 3600 (seconds). -
Page 42: Wds
Chapter 4 Configuration WDS bridging allows communication between AirStations. Parameter Meaning Check to use WDS bridging. Specify Master/Slave Define this AirStation's role in a WDS bridge. Master Set AirStation as a master. Listen to the Salve or a device set as a slave to connect. Slave Set AirStation as a slave. - Page 43 Chapter 4 Configuration Parameter Meaning SSID Configure the Master Airstation's SSID. [Search] Click to search for other AirStations' SSIDs. Wireless authentication Configure authentication method for the master AirStation Encryption for wireless Choose encryption type for the master AirStation. WPA-PSK (Pre Shared Key) Set the master AirStation's Encryption key.
-
Page 44: Admin Config
Chapter 4 Configuration Admin Config Name Configure basic AirStation settings. Parameter Meaning AirStation Name Enter a name for the AirStation. Names may include up to 64 alphanumeric characters and hyphens (-). List Network Services Enable or disable this item to display the computers and devices on your network with their supported services. -
Page 45: Password
Chapter 4 Configuration Password Configure the password to log in to the AirStation’s configuration screen. Parameter Meaning Administrator Name The Administrator name is used to log in to the AirStation’s configuration interface. This name is fixed as [root]. Administrator Password The password is required to log in. -
Page 46: Time/Date
Chapter 4 Configuration Time/Date Configure the AirStation’s internal clock. Parameter Meaning Local Date You may manually set the date of the AirStation’s internal clock. Local Time You may manually set the time of the AirStation’s internal clock. Time Zone Specify the time zone (offset of Greenwich Mean Time) of the AirStation’s internal clock. -
Page 47: Ntp
Chapter 4 Configuration Configure an NTP server to automatically synchronise the AirStation’s internal clock. Parameter Meaning NTP Functionality Enable to use an NTP server. The default is Enabled. NTP Server Enter the name of the NTP server as a host name, host name with domain name, or IP address. -
Page 48: Eco
Chapter 4 Configuration Configure Eco mode from this screen. Parameter Meaning Energy saving mode Enabling the energy setting mode will shut down the AirStation whenever all connected wired Ethernet devices are shut down. When a connected device resumes communication with the AirStation’s Ethernet port, the AirStation will power on normally again. -
Page 49: Access
Chapter 4 Configuration Access Restrict access to the AirStation’s settings screens. Parameter Meaning Log Output Enabling outputs a log of changes to access settings. Prohibit configuration from wireless If enabled, prevents access to settings screens from wirelessly connected devices (only wired devices may configure). Prohibit configuration from wired If enabled, prevents access to settings screens from wired devices (only wirelessly connected devices may configure). -
Page 50: Log
Chapter 4 Configuration Transfer the AirStation’s logs to a syslog server. Parameter Meaning Log Transfer Enable to send logs to a syslog server. Syslog Server Identify the syslog server by host name, host name with domain name, or IP address. You may enter up to 255 alphanumeric characters, hyphens (-), and underscores (_). -
Page 51: Save/Restore
Chapter 4 Configuration Save/Restore Save AirStation settings as a file, and restore from them later. Parameter Meaning Save current settings Clicking [Save] will save the current configuration of the AirStation to a file. If the [Encrypt the configuration file with a password] option is checked, then the configuration file will be password protected with the current Administrator Password. -
Page 52: Initialize/Restart
Chapter 4 Configuration Initialize/Restart Initialize or restart the AirStation. Parameter Meaning Restart Click [Restart Now] to restart the AirStation. Initialize Click [Initialize Now] to initialize and restart the AirStation. WLAE-AG300N User Manual... -
Page 53: Update
Chapter 4 Configuration Update Update the AirStation’s firmware. Parameter Meaning Firmware Version Displays the current firmware version of the AirStation. Specify Local File Update method Updates the firmware stored on your computer. Auto Update Online Automatically updates the latest firmware that is available online. Firmware File Name Click [Browse...] to specify a firmware file, then click [Update Firmware]. -
Page 54: Diagnostic
Chapter 4 Configuration Diagnostic System Info View system information for the AirStation. WLAE-AG300N User Manual... - Page 55 Chapter 4 Configuration Parameter Meaning Model Displays the product name of the AirStation and the firmware version. AirStation Name Displays the AirStation Name. Displays the information about the LAN port. Wireless Displays the wireless status. Displays the information about WDS port. WLAE-AG300N User Manual...
-
Page 56: Logs
Chapter 4 Configuration Logs The AirStation’s logs are recorded here. Parameter Meaning Display log info Choose the types of logs to display. Logs Displays the log information recorded in the AirStation. WLAE-AG300N User Manual... -
Page 57: Packet Info
Chapter 4 Configuration Packet Info Viewpacket transfer information. Parameter Meaning Sent Displays the number of packets sent to the LAN side of the Ethernet, and the LAN side of the wireless connection. Received Displays the number of packets received from the LAN side of the Ethernet, and the LAN side of the wireless connection. -
Page 58: Client Monitor
Chapter 4 Configuration Client Monitor This screen shows devices that are connected to the AirStation. Parameter Meaning Client Monitor Displays information ( MAC address, communication method, wireless authentication and 802.11n) for devices that are connected to the AirStation. WLAE-AG300N User Manual... -
Page 59: Ping
Chapter 4 Configuration Ping A Ping test checks whether the AirStation can communicate with a specific network device. Parameter Meaning Destination Address Enter an IP address or a host name of the device for which you try to verify the connection, and click [Execute]. The result will be displayed in the [Result] field. -
Page 60: Chapter 5 Connect To A Wireless Network
AirNavigator CD. Consult your wireless client’s documentation for more information. • Buffalo’s Client Manager software can be used with the wireless LAN devices built into your computer. However, it is not guaranteed to work with all wireless LAN devices available. Some wireless clients may require manual setup. -
Page 61: Windows 7/Vista (Client Manager V)
Chapter 5 Connect to a Wireless Network Windows 7/Vista (Client Manager V) If you are using Windows7 or Windows Vista, use the included Client Manager V software to connect wirelessly with AOSS/WPS. Click the icon in the system tray. Click [Create Profile]. When the message "A program needs your permission to continue"... -
Page 62: Windows Xp (Client Manager 3)
Chapter 5 Connect to a Wireless Network Windows XP (Client Manager 3) If you are using Windows XP, use Client Manager 3 to connect wirelessly with AOSS/WPS. Right click on the icon displayed in the system tray, and select [Profile]. Click [WPS AOSS] button. -
Page 63: Other Devices (E.g. Game Console)
Chapter 5 Connect to a Wireless Network Other Devices (e.g. Game Console) If you are using a game machine which supports AOSS or WPS, refer to that device’s manual to initiate AOSS/WPS. When instructed, hold down the AOSS button on the AirStation for 1 seconds. When the wireless LED stops flashing and begins to glow steadily, the connection is complete. -
Page 64: Windows Vista (Wlan Autoconfig)
Chapter 5 Connect to a Wireless Network Enter the encryption key and click [OK]. Windows Vista (WLAN AutoConfig) With Windows Vista, use the WLAN AutoConfig to connect to the AirStation. Right click on the wireless network icon in the system tray. Click [Connect to a network]. - Page 65 Chapter 5 Connect to a Wireless Network If the screen below is displayed, click [I want to enter the network key or passphrase instead]. Otherwise,go to step 4. WLAE-AG300N User Manual...
- Page 66 Chapter 5 Connect to a Wireless Network Enter the encryption key and click [Connect]. Step through the wizard to finish configuration. If the Set Network Location screen is displayed, select [Home], [Work], or [Public location] depending where you’re using the AirStation. WLAE-AG300N User Manual...
-
Page 67: Windows Xp (Wireless Zero Configuration)
Chapter 5 Connect to a Wireless Network Windows XP (Wireless Zero Configuration) Windows XP includes a built-in utility to connect to your AirStation. Note: If Client Manager 3 is installed on your computer, Wireless Zero Config is disabled. Uninstall Client Manager 3 to use Wireless Zero Config, or just use Client Manager 3 to connect to the AirStation. -
Page 68: Connecting 2 Wlae-Ag300Ns (Manual Setup)
Chapter 5 Connect to a Wireless Network Connecting 2 WLAE-AG300Ns (Manual Setup) To connect 2 WLAE-AG300Ns manually without using AOSS/WPS, follow the procedure below. Refer to Chapter 4 to display the configuration screen. When the configuration screen is displayed, refer to step 9 and later on Chapter 3, “Using AirStation As An Ethernet Converter or A Repeater”. -
Page 69: Chapter 6 Trouble Shooting
Chapter 6 Trouble Shooting Cannot connect to the Internet (wired connection). • Make sure that your AirStation is plugged in! • Check that your AirStation’s LEDs are lit as below: Status LED is Green. Wireless LED is Green, Amber, or Red. •... -
Page 70: You Forgot Airstation's Ssid, Encryption Key, Or Password
Chapter 6 Trouble Shooting • Place your AirStation and wireless devices 2 - 10 feet apart. • Restart your AirStation. You forgot AirStation's SSID, Encryption Key, or Password. Hold down the reset button on the base of your AirStation for 3 seconds to initialize its settings. All settings, including your password, SSID, and encryption key will be initialized to their defaults. -
Page 71: Other Tips
Chapter 6 Trouble Shooting Other Tips Issue: I reset my AirStation to factory settings and forgot how to log in to the configuration utility. Answer: Refer to Chapter 4 to login to the AirStation’s configuration screen. The user name is [root] and the password is blank by default. - Page 72 You should now be able to connect to the Internet. If you still cannot, refer to Appendix D to modify your computer’s IP address settings. Issue: Where can I download the latest drivers, firmware and instructions for my Buffalo wireless products? Answer: The latest drivers and firmware are available online at www.buffalotech.com...
-
Page 73: Appendix A Specifications
Appendix A Specifications Wireless LAN Interface Standard Compliance IEEE802.11a / IEEE802.11b / IEEE802.11g / IEEE802.11n Transmission Method Direct Sequence Spread Spectrum (DSSS), OFDM, MIMO 802.11a Frequency Range Available 808.11a frequencies depend on the country of purchase. See the next page for details. 802.11g Frequency Range 2,412 - 2,462 MHz (Channels 1 - 11) Transmission Rate 802.11b:... - Page 74 Appendix A Specifications Other Power Supply AC 100-240 V Universal, 50/60 Hz Power Consumption About 7.5 W (Max) Dimensions 70 mm x 100 mm x 40 mm (2.8 x 4.0 x 1.6 in.) Weight 198 g (7 oz.) Operating Environment 0 - 40°...
-
Page 75: Appendix B Default Configuration Settings
Appendix B Default Configuration Settings Feature Parameter Default Setting LAN Side IP Address 192.168.11.100 (255.255.255.0) Default Gateway none DNS Server Address none Route Routing Information none Enabled External Registrar Enabled AirStation PIN An 8-digit random value (Printed on the label of the AirStation) WPS Security Information WPS status: configured or unconfigured... - Page 76 Appendix B Default Configuration Settings Feature Parameter Default Setting 11n/a/g/b Wireless Wireless Channel Auto [All channel] 300 Mbps Mode Bandwidth: 20 MHz Extension Channel: - Broadcast SSID Allow Separate feature not used SSID Use AirStation's MAC address Wireless authentication WPA/WPA2 mixedmode - PSK, or no authentication Wireless encryption TKIP/AES mixedmode, or no encryption WPA-PSK (Pre-Shared Key)
- Page 77 Appendix B Default Configuration Settings Feature Parameter Default Setting WMM-EDCA Parameters For AP For STA (Priority AC_BK (Low) ) CWmin CWmax 1023 1023 AIFSN TXOP Limit Admission Control ----- Disabled WMM-EDCA Parameters For AP For STA (Priority AC_BE (Normal) ) CWmin CWmax 1023...
- Page 78 Appendix B Default Configuration Settings Feature Parameter Default Setting Time/Date Local Date 2010 Year 1 Month 1 Day Local Time 0 Hour 0 Minute 0 Seconds Time Zone (GMT-06:00) Central Standard Time: CST or (GMT+00:00) Greenwich Mean Time,London or (GMT+08:00) Singapore, Beijing, Hong Kong, Taipei or (GMT+09:00) Tokyo, Osaka, Seoul NTP Functionality Enabled...
-
Page 79: Appendix C Ethernet Converter Manager
Application]. Opening and Closing Ethernet Converter Manager To start Ethernet Converter Manager, click [Start] > [All programs] > [BUFFALO] > [AirStation Utility] > [Ethernet Converter Manager]. To close the Ethernet Converter Manager, click [X] at the top right of the screen, or click [Exit]. -
Page 80: Select Lan Adapter Screen
Appendix C Ethernet Converter Manager Select LAN Adapter screen This screen is to select LAN Adapter which is used to setup. This screen is principally displayed when more than one wired LAN adapter is connected to a computer. If there is only one AirStation, this will not be displayed. -
Page 81: Select Ethernet Converter
Appendix C Ethernet Converter Manager Select Ethernet Converter If you have multiple AirStation Ethernet Converters on the network, they’ll all be displayed here. Choose your AirStation from the list and highlight it. Click [Select]. Parameter Meaning [Refresh] Click this button to search and view the list of the AirStations that can be configured with this software. -
Page 82: Main Screen
Appendix C Ethernet Converter Manager Main Screen Change your AirStation’s IP address or other settings from this window. Parameter Meaning [Options] > [Launch Web Setting Displays the AirStation’s Web configuration interface. screen] Note: If your PC and the AirStation are on different network subnets, then the IP address configuration screen is displayed instead. - Page 83 Appendix C Ethernet Converter Manager Parameter Meaning [Options] > [Refresh] Updates displayed information for your AirStation. [Options] > [Back to Ethernet Takes you back to the Ethernet Converter selection screen. Converter Selection] [Options] > [About] Displays the version number of your Ethernet Converter Manager. [Connection Settings] Display the access point connection settings screen.
-
Page 84: Modify Ip Address Screen
Appendix C Ethernet Converter Manager Modify IP Address Screen Modify the AirStation’s IP address. Parameter Meaning Acquire IP Address Automatically via Check this option to automatically obtain an IP address from a DHCP DHCP server. IP Address / Subnet Mask If DHCP is not enabled, the you can enter an IP address and subnet mask for the AirStation manually. -
Page 85: Connection Settings
Appendix C Ethernet Converter Manager Connection Settings Configure your access point’s wireless connection settings. Parameter Meaning [Scan] Click this button to search for available access points. SSID Select an access point to connect to. Double-click on an access point’s SSID to select it. Encryption method Select the type of encryption to use. -
Page 86: Appendix Dtcp/Ip Settings In Windows
Appendix D TCP/IP Settings in Windows Windows 7 To configure TCP/IP in Windows 7, follow the procedure below. Click [Start] > [Control Panel] > [Network and Internet]. Double click [Network and Sharing Center]. Click [Change Adapter Settings] on the left side menu. Right click on [Local Area Connection], then click [Properties]. -
Page 87: Windows Vista
Appendix D TCP/IP Settings in Windows Windows Vista To configure TCP/IP in Windows Vista, follow the procedure below. Click [Start] > [Settings] > [Control Panel]. Double click [Network and Sharing Center]. Click [Manage network connections] on the left side menu. Right click on [Local Area Connection], then click [Properties]. - Page 88 Appendix D TCP/IP Settings in Windows Windows XP To configure TCP/IP in Windows XP, follow the procedure below. Click [Start] > [Settings] > [Control Panel]. Double click [Network]. Right click on [Local Area Connection], then click [Properties]. Select [Internet Protocol (TCP/IP)], then click [Properties]. To have DHCP set your IP address settings automatically, check [Obtain an IP address automatically] and [Obtain DNS server address automatically].
-
Page 89: Appendix E Restoring The Default Configuration
Appendix E Restoring the Default Configuration With the AirStation powered on, hold down this button for 3 seconds to return it to factory default settings. WLAE-AG300N User Manual... -
Page 90: Appendix F Regulatory Compliance Information
Appendix F Regulatory Compliance Information Federal Communication Commission Interference Statement This equipment has been tested and found to comply with the limits for a Class B digital device, pursuant to Part 15 of the FCC Rules. These limits are designed to provide reasonable protection against harmful interference in a residential installation. -
Page 91: Industry Canada Statement
Appendix F Regulatory Compliance Information Industry Canada statement: This device complies with RSS-210 of the Industry Canada Rules. Operation is subject to the following two conditions: (1) This device may not cause harmful interference, and (2) this device must accept any interference received, including interference that may cause undesired operation. - Page 92 RF output power may be limited to 10 mW EIRP in the frequency range of 2454 – 2483.5 MHz. For detailed information the end-user should contact the national spectrum authority in France. Česky[Czech] Buffalo Technology Inc. tímto prohlašuje, že tento AirStation WLAE-AG300N je ve shodě se základními požadavky a dalšími příslušnými ustanoveními směrnice 1999/5/ES. Dansk[Danish] Undertegnede Buffalo Technology Inc.
- Page 93 Appendix F Regulatory Compliance Information English Hereby, Buffalo Technology Inc. declares that this AirStation WLAE-AG300N is in compliance with the essential requirements and other relevant provisions of Directive 1999/5/EC. Español[Spanish] Por medio de la presente Buffalo Technology Inc. declara que el AirStation WLAE-AG300N cumple con los requisitos esenciales y cualesquiera otras disposiciones aplicables o exigibles de la Directiva 1999/5/CE.
- Page 94 Buffalo Technology Inc. declara que este AirStation WLAE-AG300N está conforme com os requisitos essenciais e outras disposições da Directiva 1999/5/CE. Slovensko[Slovenian] Buffalo Technology Inc. izjavlja, da je ta AirStation WLAE-AG300N v skladu z bistvenimi zahtevami in ostalimi relevantnimi določili direktive 1999/5/ES. Slovensky[Slovak] Buffalo Technology Inc.
- Page 95 Appendix F Regulatory Compliance Information 根據 NCC 低功率電波輻射性電機管制辦法: 第十二條: 經型式認證合格之低功率射頻電機,非經許可,公司、商號或使用者均不得擅自變更頻率、加 大功率或變更原設計之特性及功能。 第十四條: 低功率射頻電機之使用不得影響飛航安全及干擾合法通信;經發現有干擾現象時,應立即停 用,並改善至無干擾時方得繼續使用。前項合法通信,指依電信法規定作業之無線電通信。低 功率射頻電機須忍受合法通信或工業、科學及醫療用電波輻射性電機設備之干擾。 5.25-5.35秭赫頻帶內操作之無線資訊傳輸設備,限於室內使用。 이 기기는 가정용으로 전자파적합등록을 한 기기로서 주거지역에서는 물론 모든 지역에서 사용할 수 있습니다. 해당 무선설비는 전파혼신 가능성이 있으므로 인명안전과 관련된 서비스는 할 수 없음 법에...
-
Page 96: Appendix G Environmental Information
Appendix G Environmental Information • The equipment that you have purchased has required the extraction and use of natural resources for its production. • The equipment may contain hazardous substances that could impact health and the environment. • In order to avoid the dissemination of those substances in our environment and to diminish the pressure on the natural resources, we encourage you to use the appropriate take-back systems. -
Page 97: Appendix H Gpl Information
Appendix H GPL Information The source code for Buffalo products that use GPL code is available at http://opensource.buffalo.jp/ . WLAE-AG300N User Manual... -
Page 98: Appendix I Warranty Information
Appendix I Warranty Information Buffalo Technology (Buffalo Inc.) products come with a two-year limited warranty from the date of purchase. Buffalo Technology (Buffalo Inc.) warrants to the original purchaser the product; good operating condition for the warranty period. This warranty does not include non-Buffalo Technology (Buffalo Inc.) installed components.
Need help?
Do you have a question about the AirStation Nfiniti WLAE-AG300N and is the answer not in the manual?
Questions and answers