NETGEAR PS101 Reference Manual
Mini print server
Hide thumbs
Also See for PS101:
- Reference manual (142 pages) ,
- Installation manual (17 pages) ,
- Technical specifications (2 pages)

Related Manuals for NETGEAR PS101


Summary of Contents for NETGEAR PS101
-
Page 1: Reference Manual
Reference Manual for NETGEAR PS101 Mini Print Sever NETGEAR, Inc. 4500 Great America Parkway Santa Clara, CA 95054 USA Phone 888-NETGEAR M-PS101NA-4 March 2002... - Page 2 In the interest of improving internal design, operational function, and/or reliability, NETGEAR reserves the right to make changes to the products described in this document without notice. NETGEAR does not assume any liability that may occur due to the use or application of the product(s) or circuit layout(s) described herein.
- Page 3 Bestätigung des Herstellers/Importeurs Es wird hiermit bestätigt, daß das Model PS100 series Print Sever gemäß der im BMPT-AmtsblVfg 243/1991 und Vfg 46/1992 aufgeführten Bestimmungen entstört ist. Das vorschriftsmäßige Betreiben einiger Geräte (z.B. Testsender) kann jedoch gewissen Beschränkungen unterliegen. Lesen Sie dazu bitte die Anmerkungen in der Betriebsanleitung.
- Page 4 • Internet/World Wide Web NETGEAR maintains a World Wide Web Home Page that you can access at the universal resource locator (URL) "http://www.NETGEAR.com". A direct connection to the Internet and a Web browser such as Internet Explorer or Netscape are required.
- Page 5 PCs to connect to the same printer, processing and trafficking printing requests to any parallel device. These print servers are fast and easy to set up with NETGEAR Print Server with NETGEAR software configuration program. With Microsoft Internet Explorer or Netscape web browser, you can configure the print server even easier.
-
Page 6: Conventions
Sever Installation Guide. This guide provides instructions for installing the print servers by using the NETGEAR Print Server Utility, a program developed by NETGEAR for fast and easy device configuration, and for web configuration, a built-in web server in the print server so you can use a... -
Page 7: Table Of Contents
ETTING ECOGNIZE THE RINT ERVER Auto-IP ............................24 NETGEAR Add Printer Wizard - Write Down the Port Name ............27 ................30 DD A PRINTER TO YOUR SYSTEM TO PRINT CHAPTER 5 USING ADVANCED MANAGEMENT TOOLS ..........37 ..37... - Page 8 NetGear Print Server Manual APPENDIX A TECHNICAL SPECIFICATIONS ..............49 ......................... 49 ENERAL PECIFICATIONS APPENDIX B UNDERSTANDING IP ADDRESSES ............... 51 ....................51 IP A DDRESSES AND THE NTERNET ............................52 ETMASK ......................... 53 UBNET DDRESSING ........................54 IP A...
-
Page 9: Chapter 1 Introduction
NOTE: Printers with the mini Centronics connecter is not compatible with NETGEAR PS101 Mini Print Server. How to tell? If you can plug in PS101 Mini Print Server on the back of the printer, your printer is suitable to use with NETGEAR PS101 Mini Print Server. -
Page 10: Outlooks For Ps101 Mini Print Servers
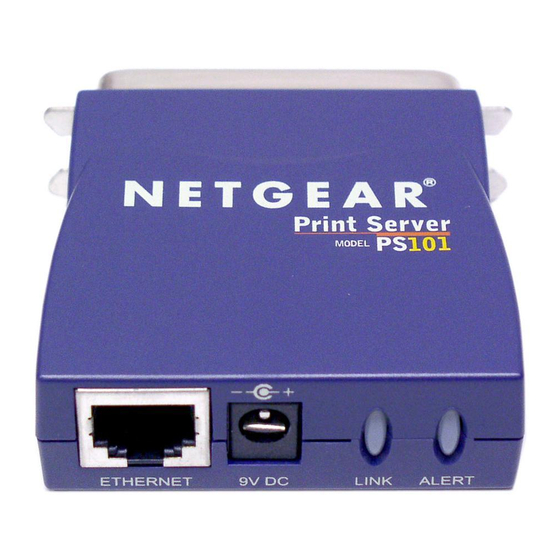
The LEDs that indicate the status of the server, and the printing traffic of the Ethernet are located on the panels of the Model PS101 Mini Print Sever. It has one 10 BASE-T network port. The port operates in 10 Mbps and in half-duplex mode when connected to a 10/100Mbps Ethernet network. As illustrated bellow, it has a power adapter receptacle that accepts a 9V 500mA DC power adapter. -
Page 11: Chapter 2 Installation
Customer Support Phone Card • Call your reseller or NETGEAR Customer Support in your area if there are any wrong, missing, or damaged parts. Refer to "Customer Support" section for the location of customer support in your area. Keep the carton, including the original packing materials. Use them to repack the print server if you... -
Page 12: Connecting Devices To The Print Server
Ethernet specifications limit the twisted pair cable (called a twisted pair segment) extended from a network port to 100 meters in length. Before applying power on the PS101 Mini Print Server and the printer you would like to use with, connect the PS101 Mini Print Server to the port of the printer first. -
Page 13: Verifying Power
Customer Support. For the telephone number of the representative in your area, refer to Customer Support section. To avoid damaging, this device is not certified for used in an enclosure environment. After using a period of time, it is normal that the PS101 Mini Print Server may get warm. -
Page 14: Chapter 3 Web Management For Print Server
Figure 3-1 Print Server Administration program Select the PS101 and click on Advance button to open the panel. Refer to Chapter 5, section 5-3 for the menu Control option and select Device Information. There you will find the IP address for the PS101 Print Server. -
Page 15: Connecting To The Print Server
Alternatively, the IP address of the print server can be found under "Device Information" in the "Control" menu of the NETGEAR Print Server Administration Program. If the IP address information is correct, you can usually use the name of the PS101 Mini Print Server for the print server web configuration. The name of the print server is on the base of the device in the form of PSnnnnnn, where nnnnnn varies on each PS101. -
Page 16: Browser Menu Selections And Configuration Screens
NetGear Print Server Manual 3-3 Browser Menu selections and Configuration Screens This section describes the browser menu selections and corresponding configuration screens. Server Status The Server Status screen shows print server system data and the current settings for all of the other screens. -
Page 17: Configure Server
If you forget the password to the print Password server, the only way to reset it is by resetting the device to factory default through the NETGEAR Print Confirm Password... -
Page 18: Tcp/Ip
NETGEAR router, the default subnet mask is usually 255.255.255.0. Gateway This is the IP address of the router on your network. For example, in a network with a NETGEAR router, Address the gateway address is usually 192.168.0.1. -
Page 19: Printer Port
NetGear Print Server Manual Printer Port The Printer Port screen provides the status of the printer. See Figure 3-5. Figure 3-5 Printer Port Screen Printer Port Connected Shows the descriptive name for the new printer. Printer HandShake This sets one of the communication parameters between this device and the printer. -
Page 20: Reset
NetGear Print Server Manual Reset When you change settings for TCP/IP, you will need to reset the print server. If the print server is rebooted, any print job in progress will be disrupted. If DHCP client is enabled, which is the default setting, after system reboots, the IP address of the unit may be changed. -
Page 21: Chapter 4 Microsoft Windows System Printing
NetGear Print Server Manual Chapter 4 Microsoft Windows System Printing This chapter describes how to configure and use the NETGEAR PS101 Mini Print Sever in a Microsoft Windows networking environment. To configure your hardware and software for the Microsoft Windows platform, you may: •... -
Page 22: Netgear Print Server Software Installation
To install and set up your network and your print server for the NETGEAR Print Server, you may use a PC with a Microsoft Windows (95, 98, NT 4.0, ME, 2000, or XP) operating system and with either the TCP/IP protocol or the NetBEUI protocol enabled. - Page 23 NetGear Print Server Manual The second screen provides you an important message as shown below. Click on Next button. Figure 4-2 Information...
- Page 24 • NETGEAR Add Printer Wizard A step-by-step guide program to configure the printer to print from your Microsoft Windows You MUST install the NETGEAR Add Printer Wizard so you can use the print server to print from Windows. • Administrative Tools Advance administrative tools including admin and IPSetup Use admin to manage the print servers on LAN.
- Page 25 NetGear Print Server Manual After make the proper selections, click on Next button. You can choose the location of the program. Figure 4-4 Destination Location Choose a program folder name. You click on Next button to accept the default name.
- Page 26 NetGear Print Server Manual The next screen shows you the progress of the installation. Figure 4-6...
- Page 27 NetGear Print Server Manual Before you finish the installation, you can choose to run the NETGEAR Print Server Setup Wizard and read the manual. You can uncheck either one or both of the selections and run it at a later time.
-
Page 28: Setting Up Your Pc To Recognize The Print Server
• The print server is attached to the printer port on the printer. • The AC adapter is plugged into the wall socket. • The Ethernet cable is plugged into the ETHERNET port. Figure 4-9 NETGEAR Print Server software Icon... - Page 29 Windows 98, ME, 2000, and XP use TCP/IP as the primary networking protocol. PS101 does not support NetWare IPX/SPX environment. Older system, like Microsoft Windows 3.1, may support only Netbios protocol as the Microsoft Network. You must have either TCP/IP or Netbios protocol, or both to use NETGAER PS101 print server.
- Page 30 Click on Next. The Printer Server Setup Wizard window shows the current available NETGEAR Print Server on LAN. Click on Refresh button to see the new added print server. If you still don’t see the one you’d like to see, wait a minute and click the Refresh button again.
- Page 31 NetGear Print Server Manual Select the PS101 print server and click on Next. The Printer Server Setup Wizard window shows the current print server Name. The default name is the Device Name on the base of the unit. Change it to a unique name, or leave it without changing it. See Figure 4-12 Select Name for Print Server.
-
Page 32: Auto-Ip
Auto-IP When NETGEAR PS101 Print Server is without an IP address due to as a DHCP client and there is no DHCP server to automatically get an IP address, it will self-assign a unique IP address. The address range is from 169.254.0.1 to 169.254.254.254 with the subnet mask 255.255.0.0 so that the print server can... - Page 33 NetGear Print Server Manual Figure 4-13 Set up TCP/IP for Print Server to get an IP address...
- Page 34 Click No, if you don’t need to add a printer to your system now. You can add a printer at a later time by opening the NETGEAR Print Server group and running NETGEAR Add Printer Wizard. Figure 4-15 Add a Printer...
-
Page 35: Netgear Add Printer Wizard - Write Down The Port Name
You can reach this setup procedure by answering Yes to the previous Figure 4-15 Information. Or open NETGEAR Print Server group and run NEYGEAR Add Printer Wizard. Make sure that the NETGEAR Print Server and the printer that connects to it are both powered on. Make sure that the cable connections between them are properly connected. - Page 36 NetGear Print Server Manual ADDPORT Window (Epson Connection) Click on No if you do not have an Epson Stylus Color printer attached to the port, and continue to step 8. Click on Yes if you do have an Epson Stylus Color printer (or plan to install one). You must disable the Epson printer.
- Page 37 NetGear Print Server Manual ADD PORT Window If this is not an Epson printer, skip the above procedure. The Add Port should be added successfully. See Figure 4-19 Add Port message. Figure 4-19 Add Port message Write Down the Port Name It is very important to remember and write down the port name.
-
Page 38: Add A Printer To Your System To Print
NetGear Print Server Manual 4-4 Add a printer to your system to print Select Printer Port for Add Printer Wizard After selected the printer, you need to select a printer port to print. See Figure 4-20 Select Printer Port for Add Printer Wizard. - Page 39 NetGear Print Server Manual Use the printer port name written at the last section. Scroll down and find the printer port name. For example, the printer port name here is ‘IP_192.168.1.108_P1’. See Figure 4-21 Find and select the printer port. For Windows 95, and 98 users, this window will show up after Add Printer (Figure 4-22 thereafter).
- Page 40 NetGear Print Server Manual Figure 4-22 Add Printer Wizard Click on Next If you have ever installed the printer driver in the system, Figure 4-23 Use Existing Driver window shows. You can choose to keep the existing driver, or replace it. If you don’t see Figure 4-23, go to the next step.
- Page 41 NetGear Print Server Manual Figure 4-23 Use Existing Driver for Add Printer Wizard Click on Next Name the printer. See Figure 4-24 Name Your Printer for Add Printer Wizard. If there are more than one printer drivers installed in the system, you may answer Yes to choose this as your default printer for your...
- Page 42 NetGear Print Server Manual Figure 4-24 Name Your Printer for Add Printer Wizard Click on Next See Figure 4-25 Printer Sharing. When you use print server for the printer, you don’t usually need to share the printer on the local machine. Keep the default answer as Do not share this printer.
- Page 43 NetGear Print Server Manual Figure 4-26 Print Test Page for Add Printer Wizard Click on Next If you answer Yes to print a test page, see Figure 4-27. Figure 4-27 Printer print the test page Click on OK Complete the Add Printer Wizard. See Figure 4-28 Completing the Add Printer Wizard.
- Page 44 NetGear Print Server Manual Figure 4-28 Completing the Add Printer Wizard Click on Finish Now you can print through the PS101 print server. The Figure 4-17 Printer Select Window (Add Port) window remains on the screen. Click on End to close it.
-
Page 45: Chapter 5 Using Advanced Management Tools
NETGEAR Print Server Administration Program All active NETGEAR print servers are listed on the screen as shown. If there is any print server missing from the screen, you may click on the Browse button to scan the network one more time. By... -
Page 46: Buttons
NetGear Print Server Manual default, the NetGear Administration Program only browses the network with NetBEUI to minimize unnecessary packets on the network. If you still do not see all the print servers, the print server that you are trying to configure might have the default NetBEUI protocol disabled. - Page 47 The protocol currently used for communication between your PC and the Print Server is Enabled and grayed out, so it cannot be disabled. Browse Button Use this button to re-scan the network and update icons for any Print Servers located. Exit Button. The Exit button ends the NetGear setup utility.
-
Page 48: Advanced Print Server Configuration
NetGear Print Server Manual 5-2 Advanced Print Server Configuration From the main menu, click on the Advanced button to use the advanced configuration procedure. The Advanced Print Server Configuration screen opens. The Advanced Print Server Configuration screen contains the fields listed on tabs that can be selected in any order to customize the configuration of the print server. -
Page 49: Tcp/Ip Tab
There is a factory default name. For any change, NETGEAR recommends that a name be determined before setting the print server in any network. This name should be no more than 16 characters with at least a non numeric letter. Spaces are not allowed, but dashes (-) and underscore marks (_) are accepted. -
Page 50: Logical Port Tab
This IP address is assigned to the print server. If you have a private LAN and do not plan to connect to the TCP/IP-based internet, NETGEAR recommends that you use the address from the IETP-designated private addresses (for example, 192.168.x.x or 10.x.x.x). - Page 51 NetGear Print Server Manual Logical Port Tab Window Logical Port Tab Fields Field Description Current Selects the logical port to be configured. Eight logical ports are available for print servers with two printer Selected ports; three logical ports are available for one printer port print servers.
-
Page 52: Physical Port Tab
NetGear Print Server Manual above. Physical Port Tab This tab allows you to set the "Handshake Signal" used for communication between the Print Server Physical Port Physical Port Tab Fields Field Description Current Selected Selects the physical port to be configured. -
Page 53: Device Information
NetGear Print Server Manual The NetGear Administration program contains a menu bar that provides a number of options including Control, Printer, and Help, which are outlined in the following section. Control Menu Control is the first item on the top menu bar is for print server control. Click on the Control selection, move the cursor down to select one of the menu selections and click again to carry out the intended action, as described below. - Page 54 NetGear Print Server Manual Device Information • Reset Device Issues a soft reset to reboot the print server. This process allows newly modified print server parameters to take effect. • Restore Default Configuration Changes all print server parameters to their factory default values. If only partial restoration is intended, use the tab options for the different protocols and choose "Set to Default"...
-
Page 55: Help Menu
NetGear Print Server Manual Printer Status The printer ports not existing on the print server are shadowed or grayed out. On the popup window, you can check the connection status of the print server such as on-line, off-line, paper jam, and out-of-paper. Also on display is the printing information indicating if the print server is sending data to the printer or if the printer is idling. -
Page 56: Configuring Using Ip Setup
Windows environment. Please see Appendix E for IPSetup utility reference. With IPSetup tool, you can force an IP address to a NETGEAR Print Server. It sets up the subnet mask and default gateway as well as disables the DHCP. In this way, you can always get a known and fixed... -
Page 57: Appendix Atechnical Specifications
NetGear Print Server Manual Appendix A Technical Specifications This appendix provides technical specifications for the NETGEAR Model PS101 Print Server. General Specifications Network Protocol and Standards Compatibility IEEE 802.3i 10BASE-T CSMA/CD NetBEUI and TCP/IP protocols Data Rate 10 Mbps differential Manchester encoded... - Page 58 NetGear Print Server Manual UL listed (UL 1950) CSA certified (CSA 22.2 #950) TUV licensed (EN 60 950) T-Mark...
-
Page 59: Appendix Bunderstanding Ip Addresses
NetGear Print Server Manual Appendix B Understanding IP Addresses This appendix provides information about understanding IP addresses, which you must assign to the NETGEAR PS100 series Print Sever when operating in a TCP/IP environment. IP Addresses and the Internet Because TCP/IP networks are interconnected widely across the world, every machine on the Internet must have a unique address to make sure that transmitted data reaches the correct destination. -
Page 60: Netmask
NetGear Print Server Manual 128.1.x.x to 191.254.x.x. Class C addresses can have 254 hosts on a network. Class C addresses use 24 bits for the network address and 8 bits for the node. They are in this range: 192.0.1.x to 223.255.254.x. -
Page 61: Subnet Addressing
NetGear Print Server Manual Subnet Addressing By looking at the addressing structures, you can see that even with a Class C address there are a large number of hosts per network. Such a structure is an inefficient use of addresses if each end of a routed link requires a different network number. -
Page 62: Private Ip Addresses
255.255.255.252 /30 255.255.255.254 /31 255.255.255.255 /32 NETGEAR strongly advises that all hosts on a LAN segment use the same netmask for the following reasons: So that hosts recognize local IP broadcast packets When a device broadcasts to its segment neighbors, it uses a destination address of the local network address with all ones for the host address. -
Page 63: Address Resolution Protocol
DHCP server stores a list or pool of IP addresses, along with other information (such as gateway and DNS addresses) that it may assign to the other devices on the network. The NETGEAR Model RT328/RH348 router has the capacity to act as a DHCP server. -
Page 64: Appendix Cip Setup
Clicking on Reset will set all values back to zero, and clicking on OK sets the data entered. Ensure that the IP address assigned to the device is not already in use. Following picture is the NETGEAR Print Server IP Address Configuration window. NETGEAR Print Server IP Address Configuration... -
Page 65: Appendix Dascii To Hexadecimal Conversion Table
NetGear Print Server Manual Appendix D ASCII to Hexadecimal Conversion Table Hexadecimal Value ASCII Character (SPACE) " &... - Page 66 NetGear Print Server Manual < >...
- Page 67 NetGear Print Server Manual...
Need help?
Do you have a question about the PS101 and is the answer not in the manual?
Questions and answers