Sharp MX-6240N Quick Start Manual
Digital full colour multifunctional system
Hide thumbs
Also See for MX-6240N:
- Quick start manual (38 pages) ,
- Support manual (16 pages) ,
- Brochure & specs (12 pages)
Table of Contents
Advertisement
DIGITAL FULL COLOUR MULTIFUNCTIONAL SYSTEM
Model: MX-6240N/MX-7040N
QUICK START GUIDE
BEFORE FIRST USE ......................................2
INFORMATION ON DISPOSAL ......................3
AND HOW TO USE THEM .............................4
CAUTIONS ......................................................5
NAMES OF PARTS AND POWER INPUT ......7
HOME SCREEN ..............................................8
PRINTER .........................................................9
COPY .............................................................10
FAX.................................................................12
SCAN .............................................................14
DOCUMENT FILING ......................................16
COPY OUTPUT ..............................................18
MANUAL FINISHING .....................................20
SPECIFICATIONS ..........................................22
SUPPLIES ......................................................28
OPTIONS .......................................................29
(NOISE EMISSION) .......................................31
Keep this manual close at hand for reference whenever needed.
Advertisement
Table of Contents

Related Manuals for Sharp MX-6240N


Summary of Contents for Sharp MX-6240N
-
Page 1: Table Of Contents
DIGITAL FULL COLOUR MULTIFUNCTIONAL SYSTEM Model: MX-6240N/MX-7040N QUICK START GUIDE BEFORE FIRST USE ........2 INFORMATION ON DISPOSAL ......3 OPERATION MANUALS AND HOW TO USE THEM ......4 CAUTIONS ............5 NAMES OF PARTS AND POWER INPUT ..7 HOME SCREEN ..........8 PRINTER ............9 COPY .............10... -
Page 2: Before First Use
All information included herein is subject to change without notice. Copyright© 1995-2007 Adobe Macromedia Software LLC. All rights reserved. SHARP is not responsible for any loss or damages, direct or indirect, arising from or related to the use of this operation manual. -
Page 3: Information On Disposal
If the product is used for business purposes and you want to discard it: Please contact your SHARP dealer who will inform you about the take-back of the product. You might be charged for the costs arising from take-back and recycling. -
Page 4: Operation Manuals And How To Use Them
OPERATION MANUALS AND HOW TO USE THEM Quick Start Guide (this document) Software Setup Guide (CD-PDF) DIGITAL FULL COLOUR MULTIFUNCTIONAL SYSTEM Model: MX-6240N/MX-7040N Features important safety notes, names of parts Explains how to install the various drivers needed QUICK START GUIDE... -
Page 5: Cautions
To prevent the loss of important documents in the unlikely event of a hard drive failure, keep the originals of important documents or store the original data elsewhere. With the exception of instances provided for by law, Sharp Corporation bears no responsibility for any damages or loss due to the loss of stored document data. - Page 6 CAUTIONS Power notes WARNING Do not insert or remove the power plug with wet hands. If you will not use the machine for a long time, be sure to remove the power plug from the outlet for safety. This may cause electrical shock. When removing the power plug from the outlet, do not pull on the cord.
-
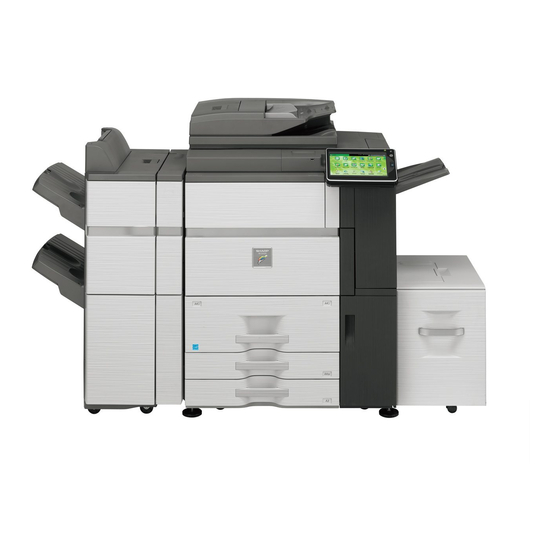
Page 7: Names Of Parts And Power Input
NAMES OF PARTS AND POWER INPUT The machine has two power switches: The main power switch inside the front cover located in the lower left corner, and the [POWER] button ( ) on the operation panel. Keyboard Main power indicator Turning on the power • Turn the main power switch to the "... -
Page 8: Home Screen
HOME SCREEN This screen appears first. When you touch an icon, the corresponding screen appears. FTP/Desktop The scanned document is sent to the specified FTP server directory or the Pressing the [Home Screen] button ( ) on the operation panel also displays this screen. specified folder in a computer connected to the network. * The screen may differ from the actual one depending on the model or customization. Network Folder The scanned original is sent to the computer network folder specified in the Copy Windows network. -
Page 9: Printer
PRINTER Basic printing In a Windows environment „ This section explains how to print a document from "WordPad", which is a standard accessory application in Windows. Select [Print] from the [File] Select the printer driver for Click the [Paper] tab and select Click the [OK] button to menu the machine and click the... -
Page 10: Copy
COPY Basic operations Place the Copy settings Preview Specify the Start number of original (Black & white, or colour) copies 1 Copy settings Corrects the number 2 Displays the [Function Review] dialog of copies 3 Scans the original and displays it in the preview area (if preview is required) 4 Cancels all settings Copy settings Colour mode... - Page 11 Original Exposure Selects automatically Selects automatically Best for maps containing fine text Displays inch size list Best for faint coloured originals such as those Best for text originals written using pencil Displays AB size list Prioritizes the quality of text and printed photo Displays the direct entry screen Tap a darker or lighter area to adjust shading images Displays the custom size list...
-
Page 12: Fax
Basic operations Place the Fax scanning and send settings Preview Specify the Start original destination 1 Fax scanning and send settings Correction 2 Displays the [Function Review] dialog 3 Scans the original and displays it in the preview area (if preview is required) 4 Cancels all settings Fax scanning and send settings Exposure... - Page 13 Select among addresses Job Build Original Count recently sent to Tap this to switch the job build mode on or off. Tap this to switch the original count setting on or off. Setting it to On sends fax after checking the scanned number of Setting it to On scans a large number of originals in segments.
-
Page 14: Scan
SCAN Basic Operations (Scan to E-mail) Place the Scan settings Preview Specify the destination Start original 1 Scan settings 2 Displays the [Function Review] dialog 3 Scans the original and displays it in the preview area (if preview is required) 4 Cancels all settings Scan settings Touch to input... - Page 15 File Format This function sets the file format and compression mode (ratio) of send data. File format Compression mode Number of pages setting Colour/Greyscale Colour/Greyscale Colour/Greyscale/Black & white Compressible modes: Transmittable formats: Transmittable formats: Compressible modes: Specify the number None, MH (G3), MMR TIFF, XPS, JPEG, PDF, PDF/A TIFF, XPS, PDF, PDF/A Low, Medium, High, Bk Letter Emphasis of pages per file (G4) Sends data by reducing...
-
Page 16: Document Filing
DOCUMENT FILING This function saves the original scanned on the machine, received fax data, or print data from a PC on the hard disk drive of the machine or on an external memory device. The saved data can be printed or sent. Editing of the stored files, for example combining, is also possible. Basic operations HOME SCREEN Select the folder Place the original Start Folder select screen... - Page 17 File list view File thumbnails view You can select the method to display files. List view or thumbnails view can be selected. Viewing by folder Viewing by job „ „ Job settings menu Select a file you wish to retrieve, then select a desired operation. The following operations are displayed on the action panel. The [Print Now] operation is not displayed on the action panel but displayed as a button in the trigger area. Prints a file from the reprint screen Views property change and file detail information This item changes to [Print] when multiple files are selected.
-
Page 18: Copy Output
COPY OUTPUT Configure the output settings for copies using Sort, Group, Offset, Staple, Punch, or Fold. Basic operations Select [Output] Copy output settings Check the preview image Start (Black & white, or colour) 1 Specify the output tray 2 Select the output and paper output type 3 Specify the details of output mode Output tray settings Output tray settings Sort/Group function... - Page 19 Saddle Stitch Trimmer Setting (When a saddle finisher is installed) (When a trimming module is installed on the saddle finisher) Scanning 2-Sided originals Copies can be folded at the centre, stapled, and output. Enabling "Saddle Stitch" allows you to configure the trimmer settings. (When a trimming module is installed on the saddle finisher) For saddle folding, it trims a side drop, offering a good-looking output Tap this to switch the cover setting Off or On, or to Turns off the trimmer setting...
-
Page 20: Manual Finishing
MANUAL FINISHING This function allows you to set for finish on copied or printed pages. You can select the manual finishing mode if the inserter is installed. When the finisher (100-sheet stapling), saddle finisher (100-sheet stapling), punch module, or folding unit is installed, finishing operations, such as stapling, punching or folding, can be performed. Basic operations Place the original Switch to the manual finishing Finishing method settings Start mode Changing modes from the Home „ Screen Changing modes from the screen „ for each mode Adjust the inserter tray guide to the pa- 1 Select the appropriate finishing method per size, and load paper. - Page 21 Staple Saddle Stitch Folding function (When a saddle finisher (100-sheet stapling) is installed) (When a folding unit is installed) (When a finisher installed) This function staples each set of copies at two positions in the This function folds paper in Z-fold, C-fold, or other types of shapes. This function staples the loaded paper sheets into a sheaf.
-
Page 22: Specifications
SPECIFICATIONS Basic Specifications / Copier specifications Name MX-6240N/MX-7040N Same size: 1:1 ± 0.8 % Enlarge: 115 %, 122 %, 141 %, 200 %, 400 % Reduce: 25 %, 50 %, 70 %, 81 %, 86 % Type Console Copy ratios Zoom range: 25 to 400 % (25 - 200 % using DSPF) in 1 % increments, total 376 increments. Can calculate zoom rate when mm is specified. - Page 23 Automatic document feeder (Standard equipment) Name Duplex Single Pass Feeder (DSPF) 150 sheets (21 lbs. (80 g/m Paper storage capacity (or maximum stack height of 49/64" (19.5 mm)) Document feeder types Duplex Single Pass Feeder (DSPF) B/W: 75 one-sided sheets/minute (A4 (8-1/2" × 11") horizontal) Original paper sizes A3 (11"...
- Page 24 SPECIFICATIONS Finisher MX-FN19 MX-FN21 Name Finisher (50-sheet stapling) Name Finisher (100-sheet stapling) Paper sizes Depends on feeder specifications Paper sizes Depends on feeder specifications Useable paper 55 to 300 g/m Index (16 lbs. to 170 lbs.) Useable paper 55 to 300 g/m Index (16 lbs. to 170 lbs.) No.
- Page 25 Saddle stitch finisher MX-FN20 MX-FN22 Name Saddle Stitch Finisher (50-sheet stapling) Name Saddle Stitch Finisher (100-sheet stapling) Paper sizes Depends on feeder specifications Paper sizes Depends on feeder specifications Useable paper 55 to 300 g/m Index (16 lbs. to 170 lbs.) Useable paper 55 to 300 g/m Index (16 lbs.
- Page 26 MX-PN13B: 3 holes MX-PN13D: 4 holes (wide) Fax Specifications Name Facsimile expansion kit (MX-FX11) Approx. 2 seconds *1 (A4 (8-1/2" × 11") Sharp standard paper, normal Transmission time characters, Super G3 (JBIG)) Useable lines General phone lines (PSTN), private branch exchange (PBX) Approx.
- Page 27 Colour: 75 sheets/minute (one-sided) letter) Scan speed When in standard mode using Sharp standard paper (A4 (8-1/2" × 11") size (8-1/2" × 11" (A4)) Driver TWAIN compliant with 6% coverage) and the auto colour detector is turned off. The speed varies depending on the data volume of the original.
-
Page 28: Supplies
SUPPLIES Standard supplies for this product that can be replaced by the user include paper, toner cartridges, and staple cartridges for the finisher. For best copying results, be sure to use only Sharp Genuine Be sure to use only SHARP-specified products for the toner cartridges, finisher staple Supplies which are designed, engineered, and tested to maximize cartridge, and transparency film. the life and performance of Sharp products. Look for the Genuine Supplies label on the toner package. -
Page 29: Options
OPTIONS Optional Units When optional units are installed, finishing operations such as stapling, punching or folding, can be performed. With full installation options 1 Folding Unit 2 Finisher/Saddle Stitch Finisher 3 Inserter 4 Curl Correction Unit 5 This Unit 6 Multi Bypass Tray 7 Paper Pass Unit 8 Large Capacity Trays Finisher/Saddle Stitch Finisher Folding Unit Each set of copies can be stapled, or the sheets can be folded and stapled. -
Page 30: Punch Module
Punch Module Inserter Punches copies and outputs them automatically to the tray. Inserts a sheet of paper into a specific page as an insertion sheet. Punch Module (3 holes) Inserter MX-PN12B MX-CF11 • For 50-sheet stapling finisher (MX-FN19) or saddle stitch finisher (MX-FN20) • 200 sheets × 2 Punch Module (3 holes) MX-PN13B • For 100-sheet stapling finisher (MX-FN21) or saddle stitch finisher (MX-FN22) Curl Correction Unit Large Capacity Trays Perform the curl correction of the output. -
Page 31: Administrator/Others (Noise Emission)
"System Administrator" will also be allowed to log in from the Web browser. You can also specify a device account as a login user. Noise emission Noise emission values The following shows noise emission values as measured according to ISO7779. Sound power level L MX-6240N MX-7040N Operating 7.8 B 7.8 B Standby... -
Page 32: Sharp Corporation
MX-6240N/MX-7040N QUICK START GUIDE SHARP CORPORATION PRINTED IN FRANCE TINSE5039GHZZ...