
Related Manuals for Pro-Form Crosswalk 405 E


Summary of Contents for Pro-Form Crosswalk 405 E
- Page 1 ModeJ No.831.24633.0 LL EXERCIS SeriaJ No. User's Manual Seri_ Number Decal , Assembly , Operation ,, Maintenance , Part List and Drawing Sears, Roebuck and Co., Hoffman Estates, IL 60179...
-
Page 2: Table Of Contents
TABLE OF CONTENTS iMPORTANT PRECAUTIONS ..............BEFORE YOU BEGIN ..............ASSEMBLY ................OPERATION AND ADJUSTMENT ............HOW TO FOLD AND MOVE THE TREADMILL ..........TROUBLESHOOTING ..............CONDiTiONiNG GUiDELiNES ............... PART LiST ................EXPLODED DRAWING ..............ORDERING REPLACEMENT PARTS ..........Back Cover WARRANTY .............. -
Page 3: Important Precautions
iMPORTANT PRECAUTIONS... - Page 4 The decals shown below have been placed on the treadmill, if a decal is missing, or if it is not legible, call toll=free 1-888-533-1333 and order a free replacement decal. Apply the decal in the location shown. Note: The decals are not shown at Protect yourself end others from...
-
Page 5: Before You Begin
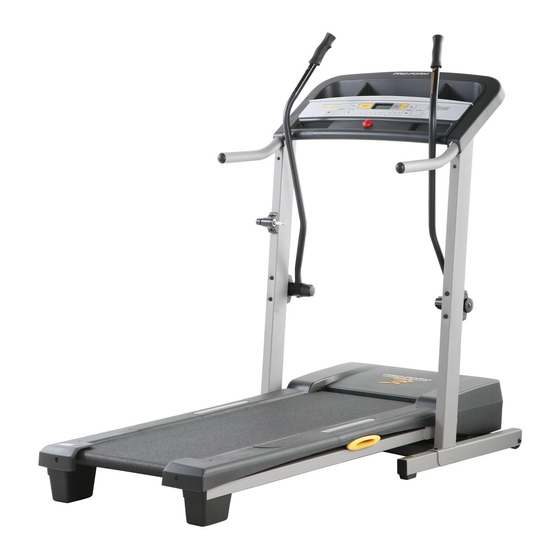
BEFORE YOU BEGIN Thank you for selecting the new PROFORM ®CROSS- ing this manual, call 1-800-4-MY-HOME ®(1-800-469- WALK 405E treadmill. The CROSSWALK 405E tread- 4663).To help us assist you, please note the product model number and serial number before calling. The mill offers a selection of features designed to make your model number of the treadmill is 831.24633.0. -
Page 6: Assembly
ASSEMBLY Assembly requires two persons. Set the treadmill in a cleared area and remove all packing materials. Do not dispose of the packing materials until assembly is completed. Note: The underside of the treadmill walking belt is coated with high-performance lubricant. - Page 7 Attach twoRoundBasePads(57)tothebaseof therightUpright ( 69)withtwo1"TekScrews (39). Attach a Wheel ( 66)tothebaseoftheright Upright (69)witha Wheel B olt(64)anda Nut (13)asshown. D onot overtightenthe Wheel Bolt;theWheel s hould turnfreely. Withthehelpofa second person, c arefully tip thetreadmill ontoitsrightside.Donot fully fold the Frame (86) until the treadmill is com- pletely assembled.
- Page 8 SettheConsole (43)face-down o na softsur- facetoavoidscratching t heConsole. N ext, s et oneof theHandrails ( 71)ontheConsole as shown. A ttach theHandrail withthree3/4" Screws (2).Makesurethatthe console wire is not pinched. Start all three Screws before tightening any of them. Do not overtighten the Screws.
- Page 9 Attach the Left Upper Body Arm (76) to the left Upright (69) with two 3 1/2" Bolts (96), two 1/4" Washers (38), and two 3/8" Star Washers (5) as shown. Make sure that the Left Upper Body Arm is on the indicated side of the Console (43).
-
Page 10: Operation And Adjustment
OPERATION AND ADJUSTMENT THE PRE-LUBRICATED WALKING BELT tric shock. This product is equipped with a cord having an equipment-grounding conductor and a grounding Your treadmill features a walking belt coated with high- plug. Plug the power cord into a surge suppressor, performance lubricant, iMPORTANT: Never apply sil- and plug the surge suppressor... - Page 11 CONSOLEDIAGRAM ..£SB ......... INCLIN ........................SPEED t_a _'i _ _tu_ _ I1_ _i_"? _ _1b e "_ e f°lO '_ _ 123456789!40 Pulse ........................Son or ......oto: ,, Co, LZt,c on the console, remove the plastic. FEATURES OFTHECONSOLE HOW TO TURN ON THE POWER The treadmill console offers a selection of features Plug in the power cord (see...
- Page 12 Follow your progress with the displays. HOWTO USETHE MANUALMODE The lower left insert the key into the console. display--As exercise, the See HOW TO TURN ON THE POWER on page lower left display can show the elapsed time and the distance that Select the manual mode.
- Page 13 Measure your heart rate if desired. HOW TO USE A CALORIE GOAL PROGRAM To measure your heart rate, stand on the foot rails and place your left thumb on the pulse sen- Insert the key into the console. sor (see the drawing at the top of page 11). Do not press too hard, or the circulation in your See HOW TO TURN ON THE POWER on page thumb will be restricted and your pulse may...
- Page 14 THE INFORMATION MODE/DEMO MODE An "E" (for English) or an "M" (for metric) will appear in the The console features an information mode that keeps lower right display. Press the track of treadmill usage information and allows you to Speed increase button to select a unit of measurement for the console.
- Page 15 HOW TO USE THE UPPER BODY ARMS As you walk on the treadmill, you can hold the handrails or use the upper body arms. To exercise your arms, shoulders, and back for a total body work- out, move the upper body arms forward and back as you walk on the treadmill.
-
Page 16: How To Fold And Move The Treadmill
HOW TO FOLD AND MOVE THE TREADMILL HOW TO FOLD THE TREADMILL FOR STORAGE Before folding the treadmill, adjust the incline to the Jowest position. If this is not done, the treadmill may be per- manently damaged. Next, unplug the power cord. CAUTION: You must be able to safely lift 45 pounds (20 kg) to raise, Jower, or move the treadmiJL 1. - Page 17 HOW TO LOWER THE TREADMILL FOR USE 1. Hold the treadmill with your right hand as shown. Pull the latch knob to the left and hold it. Pivot the frame downward until it is past the latch pin. Engaged 2. Hold the metal frame firmly with both hands, and lower it to the floor.
-
Page 18: Troubleshooting
TROUBLESHOOTING Most treadmill problems can be solved by following the simple steps below. Find the symptom that applies, and follow the steps listed. If further assistance is needed, call toll-free 1-800-4-MY-HOME ® (1-800-469-4663). PROBLEM: The power does not turn on SOLUTION: a. - Page 19 PROBLEM: The walking belt slows when walked on SOLUTION: a. Use only a single-outlet surge suppressor that meets all of the specifications described on page 9. If the walking belt is overtightened, treadmill perfor- mance may decrease and the walking belt may be- come damaged.
-
Page 20: Conditioning Guidelines
CONDiTiONiNG GUiDELiNES ergy. Only after the first few minutes does your body begin to use stored fat oa/ofies for energy. If your goal is to burn fat, adjust the speed and incline of the tread- mill until your heart rate is near the lowest number in your training zone. - Page 21 SUGGESTED STRETCHES The correct form for several basic stretches is shown at the right. Move slowly as you stretch--never bounce. 1. Toe Touch Stretch Stand with your knees bent slightly and slowly bend forward from your hips. Allow your back and shoulders to relax as you reach down toward your toes as far as possible.
- Page 22 NOTES...
-
Page 23: Part List
PART LIST--Model No. 831.24633.0 R0706A Qty. Description Qty. Description Qty. Description Hood Ground Wire Arm w/Grip 3/4" Screw Resistance Assembly Hand Grip Motor Belt Wire Harness Right Foot Rail Motor Tension Bolt Console Power Cord 3/8" Star Washer Rear Roller Plate Reset/Off Motor Star Washer Rear Roller... -
Page 24: Exploded Drawing
EXPLODED DRAWING--iVlodei No. 831.24633.0 Rozo6A '_" ("4... - Page 25 Part 2 of 4...
- Page 26 Part 3 of 4 '_16...
- Page 27 Part 4 of 4 77-- 48-I_...
- Page 28 Your Home For repair--in your home--of all major brand appliances, lawn and garden equipment, or heating and cooling systems, no matter made it, no matter who sold iiiiiiiiiiiiiii_ For the replacement parts, accessories, and user's manuals that you need to do-it-yourself. iiiiiiiiiiiiiiii For Sears professional installation...
Need help?
Do you have a question about the Crosswalk 405 E and is the answer not in the manual?
Questions and answers
How does the incline parts go together under the treadmill
How to turn on
To turn on the Pro-Form Crosswalk 405 E, make sure the power cord is plugged into a surge suppressor, and the surge suppressor is plugged into a properly grounded outlet. Then, insert the key into the console.
This answer is automatically generated