Table of Contents
Advertisement
Quick Links
Advertisement
Table of Contents

Related Manuals for Kenmore 1347


Summary of Contents for Kenmore 1347
- Page 1 INSTRUCTIONS MODEL[ 3470 ZIG o ZAG...
- Page 2 Dear Homem_i_er : You have just invested in a very fine zigzag sewing machine,. Before using your new Kenmore machine, please pause for a moment and carefully read this booklet which contains instructions on how to operate and care for your machine.
- Page 3 TABLE OF Section _[ Knowing Your Sewing Machine CONTENTS identifying Parts ..... 2, 3 Installing Machine ....Winding the Bobbin ......Threading the Bobbin Case ....Threading of Top Thread ..Using Controls Top Tension Control ....8, 9 Bobbin Tension Adjusting ....
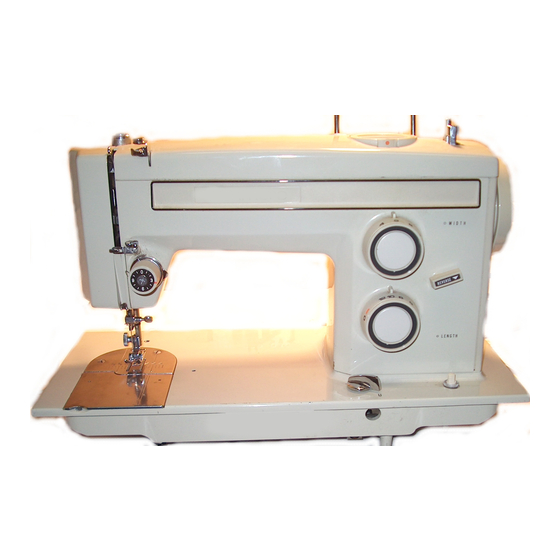
- Page 4 • i• •_ •• • ® ® ® ..• r• 1, Hand Hole Cover Plate Take- up Lever Seam Guide Lines Upper Thread Guide 3, Presser Foot Special Stitch Dial Guide Pin Ho_e Stitch Width Control Thread Guide 15,, Reverse Stitch Control 6, Needle Clamp Screw...
- Page 5 • .:• i •:• "::LI::i!::,i':•; • :. _:I:Y:••• ¸/• Clutch Knob Presser Foot Lever Thread Cutter Hand Wheel Bobbin Winder Presser Foot Thumb Screw Needle Plate Thread Spool Pins 24. Bobbin Winder Tension Disc Feed Dogs Pressure Regulator...
- Page 6 ® ® ® ; :;ii:_i :;iiii;i:!:i_i_ii:!_i!ii_i_ ¸; _: ;:i/{;/: _!_:_;!iii_!iiii_i_:i_:;_: _ : i • Plug machine cord into any 110- 1o Loosen hinge screws 120 volt walt outlet° Turn on power under holes in the rear edge of the by pushing light and power switch.
- Page 7 ® ® ® :i:i: bobbin winder latch against bob- 1. Release clutch by turning clutch until it clicks. Holding onto knob toward you, end of thread, start machine, When 2, Draw thread from spool through bobbin is slightly filled, snip bobbin winder tension...
- Page 8 ® ® ® ® ® ® 1, To remove bobbin from the shuttle, Pull thread under tension spring. raise needle to its highest position. Holding latch open, positionocase Remove hand hole cover plate,, into shuttle, and release latch, Case Pull open latch of bobbin case.
- Page 9 can be slipped into the hook (See Fig, Place thread on spool pin as shown 1)_ When the thread is rejeased, with thread coming from the back spring wire loop will return to position the spool_ Draw thread through (See Fig, 2) with thread...
- Page 10 Probablythe mostimportantcontrolon your machineis this onethat regulates your top threadtension,tt consists of discs between which the thread passes, The pressure on these discs is regulated by turning the dial on the front the control.. The higher the number, the tighter the tension, There are many...
- Page 11 A perfect straight stitch wil! have threads locked between the two layers of fabric with no loops top or bottom. Upper thread too tight Decrease Tension Upper thread too loose Increase Tension...
- Page 12 ..• Bobbin tension requires adjusting tess frequently than upper thread tension If the stitch is satisfactory but the seam is puckered, it may be necessary loosen the tension on both the top and bottom threads Be sure to balance them as indicated on Page 9 When...
- Page 13 • i• •!:i• •: !• ••• The easiest way to check tensions is to sew a medium zig zag stitch on the fabric you will be using, Use the appropriate type of thread and needle Use different colors of thread on the bobbin and upper spool Sew a line of zig zag stitches...
- Page 14 This control regulatesthe width of the stitch you select THE HIGHERTHE NUMBER - THEWIDERTHESTITCH,You mayvaryyourzigzagstitch width by adjustingthis control to tile setting you desire, This control must be on Red Dot in orderto do straight stitching The stitch length control regulatesthe length of the stitch you select THE HIGHERTHE NUMBER- THESHORTER THESTITCH, The number on stitch length control indicates the approximatenumber of stitches per inch...
- Page 15 _i_:_: _ :_i,"_ _i _ _:_ !,_i, __:...
- Page 16 • • : L ¸¸ It is best to begin and end seams With afew stitches taken in reverse: This is called back tacking. Back tacking fastens the:ends of the seams firmly and prevents raveling. When reverse stitching is needed, turn cont[o(:::ciOckwise andlhold...
- Page 17 There are certaintypes of utility stitches you will use often in your home sewing. This control enables to just dial stitch need task at hand., ..• • • • L • The setting illustrated above is the one used most of your stitching.
- Page 18 You will find that much of "your sewing is in the mending categoryi:::::For this reason have been provided with a stitch repair of tears. Use of the stitch setting shown is given in more detail _n the next section under Mending°...
- Page 19 In addition to the obvious controls of your machine, there are other small regulators and controls to aid you in using your sewing machine Push down the outer ring of the pressure regulator This will release the pressure on the presser foot. (See above) To increase the pressure,...
- Page 20 The feed dog contro! is located on the right front of the machine bedplate, There are a few times when you want control feeding of the fabric yourself When the control is turned to the left, the feed dogs drop and do not move the fabric,, For most of your sewing, turn...
- Page 21 Seam guides are printed on either side of the needle plate to aid you in guid- ing your fabric GUIDE LINE EXTENDING ABOVE RIGHT SIDE NEEDLE PLATE THE "ALL IMPORTANT" 5/8" SEAM C o_neri_g Guide LINE The cornering guides are convenient when turning a square...
- Page 22 Use KENMORE needles The size of needle should conform with size of the thread and both should suitable to the fabric (See next page) Never use a bent needle or one with a blunt point I shows you the exact...
- Page 23 NEEDLE THREAD SIZE SIZE FABRIC Lightweight: Batiste, Dimity, Polyester Core/Cotton Wrap Fine Mercerized Cotton Chiffon, Silks, Synthetic Jerseys, 9 or 1I Fine Lace, Organza, Crepe, Polyester Synthetic Taffetta, Voile, Organdy Silk A 50 Mercerized Cotton Medium Weight: Cotton, Cotton Bbnds, Percale, Gingham, Polyester...
- Page 24 change various presser feet, raise presser bar to its highest position lifting presser foot lever_ Loosen the presser foot thumb screw, choose proper foot, insert from the front.. Tighten screw using large screw driver to make certain the foot is secure. You have been given a variety of presser feet:...
- Page 25 • You will find following parts your Attachment Box: t_ Cover Plate with pinion gear in the center. 2,, Guide Plate with Guide Pin that fits in guide pin ho_e on machine bed just behind needle plate. 3, Desired size of buttonhole is select- ed by turning disc.
- Page 26 1, Test the needle - it should be straight, properly set and sharp on the point, It should be the correct size for the fabric and thread being used, Do not be afraid to change your needle frequently., Many of the new fabrics made of synthetic blends...
- Page 27 Setyour machinejust asshown in the illustration in order to straight stitch It is important each dial have the following settings SETTINGS Special Stilch Dial - Red Do_ Stitch Width Conlrol - Red Dot Stitch Length Control - i2 Straight Stitch Foot will find...
- Page 28 7 ;; ."': ' {77 ..i tLi C-',,<r_ ..: _,::- ..Be sure both threads are drawn back under the presser foot, Lower needle into fabric about inch from beginning of seam Turn the reverse stitch control clockwise and stitch reverse until needle reaches beginning...
- Page 29 SETTINGS Special Stitch Dial - Red Dot Stitch Widfl_ ContF_ol - 1 __o4 S_J1ch Length Contl-o! - _IW i',!u_;_be7 o _t_DTH Zigzag Presse_ Foot This type of stitching greatly expands the use of your machine This is the feature that enables to overcast seams,...
- Page 30 _,i_ "-_,"_ i¸ ;!_:i_'_i :¸i ¸ 'i : ¸_':I': ! !',i_:ii:J: Use this stretch stitch with knitted fabric and other fabdcs that stretch as you do with regular straight stitch seaming seam pressed open with regular seam, but will stretch if necessary, This is also a good...
- Page 31 After tile basic constructionof ,,ourgarmentis finished, there arestill many tir_is!-:in 9 tou(;l,esto ba done To aid your completion of ,/our garmenL the i(,ar_rnore hasbe,andesigned"_:o do d_efollowing tasksthat formerly hadto be done b':/hand S ETTt !4 G S Special Stitch Dia! - Red Dol Stitch Widd]...
- Page 32 ::IV", "- < _?'L _ -, _', '-' /¸¸¸i¸ i'i_,:! ¸ i i ¸ -, •: i_ _i '_:: [_GI ji.. [:: !:ill:: The foot is adjustable for use on the right or left side of the needle when sewing the regular type of zipper Adjust the foot...
- Page 33 Guide pin hole SETTING Pinion gear Special Stitch DP, d - Red Dot Stitch Width Cor_rol - i _o i Feed E)o!_s - D_:-.._,m Satin-', S',.ii__h F-oat Remove regular cover plate Guide insert buttonhole cover plate. Select desired size of buttonhole by turning disc as shown...
- Page 34 _' _i:_¸' i _ ¸:' i: i_;il,i ! i !i!!i !i¸:¸¸! _ _i: "-:_i_i:! !._,i:_ii_ :_,_! i_i: , Select an applique design to be applied to your garment and baste it in place° Satin stitch around edge the applique completely covering edge, You may want to do this with...
- Page 35 Fold garment away from leaving 1/8" of hem edge extend- (Fig, 2) Fig, 2 3o Place garment under presser foot in such a manner that straight stitches will be sewn on extended edge. The zigzag stitch should just catch the fold of the garment. (Fig°...
- Page 36 i,/,:i ::' i : r,/_L i _ i ¸'; : :7_' ":: _;i To repair a straight or three-cornered tear, position the tear under the needle in such a way that the stitching catches both sides of the tear When mending a three-cornered tear.
- Page 37 SETTINGS Special Siilch Di_A - Red Dot Feed Dogs - Down Zigzag Presse_ Foot 1, Align two holes of button with slot of presser foot and lower foot hold the button securely. 2. Turn hand wheel manually until needle point is just above button.
- Page 38 &_...
- Page 39 €'-i __ o "O Z° "O :!i ¸':::?: /(:y!::':':i ?I_!': I: / :::_ ::::::_ : i_ i: ¸ :: • :O :-'3: ?.._ :: N :'_3: : O,_: .,Oi:_ ': :;::E !:K :_i_ i;::,il :::N;: 5':!i::...
- Page 40 Fig. 1 Cleaning the feed dogs with brush, To insure the best possible operation your machine, it is necessary keep the essential parts clean at all times. Using a small brush, remove the lint that accumulates in the shuttle area and around the feed dogs.
- Page 41 Remove arm cover plate to oil points indicated in top of machine head. To remove cover plate, insert a screw driver into the spacing between casting and top cover plate and lift the cover plate as illustrated b_low,...
- Page 42 _ _ii_i _ _i: i,_ i!: _ : _,::, i_ }!i: i:, !::_ J, !ii_:::_:_':'i,: _ :i _ ii_L_ I: :_ ,:__:i, _, _ _ Tilt machine head back to oil points indicated on underside of machine Swing hinged face cover plate open and oil points...
- Page 44 :':i: i/:':'i: ¸¸ ¸¸_ _¸v _ : !
- Page 45 All parts listed herein may be ordered from any Sears,Roebuck and Co, or Simpsons-SearsLimited store or servicecenter_ WHEN ORDERING REPAIR PARTS, ALWAYS GIVE THE FOLLOWING INFORMATION: 1o PARTNUMBER 2., PART DESCRIPTION 3, MODEL NUMBER 4_ NAME OF ITEM If the parts you need are not stocked locally, your orderwill be electron- ically transmittedto a Sears RepairParts Distribution Centerfor expedited handling.
- Page 46 ± WARRANTY FULL 25-YEAR WARRANTY SEWING MACHINE HEAD For 25 years from the first day of use in your home, Sears will, free of charge, repair defects in material or workmanship which appear in the sewing machine head FULL YEAR WARRANTY ELECTRfCAL EQUIPMENT...
- Page 47 SEWUNG MACHBNE Now that you have purchased your Sewing Machine, should a need ever exist for repair parts or service, simply contact Sears Service Center and most Sears, Roebuck and Con or Simpsons-Sears Limited Stores, Be sure to provide all pertinent facts when you call or visit, The model number of your Sewing...